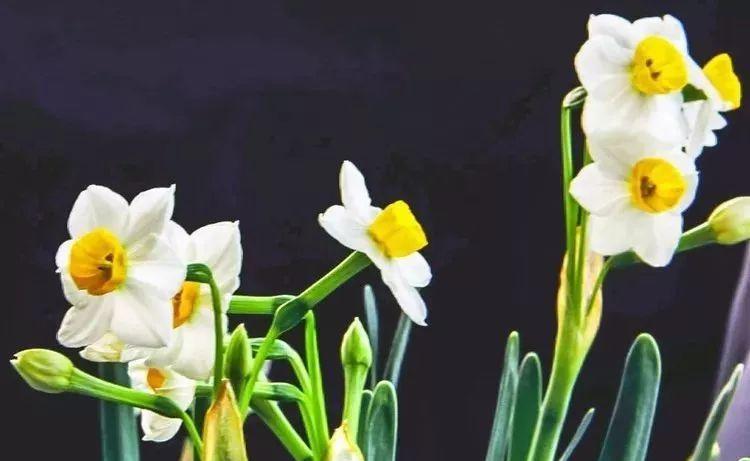
1. The main corolla of daffodils is 6 petals, each petal is fan-shaped, and the secondary corolla is cup-shaped.
Use light ink to hook the petals, one petal flower with two strokes, and then a cup-shaped corolla in the middle of the middle ink hook. You can also draw a corolla first, and then outline the outer petals.

2. The main corolla of daffodils is divided into front, side, semi-side, back and so on. When painting the main corolla, the front and back layers of the petals are divided into medium and light ink. The front side corolla can be painted slightly rounder. Then use heavy ink to dot the three flower buds.
3. Light ink hook flower handle and bracts (flower sheath). The flower tray under the corolla is flared and the peduncle is thinner than the leaf, about one-third the thickness of the leaf.
4. Use slightly heavier ink to outline the ribbon leaf shape, start from the end of the leaf and hook to the root of the leaf. The two strokes form a leaf, and the leaf tip is curved (blunt and round). The leaves on the front can be painted wider, about a finger wide, and the leaves on the side can be painted slightly thinner. It should be noted that the leaves should be long and short, interspersed and dense. The composition should be far and near to increase the sense of layering.
5, the posture of the flower has a front and a side, there is a pitch and a tilt, can not be painted as a front.
6, daffodil dyeing is mainly to dye the corolla, can be used garcinia dye flower buds, the middle point of vermilion, petals can not be dyed, but also after the ink color is dried and then use white powder to lightly dye the petals.
7. Use one-to-one Garcinia and flower green to make a juice green, and apply color to the leaves and stems. When dyeing, there should be depth and shallowness, not uniform, all dull and unnatural.
The spherical roots of daffodils can be dyed locally with a light ochre color, or the front side of the bulbous root can be used with an ink pen flank to highlight the thickness of the roots!
How to draw birds
1. Frontal standing bird painting method
1. Use the big white cloud pen to slightly dip in the medium ink, and point out the head with the side pen.
2. Light ink side pen, two strokes to draw the abdomen.
3. Dip the tip of the pen into thick ink and tick out the mouth, eyes and cheeks.
4. Draw wings, tails and claws in thick ink, and when the bird stands, its wings are close together next to the torso.
5. Draw branches under the bird's paws with dry ink.
Second, the side bird painting method
1. Draw the head with the side pen in medium ink.
2. Dip the tip of the pen into the belly of the medium ink pen and add water to draw the wings and back with three strokes.
3. Draw the chest and abdomen with a light ink stroke.
4. Draw the mouth, eyes, cheeks, wings, tail and claws with thick ink. According to the flying posture, the wings are drawn close to the flank of the back, the wings should not be long, and the root of the wing is narrowed from wide to narrow to the tip of the wing. Flying feathers are pointed with thick ink centers, from front to back, in an arc and evenly arranged. The tail feathers are short, and they can be easily pointed out from the base of the tail to the tip of the tail.
5, with thick ink on the back of the point of five or six pockmarks, it is painted as a sparrow. According to this method, without pedestal dots on the back, you can draw small birds like sparrows, such as thrushes, peacebirds, bald eagles, etc.
How to draw a goldfish
First, use the red top of the akebode goldfish.
Second, with two full strokes, draw the belly of the goldfish, pay attention to the fullness of the painting.
Three, draw the spine of the goldfish in one stroke.
Fourth, draw the fish tail with light ink. Four stripes are drawn on the front and three tails are drawn on the sides.
Fifth, point out the eyes and mouth.
The black goldfish is drawn in the same way as the first fish, first using ink to point out the head.
Then point out the body with light ink, and then point out the tail of the fish.
Finally nod eyes and mouth.
How to draw roosters and hens
First, the drawing method of the rooster
1, painting the rooster is generally from the head, you can first determine the position of the eyes and mouth. The three lines of the mouth are long and short, the upper mouth is slightly thicker, the lower mouth is slightly thinner, the eyes should be aligned with the mouth slit, and the ears are under the back of the eyes.
2, the crown of the rooster has two parts. First adjust the cinnabar and then the red at the front of the pen, and finally the nib adjusts the rouge color to be more intense.
3. Adjust the medium ink color, flank, and draw the head and neck in a general way. When painting, pay attention to leaving the back of the head (occipital part), and the line should not be too rigid.
4. Dip the tip of the pen into light ink and draw the back with a few strokes (this method is called the Phi Phi method).
5. Draw the wings and compound feathers with thick ink.
6. Use a larger pen to dip thick ink to draw the tail feathers in the direction of the tail feathers, and use the flank to outline the compound feathers on several pieces of tails.
7. Use a larger pen to dip the ink to draw the chest and abdomen, the abdomen should be weak, and the ink color is lighter.
8. Draw the thighs on both sides of the abdomen, and the ink color should be lighter and drier to draw the texture.
9. Use dry ink to outline the tarsus and claws, the middle toe is longer, the inner and outer toes are shorter, and the hind toe is the shortest.
10, coloring: garcinia yellow dyeing mouth, the tip of the mouth slightly added ochre, the eyes stained light grass green, eye circles and ears dyed light ochre, tarsocarpnia and claw dyeing garcinia plus ochre can also add less juice green.
Second, the way the hen is drawn
1. Paint the head, mouth and eyes with a small brush of thick ink, and then dye the chicken mouth with orange and yellow, and dye the crown and meat sag with a red cover.
2. Use a large brush of gray ink to paint the neck and chest.
3. Draw the back, tail and tail feathers with a large amount of thick ink.
4. Draw the legs with a large brush in ink
5. Hook the chicken feet with a small pen of thick ink and dye it with garcinia
6. Dye the body with light ochre or ochre.