In the 56th reading note, I introduce the contents of chapter 8, section 5 of Absolute Tennis. Most amateur players have weak backhands, and if you can use your backhand to hit a quick flat shot and a stable upturn, you should be a master in the amateur. Compared to the difficult draw, backhand cutting is relatively easy, and many amateur players will naturally adopt the way of cutting.
In the view of Smith, the author of "Absolute Tennis", backhand cutting is indeed easier to learn than drawing balls, and amateur players are easier and more likely to learn backhand cutting.
Similar to the previous content, Smith divides backhand cutting into five steps: turning, pulling backwards, swinging forward, hitting the ball and swinging along. Today we will extract the important contents and briefly introduce the technical points of these five steps.
First, the transformation
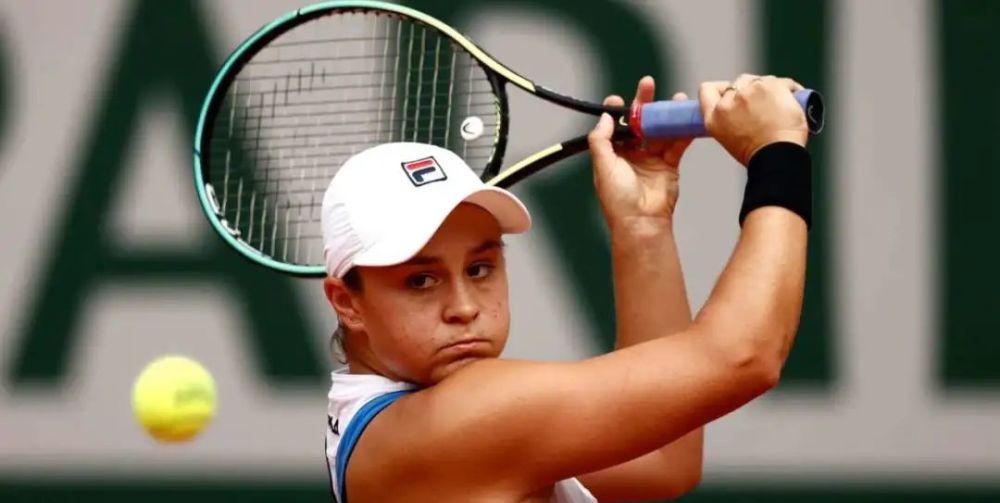
When it comes to technical points such as forehand and backhand, Smith started with the rotation, and he repeatedly emphasized the important role of the shoulder rotation in the whole rotation. The first step in backhand cutting is also to turn the body by turning the shoulder, and keep the elbow bent and relaxed, and the pat face is open and located at the height of the shoulder. During this process, keep your head upright and your back straight to maintain a good balance of the body.
Backhand cutting should use a continental grip, and your non-gripper hand can be placed on the throat of the racket to keep the racket stable. The entire action can refer to the following figure.

Second, pull the beat
As with the previously mentioned DSLR, a significant indicator of whether the backhand cutting turn and the pull shot are sufficient is that your right shoulder should be located near the chin and your chest should be facing the fence on the side of the court.
So, what kind of pulling posture is ideal? Smith teaches us three intuitive criteria for judging. First, your big arm and forearm should form a V-shape; second, your forearm should form an L-shape with the racket; third, your racket should be roughly parallel to the bottom line.
Third, swing forward
This is a critical step in backhand cutting. The whole movement is from top to bottom and contains a forward movement.
It should be noted that you need to control the distance of your body from the ball. If you get too close to the ball, your elbows will bend too much, and the racket's head will fall below the wrist before hitting the ball, which will cause a loss of strength and increase the difficulty of possession. Unless the opponent's incoming ball bounces very low, you should keep the head of the racket above your wrist before hitting the ball.
The swing trajectory of the backhand spin ball is from the bottom up, while the cutting ball is from the top down, and it is this action that makes the ball spin down.
Therefore, the higher the point at which the cutting action begins and the greater the downward angle (closer to the vertical ground), the stronger the downward rotation is generated. When dealing with an incoming ball with a very high bounce height, the higher the initial point of the cutting action and the greater the downward angle. And when dealing with a low-level incoming ball, your cutting action will also become a little lower.
4. Hit the ball
After swinging the racket downwards and forwards, you will start hitting the ball. The backhand cuts a little bit lower than the backhand draw, but is farther away from the body.
At the moment of hitting the ball, the racket is almost perpendicular to the ground. However, many amateur players are unable to do this, and the face of the beat when they touch the ball often forms a sharp angle with the ground, that is, the beat surface is closer to the ground than to the nearly vertical ground. Smith argues that amateur players don't actually have to struggle too hard to keep the beat perpendicular to the ground when hitting. Anyway, as long as you swing the ball from top to bottom, it will definitely produce a downward rotation, and it is difficult for ordinary people to cut a downward spiral and aggressive cutting ball like a professional player.
In fact, professional players can make the racket perpendicular to the ground when touching the ball because of their strong ball control ability and swing power, which ordinary amateur players do not have. Blindly emphasizing that the beat surface is perpendicular to the ground makes it impossible for many people to cut out the deep return ball. Instead of overemphasizing the rapid downward movement of the racket, it is better to adopt a gentler swing trajectory, and you can imagine that there is a glass table under the racket, and you can't break the glass table when swinging.
Fifth, swing with it
As we mentioned earlier about not being able to break a glass table, the entire action of cutting is similar to a parabola with an opening downwards. After you finish hitting the ball, your swing trajectory should continue upwards.
During the swing, you want to keep your hips and back feet stable, and the weight of your body should be transferred to your right leg. Immediately after completing the swing, your legs should return to their original state and start running in separate legs or towards the opponent's ball.
The whole step of backhand cutting can refer to the following six diagrams.
At this point, we have introduced the entire content of Chapter 8, Section 5 of Absolute Tennis. In my next reading note, I'll cover the last section of the chapter, the three ways to practice backhand hitting. (Source: Tennis House Author: Yun Cirrus Yunshu)