前言:
本文的測試思路僅供參考和學習,希望能和大家分享、交流相關的學習經驗!
同時,本人的文字功底不是那麼好,是以就直接上代碼,請多多諒解!文章内也沒對算法做解讀,是以,若是想要了解算法,可以參考相關算法的解讀部落格!!文章最後貼上Project的github連結 ~
項目參考連結:https://github.com/Qidian213/deep_sort_yolov3
目錄
一. MTCNN實時視訊人臉檢測
二. Deep_Sort與MTCNN結合
三. 結果截圖展示
一. MTCNN實時視訊人臉檢測
此部分本人的上一篇部落格已經寫了,如何訓練人臉檢測model,以及實作實時視訊的人臉檢測;這裡貼一下連結,防止迷路: MTCNN實時人臉檢測
二. Deep_Sort跟蹤算法與MTCNN人臉檢測算法的結合
deep_sort是sort算法的更新版,提升了算法對多目标跟蹤的準确性(其實我沒做過跟蹤,隻知道這些)。同時,該算法在速度上還是很理想的,與MTCNN結合,做人臉的跟蹤,也能夠達到實時的效果;
大緻講一下本人code思路,然後直接上code;
【deep-sort算法需要擷取到人臉的定位框資訊,也就是檢測框位置坐标資訊,然後根據坐标資訊去預測下一個時刻的狀态,然後就可以實作跟蹤了。是以,很簡單,把mtcnn人臉檢測的boxes資訊丢給deep_sort算法就好了, 到這裡就實作了人臉的跟蹤了】
1.deep_sort算法環境的搭建
上一篇MTCNN人臉檢測的部落格已經完成了基本環境的搭建了,在上一篇部落格的基礎之上,将下面的packages用pip指令安裝好即可:
pip install opencv-python
pip install numpy
pip install scikit-learn
pip install pillow
2.deep_sort算法與MTCNN檢測部分的結合
直接上主要的code: mtcnn_sort.py
#-*-coding: utf-8-*-
#Author: lxz-HXY

'''
deep_sort combine with MTCNN  to follow people's face!!!
'''
from __future__ import division, print_function, absolute_import
import os
from timeit import time
import warnings
import sys
from cv2 import cv2
import numpy as np
import gc
from multiprocessing import Process, Manager

from training.mtcnn_model import P_Net, R_Net,O_Net
from tools.loader import TestLoader
from detection.MtcnnDetector import MtcnnDetector
from detection.detector import Detector
from detection.fcn_detector import FcnDetector

from deep_sort import preprocessing
from deep_sort import nn_matching
from deep_sort.detection import Detection
from deep_sort.tracker import Tracker
from tools import generate_detections as gdet
from deep_sort.detection import Detection as ddet
warnings.filterwarnings('ignore')

def mtcnn(stage):
    detectors = [None, None, None]
    if stage in ['pnet', 'rnet', 'onet']:
        modelPath = './tmp/model/pnet/'
        a = [b[5:-6] for b in os.listdir(modelPath) if b.startswith('pnet-') and b.endswith('.index')]
        maxEpoch = max(map(int, a)) # auto match a max epoch model
        modelPath = os.path.join(modelPath, "pnet-%d"%(maxEpoch))
        print("Use PNet model: %s"%(modelPath))
        detectors[0] = FcnDetector(P_Net,modelPath)
    if stage in ['rnet', 'onet']:
        modelPath = './tmp/model/rnet/'
        a = [b[5:-6] for b in os.listdir(modelPath) if b.startswith('rnet-') and b.endswith('.index')]
        maxEpoch = max(map(int, a))
        modelPath = os.path.join(modelPath, "rnet-%d"%(maxEpoch))
        print("Use RNet model: %s"%(modelPath))
        detectors[1] = Detector(R_Net, 24, 1, modelPath)
    if stage in ['onet']:
        modelPath = './tmp/model/onet/'
        a = [b[5:-6] for b in os.listdir(modelPath) if b.startswith('onet-') and b.endswith('.index')]
        maxEpoch = max(map(int, a))
        modelPath = os.path.join(modelPath, "onet-%d"%(maxEpoch))
        print("Use ONet model: %s"%(modelPath))
        detectors[2] = Detector(O_Net, 48, 1, modelPath)
    return detectors

'''
python多程序:
receive:該程序接收圖檔
realse:該程序處理圖檔,進行人臉檢測
'''
def receive(stack):
    top = 100
    # url = ' '
    cap = cv2.VideoCapture(0)
    ret, frame = cap.read()
    while True:
        ret, frame = cap.read()
        if ret:
            stack.append(frame)
            if len(stack) >= top:
                print('Stack is full.........')
                del stack[:50]
                gc.collect()

def realse(stack):
    print('Begin to get frame......')
    #解決GPU使用占用問題
    import tensorflow as tf
    os.environ['CUDA_VISIBLE_DEVICES'] = '0'
    config = tf.ConfigProto()
    config.gpu_options.allow_growth = True
    session = tf.Session(config=config)

    tmp = []
    max_cosine_distance = 0.3
    nn_budget = None
    nms_max_overlap = 1.0
    # deep_sort
    model_filename = 'mars-small128.pb'
    encoder = gdet.create_box_encoder(model_filename,batch_size=1)
    metric = nn_matching.NearestNeighborDistanceMetric("cosine", max_cosine_distance, nn_budget)
    tracker = Tracker(metric)
    # mtcnn
    detectors = mtcnn('onet')
    mtcnnDetector = MtcnnDetector(detectors=detectors, min_face_size = 24, threshold=[0.9, 0.6, 0.7])
    while True:
        if len(stack) > 0:
            frame = stack.pop()
            frame = cv2.resize(frame, (int(frame.shape[1]/3), int(frame.shape[0]/3)))
            frame = np.array(frame)
            #這裡mtcnn檢測到的box資訊經過處理,轉換成deepsort所需要的坐标位置
            #左上角坐标資訊和box中心坐标位置
            tmp, _ = mtcnnDetector.detect_video(frame)
            features = encoder(frame, tmp)
            detections = [Detection(bbox, 1.0, feature) for bbox, feature in zip(tmp, features)]
            # Run non-maxima suppression.
            boxes = np.array([d.tlwh for d in detections])
            scores = np.array([d.confidence for d in detections])
            indices = preprocessing.non_max_suppression(boxes, nms_max_overlap, scores)
            detections = [detections[i] for i in indices]
            # Call the tracker
            tracker.predict()
            tracker.update(detections)
            for track in tracker.tracks:
                if not track.is_confirmed() or track.time_since_update > 1:
                    continue
                bbox = track.to_tlbr()
                cv2.rectangle(frame, (int(bbox[0]), int(bbox[1])), (int(bbox[2]), int(bbox[3])), (255,0,0), 1)
                cv2.putText(frame, str(track.track_id),(int(bbox[0]), int(bbox[1])), 0, 0.5, (0,255,0), 1)

            for det in detections:
                bbox = det.to_tlbr()
                cv2.rectangle(frame,(int(bbox[0]), int(bbox[1])), (int(bbox[2]), int(bbox[3])),(0,0,255), 1)

            cv2.imshow("Detected", frame)

            if cv2.waitKey(1) & 0xFF == ord('q'):
                break
    cv2.destroyAllWindows()

if __name__=='__main__':
    t = Manager().list()
    t1 = Process(target=receive, args=(t,))
    t2 = Process(target=realse, args=(t,))
    t1.start()
    t2.start()
    t1.join()
    t2.terminate()
代碼看起來還是很容易了解的,就是調用了人臉檢測,然後将位置資訊輸送給Deep-sort算發。這裡需要注意,在您使用的時候注意相關的檔案路徑問題【比如說:mtcnn的模型路徑,deep-sort檔案路徑等】。各位朋友使用整個project,在所有前提要求準備好的情況下直接運作該代碼即可!! 一個回車實作 人臉 跟蹤!
要是遇到代碼報錯:
1.請檢查你的cuda+cudnn版本和tf版本是不是比對【比對配置表相關部落格】;
2.相關的依賴包是否有安裝;
3.整個project檔案結構解讀
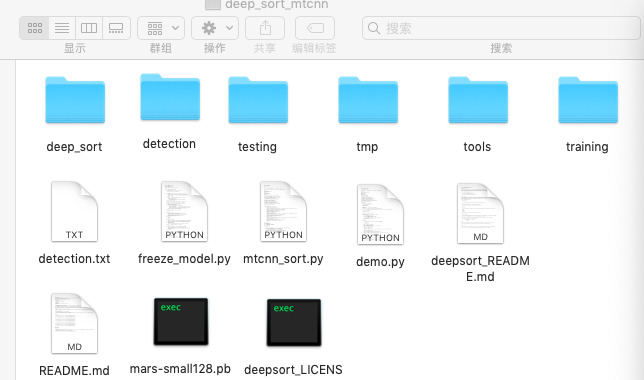
在圖檔裡面,除了
deep_sort檔案
夾以及
mars-small128.pb
檔案為 deepsort算法的核心檔案。其餘的檔案都來自于mtcnn人臉檢測部分。
三.結果截圖展示
這裡就隻上了一個截圖展示效果, 其實效果沒有大家想的那麼理想。你要是在攝像頭面前,人臉不亂動,不是很大幅度的動,跟蹤效果還是不錯的!你要是大幅度動頭,那就不是那麼理想了。 跟蹤的id會變化。至于為什麼,你應該知道的,deepsort做的是行人的跟蹤。。。。。如果你有足夠的資料,訓練一下人臉的跟蹤模型,效果你該也會不錯的!如果,你真的做了,該部分工作,歡迎交流~
【圖檔為本人截圖,若果有侵權,本人将立即删除!!!圖檔請勿随意轉載使用!!】

最後,貼上整個project的github位址,本部落格簡單,還算明了吧。。。。。。如果本文對您的學習、科研有幫助的話歡迎大家點贊!順便給project留下個小星星,謝謝!
GitHub: https://github.com/YingXiuHe/MTCNN-Deep_Sort-.git
【下幾篇部落格内容:一步一步實作實時人臉識别】