消息隊列中間件是分布式系統中重要的元件,主要解決應用耦合,異步消息,流量削鋒等問題,實作高性能,高可用,可伸縮和最終一緻性架構使用較多的消息隊列有ActiveMQ,RabbitMQ,Kafka,RocketMQ等,這裡主要講解RabbitMQ的簡單使用
一、建立SpringBoot項目,并引入依賴
<dependency>
    <groupId>org.springframework.boot</groupId>
    <artifactId>spring-boot-starter-amqp</artifactId>
</dependency>
二、Queue方式
1、定義配置類
/**
 * @author Gjing
 **/
@Configuration
public class RabbitMqConfiguration {

    /**
     * 聲明一個名為simple的隊列
     */
    @Bean
    public Queue testQueue() {
        return new Queue("simple");
    }
}
2、聲明一個生産者
/**
 * @author Gjing
 **/
@Component
public class Producer {

    @Resource
    private AmqpTemplate rabbitTemplate;

    public void send() {
        String message = "hello";
        this.rabbitTemplate.convertAndSend("simple", message);
    }
}
3、聲明消費者
/**
 * @author Gjing
 **/
@Slf4j
@Component
public class Consumer {

    @RabbitListener(queues = "simple")
    public void receive(String message) {
        log.info("消費者1收到消息:{}", message);
    }
}
4、建立Controller進行調用
/**
* @author Gjing
**/
@RestController
public class DemoController {
@Resource
private Producer producer;
@PostMapping("/message")
public void send() {
for (int i = 0; i < 10; i++) {
this.producer.send();
}
}
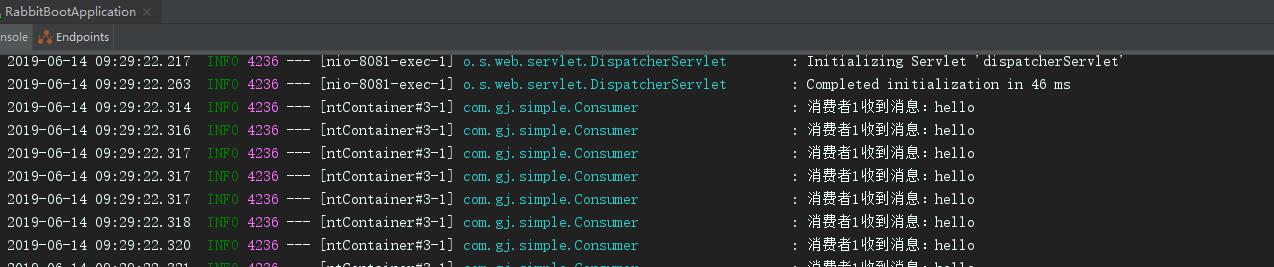
} 5、執行結果
三、topic exchange方式
/**
 * @author Gjing
 **/
@Configuration
public class RabbitMqConfiguration {

    /**
     * 聲明一個名為topic.message1的隊列
     */
    @Bean
    public Queue topicQueue() {
        return new Queue("topic.message1");
    }

    /**
     * 聲明一個名為topic.message2的隊列
     */
    @Bean
    public Queue topicQueue2() {
        return new Queue("topic.message2");
    }

    /**
     * 聲明一個名為exchange的交換機
     */
    @Bean
    public TopicExchange exchange() {
        return new TopicExchange("exchange");
    }

    /**
     * 将topic.message1的隊列綁定到exchange交換機
     */
    @Bean
    public Binding bindMessage1() {
        return BindingBuilder.bind(topicQueue()).to(exchange()).with("topic.message1");
    }

    /**
     * 将topic.message2的隊列綁定到exchange交換機
     */
    @Bean
    public Binding bindMessage2() {
        return BindingBuilder.bind(topicQueue2()).to(exchange()).with("topic.message2");
    }
}
2、定義生産者
/**
 * @author Gjing
 **/
@Component
public class TopicProducer {

    @Resource
    private AmqpTemplate rabbitTemplate;

    public void send() {
        String message1 = "I am topic.message1";
        String message2 = "I am topic.message2";
        this.rabbitTemplate.convertAndSend("exchange", "topic.message1", message1);
        this.rabbitTemplate.convertAndSend("exchange", "topic.message2", message2);
    }
}
3、定義消費者1
/**
 * @author Gjing
 **/
@Component
@Slf4j
public class TopicConsumer1 {

    @RabbitListener(queues = "topic.message1")
    public void receive(String message) {
        log.info("消費者1收到消息:{}", message);
    }
}
4、定義消費者2
/**
 * @author Gjing
 **/
@Component
@Slf4j
public class TopicConusmer2 {
    @RabbitListener(queues = "topic.message2")
    public void receive(String message) {
        log.info("消費者2收到消息:{}", message);
    }
}
5、建立controller進行調用
/**
 * @author Gjing
 **/
@RestController
public class TopicController {
    @Resource
    private TopicProducer topicProducer;

    @PostMapping("/message-topic")
    public void sendMessageTopic() {
        for (int i = 0; i < 10; i++) {
            this.topicProducer.send();
        }
    }
}
6、執行結果

四、fanout方式
/**
 * @author Gjing
 **/
@Configuration
public class RabbitMqConfiguration {

    /**
     * 聲明一個名為fanout.1的隊列
     */
    @Bean
    public Queue fanoutQueue1() {
        return new Queue("fanout.1");
    }
    /**
     * 聲明一個名為fanout.2的隊列
     */
    @Bean
    public Queue fanoutQueue2() {
        return new Queue("fanout.2");
    }
    /**
     * 聲明一個名為fanout.3的隊列
     */
    @Bean
    public Queue fanoutQueue3() {
        return new Queue("fanout.3");
    }

    /**
     * 聲明一個名為fanoutExchange的轉發器
     */
    @Bean
    public FanoutExchange fanoutExchange() {
        return new FanoutExchange("fanoutExchange");
    }

    /**
     * 将隊列fanoutQueue1綁定到fanout轉發器
     */
    @Bean
    public Binding bindFanout1() {
        return BindingBuilder.bind(fanoutQueue1()).to(fanoutExchange());
    }

    /**
     * 将隊列fanoutQueue1綁定到fanout轉發器
     */
    @Bean
    public Binding bindFanout2() {
        return BindingBuilder.bind(fanoutQueue2()).to(fanoutExchange());
    }

    /**
     * 将隊列fanoutQueue1綁定到fanout轉發器
     */
    @Bean
    public Binding bindFanout3() {
        return BindingBuilder.bind(fanoutQueue3()).to(fanoutExchange());
    }
}
/**
* @author Gjing
**/
@Component
public class FanoutProducer {
@Resource
private AmqpTemplate amqpTemplate;
public void send() {
String message = "hello, I am speaker";
//這裡的routingKey會被rabbitMQ忽略,如果不設定這個參數會導緻發送消息失敗,
//是以這裡随便寫(我給他空字元串),rabbitMQ會預設發給所有綁定的
this.amqpTemplate.convertAndSend("fanoutExchange","", message);
}
} /**
* @author Gjing
**/
@Component
@Slf4j
public class FanoutConsumer1 {
@RabbitListener(queues = "fanout.1")
public void receive(String message) {
log.info("消費者1收到消息:{}", message);
}
} /**
* @author Gjing
**/
@Component
@Slf4j
public class FanoutConsumer2 {
@RabbitListener(queues = "fanout.2")
public void receive(String message) {
log.info("消費者2收到消息:{}", message);
}
} 5、定義消費者3
/**
 * @author Gjing
 **/
@Component
@Slf4j
public class FanoutConsumer3 {
    @RabbitListener(queues = "fanout.3")
    public void receive(String message) {
        log.info("消費者3收到消息:{}", message);
    }
}
6、建立controller調用
/**
 * @author Gjing
 **/
@RestController
public class FanoutController {
    @Resource
    private FanoutProducer fanoutProducer;

    @PostMapping("/message-fanout")
    public void sendFanout() {
        this.fanoutProducer.send();
    }
}
7、執行結果
五、RabbitMQ核心概念
server:又稱Broker,接受用戶端的連接配接實作AMQP實體服務;connection:與broker的連接配接;channel:網絡通道,幾乎所有的操作都是在channel中進行;message:伺服器和應用程式之間傳送的資料,由properties和body組成,properties可以對消息進行修飾,比如消息的優先級和進階特性, body為消息的内容;exchange:交換機,接收消息,根據路郵件轉發消息到綁定的隊列;binding:exchange和queue之間的虛拟連接配接,可以包含routing key;Routing key:一個路由規則,虛拟機用他确定如何路由一個特定資訊;Queue:也稱為message Queue,消息隊列,儲存資訊并将它們轉發給消費者。
Exchange類型:
- Fanout:路由規則是把所有發送到該Exchange的消息路由到所有與她綁定的Queue中
SpringBoot使用RabbitMQ消息隊列
備注:生産者P生産消息1推送到Exchange,由于Exchange Type=fanout這時候會遵循fanout的規則将消息推送到所有與他綁定的Queue。
- direct:把消息路由到那些binding key與routing key完全比對的Queue中。
SpringBoot使用RabbitMQ消息隊列
備注:生産者P發送消息時Routing key = bloking時,這時候将消息傳送到Exchange,Exchange擷取到生産者發送過來的消息後,會根據自身的規則進行與比對響應的Queue,這時候發現Queue1和Queue2都符合,就會将消息傳送給這兩個隊列,如果我們以Routing key = create和routing key = confirm發送消息時,這時候消息隻會被推送到Queue2隊列中,其他的Routing key 的消息會被丢棄。
- topic:模糊比對,通過通配符滿足一部分規則就可以傳送,其中注意的是有兩個字元 ‘星号’ 和#号,其中 星号 用于比對一個單詞,#号用于比對多個單詞(可以是0個)
SpringBoot使用RabbitMQ消息隊列
備注:當生産者發送消息Routing Key=F.C.E的時候,這時候隻滿足Queue1,是以會被路由到Queue中,如果Routing Key=A.C.E這時候會被同是路由到Queue1和Queue2中,如果Routing Key=A.F.B時,這裡隻會發送一條消息到Queue2中。
常見面試題
- 什麼是中繼資料?中繼資料分為哪些類型?包括哪些内容?與cluster相關的中繼資料有哪些?中繼資料是如何儲存的?中繼資料在cluster中是如何分布的?
在非cluster模式中,中繼資料主要分為Queue中繼資料(Queue名字和屬性等)、Exchange中繼資料(Exchange名字、類型、屬性等)、binding中繼資料(存放路由關系的查找表)、vhost中繼資料(vhost範圍内針對前三者的名字空間限制和安全屬性設定)。在cluster模式下,包括cluster中node位置資訊和node關系資訊。中繼資料按照erlang node的類型确定是僅儲存于RAM中,還是同時儲存在RAM或者Disk上,中繼資料在cluster中是全node分布的
- rabbitmq的一個Queue中存放的message是否有數量限制?
可以認為無限制,限制取決于機器的記憶體,但是消息過多會導緻處理效率的下降。
- rabbitmq如何實作延遲隊列?
沒有直接支援延遲隊列功能,但是可以通過兩個特性來實作延遲隊列,①TTL:通過隊列屬性設定,隊列中的所有消息都有相同的過期時間、對消息進行單獨設定,每條消息TTL可以不同。如果同時使用,則消息的過期時間以兩者之間TTL較小的那個數值為準,消息在隊列的生存時間一旦超過設定的TTL值,就稱為dead letter。②DLX:Queue可以配置X-dead-letter-exchange和x-dead-letter-routing-key(可選)兩個參數,如果隊列内出現了dead letter,則按照這兩個參數重新路由轉發到指定的隊列。
- X-dead-letter-exchange:出現dead letter之後将dead letter重新發送到指定exchange
- 出現dead letter之後将dead letter重新按照指定的routing-key發送
- 出現dead letter的情況有:
- 消息或者隊列的TTL過期; 2. 隊列達到最大長度; 3. 消息被消費者拒絕
前往第二章:
SpringBoot使用RabbitMQ(二)以上為個人見解,如有誤歡迎各位指正