摘要: 問題很詳細,插圖很好看。
- 原文: 你要的 React 面試知識點,都在這了
- 作者: 前端小智
經授權轉載,版權歸原作者所有。
React是流行的javascript架構之一,在2019年及以後将會更加流行。React于2013年首次釋出,多年來廣受歡迎。它是一個聲明性的、基于元件的、用于建構使用者界面的高效javascript庫。
以下是面試前必須了解的話題。
- 什麼是聲明式程式設計
- 聲明式程式設計 vs 指令式程式設計
- 什麼是函數式程式設計
- 什麼是元件設計模式
- React 是什麼
- React 和 Angular 有什麼不同
- 什麼是虛拟DOM及其工作原理
- 什麼是JSX
- 元件和不同類型
- Props 和 State
- 什麼是 PropTypes
- 如何更新狀态和不更新狀态
- 元件生命周期方法
- 超越繼承的組合
- 如何在React中應用樣式
- 什麼是Redux及其工作原理
- 什麼是React路由器及其工作原理
- 什麼是錯誤邊界
- 什麼是 Fragments
- 什麼是傳送門(Portals)
- 什麼是 Context
- 什麼是 Hooks
- 如何提高性能
- 如何在重新加載頁面時保留資料
- 如何從React中調用API
- 總結
聲明式程式設計是一種程式設計範式,它關注的是你要做什麼,而不是如何做。它表達邏輯而不顯式地定義步驟。這意味着我們需要根據邏輯的計算來聲明要顯示的元件。它沒有描述控制流步驟。聲明式程式設計的例子有HTML、SQL等
HTML file
// HTML
<div>
  <p>Declarative Programming</p>
</div>
SQL file
select * from studens where firstName = 'declarative'; 聲明式程式設計的編寫方式描述了應該做什麼,而指令式程式設計描述了如何做。在聲明式程式設計中,讓編譯器決定如何做事情。聲明性程式很容易推理,因為代碼本身描述了它在做什麼。
下面是一個例子,數組中的每個元素都乘以
2
,我們使用聲明式
map
函數,讓編譯器來完成其餘的工作,而使用指令式,需要編寫所有的流程步驟。
const numbers = [1,2,3,4,5];

// 聲明式
const doubleWithDec = numbers.map(number => number * 2);

console.log(doubleWithDec)

// 指令式
const doubleWithImp = [];
for(let i=0; i<numbers.length; i++) {
    const numberdouble = numbers[i] * 2;
    doubleWithImp.push(numberdouble)
}

console.log(doubleWithImp)
函數式程式設計是聲明式程式設計的一部分。javascript中的函數是第一類公民,這意味着函數是資料,你可以像儲存變量一樣在應用程式中儲存、檢索和傳遞這些函數。
函數式程式設計有些核心的概念,如下:
- 不可變性(Immutability)
- 純函數(Pure Functions)
- 資料轉換(Data Transformations)
- 高階函數 (Higher-Order Functions)
- 遞歸
- 組合
不可變性意味着不可改變。 在函數式程式設計中,你無法更改資料,也不能更改。 如果要改變或更改資料,則必須複制資料副本來更改。
例如,這是一個student對象和
changeName
函數,如果要更改學生的名稱,則需要先複制 student 對象,然後傳回新對象。
在javascript中,函數參數是對實際資料的引用,你不應該使用 student.firstName =“testing11”,這會改變實際的
student
對象,應該使用Object.assign複制對象并傳回新對象。
let student = {
    firstName: "testing",
    lastName: "testing",
    marks: 500
}

function changeName(student) {
    // student.firstName = "testing11" //should not do it
    let copiedStudent = Object.assign({}, student);
    copiedStudent.firstName = "testing11";
    return copiedStudent;
}

console.log(changeName(student));

console.log(student);
純函數
純函數是始終接受一個或多個參數并計算參數并傳回資料或函數的函數。 它沒有副作用,例如設定全局狀态,更改應用程式狀态,它總是将參數視為不可變資料。
我想使用 appendAddress 的函數向
student
對象添加一個位址。 如果使用非純函數,它沒有參數,直接更改
student
對象來更改全局狀态。
使用純函數,它接受參數,基于參數計算,傳回一個新對象而不修改參數。
let student = {
    firstName: "testing",
    lastName: "testing",
    marks: 500
}

// 非純函數
function appendAddress() {
    student.address = {streetNumber:"0000", streetName: "first", city:"somecity"};
}

console.log(appendAddress());

// 純函數
function appendAddress(student) {
    let copystudent = Object.assign({}, student);
    copystudent.address = {streetNumber:"0000", streetName: "first", city:"somecity"};
    return copystudent;
}

console.log(appendAddress(student));

console.log(student);
資料轉換
我們講了很多關于不可變性的内容,如果資料是不可變的,我們如何改變資料。如上所述,我們總是生成原始資料的轉換副本,而不是直接更改原始資料。
再介紹一些 javascript内置函數,當然還有很多其他的函數,這裡有一些例子。所有這些函數都不改變現有的資料,而是傳回新的數組或對象。
let cities = ["irving", "lowell", "houston"];

// we can get the comma separated list
console.log(cities.join(','))
// irving,lowell,houston

// if we want to get cities start with i
const citiesI = cities.filter(city => city[0] === "i");
console.log(citiesI)
// [ 'irving' ]

// if we want to capitalize all the cities
const citiesC = cities.map(city => city.toUpperCase());
console.log(citiesC)
// [ 'IRVING', 'LOWELL', 'HOUSTON' ]
高階函數
高階函數是将函數作為參數或傳回函數的函數,或者有時它們都有。 這些高階函數可以操縱其他函數。
Array.map,Array.filter和Array.reduce
是高階函數,因為它們将函數作為參數。
const numbers = [10,20,40,50,60,70,80]

const out1 = numbers.map(num => num * 100);
console.log(out1);
// [ 1000, 2000, 4000, 5000, 6000, 7000, 8000 ]

const out2 = numbers.filter(num => num > 50);
console.log(out2);
// [ 60, 70, 80 ]

const out3 = numbers.reduce((out,num) => out + num);
console.log(out3);
// 330
下面是另一個名為
isPersonOld
的高階函數示例,該函數接受另外兩個函數,分别是
message
和
isYoung
。
const isYoung = age => age < 25;

const message = msg => "He is "+ msg;

function isPersonOld(age, isYoung, message) {
    const returnMessage = isYoung(age)?message("young"):message("old");
    return returnMessage;
}

// passing functions as an arguments
console.log(isPersonOld(13,isYoung,message))
// He is young
遞歸是一種函數在滿足一定條件之前調用自身的技術。隻要可能,最好使用遞歸而不是循環。你必須注意這一點,浏覽器不能處理太多遞歸和抛出錯誤。
下面是一個示範遞歸的例子,在這個遞歸中,列印一個類似于樓梯的名稱。我們也可以使用
for
循環,但隻要可能,我們更喜歡遞歸。
function printMyName(name, count) {
    if(count <= name.length) {
        console.log(name.substring(0,count));
        printMyName(name, ++count);
    }
}

console.log(printMyName("Bhargav", 1));

/*
B
Bh
Bha
Bhar
Bharg
Bharga
Bhargav
*/

// withotu recursion
var name = "Bhargav"
var output = "";
for(let i=0; i<name.length; i++) {
    output = output + name[i];
    console.log(output);
}
在React中,我們将功能劃分為小型可重用的純函數,我們必須将所有這些可重用的函數放在一起,最終使其成為産品。 将所有較小的函數組合成更大的函數,最終,得到一個應用程式,這稱為組合。
實作組合有許多不同方法。 我們從Javascript中了解到的一種常見方法是連結。 連結是一種使用點表示法調用前一個函數的傳回值的函數的方法。
這是一個例子。 我們有一個
name
,如果
firstName
lastName
大于5個單詞的大寫字母,剛傳回,并且列印名稱的名稱和長度。
const name = "Bhargav Bachina";

const output = name.split(" ")
    .filter(name => name.length > 5)
    .map(val => {
    val = val.toUpperCase();
    console.log("Name:::::"+val);
    console.log("Count::::"+val.length);
    return val;
});

console.log(output)
/*
Name:::::BHARGAV
Count::::7
Name:::::BACHINA
Count::::7
[ 'BHARGAV', 'BACHINA' ]
*/
在React中,我們使用了不同于連結的方法,因為如果有30個這樣的函數,就很難進行連結。這裡的目的是将所有更簡單的函數組合起來生成一個更高階的函數。
const name = compose(
    splitmyName,
    countEachName,
    comvertUpperCase,
    returnName
)

console.log(name);
什麼是 React
React是一個簡單的javascript UI庫,用于建構高效、快速的使用者界面。它是一個輕量級庫,是以很受歡迎。它遵循元件設計模式、聲明式程式設計範式和函數式程式設計概念,以使前端應用程式更高效。它使用虛拟DOM來有效地操作DOM。它遵循從高階元件到低階元件的單向資料流。
React 與 Angular 有何不同?
Angular是一個成熟的MVC架構,帶有很多特定的特性,比如服務、指令、模闆、子產品、解析器等等。React是一個非常輕量級的庫,它隻關注MVC的視圖部分。
Angular遵循兩個方向的資料流,而React遵循從上到下的單向資料流。React在開發特性時給了開發人員很大的自由,例如,調用API的方式、路由等等。我們不需要包括路由器庫,除非我們需要它在我們的項目。
什麼是Virtual DOM及其工作原理
React 使用 Virtual DOM 來更新真正的 DOM,進而提高效率和速度。 我們來詳細讨論這些。
什麼是Virtual DOM
浏覽器遵循HTML指令來構造文檔對象模型(DOM)。當浏覽器加載HTML并呈現使用者界面時,HTML文檔中的所有元素都變成DOM元素。
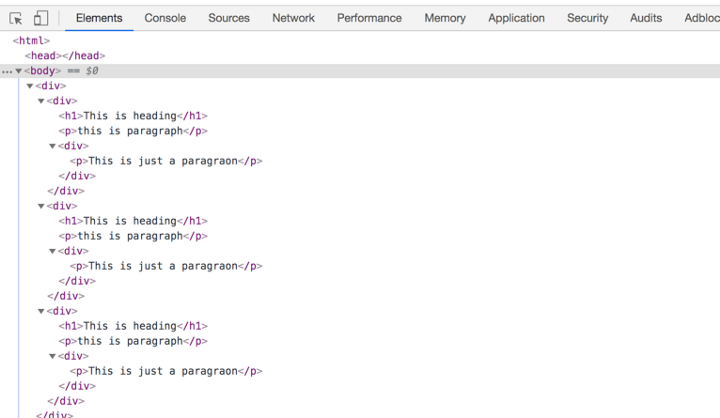
DOM是從根元素開始的元素層次結構。例如,看看下面的HTML。
<div>
    <div>
        <h1>This is heading</h1>
        <p>this is paragraph</p>
        <div>
            <p>This is just a paragraon</p>
        </div>
    </div>
    <div>
        <h1>This is heading</h1>
        <p>this is paragraph</p>
        <div>
            <p>This is just a paragraon</p>
        </div>
    </div>
    <div>
        <h1>This is heading</h1>
        <p>this is paragraph</p>
        <div>
            <p>This is just a paragraon</p>
        </div>
    </div>
</div>
當在浏覽器中加載這個HTML時,所有這些HTML元素都被轉換成DOM元素,如下所示
當涉及到SPA應用程式時,首次加載index.html,并在index.html本身中加載更新後的資料或另一個html。當使用者浏覽站點時,我們使用新内容更新相同的index.html。每當DOM發生更改時,浏覽器都需要重新計算CSS、進行布局并重新繪制web頁面。
React 使用 Virtual DOM 有效地重建 DOM。 對于我們來說,這使得DOM操作的一項非常複雜和耗時的任務變得更加容易。 React從開發人員那裡抽象出所有這些,以便在Virtual DOM的幫助下建構高效的UI。
虛拟DOM是如何工作的
虛拟DOM隻不過是真實 DOM 的 javascript對象表示。 與更新真實 DOM 相比,更新 javascript 對象更容易,更快捷。 考慮到這一點,讓我們看看它是如何工作的。
React将整個DOM副本儲存為虛拟DOM

每當有更新時,它都會維護兩個虛拟DOM,以比較之前的狀态和目前狀态,并确定哪些對象已被更改。 例如,段落文本更改為更改。
現在,它通過比較兩個虛拟DOM 差異,并将這些變化更新到實際DOM
一旦真正的DOM更新,它也會更新UI
什麼是 JSX
JSX是javascript的文法擴充。它就像一個擁有javascript全部功能的模闆語言。它生成React元素,這些元素将在DOM中呈現。React建議在元件使用JSX。在JSX中,我們結合了javascript和HTML,并生成了可以在DOM中呈現的react元素。
下面是JSX的一個例子。我們可以看到如何将javascript和HTML結合起來。如果HTML中包含任何動态變量,我們應該使用表達式
{}
import React from 'react';

export const Header = () => {

    const heading = 'TODO App'

    return(
        <div style={{backgroundColor:'orange'}}>
            <h1>{heading}</h1>
        </div>
    )
}
代碼部署後可能存在的BUG沒法實時知道,事後為了解決這些BUG,花了大量的時間進行log 調試,這邊順便給大家推薦一個好用的BUG監控工具
React 中一切都是元件。 我們通常将應用程式的整個邏輯分解為小的單個部分。 我們将每個單獨的部分稱為元件。 通常,元件是一個javascript函數,它接受輸入,處理它并傳回在UI中呈現的React元素。
在React中有不同類型的元件。讓我們詳細看看。
函數/無狀态/展示元件
函數或無狀态元件是一個純函數,它可接受接受參數,并傳回react元素。這些都是沒有任何副作用的純函數。這些元件沒有狀态或生命周期方法,這裡有一個例子。
import React from 'react';
import Jumbotron from 'react-bootstrap/Jumbotron';

export const Header = () => {
    return(
        <Jumbotron style={{backgroundColor:'orange'}}>
            <h1>TODO App</h1>
        </Jumbotron>
    )
}
類/有狀态元件
類或有狀态元件具有狀态和生命周期方可能通過
setState()
方法更改元件的狀态。類元件是通過擴充React建立的。它在構造函數中初始化,也可能有子元件,這裡有一個例子。
import React from 'react';
import '../App.css';
import { ToDoForm } from './todoform';
import { ToDolist } from './todolist';

export class Dashboard extends React.Component {

  constructor(props){
    super(props);

    this.state = {

    }
  }

  render() {
    return (
      <div className="dashboard">
          <ToDoForm />
          <ToDolist />
      </div>
    );
  }
}
受控元件
受控元件是在 React 中處理輸入表單的一種技術。表單元素通常維護它們自己的狀态,而react則在元件的狀态屬性中維護狀态。我們可以将兩者結合起來控制輸入表單。這稱為受控元件。是以,在受控元件表單中,資料由React元件處理。
這裡有一個例子。當使用者在 todo 項中輸入名稱時,調用一個javascript函數
handleChange
捕捉每個輸入的資料并将其放入狀态,這樣就在
handleSubmit
中的使用資料。
import React from 'react';
import Form from 'react-bootstrap/Form';
import Button from 'react-bootstrap/Button';
import Row from 'react-bootstrap/Row';
import Col from 'react-bootstrap/Col';

export class ToDoForm extends React.Component {
    constructor(props) {
      super(props);
      this.state = {value: ''};

      this.handleChange = this.handleChange.bind(this);
      this.handleSubmit = this.handleSubmit.bind(this);
    }

    handleChange(event) {
      this.setState({value: event.target.value});
    }

    handleSubmit(event) {
      alert('A name was submitted: ' + this.state.value);
      event.preventDefault();
    }

    render() {
      return (
          <div className="todoform">
            <Form>
                <Form.Group as={Row} controlId="formHorizontalEmail">
                    <Form.Label column sm={2}>
                    <span className="item">Item</span>
                    </Form.Label>
                    <Col sm={5}>
                        <Form.Control type="text" placeholder="Todo Item" />
                    </Col>
                    <Col sm={5}>
                        <Button variant="primary" type="submit">Add</Button>
                    </Col>
                </Form.Group>
            </Form>
         </div>
      );
    }
  }
非受控元件
大多數情況下,建議使用受控元件。有一種稱為非受控元件的方法可以通過使用
Ref
來處理表單資料。在非受控元件中,
Ref
用于直接從
DOM
通路表單值,而不是事件處理程式。
我們使用
Ref
建構了相同的表單,而不是使用React狀态。 我們使用
React.createRef()
定義
Ref
并傳遞該輸入表單并直接從
handleSubmit
方法中的
DOM
通路表單值。
import React from 'react';
import Form from 'react-bootstrap/Form';
import Button from 'react-bootstrap/Button';
import Row from 'react-bootstrap/Row';
import Col from 'react-bootstrap/Col';

export class ToDoForm extends React.Component {
    constructor(props) {
      super(props);
      this.state = {value: ''};
      this.input = React.createRef();

      this.handleSubmit = this.handleSubmit.bind(this);
    }

    handleSubmit(event) {
      alert('A name was submitted: ' + this.input.current.value);
      event.preventDefault();
    }

    render() {
      return (
          <div className="todoform">
            <Form>
                <Form.Group as={Row} controlId="formHorizontalEmail">
                    <Form.Label column sm={2}>
                    <span className="item">Item</span>
                    </Form.Label>
                    <Col sm={5}>
                        <Form.Control type="text" placeholder="Todo Item" ref={this.input}/>
                    </Col>
                    <Col sm={5}>
                        <Button variant="primary" onClick={this.handleSubmit} type="submit">Add</Button>
                    </Col>
                </Form.Group>
            </Form>
         </div>
      );
    }
  }
容器元件
容器元件是處理擷取資料、訂閱 redux 存儲等的元件。它們包含展示元件和其他容器元件,但是裡面從來沒有html。
高階元件
高階元件是将元件作為參數并生成另一個元件的元件。 Redux
connect
是高階元件的示例。 這是一種用于生成可重用元件的強大技術。
Props 是隻讀屬性,傳遞給元件以呈現UI和狀态,我們可以随時間更改元件的輸出。
下面是一個類元件的示例,它在構造函數中定義了
props
state
,每當使用
this.setState()
修改狀态時,将再次調用
render( )
函數來更改UI中元件的輸出。
import React from 'react';
import '../App.css';

export class Dashboard extends React.Component {

  constructor(props){
    super(props);

    this.state = {
        name: "some name"
    }
  }

  render() {

    // reading state
    const name = this.state.name;

    //reading props
    const address = this.props.address;

    return (
      <div className="dashboard">
          {name}
          {address}
      </div>
    );
  }
}
什麼是PropTypes
随着時間的推移,應用程式會變得越來越大,是以類型檢查非常重要。
PropTypes
為元件提供類型檢查,并為其他開發人員提供很好的文檔。如果react項目不使用 Typescript,建議為元件添加
PropTypes
如果元件沒有收到任何 props,我們還可以為每個元件定義要顯示的預設 props。這裡有一個例子。
UserDisplay
有三個 prop:
name
、
address
age
,我們正在為它們定義預設的props 和 prop類型。
import React from 'react';
import PropTypes from 'prop-types';

export const UserDisplay = ({name, address, age}) => {

    UserDisplay.defaultProps = {
        name: 'myname',
        age: 100,
        address: "0000 onestreet"
    };

    return (
        <>
            <div>
                <div class="label">Name:</div>
                <div>{name}</div>
            </div>
            <div>
                <div class="label">Address:</div>
                <div>{address}</div>
            </div>
            <div>
                <div class="label">Age:</div>
                <div>{age}</div>
            </div>
        </>
    )
}

UserDisplay.propTypes = {
    name: PropTypes.string.isRequired,
    address: PropTypes.objectOf(PropTypes.string),
    age: PropTypes.number.isRequired
}
如何更新狀态以及如何不更新
你不應該直接修改狀态。可以在構造函數中定義狀态值。直接使用狀态不會觸發重新渲染。React 使用
this.setState()
時合并狀态。
//  錯誤方式
this.state.name = "some name"
//  正确方式
this.setState({name:"some name"})
使用
this.setState()
的第二種形式總是更安全的,因為更新的props和狀态是異步的。這裡,我們根據這些 props 更新狀态。
// 錯誤方式
this.setState({
    timesVisited: this.state.timesVisited + this.props.count
})
// 正确方式
this.setState((state, props) => {
    timesVisited: state.timesVisited + props.count
});
元件在進入和離開DOM時要經曆一系列生命周期方法,下面是這些生命周期方法。
componentWillMount()
在渲染前調用,在用戶端也在服務端,它隻發生一次。
componentDidMount()
在第一次渲染後調用,隻在用戶端。之後元件已經生成了對應的DOM結構,可以通過
this.getDOMNode()
來進行通路。 如果你想和其他JavaScript架構一起使用,可以在這個方法中調用
setTimeout
,
setInterval
或者發送AJAX請求等操作(防止異部操作阻塞UI)。
componentWillReceiveProps()
在元件接收到一個新的 prop (更新後)時被調用。這個方法在初始化render時不會被調用。
shouldComponentUpdate()
傳回一個布爾值。在元件接收到新的
props
或者
state
時被調用。在初始化時或者使用
forceUpdate
時不被調用。 可以在你确認不需要更新元件時使用。
componentWillUpdate()
在元件接收到新的
props
state
但還沒有
render
時被調用。在初始化時不會被調用。
componentDidUpdate()
在元件完成更新後立即調用。在初始化時不會被調用。
componentWillUnMount()
件從 DOM 中移除的時候立刻被調用。
getDerivedStateFromError()
這個生命周期方法在ErrorBoundary類中使用。實際上,如果使用這個生命周期方法,任何類都會變成
ErrorBoundary
。這用于在元件樹中出現錯誤時呈現回退UI,而不是在螢幕上顯示一些奇怪的錯誤。
componentDidCatch()
這個生命周期方法在ErrorBoundary類中使用。實際上,如果使用這個生命周期方法,任何類都會變成ErrorBoundary。這用于在元件樹中出現錯誤時記錄錯誤。
在React中,我們總是使用組合而不是繼承。我們已經在函數式程式設計部分讨論了什麼是組合。這是一種結合簡單的可重用函數來生成高階元件的技術。下面是一個組合的例子,我們在 dashboard 元件中使用兩個小元件
todoForm
todoList
import React from 'react';
import '../App.css';
import { ToDoForm } from './todoform';
import { ToDolist } from './todolist';

export class Dashboard extends React.Component {

  render() {
    return (
      <div className="dashboard">
          <ToDoForm />
          <ToDolist />
      </div>
    );
  }
}
将樣式應用于React元件有三種方法。
外部樣式表
在此方法中,你可以将外部樣式表導入到元件使用類中。 但是你應該使用
className
而不是
class
來為React元素應用樣式, 這裡有一個例子。
import React from 'react';
import './App.css';
import { Header } from './header/header';
import { Footer } from './footer/footer';
import { Dashboard } from './dashboard/dashboard';
import { UserDisplay } from './userdisplay';

function App() {
  return (
    <div className="App">
      <Header />
      <Dashboard />
      <UserDisplay />
      <Footer />
    </div>
  );
}

export default App;
内聯樣式
在這個方法中,我們可以直接将
props
傳遞給HTML元素,屬性為
style
。這裡有一個例子。這裡需要注意的重要一點是,我們将javascript對象傳遞給style,這就是為什麼我們使用
backgroundColor
而不是CSS方法
backbackground -color
import React from 'react';

export const Header = () => {

    const heading = 'TODO App'

    return(
        <div style={{backgroundColor:'orange'}}>
            <h1>{heading}</h1>
        </div>
    )
}
定義樣式對象并使用它
因為我們将javascript對象傳遞給
style
屬性,是以我們可以在元件中定義一個
style
對象并使用它。下面是一個示例,你也可以将此對象作為
props
傳遞到元件樹中。
import React from 'react';

const footerStyle = {
    width: '100%',
    backgroundColor: 'green',
    padding: '50px',
    font: '30px',
    color: 'white',
    fontWeight: 'bold'
}

export const Footer = () => {
    return(
        <div style={footerStyle}>
            All Rights Reserved 2019
        </div>
    )
}
Redux 是 React的一個狀态管理庫,它基于flux。 Redux簡化了React中的單向資料流。 Redux将狀态管理完全從React中抽象出來。
它是如何工作的
在React中,元件連接配接到 redux ,如果要通路 redux,需要派出一個包含
id
和負載(payload) 的
action
。action 中的
payload
是可選的,action 将其轉發給 Reducer。
當
reducer
收到
action
時,通過
swithc...case
文法比較
action
中
type
。 比對時,更新對應的内容傳回新的
state
Redux
狀态更改時,連接配接到
Redux
的元件将接收新的狀态作為
props
。當元件接收到這些
props
時,它将進入更新階段并重新渲染 UI。
Redux 循環細節
讓我們詳細看看整個redux 循環細節。
Action: Action 隻是一個簡單的json對象,type 和有payload作為鍵。type 是必須要有的,payload是可選的。下面是一個 action 的例子。
// action

{
  type:"SEND_EMAIL",
  payload: data
};
Action Creators:這些是建立
Actions
的函數,是以我們在派發
action
時不必在元件中手動編寫每個
action
。 以下是 action creator 的示例。
// action creator

export function sendEamil(data) {
    return { type:"SEND_EMAIL", payload: data};
}
Reducers:Reducers 是純函數,它将
action
和目前
state
作為參數,計算必要的邏輯并傳回一個新r的
state
。 這些 Reducers 沒有任何副作用。 它不會改變
state
而是總是傳回
state
export default function emailReducer(state = [], action){

  switch(action.type) {
      case "SEND_EMAIL":  return Object.assign({}, state, {
       email: action.payload
      });
      default: return state;
  }
}
元件如何與 redux
redux
mapStateToProps:此函數将
state
映射到
props
上,是以隻要
state
發生變化,新 state 會重新映射到
props
。 這是訂閱
store
的方式。
mapDispatchToProps:此函數用于将
action creators
綁定到你的
props
。以便我們可以在第
12
行中使用This .
props.actions.sendemail()
來派發一個動作。
connect
bindActionCreators
來自 redux。 前者用于連接配接 store ,如第22行,後者用于将 action creators 綁定到你的
props
,如第20行。
// import connect
import { connect } from 'react-redux'
import { bindActionCreators } from 'redux'

// import action creators
import * as userActions from '../../../actions/userActions';

export class User extends React.Component {

    handleSubmit() {
        // dispatch an action
        this.props.actions.sendEmail(this.state.email);
    }

}

// you are mapping you state props
const mapStateToProps = (state, ownProps) => ({user: state.user})
// you are binding your action creators to your props
const mapDispatchToProps = (dispatch) => ({actions: bindActionCreators(userActions, dispatch)})

export default connect(mapStateToProps, mapDispatchToProps)(User);
什麼是 React Router Dom 及其工作原理
react-router-dom
是應用程式中路由的庫。 React庫中沒有路由功能,需要單獨安裝
react-router-dom
react-router-dom 提供兩個路由器
BrowserRouter
HashRoauter
。前者基于rul的pathname段,後者基于hash段。
前者:http://127.0.0.1:3000/article/num1

 後者:http://127.0.0.1:3000/#/article/num1(不一定是這樣,但#是少不了的)
react-router-dom 元件
-
BrowserRouter
HashRouter
-
Route
-
Link
-
NavLink
-
Switch
-
Redirect
下面是元件中的
Link
NavLink
Redirect
的例子
// normal link
<Link to="/gotoA">Home</Link>

// link which highlights currentlu active route with the given class name
<NavLink to="/gotoB" activeClassName="active">
  React
</NavLink>

// you can redirect to this url
<Redirect to="/gotoC" />
以下是 react router 元件的示例。 如果你檢視下面的示例,我們将比對路徑并使用
Switch
Route
呈現相應的元件。
import React from 'react'
// import react router DOM elements
import { Switch, Route, Redirect } from 'react-router-dom'
import ComponentA from '../common/compa'
import ComponentB from '../common/compb'
import ComponentC from '../common/compc'
import ComponentD from '../common/compd'
import ComponentE from '../common/compe'


const Layout = ({ match }) => {
    return(
        <div className="">
            <Switch>
                <Route exact path={`${match.path}/gotoA`} component={ComponentA} />
                <Route path={`${match.path}/gotoB`} component={ComponentB} />
                <Route path={`${match.path}/gotoC`} component={ComponentC} />
                <Route path={`${match.path}/gotoD`} component={ComponentD} />
                <Route path={`${match.path}/gotoE`} component={ComponentE} />
            </Switch>
        </div>
    )}

export default Layout
在 React 中,我們通常有一個元件樹。如果任何一個元件發生錯誤,它将破壞整個元件樹。沒有辦法捕捉這些錯誤,我們可以用錯誤邊界優雅地處理這些錯誤。
錯誤邊界有兩個作用
- 如果發生錯誤,顯示回退UI
- 記錄錯誤
下面是
ErrorBoundary
類的一個例子。如果類實作了
getDerivedStateFromError
或
componentDidCatch
這兩個生命周期方法的任何一下,,那麼這個類就會成為ErrorBoundary。前者傳回
{hasError: true}
來呈現回退UI,後者用于記錄錯誤。
import React from 'react'

export class ErrorBoundary extends React.Component {
    constructor(props) {
      super(props);
      this.state = { hasError: false };
    }

    static getDerivedStateFromError(error) {
      // Update state so the next render will show the fallback UI.
      return { hasError: true };
    }

    componentDidCatch(error, info) {
      // You can also log the error to an error reporting service
      console.log('Error::::', error);
    }

    render() {
      if (this.state.hasError) {
        // You can render any custom fallback UI
        return <h1>OOPS!. WE ARE LOOKING INTO IT.</h1>;
      }

      return this.props.children;
    }
  }
以下是我們如何在其中一個元件中使用ErrorBoundary。使用ErrorBoundary類包裹
ToDoForm
ToDoList
。 如果這些元件中發生任何錯誤,我們會記錄錯誤并顯示回退UI。
import React from 'react';
import '../App.css';
import { ToDoForm } from './todoform';
import { ToDolist } from './todolist';
import { ErrorBoundary } from '../errorboundary';

export class Dashboard extends React.Component {

  render() {
    return (
      <div className="dashboard">
        <ErrorBoundary>
          <ToDoForm />
          <ToDolist />
        </ErrorBoundary>
      </div>
    );
  }
}
在React中,我們需要有一個父元素,同時從元件傳回React元素。有時在DOM中添加額外的節點會很煩人。使用 Fragments,我們不需要在DOM中添加額外的節點。我們隻需要用
React.Fragment
或才簡寫
<>
來包裹内容就行了。如下 所示:
// Without Fragments
return (
    <div>
       <CompoentA />
       <CompoentB />
       <CompoentC />
    </div>
)

// With Fragments
  return (
    <React.Fragment>
       <CompoentA />
       <CompoentB />
       <CompoentC />
    </React.Fragment>
  )

  // shorthand notation Fragments
  return (
    <>
       <CompoentA />
       <CompoentB />
       <CompoentC />
    </>
  )
預設情況下,所有子元件都在UI上呈現,具體取決于元件層次結構。Portal 提供了一種将子節點渲染到存在于父元件以外的 DOM 節點的優秀的方案。
這裡有一個例子。預設情況下,父元件在DOM層次結構中有子元件。
我們可以将
children
元件移出
parent
元件并将其附加 id 為
someid
的 Dom 節點下。
首先,擷取 id 為 someid,我們在constrcutorand中建立一個元素div,将child附加到componentDidMount中的someRoot。 最後,我們在ReactDOM.createPortal(this.props.childen),domnode的幫助下将子節點傳遞給該特定DOM節點。
首先,先擷取 id 為
someid
DOM元素,接着在構造函數中建立一個元素div,在
componentDidMount
方法中将
someRoot
放到 div 中 。 最後,通過
ReactDOM.createPortal(this.props.childen), domnode)
将
children
傳遞到對應的節點下。
const someRoot = document.getElementById('someid');

class Modal extends React.Component {
  constructor(props) {
    super(props);
    this.el = document.createElement('div');
  }

  componentDidMount() {
    someRoot.appendChild(this.el);
  }

  componentWillUnmount() {
    someRoot.removeChild(this.el);
  }

  render() {
    return ReactDOM.createPortal(
      this.props.children,
      this.el,
    );
  }
} 什麼是上下文
有時我們必須将
props
傳遞給元件樹,即使所有中間元件都不需要這些
props
。上下文是一種傳遞
props
的方法,而不用在每一層傳遞元件樹。
Hooks 是React版本16.8中的新功能。 請記住,我們不能在函數元件中使用
state
,因為它們不是類元件。Hooks 讓我們在函數元件中可以使用state 和其他功能。
目前沒有重大變化,我們不必放棄類元件。
Hook 不會影響你對 React 概念的了解。 恰恰相反,Hook 為已知的 React 概念提供了更直接的 API:props, state,context,refs 以及生命周期。稍後我們将看到,Hook 還提供了一種更強大的方式來組合他們。
我們可以使用一些鈎子,例如useState,useEffect,useContext,useReducer等。
下面是 Hooks 的基本規則
- Hooks 應該在外層使用,不應該在循環,條件或嵌套函數中使用
- Hooks 應該隻在函數元件中使用。
讓我們看一個例子來了解 hooks。 這是一個函數元件,它采用
props
并在UI上顯示這些
props
。 在
useState
鈎子的幫助下,我們将這個函數元件轉換為有狀态元件。 首先,我們在第5行定義狀态,這相當于
constructor(props) {
 super(props);
 this.state = {
     name:'myname', age:10, address:'0000 one street'
 }
}
useState
傳回兩個項,一個是
user
,另一個是
setUser
函數。
user
是一個可以在沒有
this
關鍵字的情況下直接使用的對象,
setUser
是一個可以用來設定使用者點選第
21
行按鈕的狀态的函數,該函數等效于以下内容。
this.setState({name:'name changed'}) import React, { useState } from "react";
export const UserDisplay = ({ name, address, age }) => {
const [user, setUser] = useState({
name: "myname",
age: 10,
address: "0000 onestreet"
});
return (
<>
<div>
<div class="label">Name:</div>
<div>{user.name}</div>
</div>
<div>
<div class="label">Address:</div>
<div>{user.address}</div>
</div>
<div>
<div class="label">Age:</div>
<div>{user.age}</div>
</div>
<button onClick={() => setUser({ name: "name changed" })}>
Click me
</button>
</>
);
}; 我們可以通過多種方式提高應用性能,以下這些比較重要:
- 适當地使用
shouldComponentUpdate
-
create-react-app
- 不可變性是提高性能的關鍵。不要對資料進行修改,而是始終在現有集合的基礎上建立新的集合,以保持盡可能少的複制,進而提高性能。
- 在顯示清單或表格時始終使用
Keys
- 代碼分離是将代碼插入到單獨的檔案中,隻加載子產品或部分所需的檔案的技術。
單頁應用程式首先在DOM中加載
index.html
,然後在使用者浏覽頁面時加載内容,或者從同一
index.html
中的後端API擷取任何資料。
如果通過點選浏覽器中的重新加載按鈕重新加載頁面
index.html
,整個React應用程式将重新加載,我們将丢失應用程式的狀态。 如何保留應用狀态?
每當重新加載應用程式時,我們使用浏覽器
localstorage
來儲存應用程式的狀态。我們将整個存儲資料儲存在
localstorage
中,每當有頁面重新整理或重新加載時,我們從
localstorage
加載狀态。
如何在React進行API調用
redux-thunk
在React中調用API。因為
reduce
是純函數,是以沒有副作用,比如調用API。
是以,我們必須使用
redux-thunk
從 action creators 那裡進行 API 調用。Action creator 派發一個action,将來自API的資料放入action 的
payload
中。Reducers 接收我們在上面的
redux
循環中讨論的資料,其餘的過程也是相同的。
redux-thunk是一個中間件。一旦它被引入到項目中,每次派發一個
action
時,都會通過
thunk
傳遞。如果它是一個函數,它隻是等待函數處理并傳回響應。如果它不是一個函數,它隻是正常處理。
這裡有一個例子。
sendEmailAPI
是從元件中調用的函數,它接受一個資料并傳回一個函數,其中
dispatch
作為參數。我們使用
redux-thunk
調用API
apiservice
,并等待收到響應。一旦接收到響應,我們就使用
payload
派發一個
action
import apiservice from '../services/apiservice';

export function sendEmail(data) {
    return { type:"SEND_EMAIL", payload: data };
}

export function sendEmailAPI(email) {
    return function(dispatch) {
        return apiservice.callAPI(email).then(data => {
            dispatch(sendEmail(data));
        });
    }
}
要想有把握的面試,必須充分了解上述所有主題。 即使你目前正在使用React,了解這些概念也能增強你在職場中信心。