說在前面
之前的文章我們已經詳細的講解了微服務的概念,以及分析了Dubbo與SpringCloud這兩個SOA架構的差別。傳送門1(SpringCloud(1):說說什麼是微服務):
https://www.jianshu.com/p/183871ec8add傳送門2:(SpringCloud(2):注冊中心Eureka的搭建):
https://www.jianshu.com/p/79b1000e068f那麼概念了解了,注冊中心也已經搭建好了,我們來搭建服務生産者吧。
服務生産者
核心坐标
<!--eureka-client-->
        <dependency>
            <groupId>org.springframework.cloud</groupId>
            <artifactId>spring-cloud-starter-netflix-eureka-client</artifactId>
        </dependency>
Maven坐标
<parent>
        <groupId>cn.****</groupId>
        <artifactId>***</artifactId>
        <version>1.0-SNAPSHOT</version>
        <relativePath>../pom.xml</relativePath> <!-- lookup parent from repository -->
    </parent>

 <dependencies>

        <dependency>
            <groupId>cn.lpck</groupId>
            <artifactId>commons</artifactId>
            <version>1.0-SNAPSHOT</version>
        </dependency>

        <dependency>
            <groupId>org.springframework.boot</groupId>
            <artifactId>spring-boot-starter-web</artifactId>
        </dependency>

        <dependency>
        <groupId>org.springframework.boot</groupId>
        <artifactId>spring-boot-starter-test</artifactId>
        <scope>test</scope>
        </dependency>

        <!--eureka-client-->
        <dependency>
            <groupId>org.springframework.cloud</groupId>
            <artifactId>spring-cloud-starter-netflix-eureka-client</artifactId>
        </dependency>

        <!-- alibaba的druid資料庫連接配接池 -->
        <dependency>
            <groupId>com.alibaba</groupId>
            <artifactId>druid-spring-boot-starter</artifactId>
            <version>1.1.9</version>
        </dependency>

        <dependency>
            <groupId>org.springframework.boot</groupId>
            <artifactId>spring-boot-starter-jdbc</artifactId>
        </dependency>

        <dependency>
            <groupId>mysql</groupId>
            <artifactId>mysql-connector-java</artifactId>
            <scope>runtime</scope>
        </dependency>

        <!-- 分頁插件 -->
        <dependency>
            <groupId>com.github.pagehelper</groupId>
            <artifactId>pagehelper-spring-boot-starter</artifactId>
            <version>1.2.5</version>
        </dependency>

        <dependency>
            <groupId>org.springframework.boot</groupId>
            <artifactId>spring-boot-starter-data-redis</artifactId>
        </dependency>

        <dependency>
            <groupId>org.apache.commons</groupId>
            <artifactId>commons-pool2</artifactId>
            <version>2.6.0</version>
        </dependency>

    </dependencies>
配置檔案 application.properties
spring.application.name
:服務提供者的名字,可以随便起後面會用到
eureka.client.service-url.defaultZone
:注冊中心位址
management.endpoints.web.exposure.include
:制定放開的handler,由于Springboot2.0預設關閉了自帶的一些handler不開放我們就無法通路,開放之後我們可以用監控中心進行健康以及心跳的檢測
server.port
:容器端口
...
:一些整合配置,mybatis mysql redis.....
spring.application.name=eureka-producer
#使用eureka叢集注冊中心
#eureka.client.service-url.defaultZone=http://localhost:10001/eureka/,http://localhost:10002/eureka/
eureka.client.service-url.defaultZone=http://localhost:10000/eureka/

management.endpoints.web.exposure.include=refresh,health,info,env,loggers,metrics,trace,dump
management.endpoint.health.show-details=always
# 9000
server.port=9000

spring.datasource.name=myboot
spring.datasource.type=com.alibaba.druid.pool.DruidDataSource
spring.datasource.druid.filters=stat
spring.datasource.druid.driver-class-name=com.mysql.jdbc.Driver
spring.datasource.druid.url=jdbc:mysql://10.*.**.**:3306/db_***?useUnicode=true&characterEncoding=UTF-8&allowMultiQueries=true
#spring.datasource.druid.url=jdbc:mysql://localhost:3306/db_bxgg?useUnicode=true&characterEncoding=UTF-8&allowMultiQueries=true
spring.datasource.druid.username=root
spring.datasource.druid.password=root
spring.datasource.druid.initial-size=1
spring.datasource.druid.min-idle=1
spring.datasource.druid.max-active=204
spring.datasource.druid.max-wait=60000
spring.datasource.druid.time-between-eviction-runs-millis=60000
spring.datasource.druid.min-evictable-idle-time-millis=300000
spring.datasource.druid.validation-query=SELECT 'x'
spring.datasource.druid.test-while-idle=true
spring.datasource.druid.test-on-borrow=false
spring.datasource.druid.test-on-return=false
spring.datasource.druid.pool-prepared-statements=false
spring.datasource.druid.max-pool-prepared-statement-per-connection-size=20

mybatis.mapper-locations=classpath:Mapper/*.xml
mybatis.type-aliases-package=**.****.****

spring.mvc.static-path-pattern=/static/**

pagehelper.helper-dialect=mysql
pagehelper.reasonable=true
pagehelper.support-methods-arguments=true
pagehelper.params=count=countSql

##redis
#資料庫索引預設為0
spring.redis.database=0
spring.redis.host=10.9.**.****
#spring.redis.host=localhost
spring.redis.port=6379
#數值為負數表示沒有限制
spring.redis.jedis.pool.max-active=8
spring.redis.jedis.pool.max-wait=-1
spring.redis.lettuce.pool.max-idle=8
spring.redis.jedis.pool.min-idle=0
spring.redis.timeout=5000
啟動類
由于我們用的SpringBoot2.0版本,已經不需要在啟動類上加任何别的注解
package cn.**.eurekaproducer;

import com.alibaba.fastjson.serializer.SerializerFeature;
import com.alibaba.fastjson.support.config.FastJsonConfig;
import com.alibaba.fastjson.support.spring.FastJsonHttpMessageConverter;
import org.mybatis.spring.annotation.MapperScan;
import org.springframework.boot.SpringApplication;
import org.springframework.boot.autoconfigure.SpringBootApplication;
import org.springframework.boot.autoconfigure.http.HttpMessageConverters;
import org.springframework.context.annotation.Bean;
import org.springframework.http.MediaType;
import org.springframework.http.converter.HttpMessageConverter;

import java.util.ArrayList;
import java.util.List;

@SpringBootApplication
@MapperScan("**.**.eurekaproducer.mapper")
public class EurekaProducerApplication {

    public static void main(String[] args) {

        SpringApplication.run(EurekaProducerApplication.class, args);
    }

    /**
     * 配置fastjson
     * @return
     */
    @Bean
    public HttpMessageConverters fastJsonHttpMessageConverters() {
        // 1、需要先定義一個 convert 轉換消息的對象;
        FastJsonHttpMessageConverter fastConverter = new FastJsonHttpMessageConverter();

        //2、添加fastJson 的配置資訊,比如:是否要格式化傳回的json資料;
        FastJsonConfig fastJsonConfig = new FastJsonConfig();
        fastJsonConfig.setSerializerFeatures(SerializerFeature.PrettyFormat);

        //同樣要進行中文亂碼問題
        List<MediaType> fastMediaTypes = new ArrayList<>();
        fastMediaTypes.add(MediaType.APPLICATION_JSON_UTF8);
        fastConverter.setSupportedMediaTypes(fastMediaTypes);
        //3、在convert中添加配置資訊.
        fastConverter.setFastJsonConfig(fastJsonConfig);

        HttpMessageConverter<?> converter = fastConverter;
        return new HttpMessageConverters(converter);
    }
}
到這裡我們的服務提供者已經搭建好了,我們可以啟動之前搭建好的注冊中心,然後再啟動服務提供者。
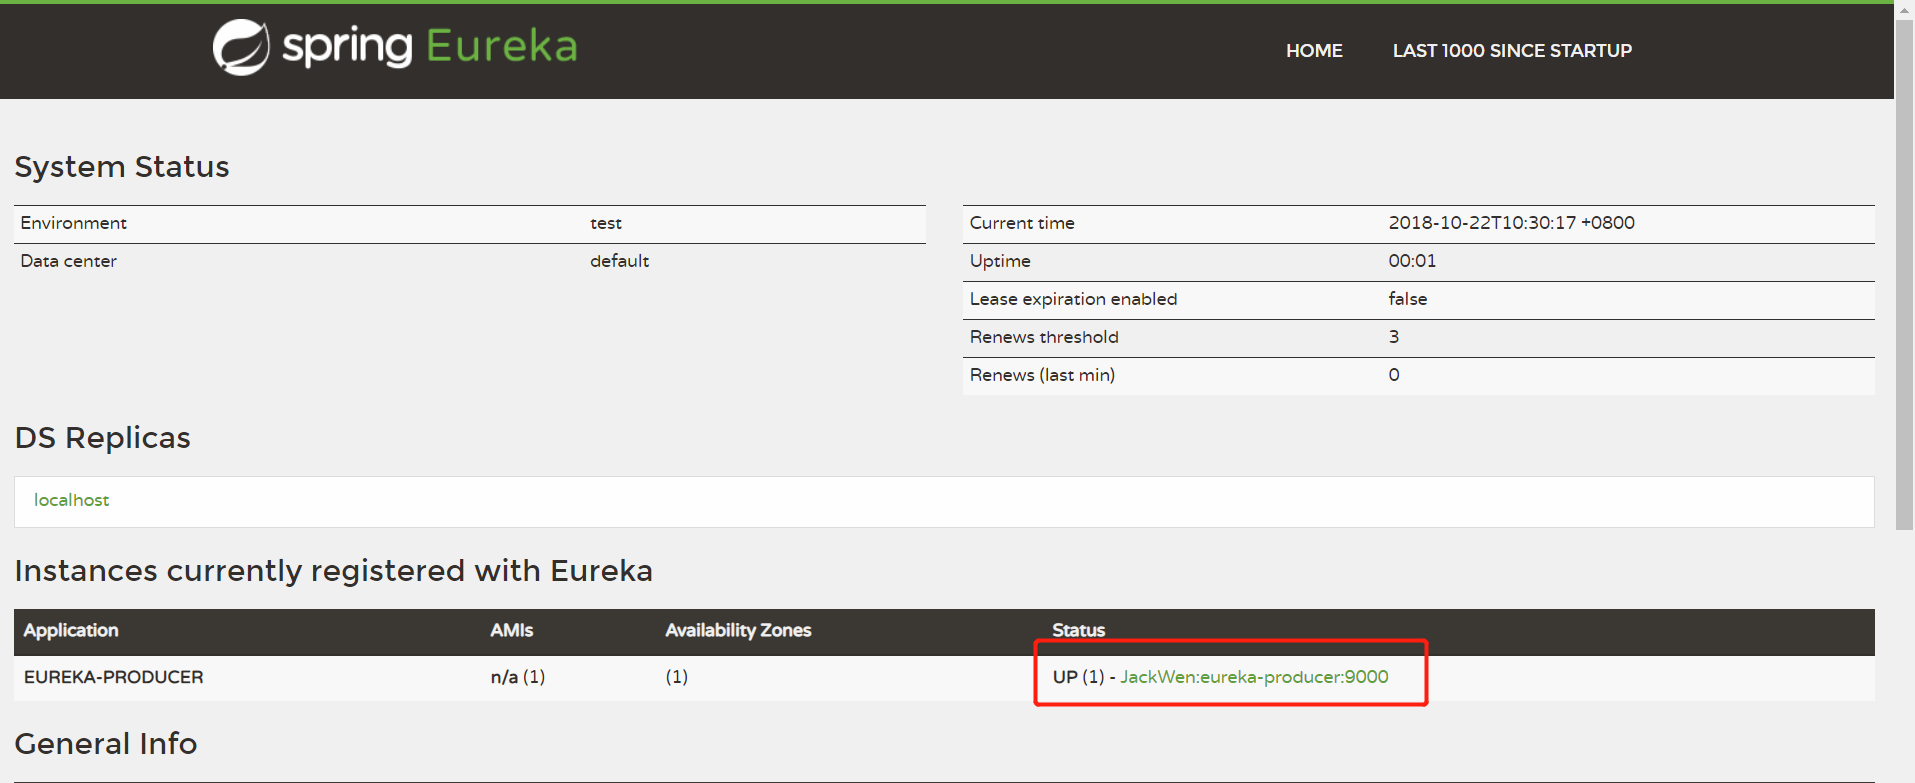
服務注冊
我們看到服務服務在注冊中心已經被發現了。
Contorller
架構以及搭建好了那麼我們最關注的還是在實際生産環境中如何來使用,我們就來編寫這樣一個Controller
查詢資料庫中所有的機構:
@RestController
@RequestMapping("/institutions")
public class InstitutionsController {

    @Autowired
    private InstitutionsService institutionsService;

    @RequestMapping("/all")
    public List<Institutions> getInstitutionsList(){
        List<Institutions> institutions = institutionsService.queryInstitutions();
        return institutions;
    }
  .....
}
通路一下試試看:

機構json
請求到資料就說明是沒有問題的,到此我們的服務提供方也就配置完成了。