一、前言
在做很多項目的UI界面的時候,相信絕大部分人都有過抄襲别人的UI界面尤其是顔色的時候,畢竟十個程式員九個沒有審美,或者說審美跟一坨屎一樣,大家主要的精力以及擅長點都是在寫功能實作具體功能上面,這個事情怎麼說呢,這确實是程式員的主要職責,但是在大部分的小公司,UI也都是需要程式員自己去搞定的,自己想不出來怎麼辦,借鑒咯,不知道顔色值怎麼辦,用顔色拾取器點一下咯。
Qt内置的grabWindow方法,可以指定句柄擷取對應的顔色,是以如果要對螢幕取得顔色值的話,傳入整個螢幕的句柄即可,螢幕的句柄在Qt中的表示是QApplication::desktop()->winId(),要實時擷取怎麼辦呢,當然最簡單的辦法就是開個定時器咯,定時器不斷調用這個方法,擷取螢幕滑鼠坐标和顔色值。
二、代碼思路
void ColorWidget::showColorValue()
{
    if (!pressed) {
        return;
    }

    int x = QCursor::pos().x();
    int y = QCursor::pos().y();

    txtPoint->setText(tr("x:%1  y:%2").arg(x).arg(y));
    QString strDecimalValue, strHex, strTextColor;
    int red, green, blue;

#if (QT_VERSION <= QT_VERSION_CHECK(5,0,0))
    QPixmap pixmap = QPixmap::grabWindow(QApplication::desktop()->winId(), x, y, 2, 2);
#else
    QScreen *screen = QApplication::primaryScreen();
    QPixmap pixmap = screen->grabWindow(QApplication::desktop()->winId(), x, y, 2, 2);
#endif

    if (!pixmap.isNull()) {
        QImage image = pixmap.toImage();

        if (!image.isNull()) {
            if (image.valid(0, 0)) {
                QColor color = image.pixel(0, 0);
                red = color.red();
                green = color.green();
                blue = color.blue();
                QString strRed = tr("%1").arg(red & 0xFF, 2, 16, QChar('0'));
                QString strGreen = tr("%1").arg(green & 0xFF, 2, 16, QChar('0'));
                QString strBlue = tr("%1").arg(blue & 0xFF, 2, 16, QChar('0'));

                strDecimalValue = tr("%1, %2, %3").arg(red).arg(green).arg(blue);
                strHex = tr("#%1%2%3").arg(strRed.toUpper()).arg(strGreen.toUpper()).arg(strBlue.toUpper());
            }
        }
    }

    if (red > 200 && green > 200 && blue > 200) {
        strTextColor = "10, 10, 10";
    } else {
        strTextColor = "255, 255, 255";
    }

    QString str = tr("background-color: rgb(%1);color: rgb(%2)").arg(strDecimalValue).arg(strTextColor);
    labColor->setStyleSheet(str);
    txtRgb->setText(strDecimalValue);
    txtWeb->setText(strHex);
}
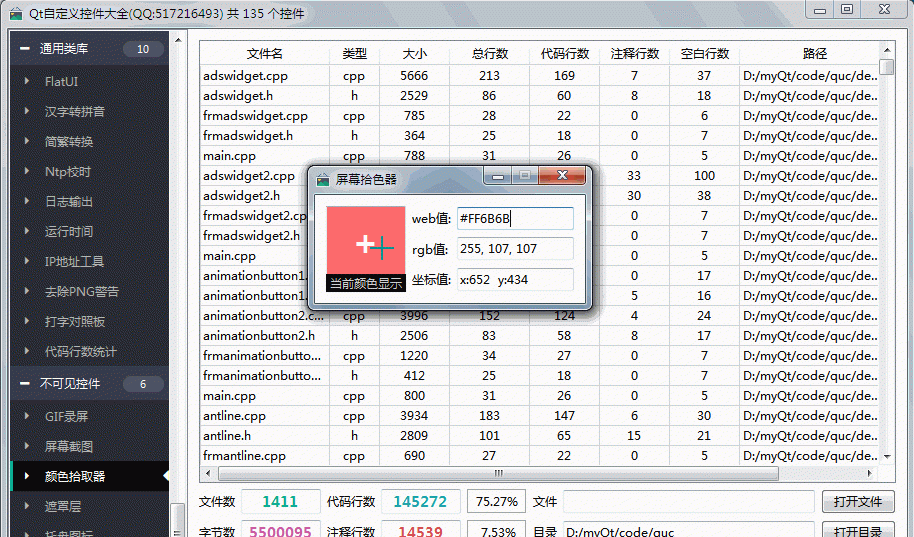
三、效果圖

四、開源首頁
以上作品完整源碼下載下傳都在開源首頁,會持續不斷更新作品數量和品質,歡迎各位關注。