1、安装mail
[root@zabbix alertscripts]# yum install mailx -y
2、编辑配置文件在最后一行添加
[root@zabbix alertscripts]# vim /etc/mail.rc
set bsdcompat
set sendcharsets=iso-8859-1,utf-8
set from=邮箱
set smtp=smtp://smtp.exmail.qq.com
set smtp-auth-user=邮箱
set smtp-auth-password=邮箱密码
set smtp-auth=login
3、测试邮件发送是否正常
[root@zabbix alertscripts]# echo "zabbix test mail" |mail -s "zabbix" 邮箱
4、编写发邮件脚本
[root@zabbix alertscripts]# cd /usr/lib/zabbix/alertscripts
[root@zabbix alertscripts]# vi mailx.sh
#!/bin/bash
#send mail
messages=
subject=echo $3 | tr '\r\n' '\n'
echo "${messages}" | mail -s "${subject}" $1 >>/tmp/mailx.log 2>&1echo $2 | tr '\r\n' '\n'
5、修改权限
touch /tmp/mailx.log
chown -R zabbix.zabbix /tmp/mailx.log
chmod +x /usr/lib/zabbix/alertscripts/mailx.sh
chown -R zabbix.zabbix /usr/lib/zabbix/
6、测试脚本发送邮件
[root@zabbix alertscripts]# echo "hello world" | mail -s "testmail" 你的邮箱
7、zabbix页面配置web
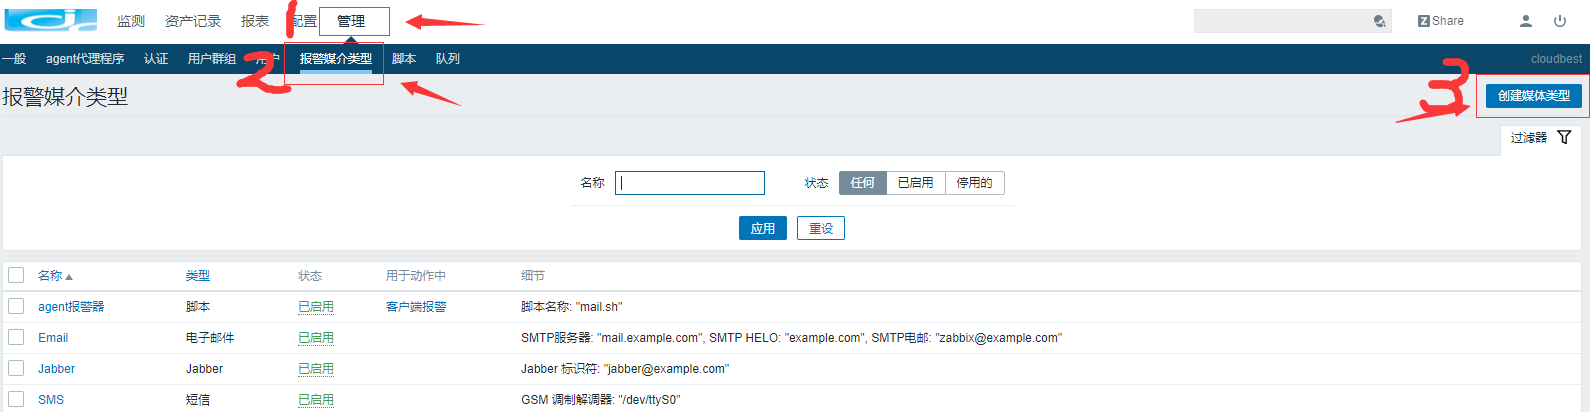
添加三个脚本参数
{ALERT.SENDTO}
{ALERT.SUBJECT}
{ALERT.MESSAGE}

8、用户配置
9、配置动作
故障{TRIGGER.STATUS},服务器名:{HOSTNAME1}发生: {TRIGGER.NAME}故障!