#######################
####### nfs ############
########################
一 NFS概念
網絡檔案系統(NFS)是Unix系統和網絡附加存儲檔案管理器常用的網絡檔案系統,允許多個用戶端通過網絡共享檔案通路。它可用于提供對共享二進制目錄的通路,也可用于允許使用者在同一工作組中從不同用戶端通路其檔案。
NFS協定有多個版本:Linux支援版本4、版本3和版本2, 而大多數系統管理者熟悉的是NFSv3。預設情況下,該協定并不安全,但是更新的版本(如NFSv4)提供了對更安全的身份驗證的支援,甚至可以通過kerberos進行加密。
二 NFS伺服器配置
若要配置基本NFS伺服器,您應該安裝nfs-utils軟體包。然後,您應該編輯/etc/exports以列出您希望通過網絡與用戶端系統共享的檔案系統,并指出哪些用戶端對導出具有何種通路權限。例如:
/var/ftp/pub 192.168.0.0/24(ro,sync)
将目錄/var/ftp/pub導出至192.168.0.0/24網絡上的所有主機(對目錄具有隻讀權限)。
/export/homes *.example.com(rw,sync)
将目錄/export/homes導出至exmaple.com中的所有主機(對目錄具有讀寫權限)。
當NFS伺服器運作時,每次您編輯/etc/exports後,都應通過在儲存更改後執行exportfs -r來確定應用這些更改。您可以使用exportfs -v顯示所有導出。
NFSv4還導出pseudo-root(所有導出的檔案系統的root)。如果用戶端挂載nfs-server:/ ,這将在NFS伺服器上的/下面相對于其位置挂載所有導出檔案系統。這對于浏覽從用戶端的伺服器導出的所有檔案系統有用。您仍可單獨挂載檔案系統。預設情況下,NFS伺服器将NFS用戶端上的root視為使用者nfsnobody。即,如果root嘗試通路挂載的導出中的檔案,伺服器會将其視作使用者nfsnobody通路。在NFS導出被無磁盤用戶端用作/和root需要被視作root的情況中,這種安全措施存在隐患。若要禁用此保護,伺服器需要将no_root_squash添加到在/etc/exports中導出設定的選項清單:
/exports/root 192.168.0.1(rw,no_root_squash)
對于NFSv4,必須在伺服器上打開端口2049/TCP(對于nfsd)。對于NFSv3和更早版本,必須為rpcbind、rpc.mountd、lockd和rpc.rquotad打開更多端口,而在“随機”選擇的端口上啟動其中許多服務這一事實又增加了複雜性。此外,NFSv2和NFSv3支援UDP傳輸,還要求打開相應的端口。
三 Demo
1.啟動服務
yum install nfs-utils
systemctl enbale nfs-server
systemctl start nfs-server
firewall-cmd --permanent --add-service=nfs
firewall-cmd --permanent --add-service=rpc-bind
firewall-cmd --permanent --add-service=mountd
95 yum install nfs-utils
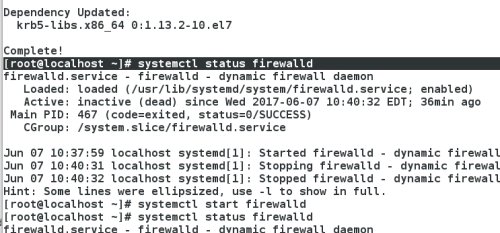
96 systemctl status firewalld
97 systemctl start firewalld
98 systemctl status firewalld
99 firewall-cmd --list-all
100 systemctl status nfs-server
101 systemctl start nfs-server
102 systemctl status nfs-server
103 firewall-cmd --permanent --add-service=nfs
104 firewall-cmd --permanent --add-service=rpc-bind
105 firewall-cmd --permanent --add-service=mountd
106 firewall-cmd --reload

[student@localhost mnt]$ showmount -e 172.25.254.244
Export list for 172.25.254.244:
2.共享目錄
server:
systemctl start nfs-server ###開啟服務
mkdir /public ###建立共享目錄
chmod 777 /public ####給共享目錄設定權限
vim /etc/exports 配置檔案 ###man 5 exportfs 檢視exports怎麼寫
exportfs -rv ###使/etc/exports檔案生效
(1)/public *(sync) ####public共享給所有人并且資料同步
(2)/public 172.25.254.0/24(sync) ####public共享給172.25.254.0網段并且資料同步
(3)/public *.example.com(sync)###public共享給example.co域的所有主機
(4)/public 172.25.254.144(ro,sync) 172.25.254.44(rw,sync)
###public共享給144是隻讀。44是讀寫。
(5)/public *(rw,sync,no_root_squash) #####public共享給所有人,當用戶端使用root挂載不改變使用者身份。
(6)/public *(sync,anonuid=1001,anongid=1000) ###public共享給所有人以1001為uid,以1000為gid。
(1-3)操作:
server:
16 vim /etc/exports
/public *(sync) ###public共享給所有人并且資料同步
17 exportfs -rv
18 mkdir /public
19 exportfs -rv
20 touch /public/file{1..4}
21 vim /etc/exports
/public 172.25.254.0/24(sync) ####public共享給172.25.254.0網段并且資料同步
22 exportfs -rv
23 vim /etc/exports
/public *.example.com(sync)###public共享給example.co域的所有主機
24 exportfs -rv
desktop:測試
mount 172.25.254.244:/public /mnt ####臨時挂載
2 mount 172.25.254.244:/public /mnt ###public共享給所有人并且資料同步
3 cd /mnt
4 ls
5 touch westos
9 umount /mnt
10 mount 172.25.254.244:/public /mnt####public共享給172.25.254.0網段并且資料同步
11 df
12 umount /mnt
13 mount 172.25.254.244:/public /mnt#####public共享給example.co域的所有主機
14 df
15 hostname
(4)
[root@server ~]# vim /etc/exports
[root@server ~]# exportfs -rv
exporting 172.25.254.144:/public
exporting 172.25.254.44:/public###public共享給144是隻讀。44是讀寫。
[root@server ~]# chmod 777 /public
測試:
[root@desktop ~]# mount 172.25.254.244:/public /mnt
[root@desktop ~]# cd /mnt
[root@desktop mnt]# ls
file1 file2 file3 file4
[root@desktop mnt]# touch westos
touch: cannot touch ‘westos’: Read-only file system
[root@foundation44 ~]# mount 172.25.254.244:/public /mnt
[root@foundation44 ~]# cd /mnt
[root@foundation44 mnt]# ls
[root@foundation44 mnt]# touch westos
file1 file2 file3 file4 westos
[root@foundation44 mnt]# ll
total 0
-rw-r--r--. 1 root root 0 Jun 8 22:52 file1
-rw-r--r--. 1 root root 0 Jun 8 22:52 file2
-rw-r--r--. 1 root root 0 Jun 8 22:52 file3
-rw-r--r--. 1 root root 0 Jun 8 22:52 file4
-rw-r--r--. 1 nfsnobody nfsnobody 0 Jun 8 23:39 westos
(5)
/public *(rw,sync,no_root_squash) #####public共享給所有人,當用戶端使用root挂載不改變使用者身份
exporting *:/public
[root@desktop mnt]# ll
-rw-r--r--. 1 root root 0 Jun 8 10:52 file1
-rw-r--r--. 1 root root 0 Jun 8 10:52 file2
-rw-r--r--. 1 root root 0 Jun 8 10:52 file3
-rw-r--r--. 1 root root 0 Jun 8 10:52 file4
-rw-r--r--. 1 nfsnobody nfsnobody 0 Jun 8 11:39 westos
[root@desktop mnt]# touch westos1
-rw-r--r--. 1 root root 0 Jun 8 11:51 westos1
(6)
/public *(sync,anonuid=1001,anongid=1000) ###public共享給所有人以1001為uid,以1000為gid。
exporting *:/public
[root@server ~]# useradd westoos
[root@server ~]# id student
uid=1000(student) gid=1000(student) groups=1000(student),10(wheel
[root@server ~]# id westoos
uid=1001(westoos) gid=1001(westoos) groups=1001(westoos)
-rw-r--r--. 1 root root 0 Jun 8 23:51 westos1
[root@foundation44 mnt]# touch file
-rw-r--r--. 1 westos kiosk 0 Jun 9 00:13 file
四 保護NFS輸出
Demo:
在serverx和desktopx上運作腳本,加入kerberos認證域:
# lab nfskrb5 setup
安裝kerberos服務所需的keytab:(以下操作都在server0上進行)
# wget -O /etc/krb5.keytab http://classroom.example.com/pub/keytabs/server0.keytab
激活NFS v4.2版本,可以輸出selinux标簽,編輯/etc/sysconfig/nfs修改如下選項:
RPCNFSDARGS="-V 4.2"
啟動nfs-secure-server服務:
# systemctl start nfs-secure-server; systemctl enable nfs-secure-server
配置NFS輸出:
# mkdir /securenfs
# echo '/securenfs desktop0(sec=krb5p,rw)' >> /etc/exports
# exportfs -r
安裝kerberos服務所需keytab:(以下操作都在dekstop0進行)
# wget -O /etc/krb5.keytab http://classroom.example.com/pub/keytabs/desktop0.keytab
啟動nfs-secure服務:
# systemctl start nfs-secure; systemctl enable nfs-secure
配置用戶端挂載:
# mkdir /mnt/secureshare
# echo 'server0:/securenfs /mnt/secureshare
/etc/fstab
nfs defaults,v4.2,sec=krb5p 0 0' >>
# mount -a
在server上;
(1)開啟kerberos認證,得到ldap使用者
(2)wegt http://172.25.254.254./pub/keytabs/server0.keytab -O
/etc/krb5.keytab
ktutil
systemctl start nfs-secure-server;
systemctl enable nfs-secure-server
vim /etc/exports
/public *(rw,sec=krb5p)
exportfs -rv
在desktop上:
開啟kerberos認證,得到ldap使用者
wegt http://172.25.254.254./pub/keytabs/server0.keytab -O
mount 172.25.254.244:/public /mnt -o sec=krb5p
su - kiosk/student
cd /mnt
su - ldapuser1
klist