該篇内容,結合執行個體介紹使用jackson來操作json資料:
1. 對象(示例為 UserEntity)轉 json 資料
2. json 資料 轉 對象
3. map 轉 json 資料
4. json 資料 轉 map
5. List<UserEntity> 轉 json 資料
6. json 資料 轉 List<UserEntity>
7.接口接收稍微複雜一點的json資料,如何拆解
在pom.xml檔案中添加 ,Jackson 依賴:
<dependency>
            <groupId>com.fasterxml.jackson.core</groupId>
            <artifactId>jackson-databind</artifactId>
            <version>2.11.1</version>
        </dependency>

        <dependency>
            <groupId>com.fasterxml.jackson.core</groupId>
            <artifactId>jackson-core</artifactId>
            <version>2.11.1</version>
        </dependency>
        <dependency>
            <groupId>com.fasterxml.jackson.core</groupId>
            <artifactId>jackson-annotations</artifactId>
            <version>2.11.1</version>
        </dependency>
示例中使用到的實體類, UserEntity.java
/**
* @Author : JCccc
* @CreateTime : 2020/3/18
* @Description :
**/
public class UserEntity {
private Integer id;
private String name;
private Integer age;
// set get 方法 和 toString 等方法就不粘貼出來了
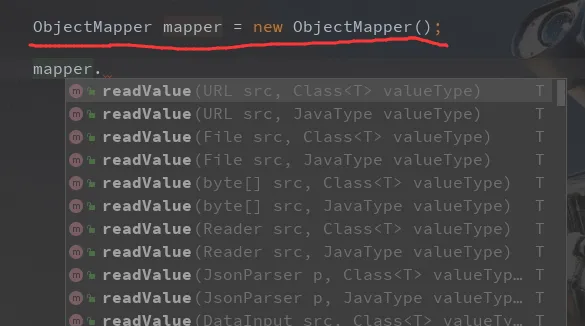
} 在介紹示例前,先看一張圖,使用jackson如:
1. 對象(示例為 UserEntity)轉 json 資料
writeValueAsString 方法
public static void main(String[] args) throws JsonProcessingException {
        UserEntity userEntity=new UserEntity();
        userEntity.setId(100);
        userEntity.setName("JCccc");
        userEntity.setAge(18);
        ObjectMapper mapper = new ObjectMapper();
        String jsonString = mapper.writerWithDefaultPrettyPrinter()
                .writeValueAsString(userEntity);
        System.out.println(jsonString);
    }
控制台輸出:

格式很漂亮,是因為使用了 :
咱們不需要漂亮,是以後面的我都不使用格式的方法了,轉換的時候,隻需要 writeValueAsString 就夠了 。
2. json 資料 轉 對象
readValue 方法
ObjectMapper mapper = new ObjectMapper();
        //json字元串轉對象
        UserEntity userEntityNew = mapper.readValue(jsonString, UserEntity.class);
        System.out.println(userEntityNew);
控制台輸出:
3. map 轉 json 資料
ObjectMapper mapper = new ObjectMapper();
        Map map=new HashMap();
        map.put("A",1);
        map.put("B",2);
        map.put("C",3);
        map.put("D",4);
        String jsonMap = mapper.writeValueAsString(map);
        System.out.println(jsonMap);
控制台輸出:
4. json 資料 轉 map
ObjectMapper mapper = new ObjectMapper();
        //json字元串轉為Map對象
        Map mapNew=mapper.readValue(jsonMap, Map.class);
        System.out.println(mapNew);
控制台輸出:
5. List<UserEntity> 轉 json 資料
ObjectMapper mapper = new ObjectMapper();
        UserEntity userEntity1=new UserEntity();
        userEntity1.setId(101);
        userEntity1.setName("JCccc1");
        userEntity1.setAge(18);
        UserEntity userEntity2=new UserEntity();
        userEntity2.setId(102);
        userEntity2.setName("JCccc2");
        userEntity2.setAge(18);
        UserEntity userEntity3=new UserEntity();
        userEntity3.setId(103);
        userEntity3.setName("JCccc3");
        userEntity3.setAge(18);
        List<UserEntity> userList=new ArrayList<>();
        userList.add(userEntity1);
        userList.add(userEntity2);
        userList.add(userEntity3);

        String jsonList = mapper.writeValueAsString(userList);
        System.out.println(jsonList);
控制台輸出:
6. json 資料 轉 List<UserEntity>
ObjectMapper mapper = new ObjectMapper();
        List<UserEntity> userListNew= mapper.readValue(jsonList,new TypeReference<List<UserEntity>>(){});
        System.out.println(userListNew.toString());
控制台輸出:
7.接口接收稍微複雜一點的json資料,如何拆解
現在模拟了一串稍微複雜一些的json資料,如:
{
  "msg": "success",
  "data": [
    {
      "id": 101,
      "name": "JCccc1",
      "age": 18
    },
    {
      "id": 102,
      "name": "JCccc2",
      "age": 18
    },
    {
      "id": 103,
      "name": "JCccc3",
      "age": 18
    }
  ],
  "status": 200
}
那麼我們接口接收時,如果操作呢?
1.直接使用 @RequestBody Map map
@PostMapping("testJackson")
    public void testJackson(@RequestBody Map map) {

        System.out.println(map);
        String  msg = String.valueOf(map.get("msg"));
        System.out.println(msg);
        List dataList = (List) map.get("data");
        System.out.println(dataList.toString());
    }
2.使用字元串接收json資料 @RequestBody String jsonStr , 那麼就使用jackson把這個json資料轉為Map,然後該怎麼拿怎麼拿。
@PostMapping("testJackson")
    public void testJackson(@RequestBody String jsonStr) throws JsonProcessingException {

        System.out.println(jsonStr);
        ObjectMapper mapper = new ObjectMapper();
        Map map = mapper.readValue(jsonStr, Map.class);
        String  msg = String.valueOf(map.get("msg"));
        System.out.println(msg);
        String  status = String.valueOf(map.get("status"));
        System.out.println(status);
        List dataList = (List) map.get("data");
        System.out.println(dataList.toString());
    }
好的,該篇就到此。
ps: 為啥我要科普這個jackson的使用麼?這個算是基本的操作了,原本我經手的很多項目都用到的fastjson ,其實使用起來也杠杠的。