一:環境安裝部分(需要mac)
一:基礎環境安裝
1.homebrew
ruby -e "$(curl -fsSL https://raw.githubusercontent.com/Homebrew/install/master/install)"
2.語言
python.pycharm
brew install python3
java:
安裝jdk,idea
3:libimobiledevice 安裝。主要看啊
brew install --HEAD libimobiledevice
# 檢視 iOS 裝置日志
idevicesyslog

# 檢視連結裝置的UDID
idevice_id --list

# 檢視裝置資訊
ideviceinfo

# 擷取裝置時間
idevicedate

# 擷取裝置名稱
idevicename

# 端口轉發
iproxy XXXX YYYY

# 螢幕截圖
idevicescreenshot
4、檢查git是否安裝
$ git --version
git version 2.19.0
未安裝git請輸入:brew install git
5、安裝carthage
輸入:

brew install carthage
5、appium service
1,先安裝npm,node.js
brew install node
或者用寶塔
或者官網下載下傳安裝
2.npm安裝appium service
npm install -g appium
6,安裝AppiumDesktop
https://github.com/appium/appium-desktop
二(注意分支。先介紹不需要安裝跟配置xcode跟WebDriverAgent的方案),跟三是二選一
以java為例
1:idea maven添加依賴
<dependency>
    <groupId>io.appium</groupId>
    <artifactId>java-client</artifactId>
    <version>7.0.0</version>
</dependency>
寫啟動方法類參數
DesiredCapabilities desiredCapabilities = new DesiredCapabilities();
        //1,指定platformName--平台名
        desiredCapabilities.setCapability("platformName","變量");
        //2,指定deviceName-裝置名
        desiredCapabilities.setCapability("deviceName","變量");
        //3,系統版本
        desiredCapabilities.setCapability("platformVersion","變量");
        //4,ios裝置udid
        desiredCapabilities.setCapability("udid","變量“);
        //5,指定appPackage --測試App辨別 ios是bundleId
        desiredCapabilities.setCapability("bundleId","變量");
        //6,automationName 底層,android會不一樣
        desiredCapabilities.setCapability("automationName","XCUITest");
        desiredCapabilities.setCapability("noReset","true");
        //用appium的底層wda
        desiredCapabilities.setCapability("xcodeOrgId","變量");
        desiredCapabilities.setCapability("xcodeSigningId","變量");
        URL url = new URL("http://127.0.0.1:4723/wd/hub");
        driver=new IOSDriver(url, desiredCapabilities);
這樣就可以啟動執行了,結束。但是,如果是想不用appium或者用appium,想直接用Xcode啟動WebDriverAgent的話,還需要如安裝WebDriverAgent環境跟xocde
三,想用如上所示才需要(選填)
1:安裝xocde
下載下傳位址:appstore 或者https://developer.apple.com/download/more/?=xcode
2:WebDriverAgent環境安裝
git clone https://github.com/facebook/WebDriverAgent
下載下傳完畢後,進入到 WebDriverAgent 目錄,執行如下腳本。
cd ./WebDriverAgent/
//執行腳本
./Scripts/bootstrap.sh
安裝證書
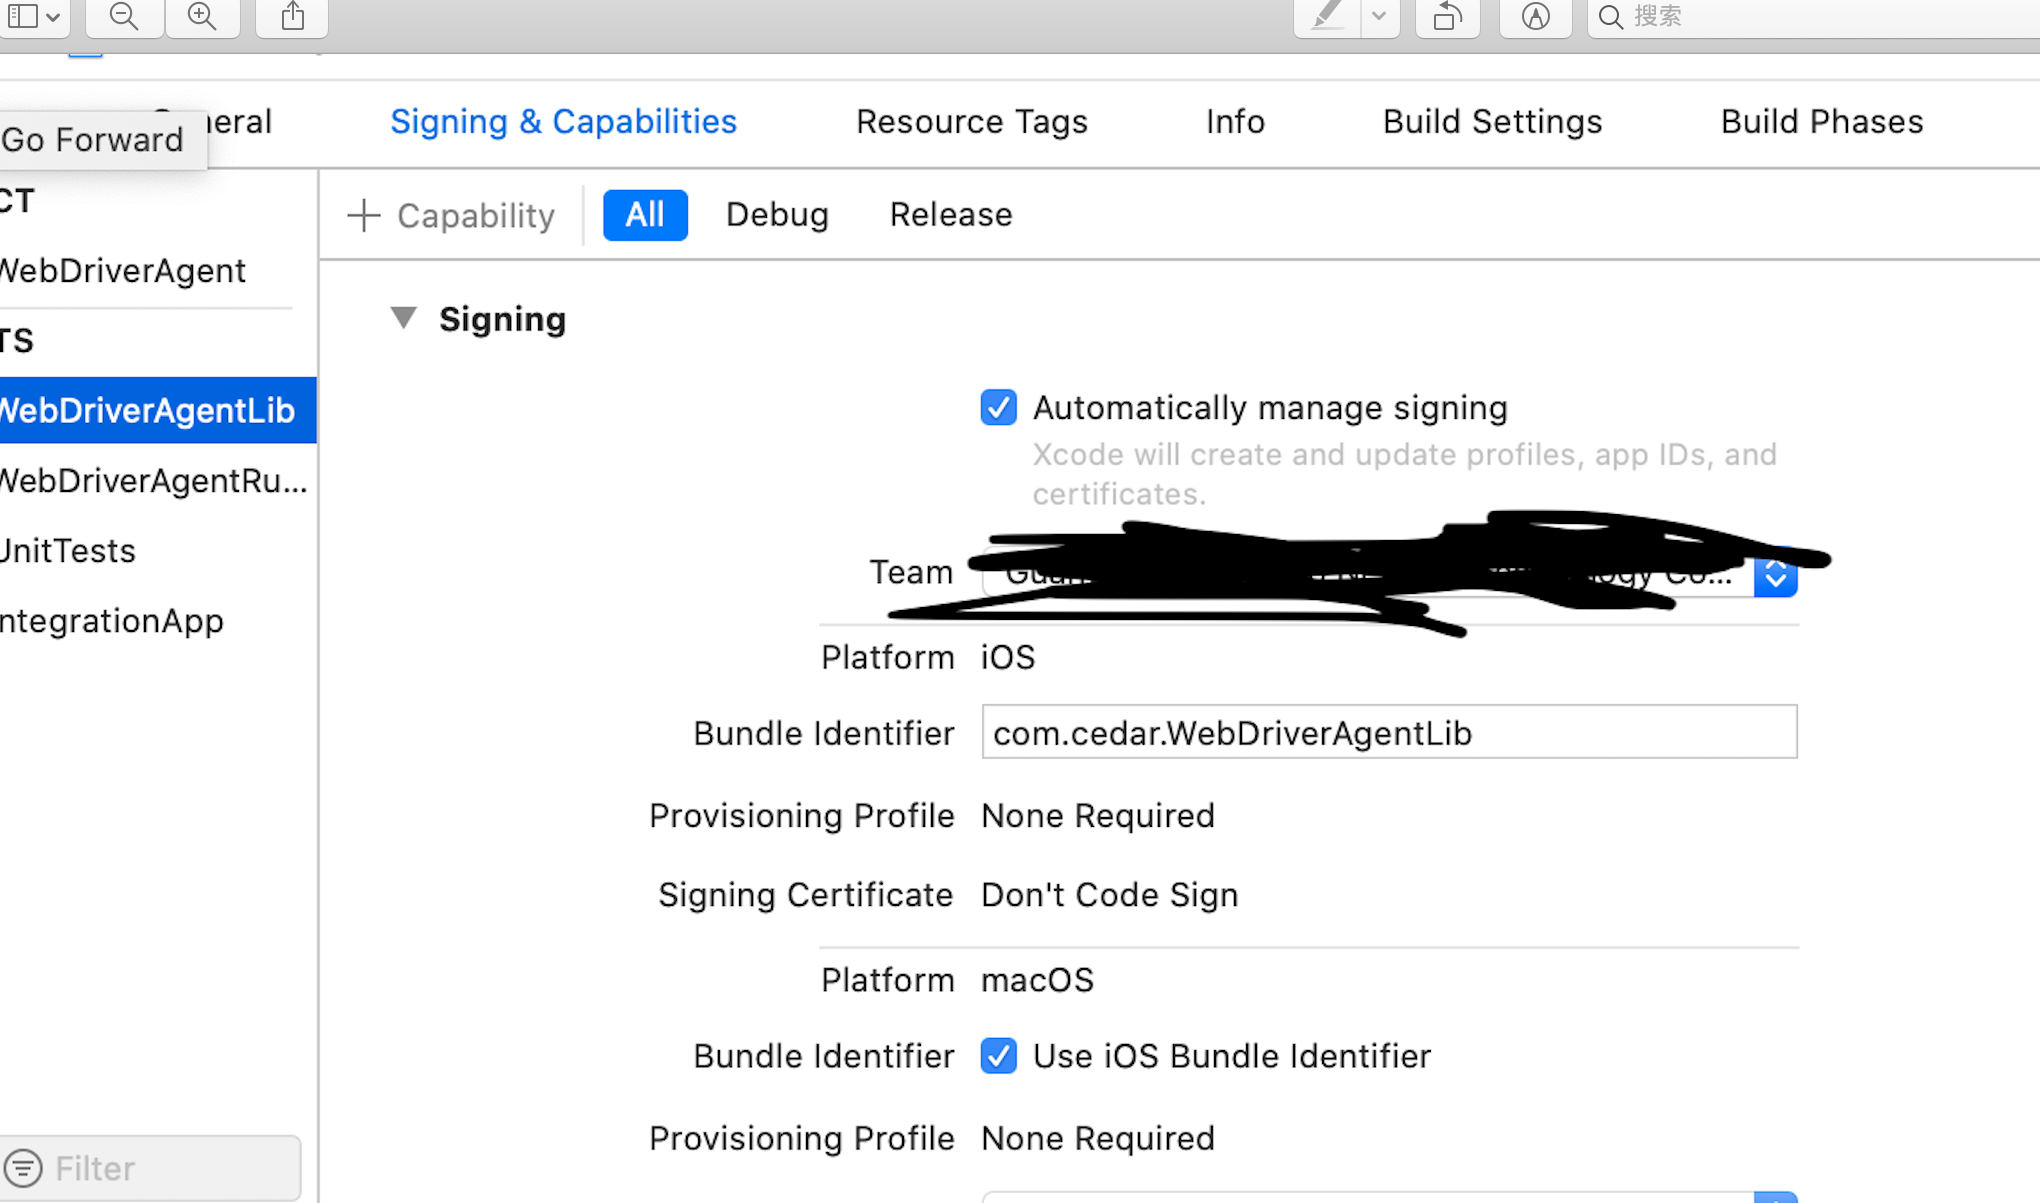
因為安裝到真機上都是需要證書簽名的,需要先在xcode中設定賬号(建議最好用開發者賬号)
ios自動化-appium(看自己選擇是否需要wda+xcode)一:基礎環境安裝1.homebrew 三,想用如上所示才需要(選填)下面說下可能遇到的問題1如果WebDriverAgent 安裝失敗,檢查npm跟carthage 或者如圖錯誤unable to resolve dependency tree,可以找其他已經裝好的,直接拿來用也行

這3個都要賬号 lib,run,app。如果是個人賬号,還需要改build的 settings 的product bundle identifler
然後運作塊,選擇runner,後面的選自己機型,command+u,運作即可
運作後手機安裝了WebDriverAgent檔案,就可以直接用wda的api去測試了,注意(這種寫法跟appium不一樣,且facebook這個的團隊意見不做了)
下面說下可能遇到的問題
1如果WebDriverAgent 安裝失敗,檢查npm跟carthage 或者如圖錯誤unable to resolve dependency tree,可以找其他已經裝好的,直接拿來用也行
2.appium自帶底層的WebDriverAgent無法啟動,主要根據提示。特别注意Capabilities有沒有
xcodeOrgId xcodeSigningId