目錄
概述
特點
Swagger2.0
基本使用
Swagger2 配置
配置API分組
其他ui
建立接口
二、Swagger3.0
依賴
支援 OpenAPI
接口位址
注解
概述
Swagger解決什麼問題?
1、自動生成REST API 文檔(替換了文檔方式)
2、線上可調試後端接口(替換postman方式)
特點
- 号稱世界上最流行的API架構
- Restful Api 文檔線上自動生成器 =>API 文檔 與API 定義同步更新
- 直接運作,線上測試API
- 支援多種語言 (如:Java,PHP等)
- 官網:https://swagger.io/
Swagger2.0
基本使用
加入依賴
<dependencies>
<!-- https://mvnrepository.com/artifact/io.springfox/springfox-swagger2 -->
    <dependency>
       <groupId>io.springfox</groupId>
       <artifactId>springfox-swagger2</artifactId>
       <version>2.9.2</version>
    </dependency>
<!-- https://mvnrepository.com/artifact/io.springfox/springfox-swagger-ui -->
    <dependency>
        <groupId>io.springfox</groupId>
        <artifactId>springfox-swagger-ui</artifactId>
        <version>2.9.2</version>
    </dependency>
</dependencies>
要使用Swagger,我們需要編寫一個配置類-SwaggerConfig來配置 Swagger
@Configuration //配置類
@EnableSwagger2// 開啟Swagger2的自動配置
public class SwaggerConfig {
}
編寫HelloController,測試確定運作成功!
通路測試 :http://localhost:8080/swagger-ui.html ,可以看到swagger的界面
Swagger2 配置
Swagger2 的配置也是比較容易的,在項目建立成功之後,隻需要開發者自己提供一個 Docket 的 Bean 即可,如下:
@Configuration
@EnableSwagger2
public class SwaggerConfig {
@Bean
public Docket docket() {
return new Docket(DocumentationType.SWAGGER_2)
//是否啟用 正式環境改為false
.enable(true)
//基本資訊配置
.apiInfo(new ApiInfoBuilder()
.title("數字工廠中的房間API文檔")
.description("面朝大海 春暖花開")
.version("v1.0")
.license("apache 2.0")
.licenseUrl("https://www.apache.org/licenses/LICENSE-2.0.html")
.contact(new Contact("奧裡給", "https://swagger.io/", "https://swagger.io/"))
.build())
/*
any() // 掃描所有,項目中的所有接口都會被掃描到
none() // 不掃描接口
通過方法上的注解掃描,如withMethodAnnotation(GetMapping.class)隻掃描get請求
withMethodAnnotation(final Class<? extends Annotation> annotation)
通過類上的注解掃描,如.withClassAnnotation(Controller.class)隻掃描有controller注解的類中的接口
withClassAnnotation(final Class<? extends Annotation> annotation)
basePackage(final String basePackage) // 根據包路徑掃描接口
* */
.select()
.apis(RequestHandlerSelectors.basePackage(" com.bim.yanchang.controller"))
/*
配置接口掃描過濾
any() // 任何請求都掃描
none() // 任何請求都不掃描
regex(final String pathRegex) // 通過正規表達式控制
ant(final String antPattern) // 通過ant()控制
*/
.paths(PathSelectors.ant("/user/**"))
.build();
}
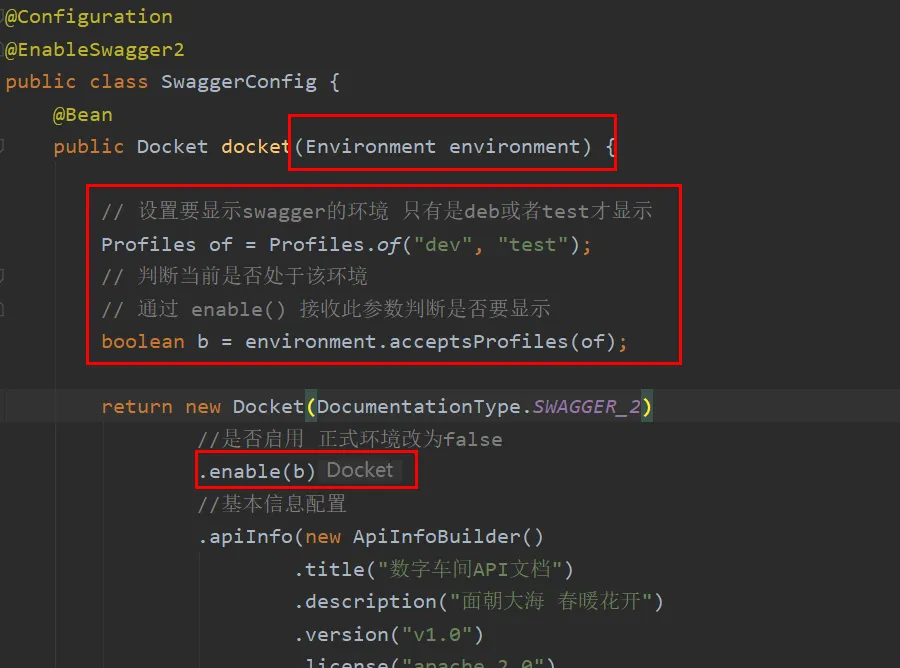
} 如何動态配置當項目處于test、dev環境時顯示swagger,處于prod時不顯示?
如此,Swagger2 就算配置成功了,非常友善。
此時啟動項目,輸入 http://localhost:8080/swagger-ui.html,能夠看到如下頁面,說明已經配置成功了:
配置API分組

1、如果沒有配置分組,預設是default。通過groupName()方法即可配置分組:
@Bean
public Docket docket(Environment environment) {
return new Docket(DocumentationType.SWAGGER_2).apiInfo(apiInfo())
.groupName("hello") // 配置分組
// 省略配置....
}
2、重新開機項目檢視分組
3、如何配置多個分組?配置多個分組隻需要配置多個docket即可:
@Bean
public Docket docket1(){
    return new Docket(DocumentationType.SWAGGER_2).groupName("group1");
}
@Bean
public Docket docket2(){
    return new Docket(DocumentationType.SWAGGER_2).groupName("group2");
}
@Bean
public Docket docket3(){
    return new Docket(DocumentationType.SWAGGER_2).groupName("group3");
}
4、重新開機項目檢視即可
案例
方案1:

@Configuration
@EnableSwagger2
public class SwaggerConfig {
    @Bean
    public Docket createRestADXApi(Environment environment) {
        Profiles of = Profiles.of("dev","sit", "prd", "pre");
        boolean b = environment.acceptsProfiles(of);
        return new Docket(DocumentationType.SWAGGER_2)
                .apiInfo(apiInfo())
                .enable(b)
                .groupName("a子產品接口")
                .select()
                .apis(RequestHandlerSelectors.basePackage("com.a.controller"))
                .paths(PathSelectors.any())
                .build();
    }

    @Bean
    public Docket createRestSSPApi(Environment environment) {
        Profiles of = Profiles.of("dev","sit", "prd", "pre");
        boolean b = environment.acceptsProfiles(of);
        return new Docket(DocumentationType.SWAGGER_2)
                .apiInfo(apiInfo())
                .enable(b)
                .groupName("b子產品接口")
                .select()
                .apis(RequestHandlerSelectors.basePackage("com.b.controller"))
                .paths(PathSelectors.any())
                .build();
    }

    @Bean
    public Docket createRestADSApi(Environment environment) {
        Profiles of = Profiles.of("dev","sit", "prd", "pre");
        boolean b = environment.acceptsProfiles(of);
        return new Docket(DocumentationType.SWAGGER_2)
                .apiInfo(apiInfo())
                .enable(b)
                .groupName("c子產品接口")
                .select()
                .apis(RequestHandlerSelectors.basePackage("com.c.controller"))
                .paths(PathSelectors.any())
                .build();
    }

    @Bean
    public Docket createRestSystemApi(Environment environment) {
        Profiles of = Profiles.of("dev","sit", "prd", "pre");
        boolean b = environment.acceptsProfiles(of);
        return new Docket(DocumentationType.SWAGGER_2)
                .apiInfo(apiInfo())
                .enable(b)
                .groupName("d子產品接口")
                .select()
                .apis(RequestHandlerSelectors.basePackage("com.d.controller"))
                .paths(PathSelectors.any())
                .build();
    }
    @Bean
    public Docket createRestFlowmApi(Environment environment) {
        Profiles of = Profiles.of("dev","sit", "prd", "pre");
        boolean b = environment.acceptsProfiles(of);
        return new Docket(DocumentationType.SWAGGER_2)
                .apiInfo(apiInfo())
                .enable(b)
                .groupName("e子產品接口")
                .select()
                .apis(RequestHandlerSelectors.basePackage("com.e.controller"))
                .paths(PathSelectors.any())
                .build();
    }

    @Bean
    public Docket createGameleyDmpApi() {
        return new Docket(DocumentationType.SWAGGER_2)
                .apiInfo(apiInfo())
                .groupName("f子產品接口")
                .select()
                .apis(RequestHandlerSelectors.basePackage("com.f.controller"))
                .paths(PathSelectors.any())
                .build();
    }

    private ApiInfo apiInfo() {
        return new ApiInfoBuilder()
                .title("管理背景接口")
                .description("管理背景接口")
                .version("1.0")
                .build();
    }

}

方案2:
@Configuration
@EnableSwagger2
@Profile({"dev","pre"})
public class SwaggerConfig {
    @Bean
    public Docket createGameleyDmpApi() {
        return new Docket(DocumentationType.SWAGGER_2)
                .apiInfo(apiInfo())
                .groupName("a子產品接口")
                .select()
                .apis(RequestHandlerSelectors.basePackage("com.a.controller"))
                .paths(PathSelectors.any())
                .build();
    }
    @Bean
    public Docket createGameleyTopOnApi() {
        return new Docket(DocumentationType.SWAGGER_2)
                .apiInfo(apiInfo2())
                .groupName("b子產品接口")
                .select()
                .apis(RequestHandlerSelectors.basePackage("com.b.controller"))
                .paths(PathSelectors.any())
                .build();
    }


    private ApiInfo apiInfo() {
        return new ApiInfoBuilder()
                .title("管理背景a子產品接口")
                .description("管理背景接口")
                .version("1.0")
                .build();
    }
    private ApiInfo apiInfo2() {
        return new ApiInfoBuilder()
                .title("接口")
                .description("管理背景b子產品接口")
                .version("1.0")
                .build();
    }
}
其他ui
1、預設的 通路 http://localhost:8080/swagger-ui.html
<dependency>
    <groupId>io.springfox</groupId>
    <artifactId>springfox-swagger-ui</artifactId>
    <version>2.9.2</version>
</dependency> 2、bootstrap-ui 通路 http://localhost:8080/doc.html
<!-- 引入swagger-bootstrap-ui包 /doc.html-->
<dependency>
    <groupId>com.github.xiaoymin</groupId>
    <artifactId>swagger-bootstrap-ui</artifactId>
    <version>1.9.1</version>
</dependency> 3、Layui-ui 通路 http://localhost:8080/docs.html
<!-- 引入swagger-ui-layer包 /docs.html-->
<dependency>
    <groupId>com.github.caspar-chen</groupId>
    <artifactId>swagger-ui-layer</artifactId>
    <version>1.1.3</version>
</dependency> 4、mg-ui 通路 http://localhost:8080/document.html
<!-- 引入swagger-ui-layer包 /document.html-->
<dependency>
    <groupId>com.zyplayer</groupId>
    <artifactId>swagger-mg-ui</artifactId>
    <version>1.0.6</version>
</dependency> 建立接口
接下來就是建立接口了
@RestController
@Api(tags = "使用者管理相關接口")
@RequestMapping("/user")
public class UserController {
    @PostMapping("/")
    @ApiOperation("添加使用者的接口")
    @ApiImplicitParams({
            @ApiImplicitParam(name = "username", value = "使用者名", defaultValue = "李四"),
            @ApiImplicitParam(name = "address", value = "使用者位址", defaultValue = "深圳", required = true)
    })
    public RespBean addUser(String username, @RequestParam(required = true) String address) {
        return new RespBean();
    }
    @GetMapping("/")
    @ApiOperation("根據id查詢使用者的接口")
    @ApiImplicitParam(name = "id", value = "使用者id", defaultValue = "99", required = true)
    public User getUserById(@PathVariable Integer id) {
        User user = new User();
        user.setId(id);
        return user;
    }
    @PutMapping("/{id}")
    @ApiOperation("根據id更新使用者的接口")
    public User updateUserById(@RequestBody User user) {
        return user;
    }
}
注解說明:
@Api 注解可以用來标記目前 Controller 的功能。
@ApiOperation 注解用來标記一個方法的作用。
@ApiImplicitParam 注解用來描述一個參數,可以配置參數的中文含義,也可以給參數設定預設值,這樣在接口測試的時候可以避免手動輸入。
如果有多個參數,則需要使用多個 @ApiImplicitParam 注解來描述,多個 @ApiImplicitParam 注解需要放在一個 @ApiImplicitParams 注解中。
需要注意的是,@ApiImplicitParam 注解中雖然可以指定參數是必填的,但是卻不能代替 @RequestParam(required = true) ,前者的必填隻是在 Swagger2 架構内必填,抛棄了 Swagger2 ,這個限制就沒用了,是以假如開發者需要指定一個參數必填, @RequestParam(required = true) 注解還是不能省略。
如果參數是一個對象(例如上文的更新接口),對于參數的描述也可以放在實體類中。例如下面一段代碼:
@ApiModel
public class User {
    @ApiModelProperty(value = "使用者id")
    private Integer id;
    @ApiModelProperty(value = "使用者名")
    private String username;
    @ApiModelProperty(value = "使用者位址")
    private String address;
    //getter/setter
}
重新整理剛剛打開的頁面,可以看到如下效果:
可以看到,所有的接口這裡都列出來了,包括接口請求方式,接口位址以及接口的名字等
二、Swagger3.0
依賴
這兩個,一個用來生成接口文檔(JSON 資料),另一個用來展示将 JSON 可視化。
<dependency>
    <groupId>io.springfox</groupId>
    <artifactId>springfox-swagger2</artifactId>
    <version>2.9.2</version>
</dependency>
<dependency>
    <groupId>io.springfox</groupId>
    <artifactId>springfox-swagger-ui</artifactId>
    <version>2.9.2</version>
</dependency>
在 3.0 版本中,我們不需要這麼麻煩了,一個 starter 就可以搞定:
<dependency>
    <groupId>io.springfox</groupId>
    <artifactId>springfox-boot-starter</artifactId>
    <version>3.0.0</version>
</dependency>
和 Spring Boot 中的其他 starter 一樣,springfox-boot-starter 依賴可以實作零配置以及自動配置支援。也就是說,如果你沒有其他特殊需求,加一個這個依賴就行了,接口文檔就自動生成了。
支援 OpenAPI
什麼是 OpenAPI?
OpenAPI 規範其實就是以前的 Swagger 規範,它是一種 REST API 的描述格式,通過既定的規範來描述文檔接口,它是業界真正的 API 文檔标準,可以通過 YAML 或者 JSON 來描述。它包括如下内容:
- 接口(/users)和每個接口的操作(GET /users,POST /users)
- 輸入參數和響應内容
- 認證方法
- 一些必要的聯系資訊、license 等。
關于 OpenAPI 的更多内容,感興趣的小夥伴可以在 GitHub 上檢視:https://github.com/OAI/OpenAPI-Specification/blob/master/versions/3.0.2.md
接口位址
3.0 中的接口位址也和之前有所不同,以前在 2.9.2 中我們主要通路兩個位址:
- 文檔接口位址:http://localhost:8080/v2/api-docs
- 文檔頁面位址:http://localhost:8080/swagger-ui.html
現在在 3.0 中,這兩個位址也發生了變化:
- 文檔接口位址:http://localhost:8080/v3/api-docs
- 文檔頁面位址:http://localhost:8080/swagger-ui/index.html
特别是文檔頁面位址,如果用了 3.0,而去通路之前的頁面,會報 404。
注解
舊的注解還可以繼續使用,不過在 3.0 中還提供了一些其他注解。
例如我們可以使用 @EnableOpenApi 代替以前舊版本中的 @EnableSwagger2。
但是實際使用中,@EnableOpenApi 注解的功能不明顯,加不加都行。翻了下源碼,@EnableOpenApi 注解主要功能是為了導入 OpenApiDocumentationConfiguration 配置類,如下:
@Retention(value = java.lang.annotation.RetentionPolicy.RUNTIME)
@Target(value = {java.lang.annotation.ElementType.TYPE})
@Documented
@Import(OpenApiDocumentationConfiguration.class)
public @interface EnableOpenApi {
}
自動化配置類 OpenApiAutoConfiguration,如下:
@Configuration
@EnableConfigurationProperties(SpringfoxConfigurationProperties.class)
@ConditionalOnProperty(value = "springfox.documentation.enabled", havingValue = "true", matchIfMissing = true)
@Import({
    OpenApiDocumentationConfiguration.class,
    SpringDataRestConfiguration.class,
    BeanValidatorPluginsConfiguration.class,
    Swagger2DocumentationConfiguration.class,
    SwaggerUiWebFluxConfiguration.class,
    SwaggerUiWebMvcConfiguration.class
})
@AutoConfigureAfter({ WebMvcAutoConfiguration.class, JacksonAutoConfiguration.class,
    HttpMessageConvertersAutoConfiguration.class, RepositoryRestMvcAutoConfiguration.class })
public class OpenApiAutoConfiguration {

}
可以看到,自動化配置類裡邊也導入了 OpenApiDocumentationConfiguration。
是以在正常情況下,實際上不需要添加 @EnableOpenApi 注解。
根據 OpenApiAutoConfiguration 上的 @ConditionalOnProperty 條件注解中的定義,我們發現,如果在 application.properties 中設定
springfox.documentation.enabled=false
,即關閉了 swagger 功能,此時自動化配置類就不執行了,這個時候可以通過 @EnableOpenApi 注解導入 OpenApiDocumentationConfiguration 配置類。技術上來說邏輯是這樣,不過應用中暫未發現這樣的需求(即在 application.properties 中關閉 swagger,再通過 @EnableOpenApi 注解開啟)。
另外,以前我們用的 @ApiResponses/@ApiResponse 注解,在 3.0 中名字沒變,但是所在的包變