★Dialog對話框的使用
在Android的開發之中會用到很多中對話框,我相信大家都會注意到對話框的使用,在這裡我會講到7種對話框的使用方法。
首先我們先看一下我寫的一個程式吧!
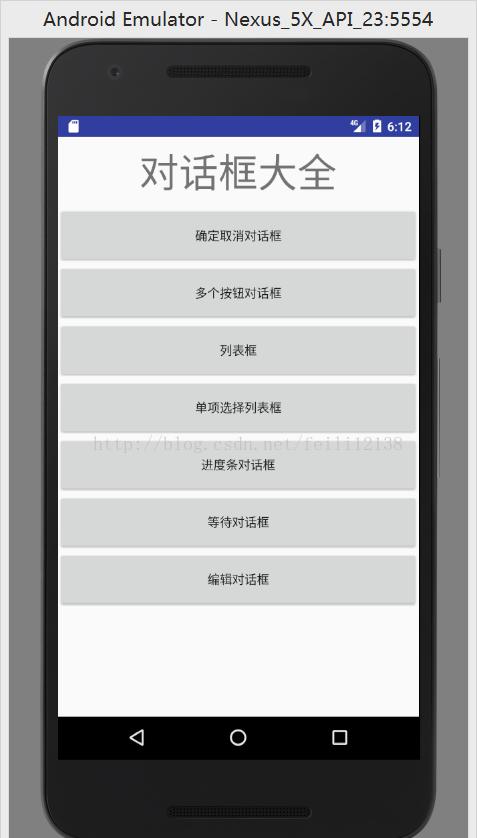
在這個程式中我們可以看見一共有7個Button也就是按鈕,沒點選一個按鈕就會彈出一種對話框,我先把源代碼貼出來再一一地講解吧!
XML布局檔案:
<?xml version="1.0" encoding="utf-8"?>
<LinearLayout xmlns:android="http://schemas.android.com/apk/res/android"
    android:layout_width="match_parent"
    android:layout_height="match_parent"
    android:orientation="vertical"
    >
    <TextView
        android:text="@string/title"
        android:textSize="45dp"
        android:gravity="center"
        android:layout_width="match_parent"
        android:layout_height="80dp" />
    <Button
        android:id="@+id/D1"
        android:layout_width="match_parent"
        android:layout_height="65dp" />
    <Button
        android:id="@+id/D2"
        android:layout_width="match_parent"
        android:layout_height="65dp" />
    <Button
        android:id="@+id/D3"
        android:layout_width="match_parent"
        android:layout_height="65dp" />
    <Button
        android:id="@+id/D4"
        android:layout_width="match_parent"
        android:layout_height="65dp" />
    <Button
        android:id="@+id/D5"
        android:layout_width="match_parent"
        android:layout_height="65dp" />
    <Button
        android:id="@+id/D6"
        android:layout_width="match_parent"
        android:layout_height="65dp" />
    <Button
        android:id="@+id/D7"
        android:layout_width="match_parent"
        android:layout_height="65dp" />
    <EditText
        android:layout_marginTop="500dp"
        android:id="@+id/editText"
        android:layout_width="match_parent"
        android:layout_height="50dp" />

</LinearLayout>
java代碼:
package com.example.zhangrenjie.dialog;
import android.app.Activity;
import android.app.AlertDialog;
import android.app.ProgressDialog;
import android.content.DialogInterface;
import android.os.Bundle;
import android.view.View;
import android.widget.Button;
import android.widget.EditText;
import android.widget.Toast;
public class DialogActivity extends Activity {
    private Button dailog1;
    private Button dailog2;
    private Button dailog3;
    private Button dailog4;
    private Button dailog5;
    private Button dailog6;
    private Button dailog7;
    final String[]Items = {"one","two","three","four","five","six"};
    @Override
    protected void onCreate(Bundle savedInstanceState) {
        super.onCreate(savedInstanceState);
        setContentView(R.layout.dialog);
        dialog1 = (Button) findViewById(R.id.D1);
        dialog2 = (Button) findViewById(R.id.D2);
        dialog3 = (Button) findViewById(R.id.D3);
        dialog4 = (Button) findViewById(R.id.D4);
        dialog5 = (Button) findViewById(R.id.D5);
        dialog6 = (Button) findViewById(R.id.D6);
        dialog7 = (Button) findViewById(R.id.D7);
        dialog1.setText(R.string.D1);
        dialog2.setText(R.string.D2);
        dialog3.setText(R.string.D3);
        dialog4.setText(R.string.D4);
        dialog5.setText(R.string.D5);
        dialog6.setText(R.string.D6);
        dialog7.setText(R.string.D7);
        dialog1.setOnClickListener(new View.OnClickListener() {
            @Override
            public void onClick(View v) {
                oneDialog();
            }
        });
        dialog2.setOnClickListener(new View.OnClickListener() {
            @Override
            public void onClick(View v) {
                twoDialog();
            }
        });
        dialog3.setOnClickListener(new View.OnClickListener() {
            @Override
            public void onClick(View v) {
                threeDialog();
            }
        });
        dialog4.setOnClickListener(new View.OnClickListener() {
            @Override
            public void onClick(View v) {
                fourDialog();
            }
        });
        dialog5.setOnClickListener(new View.OnClickListener() {
            @Override
            public void onClick(View v) {
                fiveDialog();
            }
        });
        dialog6.setOnClickListener(new View.OnClickListener() {
            @Override
            public void onClick(View v) {
                sixDialog();
            }
        });
        dialog7.setOnClickListener(new View.OnClickListener() {
            @Override
            public void onClick(View v) {
                sevenDialog();
            }
        });
    }
    private void oneDialog(){
        AlertDialog.Builder builder = new AlertDialog.Builder(DialogActivity.this);
        builder.setTitle("你确定要離開嗎?");
        builder.setPositiveButton("取消", new DialogInterface.OnClickListener() {
            @Override
            public void onClick(DialogInterface dialog, int which) {
                Toast toast=Toast.makeText(getApplicationContext(), "你選擇了取消", Toast.LENGTH_SHORT);
                toast.show();
            }
        });
       builder.setNegativeButton("确定", new DialogInterface.OnClickListener() {
           @Override
           public void onClick(DialogInterface dialog, int which) {
               Toast toast=Toast.makeText(getApplicationContext(), "你選擇了确定", Toast.LENGTH_SHORT);
               toast.show();
           }
       }) ;
        builder.create().show();
    }
    private void twoDialog(){
        AlertDialog.Builder builder = new AlertDialog.Builder(DialogActivity.this);
        builder.setTitle("投票");
        builder.setMessage("你喜歡什麼樣的女生");
        builder.setPositiveButton("可愛的", new DialogInterface.OnClickListener() {
            @Override
            public void onClick(DialogInterface dialog, int which) {
                Toast toast=Toast.makeText(getApplicationContext(), "你喜歡可愛的", Toast.LENGTH_SHORT);
                toast.show();
            }
        });
        builder.setNeutralButton("年輕的",new DialogInterface.OnClickListener(){
            @Override
            public void onClick(DialogInterface dialog, int which) {
                Toast toast=Toast.makeText(getApplicationContext(), "你喜歡年輕的", Toast.LENGTH_SHORT);
                toast.show();
            }
        });
        builder.setNegativeButton("漂亮的", new DialogInterface.OnClickListener() {
            @Override
            public void onClick(DialogInterface dialog, int which) {
                Toast toast=Toast.makeText(getApplicationContext(), "你喜歡漂亮的", Toast.LENGTH_SHORT);
                toast.show();
            }
        }) ;
        builder.create().show();
    }
    private void threeDialog(){
        AlertDialog.Builder builder = new AlertDialog.Builder(DialogActivity.this);
        builder.setTitle("清單選擇框");
        builder.setItems(Items, new DialogInterface.OnClickListener() {
            @Override
            public void onClick(DialogInterface dialog, int which) {
                Toast toast = Toast.makeText(getApplicationContext(),"您選擇的id為"+which+",列名為"+Items[which],Toast.LENGTH_SHORT);
                toast.show();
            }
        });
        builder.create().show();
    }
    private void fourDialog(){
        AlertDialog.Builder builder = new AlertDialog.Builder(DialogActivity.this);
        builder.setTitle("單項選擇框");
        builder.setSingleChoiceItems(Items, 0, new DialogInterface.OnClickListener() {
            @Override
            public void onClick(DialogInterface dialog, int which) {
                Toast toast = Toast.makeText(getApplicationContext(),
"您選擇的id為"+which+",列名為"+Items[which],Toast.LENGTH_SHORT);
                toast.show();
            }
        });
        builder.setPositiveButton("确定", new DialogInterface.OnClickListener() {
            @Override
            public void onClick(DialogInterface dialog, int which) {
            }
        });
        builder.setNegativeButton("取消", new DialogInterface.OnClickListener() {
            @Override
            public void onClick(DialogInterface dialog, int which) {

            }
        }) ;
        builder.create().show();
    }
    int MAX = 100;
    private void fiveDialog(){
        final ProgressDialog myprogressbar = new ProgressDialog(DialogActivity.this);
        myprogressbar.setTitle("下載下傳進度");
        myprogressbar.setProgressStyle(ProgressDialog.STYLE_HORIZONTAL);
        myprogressbar.setMax(MAX);
        myprogressbar.show();
        new Thread(new Runnable() {
            @Override
            public void run() {
                int progress= 0;
                while (progress < MAX){
                    try {
                        Thread.sleep(100);
                        progress++;
                        myprogressbar.setProgress(progress);
                    } catch (InterruptedException e){
                        e.printStackTrace();
                    }
                }
                myprogressbar.cancel();
            }
        }).start();
    }
    private void sixDialog(){
        final ProgressDialog waitingDialog= new ProgressDialog(DialogActivity.this);
        waitingDialog.setTitle("等待對話框");
        waitingDialog.setMessage("等待中...");
        waitingDialog.setIndeterminate(true);
        waitingDialog.setCancelable(true);
        waitingDialog.show();
    }
    private void sevenDialog(){
        final EditText editText = new EditText(DialogActivity.this);
        AlertDialog.Builder inputDialog =
                new AlertDialog.Builder(DialogActivity.this);
        inputDialog.setTitle("編輯對話框").setView(editText);
        inputDialog.setPositiveButton("确定",
                new DialogInterface.OnClickListener() {
                    @Override
                    public void onClick(DialogInterface dialog, int which) {
                        Toast.makeText(DialogActivity.this,
                                editText.getText().toString(),
                                Toast.LENGTH_SHORT).show();
                    }
                }).show();
    }
}
前面一些基礎的代碼比如擷取控件等等,我相信大家都應該知道吧!我講講主要的:
dailog1.setOnClickListener(new View.OnClickListener() {
            @Override
            public void onClick(View v) {
                oneDialog();
            }
        });
        dailog2.setOnClickListener(new View.OnClickListener() {
            @Override
            public void onClick(View v) {
                twoDialog();
            }
        });
        dailog3.setOnClickListener(new View.OnClickListener() {
            @Override
            public void onClick(View v) {
                threeDialog();
            }
        });
        dailog4.setOnClickListener(new View.OnClickListener() {
            @Override
            public void onClick(View v) {
                fourDialog();
            }
        });
        dailog5.setOnClickListener(new View.OnClickListener() {
            @Override
            public void onClick(View v) {
                fiveDialog();
            }
        });
        dailog6.setOnClickListener(new View.OnClickListener() {
            @Override
            public void onClick(View v) {
                sixDialog();
            }
        });
        dailog7.setOnClickListener(new View.OnClickListener() {
            @Override
            public void onClick(View v) {
                sevenDialog();
            }
        });
在這裡我綁定了7個監聽器,然後每個裡面都調用了一個方法,這個是java文法的基礎,我就不多說了吧!是以每個對話框的關鍵代碼在每個方法裡面我們就一個一個地講解吧!
●确定取消對話框
這個是最基本的一個對話框

在這裡我們點選第一個Button可以看見彈出來一個對話框問你确定要離開嗎?,下面有個“确定”按鈕和“取消”按鈕,點選“确定”按鈕後下面有一個Toast提示你選擇了确定,點選“取消”按鈕後會彈出一個你選擇了取消的Toast提示,我們來看看第一個按鈕的監聽事件調用了oneDialog()方法。
private void oneDialog(){
AlertDialog.Builder builder = newAlertDialog.Builder(DialogActivity.this);
builder.setTitle("你确定要離開嗎?");
builder.setPositiveButton("取消", new DialogInterface.OnClickListener() {
@Override
public void onClick(DialogInterfacedialog, int which) {
Toast toast=Toast.makeText(getApplicationContext(), "你選擇了取消", Toast.LENGTH_SHORT);
toast.show();
}
});
builder.setNegativeButton("确定", new DialogInterface.OnClickListener() {
@Override
public void onClick(DialogInterface dialog, int which) {
Toast toast=Toast.makeText(getApplicationContext(), "你選擇了确定", Toast.LENGTH_SHORT);
toast.show();
}
}) ;
builder.create().show();
}
看這幾句代碼,首先建立了AlertDialog.Builder的對象,就是builer(這裡是可以自己修改對象的名字的,不一定是builder,學過java的都應該知道面向對象吧)這裡的DialogActivity.this是一個Context對象,也就是這個Activity的名字。
builder.setTitle("你确定要離開嗎?");
builder.setPositiveButton("取消", new DialogInterface.OnClickListener() {
@Override
public void onClick(DialogInterface dialog, int which) {
Toast toast=Toast.makeText(getApplicationContext(), "你選擇了取消", Toast.LENGTH_SHORT);
toast.show();
}
});
builder.setNegativeButton("确定", new DialogInterface.OnClickListener() {
@Override
public void onClick(DialogInterface dialog, int which) {
Toast toast=Toast.makeText(getApplicationContext(), "你選擇了确定", Toast.LENGTH_SHORT);
toast.show();
}
}) ;
這裡調用了setTitle()方法和setPositiveButton()還有setNegativeButton()方法第一個是定義标題,後面兩個方法是定義兩個按鈕,這兩個方法裡面的參數第一個Button顯示的内容,比如确定和取消,然後後面是new一個監聽器,,兩個監聽器裡面都是列印一個Toast提示,這個對話框很簡單吧!
最後
builder.create().show();
調用這個方法之後才會顯示出對話框,如果忘了,對話框就不會出現哦!
●多個按鈕對話框
我們先來看看效果吧!
在這裡我們可以發現隻是比上面一個對話框多了一個按鈕還有按鈕的内容變了,點選後的提示變了,我們來看一看第二個按鈕的監聽器調用了twoDialog()方法。
private void twoDialog(){
AlertDialog.Builder builder = newAlertDialog.Builder(DialogActivity.this);
builder.setTitle("投票");
builder.setMessage("你喜歡什麼樣的女生");
builder.setPositiveButton("可愛的", new DialogInterface.OnClickListener() {
@Override
public void onClick(DialogInterface dialog, int which) {
Toast toast=Toast.makeText(getApplicationContext(), "你喜歡可愛的", Toast.LENGTH_SHORT);
toast.show();
}
});
builder.setNeutralButton("年輕的",new DialogInterface.OnClickListener(){
@Override
public void onClick(DialogInterface dialog, int which) {
Toast toast=Toast.makeText(getApplicationContext(), "你喜歡年輕的", Toast.LENGTH_SHORT);
toast.show();
}
});
builder.setNegativeButton("漂亮的", new DialogInterface.OnClickListener() {
@Override
public void onClick(DialogInterface dialog, int which) {
Toast toast=Toast.makeText(getApplicationContext(), "你喜歡漂亮的", Toast.LENGTH_SHORT);
toast.show();
}
}) ;
builder.create().show();
}
這裡我們可以發現隻是比上個對話的代碼多調用了下面的方法
builder.setMessage("你喜歡什麼樣的女生");
還有多了個按鈕
builder.setPositiveButton("可愛的", new DialogInterface.OnClickListener() {
@Override
public void onClick(DialogInterface dialog, int which) {
Toast toast=Toast.makeText(getApplicationContext(), "你喜歡可愛的", Toast.LENGTH_SHORT);
toast.show();
}
});
然後修改了提示資訊,和按鈕的名字,這個我就不多講了吧!
●清單框
同樣來看看效果
可以看出打開後彈出一個清單的對話框,點選哪一列會有一個顯示點選那一列的資訊,來看看方法
private void threeDialog(){
AlertDialog.Builder builder = new AlertDialog.Builder(DialogActivity.this);
builder.setTitle("清單選擇框");
builder.setItems(Items, new DialogInterface.OnClickListener() {
@Override
public void onClick(DialogInterface dialog, int which) {
Toast toast = Toast.makeText(getApplicationContext(),"您選擇的id為"+which+",列名為"+Items[which],Toast.LENGTH_SHORT);
toast.show();
}
});
builder.create().show();
}
這裡看一看見這裡和上面的對話框的差别是這裡調用的是setItems()方法當然還有我上面定義的一個數組,因為下面的但子昂選擇清單框也要用到,是以我沒有定義在這個方法裡面。
final String[]Items ={"one","two","three","four","five","six"};
就是這個數組,我們發現清單裡面的資訊就是用的這個數組裡面的資訊。
然後setItems()方法裡面的第一個參數就是這個數組的名字Items
Toast toast = Toast.makeText(getApplicationContext(),"您選擇的id為"+which+",
列名為"+Items[which],Toast.LENGTH_SHORT);
toast.show();
這個提示資訊裡面列印了一個id還有點選的那列的名字,這裡有兩個參數,一個是which就是每列獨有的id,還有就是Items[which]就是數組裡面根據id選擇數組的第幾個字元,列印出來,是不是還是很容易啊!
(在這裡我還是要說一下,數組的id是從開始計算的)
●單項選擇清單框
效果圖
看見這裡,我相信大家都應該很清楚了吧!跟上一個對話框沒什麼差別,隻不過是把每列變成了單項選擇按鈕,來看代碼吧!還是跟上面的一樣從監聽器裡面看調用的方法,這裡調用的方法是fourDialog()。
private void fourDialog(){
AlertDialog.Builder builder = new AlertDialog.Builder(DialogActivity.this);
builder.setTitle("單項選擇框");
builder.setSingleChoiceItems(Items, 0, newDialogInterface.OnClickListener() {
@Override
public void onClick(DialogInterface dialog, int which) {
Toasttoast = Toast.makeText(getApplicationContext(),
"您選擇的id為"+which+",列名為"+Items[which],Toast.LENGTH_SHORT);
toast.show();
}
});
builder.setPositiveButton("确定", new DialogInterface.OnClickListener() {
@Override
public void onClick(DialogInterface dialog, int which) {
}
});
builder.setNegativeButton("取消", new DialogInterface.OnClickListener() {
@Override
publicvoid onClick(DialogInterface dialog, int which) {
}
}) ;
builder.create().show();
}
這裡我們隻需要看setSingleChoiceItems()方法,裡面的第一個參數還是數組Items,第二個參數0是指開始預設選擇id為0的按鈕也就是one,然後就是new一個監聽事件,裡面是列印一個Toast提示,裡面的參數上面一個對話框已經講過了,我就不講了,然後就是下面我添加了兩個按鈕,監聽器裡面沒有寫點選後實行哪些操作,這些你們可以自己去添加自己想要的操作,然後這個例子就講完了,看下面一個例子吧!
●進度條對話框
效果圖
這裡可以看見點選按鈕之後會出現一個進度條的對話框,進度條會自己加載,當滿了之後對話框就會小時,我們來看下代碼。
int MAX = 100;
private void fiveDialog(){
final ProgressDialog myprogressbar = new ProgressDialog(DialogActivity.this);
myprogressbar.setTitle("下載下傳進度");
myprogressbar.setProgressStyle(ProgressDialog.STYLE_HORIZONTAL);
myprogressbar.setMax(MAX);
myprogressbar.show();
new Thread(new Runnable() {
@Override
public void run() {
int progress= 0;
while (progress < MAX){
try {
Thread.sleep(100);
progress++;
myprogressbar.setProgress(progress);
} catch (InterruptedException e){
e.printStackTrace();
}
}
myprogressbar.cancel();
}
}).start();
}
這裡我們要注意了這裡沒有建立AlterDialog.Builer對象,而是ProgressDailog對象。
myprogressbar.setProgressStyle(ProgressDialog.STYLE_HORIZONTAL);
myprogressbar.setMax(MAX);
myprogressbar.show();
然後這裡調用了這三個方法,這裡是指,設定進度條的風格,還有設定進度的最大值,也就是進度條的長度
int MAX = 100;
我在上面設定MAX為100,而這裡的最大值為MAX,也就是說最長為100,然後最後一句就是顯示進度條也就是說打開對話框就會顯示進度條。
new Thread(new Runnable() {
@Override
public void run() {
int progress= 0;
while (progress < MAX){
try {
Thread.sleep(100);
progress++;
myprogressbar.setProgress(progress);
} catch (InterruptedException e){
e.printStackTrace();
}
}
myprogressbar.cancel();
}
}).start();
然後就是new一個Thread對象來操控進度條自動加載的子線程,用了一個while語句來實作當進度條進度小于最大值進行自加的動作,當這個值到最大也就是MAX的時候調用cancel()方法,也就是對話框消失。
●等待對話框
效果圖
我相信這種對話框大家就很常見了吧!
我們來看看代碼
private void sixDialog(){
final ProgressDailog waitingDialog= new ProgressDialog(DialogActivity.this);
waitingDialog.setTitle("等待對話框");
waitingDialog.setMessage("等待中...");
waitingDialog.setIndeterminate(true);
waitingDialog.setCancelable(true);
waitingDialog.show();
}
這裡主要講下這個方法吧!而且這裡也是ProgressDialog對象。
waitingDialog.setCancelable(true);
這個方法主要作用是當你點選螢幕的時候對話框就會消失,當你把括号裡面的true程式設計false的時候就是當你點選螢幕的時候無法取消對話框,除非等程序結束,而我這裡沒有設定程序什麼時候結束,是以你不點選螢幕對話框也就不會消失。
●編輯對話框
效果圖
從這個效果圖中我們看見要實作的功能就是點選按鈕之後出現一個可以輸入字元的編輯框的對話框,然後有一個确定按鈕,點選确定按鈕之後就會用Toast提示列印出你輸入的内容,我們來看一下代碼吧!首先這裡要在布局檔案裡面添加一個EditText控件。
XML布局檔案裡添加EditText控件:
<EditText
android:layout_marginTop="500dp"
android:id="@+id/editText"
android:layout_width="match_parent"
android:layout_height="50dp" />
然後是java代碼:
private void sevenDialog(){
final EditText editText = new EditText(DialogActivity.this);
AlertDialog.BuilderinputDialog =new AlertDialog.Builder(DialogActivity.this);
inputDialog.setTitle("編輯對話框").setView(editText);
inputDialog.setPositiveButton("确定",
newDialogInterface.OnClickListener() {
@Override
public void onClick(DialogInterface dialog, int which) {
Toast.makeText(DialogActivity.this,
editText.getText().toString(),
Toast.LENGTH_SHORT).show();
}
}).show();
}
這裡我們先聲明EditText控件後面括号裡面的是Activity的名字,如下面的代碼
final EditText editText = newEditText(DialogActivity.this);
這裡是用了final的,大家注意。
AlertDialog.Builder inputDialog =
newAlertDialog.Builder(DialogActivity.this);
然後這裡是建立一個對象,還是和前面的一樣用到的是Alter.Bulier對象
Toast.makeText(DialogActivity.this,
editText.getText().toString(),
Toast.LENGTH_SHORT).show();
這裡的editText.getText().toString()方法就是擷取輸入框裡的值。然後列印出來。這個例子還是很簡單吧!
好了這7種對話框的使用方法我都講完了,我們下次再會。