本文基于ShardingSphere的3.x版本,資料庫基于MySQL8。
源碼位址(親測可啟動+可驗證分庫分表功能,不行的話,評論區提問,說出具體失敗情況):ShardingSphere3.x Demo
建立兩個資料庫ds0、ds1(我是在自己電腦搭了虛機,在上面安裝了兩個MySQL8的資料執行個體,端口分别是23306、23307,讀者可按自己需要配置),和對應兩個資料表user_0、user_1
ds0
  ├── user_0
  └── user_1
ds1
  ├── user_0
└── user_1 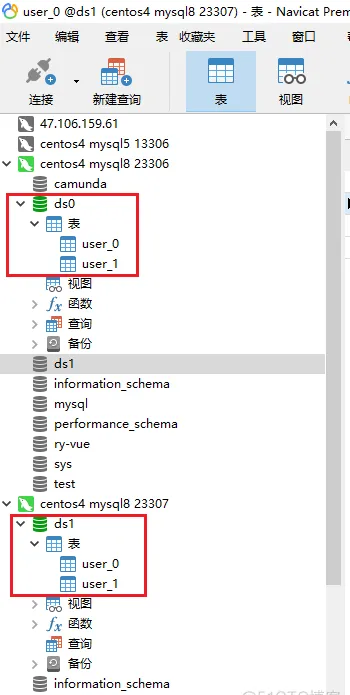
既然是分庫分表 庫結構與表結構一定是一緻的。表腳本在源碼路徑:
src\main\resources\script\ds0.db

src\main\resources\script\ds1.db
按自己實際情況修改配置檔案 application.properties 的資料庫配置(主要是改兩個資料庫的IP和端口号)
啟動項目,打開浏覽器,分别通路
// 資料在 db1_user0 中
http://localhost:8080/insert?id=1&name=lhd&age=12
// 資料在 db0_user0 中
http://localhost:8080/insert?id=2&name=lhd&age=12
// 資料在 db1_user1 中
http://localhost:8080/insert?id=3&name=lhd&age=13
// 資料在 db0_user1 中
http://localhost:8080/insert?id=4&name=lhd&age=13
可以在控制台看到如下展示,表示插入成功了

根據分片算法和分片政策 不同的id以及age取模落入不同的庫表 達到了分庫分表的結果
有的人說 查詢的話 該怎麼做呢 其實也幫我們做好了 打開浏覽器 通路:
http://localhost:8080/select 分别從ds0資料庫兩張表和ds1兩張表查詢結果 然後彙總結果傳回