編譯 | 晚君、Molly、蔣寶尚
來源 | BlockChange
區塊鍊作為比特币和其他加密貨币的核心技術,在最近幾年引起了全世界的注意,但是各國這一颠覆性的技術态度不一,因為其去中心化的分布式結構,可以使使用者之間直接進行交流,無需中心節點參與的這種技術模式對銀行、證券等機構帶來了極大影響。
在本篇文章,抛開介紹區塊鍊的技術特點和應用場景,手把手的教大家如何用python實作一個基礎的區塊鍊,和一個區塊鍊的用戶端。
我們實作的區塊鍊有如下幾個特性:
- 可以向區塊鍊中添加多個節點。
- 工作量證明(PoW)。
- 簡單的節點間沖突解決機制。
- 使用RSA 加密進行交易。
我們的區塊鍊用戶端有如下幾個功能:
- 使用公鑰/私鑰加密技術生成錢包。(基于RSA算法)。
- 使用RSA 加密算法生成交易。
我們還實作了2個展示界面:
- 挖礦者使用的“區塊鍊前端”
- 使用者生成錢包和發币的“區塊鍊用戶端”
我在原始代碼的基礎上進行了一些改動,向交易中加入了RSA加密,并實作了錢包生成和交易加密,兩個界面使用HTML/CSS/JS 實作。
完整的項目代碼:
https://github.com/adilmoujahid/blockchain-python-tutorial
請注意,這個實作是用于教學目的,是以它不适用于生産環境。因為它保密性不夠,且缺乏一些重要的特性。
區塊鍊用戶端實作
你可以從終端啟動區塊鍊用戶端。進入blockchain_client檔案夾,并輸入指令:python blockchain_client.py。
在浏覽器中打開http://localhost:8080,接下來你會看到如下展示界面。
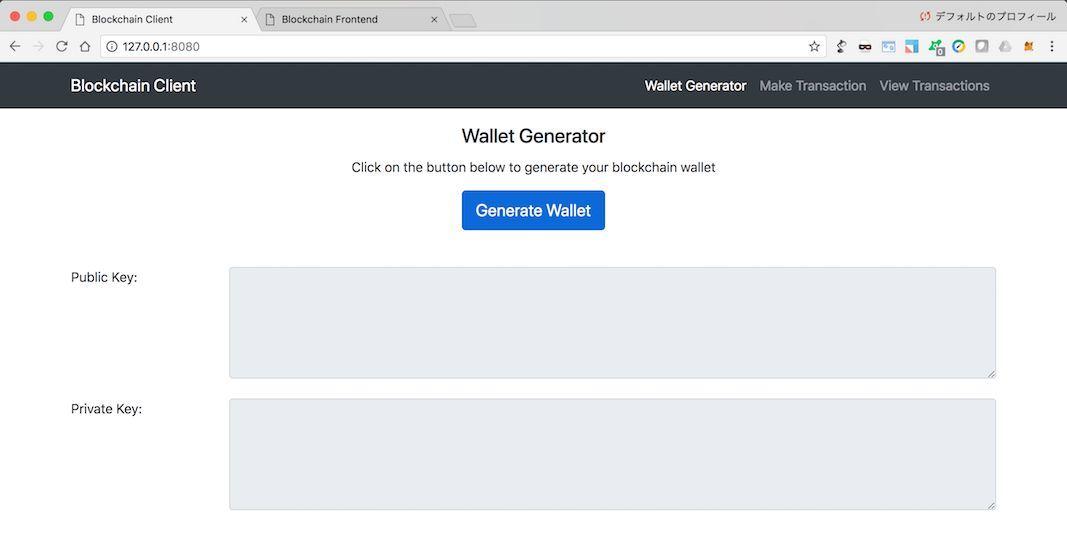
展示界面導航欄有3個标簽:
- 錢包生成器:使用RSA加密算法生成錢包(公鑰/私鑰對)。
- 生成交易:生成交易并将其發送到區塊鍊節點。
- 檢視交易:檢視區塊鍊上的交易。
要想生成交易或檢視交易,至少需要一個區塊鍊節點在運作(将在下一節中介紹)。
blockchain_client.py檔案代碼中一些重要部分的說明:我們定義了一個Python類,我們命名了4個屬性字段:sender_address,sender_private_key,recipient_address,value。
這是發送方建立交易所需的4個資訊。
to_dict()方法傳回一個Python字典格式交易資訊(沒有發件人的私鑰)。
sign_transaction()方法接收交易資訊(沒有發件人的私鑰),然後使用發送者的私鑰進行簽名。
class Transaction:
    def __init__(self, sender_address, sender_private_key,
            recipient_address, value):
        self.sender_address = sender_address
        self.sender_private_key = sender_private_key
        self.recipient_address = recipient_address
        self.value = value

    def __getattr__(self, attr):
        return self.data[attr]

    def to_dict(self):
        return OrderedDict({'sender_address': self.sender_address,
                            'recipient_address': self.recipient_address,
                            'value': self.value})

    def sign_transaction(self):
        """
        Sign transaction with private key
        """
        private_key = RSA.importKey(binascii.
        unhexlify(self.sender_private_key))
        signer = PKCS1_v1_5.new(private_key)
        h = SHA.new(str(self.to_dict()).encode('utf8'))
        return binascii.hexlify(signer.sign(h)).decode('ascii')
複制
下面是初始化一個Python Flask應用的代碼行, 我們将用它來建立不同的API來與區塊鍊及其客戶進行互動。
app = Flask(__name__) 複制
下面我們定義了3個傳回HTML頁面的Flask路徑,其中每個标簽都有一個html頁面。
@app.route('/')
def index():
  return render_template('./index.html')

@app.route('/make/transaction')
def make_transaction():
    return render_template('./make_transaction.html')

@app.route('/view/transactions')
def view_transaction():
return render_template('./view_transactions.html')
複制
下面我們定義一個生成錢包(私有/公鑰對)的API。
@app.route('/wallet/new', methods=['GET'])
def new_wallet():
  random_gen = Crypto.Random.new().read
  private_key = RSA.generate(1024, random_gen)
  public_key = private_key.publickey()
  response = {
    'private_key': binascii.hexlify(private_key.exportKey(format='DER')).decode('ascii'),
    'public_key': binascii.hexlify(public_key.exportKey(format='DER')).decode('ascii')
  }
  return jsonify(response), 200
複制

下面我們定義一個API,将sender_address, sender_private_key, recipient_address, value字段作為輸入,并傳回交易(沒有私鑰)和簽名。
@app.route('/generate/transaction', methods=['POST'])
def generate_transaction():
  sender_address = request.form['sender_address']
  sender_private_key = request.form['sender_private_key']
  recipient_address = request.form['recipient_address']
  value = request.form['amount']
  transaction = Transaction(sender_address,
  sender_private_key, recipient_address, value)
  response = {'transaction': transaction.to_dict(),
  'signature': transaction.sign_transaction()}
  return jsonify(response), 200
複制
區塊鍊的實作
你可以從終端啟動區塊鍊節點,通過進入blockchain檔案夾,并輸入指令:python blockchain_client.py或python blockchain_client.py -p <PORT NUMBER> 。如果你未指定端口号,則會預設端口号為5000。在浏覽器中打開http://localhost:<PORT NUMBER>可以看到區塊鍊前端展示界面。
展示界面導航欄有兩個标簽:
- 挖掘:用于檢視交易和區塊鍊資料,以及挖掘新的交易區塊。
- 配置:用于配置不同區塊鍊節點之間的連接配接。
下面是blockchain.py檔案代碼中一些重要部分的說明。
我們首先定義一個具有以下屬性的Blockchain類:
- transactions:将被添加到下一區塊的交易清單。
- chain:實際的區塊鍊,也就是一個區塊數組。
- nodes:一個包含節點URL的集合。區塊鍊使用這些節點從其他節點中檢索區。
- 塊鍊資料并且在檢查到它們沒有同步時更新其區塊鍊。
- node_id:一個辨別blockchain節點的随機字元串。
這個Blockchain類還實作了以下方法:
- register_node(node_url): 将新的區塊鍊節點添加到節點清單中。
- verify_transaction_signature(sender_address, signature, transaction): 檢查提供的簽名是否與通過公鑰(sender_address)簽署的交易相符。
- submit_transaction(sender_address, recipient_address, value, signature): 如果簽名通過驗證,則将交易添加到交易清單中。
- create_block(nonce, previous_hash):向區塊鍊添加一個交易塊。
- hash(block): 建立一個區塊的SHA-256散列。
- proof_of_work():工作算法的證明。尋找滿足挖掘條件的随機數。
- valid_proof(transactions, last_hash, nonce, difficulty=MINING_DIFFICULTY):檢查散列值是否滿足挖掘條件。該函數在proof_of_work函數中使用。
- valid_chain(chain): 檢查區塊鍊是否有效。
- resolve_conflicts():通過用網絡中最長鍊代替鍊的方法解決區塊鍊節點之間的沖突。
class Blockchain:
    def __init__(self):
        self.transactions = []
        self.chain = []
        self.nodes = set()
        #Generate random number to be used as node_id
        self.node_id = str(uuid4()).replace('-', '')
        #Create genesis block
        self.create_block(0, '00')

    def register_node(self, node_url):
        """
        Add a new node to the list of nodes
        """
        ...

    def verify_transaction_signature(self, sender_address,
           signature, transaction):
        """
        Check that the provided signature corresponds to transaction

        signed by the public key (sender_address)
        """
        ...

    def submit_transaction(self, sender_address,
       recipient_address, value, signature):
        """
        Add a transaction to transactions array if the signature verified
        """
        ...

    def create_block(self, nonce, previous_hash):
        """
        Add a block of transactions to the blockchain
        """
        ...

    def hash(self, block):
        """
        Create a SHA-256 hash of a block
        """
        ...

    def proof_of_work(self):
        """
        Proof of work algorithm
        """
        ...

    def valid_proof(self, transactions, last_hash, nonce,
       difficulty=MINING_DIFFICULTY):
        """
        Check if a hash value satisfies the mining conditions.
        This function is used within the proof_of_work function.
        """
        ...

    def valid_chain(self, chain):
        """
        check if a bockchain is valid
        """
        ...

    def resolve_conflicts(self):
        """
        Resolve conflicts between blockchain's nodes
        by replacing our chain with the longest one in the network.
        """
        ...
複制
下面這一行,我們初始化了一個Python Flask 應用,用于建立和區塊鍊互動的API。
app = Flask(__name__)
CORS(app)
複制
下面,我們初始化一個區塊鍊對象。
blockchain = Blockchain() 複制
下面我們定義了2種傳回我們區塊鍊前端展示界面html頁面的Flask路線。
@app.route('/')
def index():
    return render_template('./index.html')

@app.route('/configure')
def configure():
return render_template('./configure.html')
複制
下面我們定義了Flask API來管理交易和挖掘區塊鍊。
此API将'sender_address', 'recipient_address', 'amount' 和 'signature' 作為輸入,并且如果簽名有效,則将交易添加到将添加到下一個塊的交易清單中。
- '/transactions/get':此API傳回所有将會添加到下一個塊的交易。
- '/chain':此API傳回所有區塊鍊資料。
- '/mine': 此API運作工作算法的證明,同時添加新的交易塊到區塊鍊。
@app.route('/transactions/new', methods=['POST'])
def new_transaction():
    values = request.form
    # Check that the required fields are in the POST'ed data
    required = ['sender_address', 'recipient_address', 'amount',
    'signature']
    if not all(k in values for k in required):
        return 'Missing values', 400
    # Create a new Transaction
    transaction_result = blockchain.submit_transaction(values
    ['sender_address'], values['recipient_address'], values['amount'],
    values['signature'])
    if transaction_result == False:
        response = {'message': 'Invalid Transaction!'}
        return jsonify(response), 406
    else:
        response = {'message': 'Transaction will be added to Block '+
         str(transaction_result)}
        return jsonify(response), 201

@app.route('/transactions/get', methods=['GET'])
def get_transactions():
    #Get transactions from transactions pool
    transactions = blockchain.transactions
    response = {'transactions': transactions}
    return jsonify(response), 200

@app.route('/chain', methods=['GET'])
def full_chain():
    response = {
        'chain': blockchain.chain,
        'length': len(blockchain.chain),
    }
    return jsonify(response), 200
@app.route('/mine', methods=['GET'])
def mine():
    # We run the proof of work algorithm to get the next proof...
    last_block = blockchain.chain[-1]
    nonce = blockchain.proof_of_work()
    # We must receive a reward for finding the proof.
    blockchain.submit_transaction(sender_address=MINING_SENDER,
    recipient_address=blockchain.node_id, value=MINING_REWARD,
    signature="")
    # Forge the new Block by adding it to the chain
    previous_hash = blockchain.hash(last_block)
    block = blockchain.create_block(nonce, previous_hash)
    response = {
        'message': "New Block Forged",
        'block_number': block['block_number'],
        'transactions': block['transactions'],
        'nonce': block['nonce'],
        'previous_hash': block['previous_hash'],
    }
return jsonify(response), 200
複制
下面我們定義Flask API來管理區塊鍊節點。
- '/nodes/register':此API将節點URL清單作為輸入,同時添加URL到節點清單。
- '/nodes/resolve':此API通過使用網絡中最長的可用鍊替代本地鍊的方式解決區塊鍊節點間的沖突。
- '/nodes/get':此API傳回節點清單。
@app.route('/nodes/register', methods=['POST'])
def register_nodes():
    values = request.form
    nodes = values.get('nodes').replace(" ", "").split(',')
    if nodes is None:
        return "Error: Please supply a valid list of nodes", 400
    for node in nodes:
        blockchain.register_node(node)
    response = {
        'message': 'New nodes have been added',
        'total_nodes': [node for node in blockchain.nodes],
    }
    return jsonify(response), 201

@app.route('/nodes/resolve', methods=['GET'])
def consensus():
    replaced = blockchain.resolve_conflicts()
    if replaced:
        response = {
            'message': 'Our chain was replaced',
            'new_chain': blockchain.chain
        }
    else:
        response = {
            'message': 'Our chain is authoritative',
            'chain': blockchain.chain
        }
    return jsonify(response), 200
@app.route('/nodes/get', methods=['GET'])
def get_nodes():
    nodes = list(blockchain.nodes)
    response = {'nodes': nodes}
return jsonify(response), 200
複制
結論
在此篇文章中,我們介紹了涉及區塊鍊背後一些核心概念,并且學習如何用Python實作一個區塊鍊。為了簡單起見,此文沒有涉及一些技術細節,例如:錢包位址和Merkle樹。如果你想了解有關該主題的更多資訊,我建議閱讀比特币白皮書原著,并跟着比特币維基和Andreas Antonopoulos的優秀書籍學習:掌握比特币:程式設計開放區塊鍊。
原文連結:
http://adilmoujahid.com/posts/2018/03/intro-blockchain-bitcoin-python/?utm_source=wanqu.co&utm_campaign=Wanqu+Daily&utm_medium=website