伺服器版本: CentOS Linux release 7.6.1810 (Core)
tomcat版本:apache-tomcat-8.5.27.tar.gz
依賴軟體包
nginx-1.20.2.tar.gz(隻有1.19.5以上版本支援HTTP2.0)
openssl-1.0.2h.tar.gz(支援HTTP2.0的話需要1.0.2以上版本)
apr-1.5.2.tar.gz
apr-util-1.5.4.tar.gz
tomcat-native.tar.gz(存在tomcat的bin目錄下)
pcre-devel-8.32-17.el7.x86_64.rpm
zlib-1.2.7-19.el7_9.x86_64.rpm
zlib-devel-1.2.7-19.el7_9.x86_64.rpm
jdk-8u191-linux-x64.tar.gz(jdk8都可以)
一、準備工作
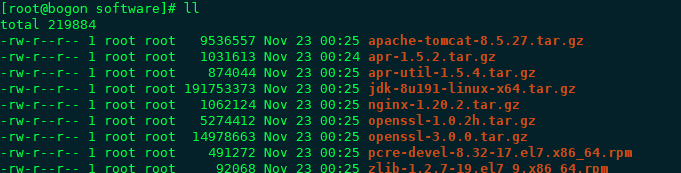
1.上傳軟體包到伺服器/usr/local/software路徑(路徑可自定義)
2.關閉防火牆,關閉selinux
臨時并永久關閉防火牆
systemctl stop firewalld && systemctl disable firewalld
臨時并永久關閉selinux
setenforce 0 && sed -i 's/^SELINUX=.*/SELINUX=disabled/' /etc/selinux/config
二、安裝,啟動,通路,檢視協定
解壓
cd /usr/local/software&& tar -zxvf apache-tomcat-8.5.27.tar.gz

啟動
cd /usr/local/software/apache-tomcat-8.5.27/bin&& sh startup.sh

檢視日志
tail -1000f /usr/local/software/apache-tomcat-8.5.27/logs/catalina.out

通路:http://192.168.44.134:8080/

三、檢視HTTP版本日志(預設是HTTP/1.1)
1.通過檢視tomcat的日志
日志檔案日期,localhost_access_log.日期.txt
tail -1000f /usr/local/software/apache-tomcat-8.5.27/logs/localhost_access_log.2021-11-21.txt
2.也可以通過浏覽器檢視,打開f12檢視
四、配置tomcatHTTP2.0協定
1.安裝openssl-1.0.2
cd /usr/local/software
tar -zxvf openssl-1.0.2h.tar.gz
cd openssl-1.0.2h/
./config -fPIC --prefix=/usr/local/openssl-1.0.2h
make
make install

#備份舊的openssl
mv /usr/bin/openssl /usr/bin/opensslbak
mv /usr/include/openssl /usr/include/opensslbak(這個沒有也沒事)

#制作軟連結
ln -s /usr/local/openssl-1.0.2h/bin/openssl /usr/bin/openssl
ln -s /usr/local/openssl-1.0.2h/include/openssl /usr/include/openssl
注意,在./config時要加上選項-fPIC,不然到後面安裝tomcat native包的時候會報錯。
另外,不用–profix指定安裝目錄的話,預設應該是安裝在/usr/local/ssl目錄。
2.安裝apr和apr-util
安裝apr
cd /usr/local/software
tar -zxvf apr-1.5.2.tar.gz
cd apr-1.5.2
./configure --prefix=/usr/local/apr

安裝時報:
rm: cannot remove 'libtoolT': No such file or directory
config.status: executing default commands

解決方法:
vim configure 配置檔案,找到RM='$RM'這一行(29605行) 修改為RM='$RM -f',修改完成後儲存重新運作
./configure --prefix=/usr/local/apr

make
make install
*******************************************************************************************
安裝apr-util
cd /usr/local/software
tar -zxvf apr-util-1.5.4.tar.gz
cd apr-util-1.5.4
./configure --with-apr=/usr/local/apr
make
make install
3.安裝tomcat native
編譯安裝tomcat native時需要指定jdk,是以先安裝jdk
cd /usr/local/software
tar -zxvf jdk-8u191-linux-x64.tar.gz
配置環境變量
vim /etc/profile
添加以下兩行,并儲存。
export JAVA_HOME=/usr/local/software/jdk1.8.0_191
PATH=$JAVA_HOME/bin:$PATH
重新整理環境變量
source /etc/profile


cd /usr/local/software/apache-tomcat-8.5.27/bin/
tar -zxvf tomcat-native.tar.gz
cd tomcat-native-1.2.16-src/native/
./configure --with-apr=/usr/local/apr --with-java-home=/usr/local/software/jdk1.8.0_191 --with-ssl=/usr/local/openssl-1.0.2h
make
make install

将/usr/local/apr/lib包路徑添加到/etc/ld.so.conf檔案:
echo "/usr/local/apr/lib" >> /etc/ld.so.conf
4.利用openssl生成證書
建立一個keys檔案,存放生成的證書
cd /usr/local/software/
mkdir keys
cd keys
1.生成一個RSA私鑰;指令一:
openssl genrsa -des3 -out server.key 2048

這個生成私鑰,des3算法,openssl格式,2048位強度。server.key是密鑰檔案名。
需要提供一個至少4位,最多1023位的密碼;
-out + 私鑰存放檔案,一會生成的私鑰就會儲存到 server.key檔案中
2.生成CSR(證書簽名請求);指令二
openssl req -new -key server.key -out server.csr

-out :儲存到 server.csr檔案中
這一步要輸入國家、地區、城市、組織、組織機關,其中Common Name和Email。其中Common Name,可以寫自己的名字或者域名,這裡要支援https協定,如果你有域名,那麼Common Name應該與域名保持一緻,否則會引起浏覽器警告。沒有域名就随便了。
3.删除私鑰中的密碼;指令三:
openssl rsa -in server.key -out server.key

删除原因:如果不删除密碼,在應用加載的時會出現輸入密碼以進行驗證。
4.生成自簽名證書;指令四:
openssl x509 -req -days 3650 -in server.csr -signkey server.key -out server.crt
-days:後面是該證書有效期限,機關:天
5.生成公鑰,格式為pem格式;指令五:
openssl x509 -in server.crt -out server.pem -outform PEM
檢視生成的證書檔案
5.複制證書檔案到tomcat的conf檔案,并修改tomcat配置檔案
cp /usr/local/software/keys/server.key /usr/local/software/apache-tomcat-8.5.27/conf
cp /usr/local/software/keys/server.crt /usr/local/software/apache-tomcat-8.5.27/conf

修改tomcat的server.xml檔案,103行附近,取消以下配置的注釋
     <Connector port="8443" protocol="org.apache.coyote.http11.Http11AprProtocol"
                maxThreads="150" SSLEnabled="true" >
         <UpgradeProtocol className="org.apache.coyote.http2.Http2Protocol" />
         <SSLHostConfig>
             <Certificate certificateKeyFile="conf/localhost-rsa-key.pem"
                          certificateFile="conf/localhost-rsa-cert.pem"
                          certificateChainFile="conf/localhost-rsa-chain.pem"
                          type="RSA" />
         </SSLHostConfig>
     </Connector>

删除certificateChainFile="conf/localhost-rsa-chain.pem"
修改maxThreads , 按照需求修改
修改certificateKeyFile="conf/server.key"
修改certificateFile="conf/server.crt"
最終修改結果如下:
     <Connector port="8443" protocol="org.apache.coyote.http11.Http11AprProtocol"
                maxThreads="150" SSLEnabled="true" >
         <UpgradeProtocol className="org.apache.coyote.http2.Http2Protocol" />
         <SSLHostConfig>
             <Certificate certificateKeyFile="conf/server.key"
                          certificateFile="conf/server.crt"
                          type="RSA" />
         </SSLHostConfig>
     </Connector>


修改tomcat bin目錄下catalina.sh
cd /usr/local/software/apache-tomcat-8.5.27/bin
vim catalina.sh

export JAVA_HOME=/usr/local/software/jdk1.8.0_191
export JRE_HOME=/usr/local/software/jdk1.8.0_191/jre
export LD_LIBRARY_PATH=$LD_LIBRARY_PATH:/usr/local/apr/lib
export LD_RUN_PATH=$LD_RUN_PATH:/usr/local/apr/lib
6.重新開機tomcat,驗證版本
停止:cd /usr/local/software/apache-tomcat-8.5.27/bin&&sh shutdown.sh
啟動cd /usr/local/software/apache-tomcat-8.5.27/bin&&sh startup.sh
檢視日志tail -1000f /usr/local/software/apache-tomcat-8.5.27/logs/catalina.out
通路路徑:https://192.168.44.134:8443/
如下圖:協定變成https,通路的協定變成H2,說明配置成功。
五、nginx配置反向代理https
1.編譯安裝
cd /usr/local/software
tar -zxvf nginx-1.20.2.tar.gz

建立安裝目錄
mkdir nginx
./configure --prefix=/usr/local/software/nginx  --with-http_ssl_module  --with-http_v2_module --with-openssl=/usr/local/software/openssl-1.0.2h --with-stream --with-debug

http_ssl_module子產品:nginx支援https協定
with-http_v2_module子產品:nginx支援http2.0協定


報錯
./configure: error: the HTTP rewrite module requires the PCRE library.
You can either disable the module by using --without-http_rewrite_module
option, or install the PCRE library into the system, or build the PCRE library
statically from the source with nginx by using --with-pcre=<path> option.

安裝PCRE:yum install -y pcre-devel-8.32-17.el7.x86_64.rpm
重新執行./configure xxxxxx

報錯
./configure: error: the HTTP gzip module requires the zlib library.
You can either disable the module by using --without-http_gzip_module
option, or install the zlib library into the system, or build the zlib library
statically from the source with nginx by using --with-zlib=<path> option.


安裝:yum install -y zlib-1.2.7-19.el7_9.x86_64.rpm zlib-devel-1.2.7-19.el7_9.x86_64.rpm
重新執行./configure xxxxxx

出現以下資訊,說明安裝成功
Configuration summary
  + using system PCRE library
  + using OpenSSL library: /usr/local/software/openssl-1.0.2h
  + using system zlib library

  nginx path prefix: "/usr/local/software/nginx"
  nginx binary file: "/usr/local/software/nginx/sbin/nginx"
  nginx modules path: "/usr/local/software/nginx/modules"
  nginx configuration prefix: "/usr/local/software/nginx/conf"
  nginx configuration file: "/usr/local/software/nginx/conf/nginx.conf"
  nginx pid file: "/usr/local/software/nginx/logs/nginx.pid"
  nginx error log file: "/usr/local/software/nginx/logs/error.log"
  nginx http access log file: "/usr/local/software/nginx/logs/access.log"
  nginx http client request body temporary files: "client_body_temp"
  nginx http proxy temporary files: "proxy_temp"
  nginx http fastcgi temporary files: "fastcgi_temp"
  nginx http uwsgi temporary files: "uwsgi_temp"
  nginx http scgi temporary files: "scgi_temp"


最後執行
make
make install
2.修改配置檔案,設定反向代理
cd /usr/local/software/nginx/conf
建立一個ssl檔案夾,将keys檔案夾中的server.key檔案和server.crt檔案複制過來
cp /usr/local/software/keys/server.key /usr/local/software/nginx/conf/ssl/
cp /usr/local/software/keys/server.crt /usr/local/software/nginx/conf/ssl/

vim nginx.conf
主要配置如下
    server {
	#443端口時必須的
        listen       443 ssl http2;
        server_name  localhost;

         #引用證書(必須,放在conf/ssl目錄下可以用相對路徑,其他位置用絕對路徑)
         ssl_certificate     ssl/server.crt;
         ssl_certificate_key ssl/server.key;

        location / {
            proxy_pass https://192.168.44.134:8443;
            proxy_set_header HOST $host;
            proxy_set_header X-Real-IP $remote_addr;
            proxy_set_header X-Forwarded-For $proxy_add_x_forwarded_for;
            proxy_set_header X-Forwarded-Proto $scheme;
            proxy_connect_timeout 18000; ##修改成半個小時

            proxy_send_timeout 18000;
            proxy_read_timeout 18000;
        }
        error_page   500 502 503 504  /50x.html;
        location = /50x.html {
            root   html;
        }
    }
3.啟動nginx,檢視效果
cd /usr/local/software/nginx/sbin
./nginx  -c /usr/local/software/nginx/conf/nginx.conf

浏覽器通路:https://192.168.44.134/ 協定也是H2,說明配置成功
參考文檔
https://www.icode9.com/content-3-894264.html
https://blog.51cto.com/qiangsh/1554761