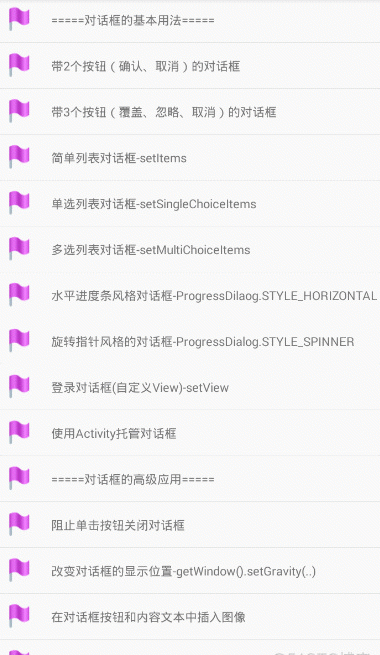
概念
Android中的對話框需要使用AlertDialog類來顯示,主要用于顯示提醒資訊,不過這個對話框類可不僅僅能用來顯示一些資訊,我們可以在對話框中防止任何的控件,使其成為一個複雜且功能強大的使用者接口。一個典型的例子就是使用AlertDialog做一個登入對話框。
對話框的基本用法
通過檢視AlertDialog類,我們可以發現,該類并沒有public的構造方法,是以我們不能直接建立AlertDialog對象。
為了建立AlertDialog對象,我們需要使用Builder類,該類是AlertDialog的内部類。
首先,必須建立AlertDialog.Builder對象
然後,通過Builder的show方法顯示對話框
或者通過Builder.create方法傳回AlertDialog對象,再通過AlertDiaolg.show方法顯示對話框。
帶2個按鈕(确認、取消)的對話框
顯示這樣的對話框的關鍵是如何顯示兩個按鈕以及響應這兩個按鈕的單擊事件。 通過
AlertDialog.setPostitiveButton
和
AlertDialog.setNegativeButton
可以為對話框添加兩個按鈕。
我們來看下這兩個方法的定義
public Builder setPositiveButton(CharSequence text, final OnClickListener listener)

public Builder setPositiveButton(@StringRes int textId, final OnClickListener listener)


public Builder setNegativeButton(CharSequence text, final OnClickListener listener)

public Builder setNegativeButton(@StringRes int textId, final OnClickListener listener)
從上述的源碼中可以看出,setPositiveButton和setNegativeButton方法各有兩個重載形式,實作的功能是一緻的,差別在于 text參數可以直接指定文本或者String變量,textId參數則需要指定一個字元串資源ID(需要在res\values目錄中的xml檔案中定義)。
一般來講,setPositiveButton的按鈕來添加 “确定”“Yes”等按鈕,setNegativeButton方法來添加“取消”,”cancel”等。
OnClickListener為DialogInterface.OnClickListener中的類。響應使用者的操作。
new AlertDialog.Builder(this)
                .setIcon(R.drawable.flag_mark_blue)
                .setTitle("是否下載下傳檔案?")
                .setPositiveButton("确定", new DialogInterface.OnClickListener() {
                    @Override
                    public void onClick(DialogInterface dialog, int which) {
                        // 提示資訊
                        AlertDialog dialog1 = new AlertDialog.Builder(DialogDemoListAct.this)
                                .setMessage("檔案已下載下傳成功")
                                .create();
                        dialog1.show();
                    }
                })
                .setNegativeButton("取消", new DialogInterface.OnClickListener() {
                    @Override
                    public void onClick(DialogInterface dialog, int which) {
                        // 取消提示資訊
                        new AlertDialog.Builder(DialogDemoListAct.this)
                                .setMessage("檔案下載下傳取消")
                                .create()
                                .show();
                    }
                })
                .show();
在使用AlertDialog類來建立對話框時需要注意以下幾點:
- setPositvieButton和setNegativeButton方法的第二個參數的資料類型是android.content,DialogInterface.OnClickListener,而不是android.view.View.OnClickListener. View.OnClickListener接口使用在視圖上的,這一點在使用時要注意。
- 使用show()方法顯示對話框是異步的,也就是說,當調用AlertDialog.Builder.show 或者AlertDialog.show方法顯示對話框後,show方法會立即傳回,并且繼續執行後面的代碼。
- 單擊使用setPositiveButton和setNegativeButton方法添加的按鈕後,即使單擊事件中不寫任何代碼,對話框也是會關閉的
- 如果某個按鈕單擊後隻需要關閉對話框,并不需要進行任何處理,listener參數設定null即可
- AlertDialog類還有很多setXXX方法用于指定對話框的其他資源,可以是對話框更加豐滿美觀。
帶3個按鈕(覆寫、忽略、取消)的對話框
用AlertDialog類建立的對話框最多可以添加3個按鈕,除了上面添加兩個方法,還可以使用setNeutralButton方法向對話框中添加第三個按鈕

new AlertDialog.Builder(this)
                .setIcon(R.drawable.flag_mark_violet)
                .setTitle("是否覆寫檔案?")
                .setMessage("覆寫後源檔案将丢失...吧啦吧啦")
                .setPositiveButton("覆寫", new DialogInterface.OnClickListener() {
                    @Override
                    public void onClick(DialogInterface dialog, int which) {

                    }
                })
                .setNeutralButton("忽略", new DialogInterface.OnClickListener() {
                    @Override
                    public void onClick(DialogInterface dialog, int which) {
                        new AlertDialog.Builder(DialogDemoListAct.this)
                                .setMessage("忽略覆寫檔案操作")
                                .create()
                                .show();
                    }
                })
                .setNegativeButton("取消", new DialogInterface.OnClickListener() {
                    @Override
                    public void onClick(DialogInterface dialog, int which) {

                    }
                })
                .show();
注意事項:
- setPositiveButton setNegativeButton setNeutralButton的調用順序可以是任意的,但是無論調用順序是什麼,在2.3這些低版本中,setPositiveButton 總會在左起第一個 ,setNeutralButton位于左起第二個,setNegativeButton位于左起第三個。 在高版本中,Googel調整了顯示位置,setPositiveButton位于右起第一位,setNeutralButton位于右起第二個,setNegativeButton位于右起第三位。
- 使用AlertDialog類建立的對話框最多隻能有3個按鈕,是以,就算多次調用這3個設定按鈕的方法,最多也隻能顯示3個。
- 這3個設定對話框按鈕的方法雖然可以調用多次,但是系統隻以每一個方法最後一次調用的為準。
簡單清單對話框-setItems
通過AlertDialog.Builder類的setItems方法可以建立簡單的清單對話框。 實際上,這種對話框相當于将ListView控件放在對話框上,然後在ListView中添加若幹簡單的文本()。
在這個執行個體中,選擇後顯示選中值,5S後自動關閉。
setItems方法定義如下
// items表示用于顯示在清單中的字元串數組
public Builder setItems(CharSequence[] items, final OnClickListener listener)
// items辨別字元串資料的資源ID
public Builder setItems(@ArrayRes int itemsId, final OnClickListener listener)
第二個參數 為 DialogInterface.OnClickListener類型。
new AlertDialog.Builder(this)
                .setIcon(R.drawable.flag_mark_gray)
                .setTitle("請選擇省份")
                .setItems(proviences, new DialogInterface.OnClickListener() {
                    @Override
                    public void onClick(DialogInterface dialog, int which) {
                        // 選擇後的提示資訊  記得調用show方法,否則不顯示啦
                        final AlertDialog alertDialog = new AlertDialog.Builder(DialogDemoListAct.this)
                                .setMessage("選擇了" + proviences[which])
                                .show();

                        // 設定定時器,5秒後,關閉AlertDialog
                        Handler handler = new Handler();
                        handler.postDelayed(new Runnable() {
                            @Override
                            public void run() { //  alertDialog.cancel(); 也可以
                                alertDialog.dismiss();
                            }
                        }, 5 * 1000);
                    }
                })
                .show();
在DialogInterface接口中有兩個用于關閉對話框的方法:dismiss 和 cancel,這兩個方法的功能完全相同,都是關閉對話框。
單選清單對話框-setSingleChoiceItems
通過AlertDialog.Builder類的setSingleChoiceItems方法可以建立帶有單選按鈕的清單對話框。setSingleChoiceItems有4個重載形式:
// 從字元串數組中裝載資料
public Builder setSingleChoiceItems(CharSequence[] items, int checkedItem, final OnClickListener listener)

// 從資源檔案中裝載資料
public Builder setSingleChoiceItems(@ArrayRes int itemsId, int checkedItem,
                final OnClickListener listener)

// 從ListAdapter中裝載資料
public Builder setSingleChoiceItems(ListAdapter adapter, int checkedItem, final OnClickListener listener)

// 從資料集中裝載資料
public Builder setSingleChoiceItems(Cursor cursor, int checkedItem, String labelColumn,
                final OnClickListener listener)
參數解釋:
- 第一個參數:表示單選清單對話框的資料源,目前支援4種資料源,分别是 資料資源、資料集、字元串數組和ListAdapter對象
- checkedItem:表示預設選中的清單項。如果設定第一個清單項為選中狀态,該參數值為0 。 如果該值小于0,表示所有的清單項都未被選中。
- listener: 單擊某個清單項被觸發的事件對象
- lableColumn:如果資料源是資料集Cursor,資料集中的某一列作為清單對話框的資料加載到清單控件中。該參數表示該列的名稱(字段名)
// 用于儲存目前清單項索引
  private int index;
  final String[] proviences = {"北京", "上海", "廣州", "深圳", "紐約", "華盛頓", "拉斯維加斯"};

  new AlertDialog.Builder(this)
                .setIcon(R.drawable.flag_mark_violet)
                .setTitle("選擇省份")
                .setSingleChoiceItems(proviences, -1, new DialogInterface.OnClickListener() {
                    @Override
                    public void onClick(DialogInterface dialog, int which) {
                        // 儲存目前選中的清單項索引
                        index = which;
                    }
                })
                .setPositiveButton("确定", new DialogInterface.OnClickListener() {
                    @Override
                    public void onClick(DialogInterface dialog, int which) {
                        // 提示資訊
                        new AlertDialog.Builder(DialogDemoListAct.this)
                                // 使用index
                                .setMessage(index + " " + proviences[index])
                                .show();

                    }
                })
                .setNegativeButton("取消", new DialogInterface.OnClickListener() {

                    @Override
                    public void onClick(DialogInterface dialog, int which) {

                        new AlertDialog.Builder(DialogDemoListAct.this)
                                .setMessage("您沒有選擇")
                                .show();

                    }
                })
                .show();
多選清單對話框-setMultiChoiceItems
通過AlertDialog.Builder.setMultiChoiceItems方法可以建立帶複選框的清單對話框。
setMultiChoiceItems有3個重載方法
// 從資源檔案中裝載資料
public Builder setMultiChoiceItems(@ArrayRes int itemsId, boolean[] checkedItems,
                final OnMultiChoiceClickListener listener)
// 從字元串數組中裝載資料
public Builder setMultiChoiceItems(CharSequence[] items, boolean[] checkedItems,
                final OnMultiChoiceClickListener listener)
// 從資料集中裝載資料
public Builder setMultiChoiceItems(Cursor cursor, String isCheckedColumn, String labelColumn,
                final OnMultiChoiceClickListener listener)
參數解釋:
- 第一個參數表示多選清單對話框的資料源,目前支援3種資料源:數組資源、資料集和字元串數組
- checkedItems:該參數的資料類型為boolean[],這個參數值的長度要和清單框中的清單項個數相同,該參數用于設定每一個清單項的預設值,預設為true,表示目前的清單項是選中狀态,否則表示未選中狀态
- listener:表示選中某一哥清單項時被觸發的事件對象
- isCheckedColumn:該參數隻用于資料集Cursor資料源,用于指定資料集的一列(字段名);如果為0,則未被選中。也就是說,對于資料集來說,某個清單項是否被選中,是有另外一列的字段值決定的。
- labelColumn:隻用于資料集。指定用于顯示清單項的列的字段名。
// 多選對話框中的資料lv
    private ListView lv;

        AlertDialog ad = new AlertDialog.Builder(this)
                .setIcon(R.drawable.tag_red)
                .setTitle("選擇省份")
                .setMultiChoiceItems(proviences,
                        new boolean[]{false, false, false, false, false, false, false},
                        new DialogInterface.OnMultiChoiceClickListener() {
                            @Override
                            public void onClick(DialogInterface dialog, int which, boolean isChecked) {

                            }
                        })
                .setPositiveButton("确定", new DialogInterface.OnClickListener() {
                    @Override
                    public void onClick(DialogInterface dialog, int which) {

                        int count = lv.getCount();
                        String s = "您選擇了:";
                        // 周遊
                        for (int i = 0; i < proviences.length; i++) {
                            if (lv.getCheckedItemPositions().get(i)) {
                                s += i + ":" + lv.getAdapter().getItem(i) + " ";
                            }
                        }

                        // 判斷數量
                        if (lv.getCheckedItemPositions().size() > 0) {
                            new AlertDialog.Builder(DialogDemoListAct.this).setMessage(s).show();
                        } else {
                            new AlertDialog.Builder(DialogDemoListAct.this).setMessage("Nothing selected").show();
                        }

                    }
                })
                .setNegativeButton("取消", null)
                .create();
        // 擷取lv
        lv = ad.getListView();
        // 顯示AlertDialog ,show為異步方法,執行後,會繼續執行下面的代碼,在這裡需要在最後調用
        ad.show();
注意事項:
- 必須指定setMulitChoiceItems方法的單擊事件對象,也就是改方法的第三個參數,該參數不能設定為null,否則預設被選中的清單項無法置成未選中狀态。對于預設未被選中的清單項沒有任何影響。
- 由于存在“确定”按鈕的單擊事件中需要引用AlertDialog變量,是以先使用create方法傳回AlertDialog對象,然後在單擊事件中使用該變量
進度對話框
檢視大拿的總結
進度對話框通過android.app.ProgressDialog類實作,該類是AlertDialog的之類,但與AlertDialog類不同,我們可以直接使用new關鍵字建立ProgressDialog對象。
進度條對話框除了要設定普通對話框必要的值外,還需要設定另外兩個值:進度的最大值和目前的進度。
// 設定進度的最大值
public void setMax(int max)
// 設定目前的進度
public void setProgress(int value)
初始進度必須使用setProgress方法設定,而遞增進度除了可以使用setProgress方法設定外,還可以使用以下方法
// 設定進度值的增量
public void  incrementProgressBy(int diff)
差別在于 setProgress設定的絕對值,incrementProgressBy設定的是進度的增量。
與普通的對話框一樣,進度對話框最多也隻能添加3個按鈕,而且可以設定進度對話框的風格:
// 建立ProgressDialog類
ProgressDialog pg = new ProgressDialog();
// 設定進度對話框為水準進度條風格
pg.setProgressStyle(ProgressDialog.STYLE_HORIZONTAL);
案例說明:
本案例示範了水準和原型進度對話框的實作方法,其中進度條包含兩個按鈕“暫停”和 “停止”,單擊暫停後,進度對話框關閉,再此顯示進度對話框時,進度條的起始位置從上次關閉對話框的位置開始(僅限與水準進度條)。 單擊取消,關閉對話框,再此顯示時,進度從0開始。
要實作進度随着時間的變化而不斷遞增,需要使用多線程及定時器來完成這個工作, 本例中使用Handler類來不斷更新進度對話框的進度值。
// 水準進度條的最大值
private static final int MAX_PROGRESS = 100;
// 預設的初始值
private int progress = 0;

 private void showProgressBarDialog(int style) {


        final ProgressDialog progressDialog = new ProgressDialog(this);
        //  設定提示的title的圖示,預設是沒有的
        progressDialog.setIcon(R.drawable.flag_mark_red);
        progressDialog.setTitle("資料進行中...");
        progressDialog.setMessage("請稍後...");
        // 設定進度對話框的風格 ,預設是圓形的
        progressDialog.setProgressStyle(style);
        // 設定是否可以通過點選Back鍵取消  預設true
        progressDialog.setCancelable(false);
        // 設定在點選Dialog外是否取消Dialog進度條  預設true
        progressDialog.setCanceledOnTouchOutside(false);

        // 設定最大值
        progressDialog.setMax(MAX_PROGRESS);
        // 設定暫停按鈕
        progressDialog.setButton(DialogInterface.BUTTON_POSITIVE, "暫停", new DialogInterface.OnClickListener() {
            @Override
            public void onClick(DialogInterface dialog, int which) {
                // 通過删除消息代碼的方式停止定時器
                progressDialogHandler.removeMessages(PROGRESSDIALOG_FLAG);
            }
        });

        progressDialog.setButton(DialogInterface.BUTTON_NEGATIVE, "停止", new DialogInterface.OnClickListener() {
            @Override
            public void onClick(DialogInterface dialog, int which) {
                progressDialogHandler.removeMessages(PROGRESSDIALOG_FLAG);
                progress = 0;
                progressDialog.setProgress(progress);
            }
        });

        // 展示
        progressDialog.show();


        progressDialogHandler = new Handler() {
            @Override
            public void handleMessage(Message msg) {
                super.handleMessage(msg);

                if (progress >= MAX_PROGRESS) {
                    // 消失 并重置初始值
                    progressDialog.dismiss();
                    progress = 0;
                } else {
                    progress++;
                    progressDialog.incrementProgressBy(1);
                    // 随機設定下一次遞增進度 (50 +毫秒)
                    progressDialogHandler.sendEmptyMessageDelayed(1, 50 + new Random().nextInt(500));
                }
            }
        };


        // 設定進度初始值
        progress = (progress > 0) ? progress : 0;
        progressDialog.setProgress(progress);
        // 發送消息
        progressDialogHandler.sendEmptyMessage(PROGRESSDIALOG_FLAG);

    }
注意事項:
- 進度對話框預設是圓形進度條,如需要設定水準進度條,使用setProgressStyle方法進行設定
- 調用sendEmptyMessage方法隻能是handleMessage方法執行一次,要想以一定的時間間隔循環執行handleMessage方法,需要在handleMessage方法中調用sendEmptyMessageDelayed方法來設定hanleMessage方法下一次被調用的等待時間,這樣就可以形成一個循環調用的效果。
- sendEmptyMessage和 sendEmptyMessageDelayed方法的第一個參數表示消息代碼,這個消息代碼用來辨別消息隊列中的消息。 例如,使用sendMessageDelayed方法設定消息代碼為1的消息在(50+)毫秒後調用handleMessage方法,可以利用這個消息代碼删除該消息,這樣系統就不會在(50+)毫秒之後調用handleMessage方法了。 在本例中,暫停和取消按鈕單擊事件都使用removeMessages方法删除了消息代碼為1的消息。
- 消息代碼可以是任意int類型的值
- 雖然ProgressDialog.getProgress可以擷取目前進度,但是隻有在水準進度條風格的對話框中才有效,如果是圓形進度條,該方法傳回永遠是0 。 是以本案例單獨使用了一個progress變量來代替目前進度,當進度條風格是圓形時,就意味着對話框永遠不會被關閉。
- 圓形進度條對話框的進度圓圈隻是一個普通的動畫,并沒有任何表示進度的功能,這種對話框一般在很難估計準确的時間和進度時使用
登入對話框,自定義布局 -setView
我們可以直接使用布局檔案或者代碼建立視圖對象,并将這些屬兔對象添加到對話框中。
AlertDialog.Builder.setView方法可以将視圖對象添加到目前的對話框中,使用下面的形式将一個視圖對象添加到對話框中。
new AlertDialog.Builder(this)
      .setIcon(R.drawable.xxx)
      .setTitle("自定義對話框")
      .setView(......)
.show(); 主要代碼:
private void showCustomViewDialog() {
        // 第一種方式 将布局檔案轉換為view
        LayoutInflater inflater = LayoutInflater.from(this);
        View view = inflater.inflate(R.layout.activity_alertdialog_login, null);
        // 第二種方式 因為R.layout.activity_login的根布局是LinearLayout
        //LinearLayout view = (LinearLayout) getLayoutInflater().inflate(R.layout.activity_alertdialog_login, null);

        new AlertDialog.Builder(this)
                .setIcon(R.drawable.tag_red)
                .setTitle("使用者登入")
                .setView(view)
                .setPositiveButton("确定", new DialogInterface.OnClickListener() {
                    @Override
                    public void onClick(DialogInterface dialog, int which) {
                        // 登入邏輯
                    }
                })
                .setNegativeButton("取消", new DialogInterface.OnClickListener() {
                    @Override
                    public void onClick(DialogInterface dialog, int which) {
                        // 取消邏輯
                    }
                })
                .show();

    }
activity_alertdialog_login.xml
<?xml version="1.0" encoding="utf-8"?>
<LinearLayout xmlns:android="http://schemas.android.com/apk/res/android"
    android:layout_width="match_parent"
    android:layout_height="match_parent"
    android:orientation="vertical" >

    <LinearLayout
        android:layout_width="match_parent"
        android:layout_height="wrap_content"
        android:layout_marginLeft="20dp"
        android:layout_marginRight="20dp"
        android:orientation="horizontal" >

        <TextView
            android:layout_width="wrap_content"
            android:layout_height="wrap_content"
            android:text="使用者名:"
            android:textSize="20sp" />

        <EditText
            android:layout_width="0dp"
            android:layout_height="wrap_content"
            android:layout_weight="1"/>
    </LinearLayout>

    <LinearLayout
        android:layout_width="match_parent"
        android:layout_height="wrap_content"
        android:layout_marginLeft="20dp"
        android:layout_marginRight="20dp"
        android:orientation="horizontal" >

        <TextView
            android:layout_width="wrap_content"
            android:layout_height="wrap_content"
            android:text="密    碼:"
            android:textSize="20sp" />

        <EditText
            android:layout_width="0dp"
            android:layout_height="wrap_content"
            android:layout_weight="1"
            android:password="true" />
    </LinearLayout>

</LinearLayout>
使用Activity托管對話框
Activity類提供了建立對話框的快捷方式。 在Activity類中有一個onCreateDialog方法。定義如下
protected Dialog onCreateDialog(int id) 當調用Activity.showDialog方法時,系統會調用onCreateDialog方法來傳回一個Dialog對象 (AlertDialog是Dialog的子類)。 showDialog方法和onCreateDialog方法一樣,也有一個int類型的id參數。該參數值傳入onCreateDialog方法。可以利用不同的id來建立多個對話框。
import android.app.Activity;
import android.app.AlertDialog;
import android.app.Dialog;
import android.content.DialogInterface;
import android.os.Bundle;
import android.util.Log;
import android.view.View;
import android.widget.Button;
import android.widget.ListView;

import com.turing.base.R;

public class ActivityDialog extends Activity implements View.OnClickListener {

    private final int DIALOG_DELETE_FILE = 1;
    private final int DIALOG_SIMPLE_LIST = 2;
    private final int DIALOG_SINGLE_CHOICE_LIST = 3;
    private final int DIALOG_MULTI_CHOICE_LIST = 4;
    private ListView lv = null;
    private String[] provinces = new String[]
            {"遼甯省", "山東省", "河北省", "福建省", "廣東省", "黑龍江省"};
    private ButtonOnClick buttonOnClick = new ButtonOnClick(1);

    @Override
    public void onClick(View view) {
        switch (view.getId()) {
            case R.id.btnDeleteFile:
                showDialog(DIALOG_DELETE_FILE);
                break;
            case R.id.btnSimpleList:
                showDialog(DIALOG_SIMPLE_LIST);
                break;
            case R.id.btnSingleChoiceList:
                showDialog(DIALOG_SINGLE_CHOICE_LIST);
                break;
            case R.id.btnMultiChoiceList:
                showDialog(DIALOG_MULTI_CHOICE_LIST);
                break;
            case R.id.btnRemoveDialog:
                removeDialog(DIALOG_DELETE_FILE);
                removeDialog(DIALOG_SIMPLE_LIST);
                removeDialog(DIALOG_SINGLE_CHOICE_LIST);
                removeDialog(DIALOG_MULTI_CHOICE_LIST);
                break;
        }
    }

    @Override
    protected Dialog onCreateDialog(int id) {
        Log.d("dialog", String.valueOf(id));
        switch (id) {
            case DIALOG_DELETE_FILE:
                return new AlertDialog.Builder(this).setIcon(
                        R.drawable.flag_mark_gray).setTitle("是否删除檔案")
                        .setPositiveButton("确定",
                                new DialogInterface.OnClickListener() {
                                    public void onClick(DialogInterface dialog,
                                                        int whichButton) {
                                        new AlertDialog.Builder(ActivityDialog.this)
                                                .setMessage("檔案已經被删除.")
                                                .create().show();
                                    }
                                }).setNegativeButton("取消",
                                new DialogInterface.OnClickListener() {
                                    public void onClick(DialogInterface dialog,
                                                        int whichButton) {

                                        new AlertDialog.Builder(ActivityDialog.this)
                                                .setMessage(
                                                        "您已經選擇了取消按鈕,該檔案未被删除.")
                                                .create().show();
                                    }
                                }).create();

            case DIALOG_SIMPLE_LIST:
                return new AlertDialog.Builder(this).setTitle("選擇省份").setItems(
                        provinces, new DialogInterface.OnClickListener() {
                            public void onClick(DialogInterface dialog,
                                                int which) {
                                final AlertDialog ad = new AlertDialog.Builder(
                                        ActivityDialog.this).setMessage(
                                        "您已經選擇了: " + which + ":"
                                                + provinces[which]).show();
                                android.os.Handler hander = new android.os.Handler();
                                hander.postDelayed(new Runnable() {
                                    @Override
                                    public void run() {
                                        ad.dismiss();

                                    }
                                }, 5 * 1000);

                            }
                        }).create();
            case DIALOG_SINGLE_CHOICE_LIST:
                return new AlertDialog.Builder(this).setTitle("選擇省份")
                        .setSingleChoiceItems(provinces, 1, buttonOnClick)
                        .setPositiveButton("确定", buttonOnClick)
                        .setNegativeButton("取消", buttonOnClick).create();
            case DIALOG_MULTI_CHOICE_LIST:
                AlertDialog ad = new AlertDialog.Builder(this).setIcon(
                        R.drawable.flag_mark_blue).setTitle("選擇省份").setMultiChoiceItems(
                        provinces, new boolean[]
                                {false, true, false, true, false, false},
                        new DialogInterface.OnMultiChoiceClickListener() {
                            public void onClick(DialogInterface dialog,
                                                int whichButton, boolean isChecked) {

                            }
                        }).setPositiveButton("确定",
                        new DialogInterface.OnClickListener() {
                            public void onClick(DialogInterface dialog,
                                                int whichButton) {
                                int count = lv.getCount();
                                String s = "您選擇了:";
                                for (int i = 0; i < provinces.length; i++) {

                                    if (lv.getCheckedItemPositions().get(i))
                                        s += i + ":"
                                                + lv.getAdapter().getItem(i)
                                                + "  ";

                                }
                                if (lv.getCheckedItemPositions().size() > 0) {
                                    new AlertDialog.Builder(ActivityDialog.this)
                                            .setMessage(s).show();
                                } else {
                                    new AlertDialog.Builder(ActivityDialog.this)
                                            .setMessage("您未選擇任何省份").show();

                                }

                            }
                        }).setNegativeButton("取消", null).create();
                lv = ad.getListView();
                return ad;

        }

        return null;
    }

    private class ButtonOnClick implements DialogInterface.OnClickListener {
        private int index;

        public ButtonOnClick(int index) {
            this.index = index;
        }

        @Override
        public void onClick(DialogInterface dialog, int whichButton) {
            if (whichButton >= 0) {
                index = whichButton;
            } else {
                if (whichButton == DialogInterface.BUTTON_POSITIVE) {
                    new AlertDialog.Builder(ActivityDialog.this).setMessage(
                            "您已經選擇了: " + index + ":" + provinces[index]).show();
                } else if (whichButton == DialogInterface.BUTTON_NEGATIVE) {
                    new AlertDialog.Builder(ActivityDialog.this).setMessage("您什麼都未選擇.")
                            .show();
                }
            }
        }
    }

    @Override
    protected void onPrepareDialog(int id, Dialog dialog) {
        super.onPrepareDialog(id, dialog);
    }

    @Override
    public void onCreate(Bundle savedInstanceState) {
        super.onCreate(savedInstanceState);
        setContentView(R.layout.activity_activity_dialog);
        Button btnDeleteFile = (Button) findViewById(R.id.btnDeleteFile);
        Button btnSimpleList = (Button) findViewById(R.id.btnSimpleList);
        Button btnSingleChoiceList = (Button) findViewById(R.id.btnSingleChoiceList);
        Button btnMultiChoiceList = (Button) findViewById(R.id.btnMultiChoiceList);
        Button btnRemoveDialog = (Button) findViewById(R.id.btnRemoveDialog);
        btnDeleteFile.setOnClickListener(this);
        btnSimpleList.setOnClickListener(this);
        btnSingleChoiceList.setOnClickListener(this);
        btnMultiChoiceList.setOnClickListener(this);
        btnRemoveDialog.setOnClickListener(this);
    }
}
對話框的進階應用
改變對話框的顯示位置
預設對話框的位置都是位于螢幕的中央,其實可以根據需要位于螢幕的上下左右甚至是任意位置,
要控制對話框的顯示位置,需要獲得對話框的Window對象,并通過Window對象的一些方法來控制對話框的顯示位置。
case 12: // 改變對話框的顯示位置
//                changePostionOfDialog(Gravity.TOP);
//                changePostionOfDialog(Gravity.BOTTOM);
//                changePostionOfDialog(Gravity.LEFT);
//                changePostionOfDialog(Gravity.RIGHT);
                // 右上方
//                changePostionOfDialog(Gravity.RIGHT | Gravity.TOP);

                // 顯示在任意位置
                showAnyPostionOfDilaog();

                break;
private void changePostionOfDialog(int postion) {
/**
AlertDialog alertDialog = new AlertDialog.Builder(this)
.setIcon(R.drawable.flag_mark_blue)
.setTitle("改變位置的AlertDiaolog")
.setMessage("我在" + postion)
.create();
alertDialog.getWindow().setGravity(postion);
alertDialog.show();
**/
ProgressDialog progressDialog = new ProgressDialog(this);
progressDialog.setIcon(R.drawable.flag_mark_yellow);
progressDialog.setTitle("ProgressDialog改變位置");
progressDialog.setMessage("where am I ?");
progressDialog.getWindow().setGravity(postion);
progressDialog.show();
} private void showAnyPostionOfDilaog() {
AlertDialog ad = new AlertDialog.Builder(this)
.setIcon(R.drawable.flag_mark_blue)
.setTitle("改變位置的AlertDiaolog")
.setMessage("我在自定義的任意位置")
.create();
Window window = ad.getWindow();
WindowManager.LayoutParams lp = window.getAttributes();
// 設定水準偏移量
lp.x = -20;
// 設定垂直偏移量
lp.y = -120;
window.setAttributes(lp);
ad.show();
} 在對話框按鈕和内容文本中插入圖像
給TextView控件中插入圖像的方法同樣也适用。
AlertDialog alertDialog = new AlertDialog.Builder(this)
                .setIcon(R.drawable.flag_mark_blue)
                .setTitle("問候")
                .setMessage(

                        Html.fromHtml("哈哈,<img src=''/>你好.", new Html.ImageGetter() {

                            @Override
                            public Drawable getDrawable(String source) {
                                Drawable drawable = getResources().getDrawable(
                                        R.drawable.face);
                                drawable.setBounds(0, 0, 32, 32);
                                return drawable;

                            }
                        }, null))
                .setPositiveButton(
                        Html.fromHtml("<img src=''/>确定", new Html.ImageGetter() {

                            @Override
                            public Drawable getDrawable(String source) {
                                Drawable drawable = getResources().getDrawable(
                                        R.drawable.ok);
                                drawable.setBounds(0, 0, 20, 20);
                                return drawable;
                            }
                        }, null), null)
                .setNegativeButton(
                        Html.fromHtml("<img src=''/>取消", new Html.ImageGetter() {

                            @Override
                            public Drawable getDrawable(String source) {
                                Drawable drawable = getResources().getDrawable(
                                        R.drawable.cancel);
                                drawable.setBounds(0, 0, 20, 20);
                                return drawable;
                            }
                        }, null), null).create();
        alertDialog.show();
改變對話框的透明度
通過WindowManager.LayoutParams.alpha可以設定對話框的透明度。
Alpha的取值範圍為0.0f ~ 1.0f之間,f表示float類型的數字。 預設1.0f ,完全不透明。 0.0f表示全透明,此時就看不到對話框了。
private void showTransparency_dialog(float v) {

        // 建立對話框
        AlertDialog ad = new AlertDialog.Builder(this)
                .setTitle("改變對話框的透明度")
                .setIcon(R.drawable.tag_red)
                .setMessage("Alpha的取值範圍 0~1 ,預設 1 ,我的透明度是" + v)
                .setPositiveButton("确定",null)
                .create();

        // 設定透明度
        Window window = ad.getWindow();
        WindowManager.LayoutParams lp = window.getAttributes();

        lp.alpha = v ;

        window.setAttributes(lp);
        // 展示對話框
        ad.show();
    }