現決定使用Openfire作為服務端,Openfire采用Java開發,基于XMPP的實時開源協作伺服器。單台可支援上萬并發使用者。
Openfire體系結構
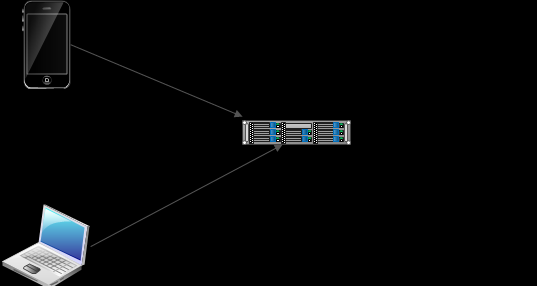
Openfire體系由其提供的伺服器端、用戶端以及相應的開發庫組成。
Openfire
通常我們所說的Openfire就是指Openfire服務端,現在已經更新到3.10.3版本,該伺服器實作了絕大部分的XMPP協定。
除此之外,還有大量的Openfire插件可供使用。
Spark
Spark是一個使用java開發的實時協作用戶端,通過簡單的配置和注冊即可使用。
Smack
Smack is a client library. You can use it to log into an XMPP domain and make use of the functionality it provides. Typically, Smack is used to implement an instant messaging client。
Tinder
Tinder is a low-level XMPP library. It provides Java implementations of basic XMPP entities, such as Stanzas (called 'Packet' in XMPP), JIDs and Components (which typically implement part of the functionality of an XMPP server). Although in theory, Tinder could be used to implement client functionality, it currently is primarily used on the server-side. Both Whack and Openfire (an XMPP server implementation) use Tinder-defined entities. Smack does not use Tinder at all.
Whack
Whack is Java library that is used to implement external components. Whack allows a Component (as defined in Tinder) to run as a stand-alone process. Whack allows you to connect this process to an XMPP domain. This way, you can extend the functionality provided by that domain without modifying the implementation of the server software.
服務端搭建
安裝資料庫
1. 安裝用戶端
rmp –ivh MySQL-client-5.6.21-1.linux_glibc2.5.x86_64.rpm
(注)如果提示沖突,需要運作yum –y remove ${APP}解除安裝沖突軟體
2. 安裝服務端
rmp –ivh MySQL-server-5.6.21-1.linux_glibc2.5.x86_64.rpm
3. 資料庫配置
3.1設定本地登入賬号
mysql –u root -p
set password for root@localhost=password('jiyq');
如果主機名其他,例如jiyq,需要将localhost改為jiyq
set password for root@jiyq=password('jiyq');
3.2切換資料庫
use mysql;
3.3設定網絡連接配接賬戶
Grant all privileges on *.* to 'root'@'%' identified by 'jiyq' with grant option;
3.4 更新賬戶權限
FLUSH PRIVILEGES;
3.5 打開防火牆3306端口
iptables -A INPUT -p tcp --dport 3306 -j ACCEPT
iptables -A OUTPUT -p tcp --sport 3306 -j ACCEPT
service iptables save
3.7 建立資料庫
create database openfire
3.8 運作建表語句
在openfire資料庫下,運作/opt/openfire/resources/database/openfire_mysql.sql
安裝服務端
1. 解壓openfire_3_10_3.zip到/opt目錄下
2. 啟動openfire
/opt/openfire/bin
./openfire start
3. 通路配置頁面
http://192.168.189.131:9090/setup/index.jsp
4. 配置語言

5. 伺服器設定
6. 資料庫設定
7. 資料庫設定-标準連接配接
8. 特性設定
9. 管理者賬戶
8. 安裝完成
用戶端搭建
這裡使用Spark作為PC端的用戶端。
1. 安裝Spark
這裡采用spark_2_7_3_online.exe版本
2. 注冊使用者
3. 登入用戶端