SpringMVC詳解(三)------基于注解的入門執行個體
前兩篇部落格我們講解了基于XML 的入門執行個體,以及SpringMVC運作的詳細流程。但是我們發現基于 XML 的配置還是比較麻煩的,而且,每個 Handler 類隻能有一個方法,在實際開發中肯定是不可能這樣來進行開發的。那麼這篇部落格我們就講解實際開發中用的最多的基于注解配置的SpringMVC配置。
本篇部落格源碼下載下傳連結:http://pan.baidu.com/s/1dESLgv3 密碼:vkuy
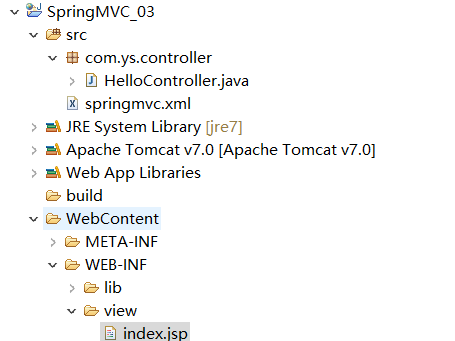
項目結構為:
1、在 web.xml 檔案中配置前端處理器
<?xml version="1.0" encoding="UTF-8"?>
<web-app xmlns:xsi="http://www.w3.org/2001/XMLSchema-instance"
	 xmlns="http://java.sun.com/xml/ns/javaee"
	 xsi:schemaLocation="http://java.sun.com/xml/ns/javaee
	 http://java.sun.com/xml/ns/javaee/web-app_3_0.xsd" id="WebApp_ID" version="3.0">
  <display-name>SpringMVC_01</display-name>
  <!-- 配置前端控制器DispatcherServlet -->
  <servlet>
    <servlet-name>springmvc</servlet-name>
    <servlet-class>org.springframework.web.servlet.DispatcherServlet</servlet-class>
    <!--springmvc.xml 是自己建立的SpringMVC全局配置檔案,用contextConfigLocation作為參數名來加載
    	如果不配置 contextConfigLocation,那麼預設加載的是/WEB-INF/servlet名稱-servlet.xml,在這裡也就是 springmvc-servlet.xml
      -->
    <init-param>
        <param-name>contextConfigLocation</param-name>
        <param-value>classpath:springmvc.xml</param-value>
    </init-param>
  </servlet>

  <servlet-mapping>
    <servlet-name>springmvc</servlet-name>
    <!--第一種配置:*.do,還可以寫*.action等等,表示以.do結尾的或者以.action結尾的URL都由前端控制器DispatcherServlet來解析
    	第二種配置:/,所有通路的 URL 都由DispatcherServlet來解析,但是這裡最好配置靜态檔案不由DispatcherServlet來解析
    	錯誤配置:/*,注意這裡是不能這樣配置的,應為如果這樣寫,最後轉發到 jsp 頁面的時候,仍然會由DispatcherServlet進行解析,
    				而這時候會找不到對應的Handler,進而報錯!!!
      -->
    <url-pattern>/</url-pattern>
  </servlet-mapping>
</web-app>
2、在 springmvc.xml 檔案中配置處理器映射器,處理器擴充卡,視圖解析器
<?xml version="1.0" encoding="UTF-8"?>
<beans xmlns="http://www.springframework.org/schema/beans"
       xmlns:xsi="http://www.w3.org/2001/XMLSchema-instance"
       xmlns:mvc="http://www.springframework.org/schema/mvc"
       xmlns:context="http://www.springframework.org/schema/context"
       xmlns:aop="http://www.springframework.org/schema/aop"
       xmlns:tx="http://www.springframework.org/schema/tx"
       xsi:schemaLocation="http://www.springframework.org/schema/beans
        http://www.springframework.org/schema/beans/spring-beans-4.2.xsd
        http://www.springframework.org/schema/mvc
        http://www.springframework.org/schema/mvc/spring-mvc-4.2.xsd
        http://www.springframework.org/schema/context
        http://www.springframework.org/schema/context/spring-context.xsd
        http://www.springframework.org/schema/aop
        http://www.springframework.org/schema/aop/spring-aop-4.2.xsd
        http://www.springframework.org/schema/tx
        http://www.springframework.org/schema/tx/spring-tx.xsd">
	<!--注解處理器映射器  -->
	<bean class="org.springframework.web.servlet.mvc.method.annotation.RequestMappingHandlerMapping"></bean>

	<!--注解處理器擴充卡  -->
	<bean class="org.springframework.web.servlet.mvc.method.annotation.RequestMappingHandlerAdapter"></bean>

	<!--使用mvc:annotation-driven可以代替上面的映射器和擴充卡
		這裡面會預設加載很多參數綁定方法,比如json轉換解析器就預設加載,是以優先使用下面的配置
	  -->
	<!-- <mvc:annotation-driven></mvc:annotation-driven> -->


	<!--單個配置Handler  -->
	<!-- <bean class="com.ys.controller.HelloController"></bean> -->

	<!--批量配置Handler,指定掃描的包全稱  -->
	<context:component-scan base-package="com.ys.controller"></context:component-scan>


	<!--配置視圖解析器  -->
	<bean class="org.springframework.web.servlet.view.InternalResourceViewResolver">
		<!-- 傳回視圖頁面的字首 -->
		<property name="prefix" value="/WEB-INF/view/"></property>
		<!-- 傳回頁面的字尾 -->
		<property name="suffix" value=".jsp"></property>
	</bean>
</beans>
3、編寫 Handler
package com.ys.controller;

import org.springframework.stereotype.Controller;
import org.springframework.web.bind.annotation.RequestMapping;
import org.springframework.web.servlet.ModelAndView;

//使用@Controller注解表示這個類是一個Handler
@Controller
public class HelloController {

	//@RequestMapping注解括号裡面的表示通路的URL
	@RequestMapping("hello")
	public ModelAndView hello(){
		ModelAndView modelView = new ModelAndView();
		//類似于 request.setAttribute()
		modelView.addObject("name","張三");
		//配置傳回的視圖名,由于我們在springmvc.xml中配置了字首和字尾,這裡直接寫視圖名就好
		modelView.setViewName("index");
		//modelView.setViewName("/WEB-INF/view/index.jsp");
		return modelView;
	}

}
注意@Controller注解和@RequestMapping注解的用法
4、編寫 視圖 index.jsp
<%@ page language="java" contentType="text/html; charset=UTF-8"
    pageEncoding="UTF-8"%>
<!DOCTYPE html PUBLIC "-//W3C//DTD HTML 4.01 Transitional//EN" "http://www.w3.org/TR/html4/loose.dtd">
<html>
<head>
<meta http-equiv="Content-Type" content="text/html; charset=UTF-8">
<title>Insert title here</title>
</head>
<body>
hello:${name}
</body>
</html>
5、在浏覽器中輸入:http://localhost:8080/SpringMVC_03/hello

作者:IT可樂
出處:http://www.cnblogs.com/ysocean/
資源:微信搜【IT可樂】關注我,回複 【電子書】有我特别篩選的免費電子書。
本文版權歸作者所有,歡迎轉載,但未經作者同意不能轉載,否則保留追究法律責任的權利。