本文首發于 vivo網際網路技術 微信公衆号
作者:陳龍
最近做的項目需要支援幾十種語言,很多小語種在不認識的人看來跟亂碼一樣,翻譯一般是由翻譯公司翻譯的,翻譯完成後再導入到項目裡面,這就容易存在一些問題。
一、問題一:翻譯容易出錯
翻譯的流程是用戶端開發編寫中文文案---翻譯成英文----外包翻譯根據英文字元串翻譯小語種,在這個流程中,有些多義詞和一些涉及語境的詞就很容易翻譯錯誤。
二、問題二:錯誤無法及時發現
前面說了,翻譯公司提供回來的字元串我們都看不懂,錯了也不知道,幾乎都是上線之後,使用者回報過來,我們才知道。
是以小語種的翻譯bug一直是項目裡面比較多的一類bug,于是就需要探索一種可以用于動态更新翻譯字元串的方案。
三、設計思路
在Android中,多語言字元串都是以各種不同檔案夾下的xml儲存的,每種檔案夾中的限定符表示一種語言,這個一般Android的開發人員都是了解的。
如下圖所示
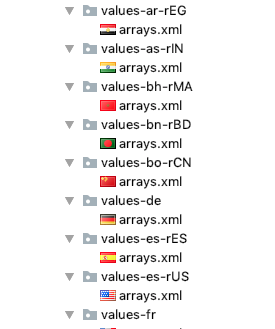
String檔案作為Resource的一種,在使用時不管是layout中使用還是在java代碼中使用其實都是調用Resource的各種方法。
那麼其實翻譯語言的動态更新實際上是Resource資源的替換更新。
在早些年的開發經驗中,我們都知道有一種Android換主題的方案來給應用進行資源替換,簡單來講方案流程如下:
- 使用addAssertPath方法加載sd卡中的apk包,建構AsserManager執行個體。
- AsserManager建構PlugResource執行個體。
- 使用裝飾者模式編寫ProxyResource,在各個擷取資源的方法中優先擷取PlugResource,擷取不到再從備份的AppResource中擷取。
- 替換Application和Activity中的Resource對象為ProxyResource。
- 繼承LayoutInflater.Factory,攔截layout生成過程,并将資源擷取指向ProxyResource,完成layout初始化。
既然有可參考的方案,那就可以直接開工了。
事實上在後續的開發過程中遇到很多細節問題,但萬事開頭難,我們可以先從第一步開始做起。
四、開發
流程一:從獨立的plugapk包中取出PlugResources資源
AssetManager mLoadedAssetManager = AssetManager.class.newInstance();
Reflector.with(mLoadedAssetManager).method("addAssetPath", String.class).call(textResPath);
Resources textResPackResources = new Resources(mLoadedAssetManager, appResources.getDisplayMetrics(), appResources.getConfiguration());
流程二:建構自己的TextResResources 實作getText等方法 将getText方法代理到PlugResources的getText
public class TextRepairProxyResourcess extends Resources {

    private static final String TAG = "TextRepairProxyResourcess";
    private Resources mResPackResources;
    private Resources mAppResources;
    private String mResPackPkgName;

    public TextRepairProxyResourcess(AssetManager assets, DisplayMetrics metrics, Configuration config) {
        super(assets, metrics, config);
    }

    public void prepare(Resources plugResources, Resources appResources, String pkgName) {
        mResPackResources = plugResources;
        mAppResources = appResources;
        mResPackPkgName = pkgName;
    }

    private void printLog(String tag, CharSequence messgae) {
        if (BuildConfig.DEBUG) {
            VLog.d(tag, messgae + "");
        }
    }

    @NonNull
    @Override
    public CharSequence getText(int resId) throws NotFoundException {
        if (!checkNull()) {
            return super.getText(resId);
        } else if (!checkTextRepairOn()) {
            return mAppResources.getText(resId);
        } else {
            CharSequence charSequence;
            try {
                int plugId = getIdentifier(resId);
                if (plugId == 0) {
                    charSequence = mAppResources.getText(resId);
                    printLog(TAG, "getText res from app ---" + charSequence);
                } else {
                    charSequence = mResPackResources.getText(plugId);
                    printLog(TAG, "getText res from plug ---" + charSequence);
                }
            } catch (Throwable e) {
                charSequence = mAppResources.getText(resId);
                if (BuildConfig.DEBUG) {
                    e.printStackTrace();
                }
            }
            return charSequence;
        }
    }

    @NonNull
    @Override
    public CharSequence[] getTextArray(int resId) throws NotFoundException {
        .............
    }

    @NonNull
    @Override
    public String[] getStringArray(int resId) throws NotFoundException {
        .............
    }

    @NonNull
    @Override
    public String getString(int resId) throws NotFoundException {
        .............
    }


    @NonNull
    @Override
    public CharSequence getQuantityText(int resId, int quantity) throws NotFoundException {
        .............
    }

    @NonNull
    @Override
    public String getQuantityString(int resId, int quantity, Object... formatArgs) throws NotFoundException {
        .............
    }

    public int getIdentifier(int resId) {
        if (!checkNull()) {
            return 0;
        } else {
            // 有些情況就是很特殊 比如webView的34800147資源 使用mAppResources.getResourceEntryName會抛出
            // notfound 異常 但是使用getString 卻又可以拿到這個資源的字元串
            try {
                String resName = mAppResources.getResourceEntryName(resId);
                String resType = mAppResources.getResourceTypeName(resId);
                int plugId = mResPackResources.getIdentifier(resName, resType, mResPackPkgName);
                return plugId;
            } catch (Throwable e) {
                return 0;
            }
        }
    }

    /**
     * 有些方法是在super的構造方法裡面調用的 需要判空處理
     *
     * @return
     */
    private boolean checkNull() {
        if (mAppResources != null && mResPackResources != null) {
            return true;
        } else {
            return false;
        }
    }

    /**
     * 有些方法是在super的構造方法裡面調用的 需要判空處理
     *
     * @return
     */
    private boolean checkTextRepairOn() {
        return TextRepairConfig.getInstance().isTextRepairOnThisSystem();
    }

}
流程三:Application啟動的時候将Application的mResources對象Hook掉并設定TextResResources對象
Reflector.with(appContext).field("mResources").set(textRepairProxyResourcess);
流程四:Activity啟動的時候将Activity的mResources對象Hook掉并設定TextResResources對象
Reflector.with(activityContext).field("mResources").set(textRepairProxyResourcess);
流程五:注冊ActivtyLifecycleCallbacks 在onActivityCreated中對activity的LayoutInfater實作自己的Factory,在Factory中對text的Attribute的屬性進行攔截并重新setText
public class TextRepairFactory implements LayoutInflater.Factory2 {
    private static final HashMap<String, Constructor<? extends View>> mConstructorMap = new HashMap<>();
    /**
     * 系統調用的是兩個參數的構造方法,我們也調用這個構造方法
     */
    private static final Class<?>[] mConstructorSignature = new Class[] { Context.class, AttributeSet.class };
    /**
     * 一般 Android 系統的 View 都存儲在這幾個包下面
     */
    private final String[] a = new String[] { "android.widget.", "android.view.", "android.webkit." };
    // 屬性處理類
    TextRepairAttribute mTextRepairAttribute;

    public TextRepairFactory() {
        mTextRepairAttribute = new TextRepairAttribute();
    }

    @Override
    public View onCreateView(View parent, String name, Context context, AttributeSet attrs) {
        /*
         * 我們模仿源碼那樣來建立 View
         */
        View view = createViewFormTag(name, context, attrs);
        /*
         * 這裡如果 View 傳回的是 null 的話,就是自定義控件,
         * 自定義控件不需要我們進行拼接,可以直接拿到全類名
         */
        if (view == null) {
            view = createView(name, context, attrs);
        }
        if (view != null) {
            mTextRepairAttribute.load(view, attrs);
        }
        return view;
    }

    @Override
    public View onCreateView(String name, Context context, AttributeSet attrs) {
        return null;
    }

    private View createView(String name, Context context, AttributeSet attrs) {
        Constructor<? extends View> constructor = findConstructor(context, name);
        try {
            return constructor.newInstance(context, attrs);
        } catch (Throwable e) {
        }
        return null;
    }

    private Constructor<? extends View> findConstructor(Context context, String name) {
        Constructor<? extends View> constructor = mConstructorMap.get(name);
        if (null == constructor) {
            try {
                // 通過反射來擷取 View 執行個體對象
                Class<? extends View> clazz = context.getClassLoader().loadClass(name).asSubclass(View.class);
                constructor = clazz.getConstructor(mConstructorSignature);
                // 緩存View的class對象
                mConstructorMap.put(name, constructor);
            } catch (Throwable e) {
            }
        }
        return constructor;
    }

    private View createViewFormTag(String name, Context context, AttributeSet attrs) {
        // 包含自定義控件
        if (-1 != name.indexOf('.')) {
            return null;
        }
        View view = null;
        for (int i = 0; i < a.length; i++) {
            view = createView(a[i] + name, context, attrs);
            if (view != null) {
                break;
            }
        }
        return view;
    }
}
public class TextRepairActivityLifecycle implements Application.ActivityLifecycleCallbacks {

    @Override
    public void onActivityCreated(Activity activity, Bundle savedInstanceState) {
            LayoutInflater layoutInflater = LayoutInflater.from(activity);
            TextRepairFactory textRepairFactory = new TextRepairFactory();
            LayoutInflaterCompat.setFactory2(layoutInflater, textRepairFactory);
    }
}
但是真的就就這麼簡單嗎?
上述幾段代碼就已經構成了資源替換的雛形,基本上完成了一個基礎的資源替換流程。
再後續的調試點檢過程種,我發現這才剛剛開始入坑。
五、探索
探索一:api 限制調用
demo一跑起來就發現log中列印諸多告警資訊。
因為是使用反射的方法将Resource替換,是以也觸發了Google的Api限制調用機制,于是研究了一下Api的限制調用。
結論:
系統簽名應用暫時沒有限制,因為demo使用的是調試簽名,換用系統簽名之後,告警消失。
探索二:性能測試
使用sd卡中的plugapk包生成PlugResources,主要是在生成assetManager過程,該過程耗時10-15ms,對于頁面啟動來說,這個時間還是太長了,于是嘗試将AssetManager緩存起來,縮短了時間。
在反射替換resource完成後,調用PlugResources的getText方法,要先從本地Resources中根據Id擷取原資源的name和type,然後在使用name和type調用getIndentifier擷取PlugResources中的resId,這個過程耗時較長,雖然也是納秒級别的,但其耗時比不hook場景下高一個資料級。
然而幸運的是,在頁面流暢性性能測試中,并沒有發現流暢性有所下降,頁面啟動速度也沒有明顯的下降。
探索三:系統版本相容
真正的大坑來了。
解決完之前的問題之後,開始進入monkey測試,在測試中發現7.0以上的機器,隻要在webView界面長按内容彈出複制粘貼對話框,就會崩潰從日志裡面可以看出來是找不到webView的資源導緻的,如果我try住這個崩潰,原資源位置顯示的字元串就會變成類似@1232432這種id标簽。
google搜尋了半天,發現相關資料甚少,看來是需要從源碼層面了解webView資源加載的相關邏輯才行。
看源碼,總是需要帶着問題去看,目标才夠清晰。
問題:為什麼6.0的系統可以使用這套方案而且不會有webView的問題而7.0以上的系統卻會崩潰,6.0和7.0以上的資源管理有什麼具體的差別。
想要得到答案 ,就得閱讀6.0和7.0以上的Resource源碼,先從6.0的源碼看起。
1、6.0資源管理源碼解析
Context初始化
private ContextImpl(ContextImpl container, ActivityThread mainThread,
           LoadedApk packageInfo, IBinder activityToken, UserHandle user, boolean restricted,
           Display display, Configuration overrideConfiguration, int createDisplayWithId) {
       mOuterContext = this;
       mMainThread = mainThread;
       mActivityToken = activityToken;
       mRestricted = restricted;
       。。。。。。。。。。
       Resources resources = packageInfo.getResources(mainThread);
       if (resources != null) {
           if (displayId != Display.DEFAULT_DISPLAY
                   || overrideConfiguration != null
                   || (compatInfo != null && compatInfo.applicationScale
                           != resources.getCompatibilityInfo().applicationScale)) {
               resources = mResourcesManager.getTopLevelResources(packageInfo.getResDir(),
                       packageInfo.getSplitResDirs(), packageInfo.getOverlayDirs(),
                       packageInfo.getApplicationInfo().sharedLibraryFiles, displayId,
                       overrideConfiguration, compatInfo);
           }
       }
       mResources = resources;
       。。。。。。。。。。。
   }
在Context建立之初,Resource就已經建立完成。
這裡有兩個地方涉及到了Resource建立
- resources =packageInfo.getResources(mainThread);
- resources =mResourcesManager.getTopLevelResources(packageInfo.getResDir(),
先從packageInfo.getResources(mainThread); 說起packageInfo 其實就是LoadedApk
packageInfo 的 getResources 方法
public Resources getResources(ActivityThread mainThread) {
if (mResources == null) {
mResources = mainThread.getTopLevelResources(mResDir, mSplitResDirs, mOverlayDirs,
mApplicationInfo.sharedLibraryFiles, Display.DEFAULT_DISPLAY, null, this);
}
return mResources;
}
再看ActivityThread
ActivityThread 的 getTopLevelResources 方法
Resources getTopLevelResources(String resDir, String[] splitResDirs, String[] overlayDirs,
String[] libDirs, int displayId, Configuration overrideConfiguration,
LoadedApk pkgInfo) {
return mResourcesManager.getTopLevelResources(resDir, splitResDirs, overlayDirs, libDirs,
displayId, overrideConfiguration, pkgInfo.getCompatibilityInfo());
其實調用的都是mResourcesManager.getTopLevelResources
Android M 的ResourcesManager寫的比較簡單
其内部有一個Resource緩存
getTopLevelResource 方法會使用傳入的參數 組裝一個key
ResourcesKey key = new ResourcesKey(resDir, displayId, overrideConfigCopy, scale);
使用這個key去緩存裡面找,找到了就拿出來用。
WeakReference wr = mActiveResources.get(key);
找不到就新建立一個assets 來生成一個Resource執行個體
AssetManager assets = new AssetManager();
if (resDir != null) {
if (assets.addAssetPath(resDir) == 0) {
return null;
}
}
if (splitResDirs != null) {
for (String splitResDir : splitResDirs) {
if (assets.addAssetPath(splitResDir) == 0) {
return null;
}
}
}
if (overlayDirs != null) {
for (String idmapPath : overlayDirs) {
assets.addOverlayPath(idmapPath);
}
}
if (libDirs != null) {
for (String libDir : libDirs) {
if (libDir.endsWith(".apk")) {
// Avoid opening files we know do not have resources,
// like code-only .jar files.
if (assets.addAssetPath(libDir) == 0) {
Log.w(TAG, "Asset path '" + libDir +
"' does not exist or contains no resources.");
}
}
}
}
緩存的另一個作用就是configuration變化的時候 可以從緩存裡面找到所有目前正在激活狀态的Resource。
并且調用這些Resource的public void updateConfiguration(Configuration config,DisplayMetrics metrics, CompatibilityInfo compat) {方法,最終生效的是對Resource中的mAssets的configuration
再來看一下Resource.java
其核心包含兩個部分
1:封裝Assets,講所有資源調用最終都是調用到mAssets的方法
public CharSequence getText(@StringRes int id) throws NotFoundException {
CharSequence res = mAssets.getResourceText(id);
if (res != null) {
return res;
}
throw new NotFoundException("String resource ID #0x" + Integer.toHexString(id));
}
2:提供緩存
private static final LongSparseArray<ConstantState>[] sPreloadedDrawables;
private static final LongSparseArray<ConstantState> sPreloadedColorDrawables = new LongSparseArray<>();
private static final LongSparseArray<android.content.res.ConstantState<ColorStateList>> sPreloadedColorStateLists = new LongSparseArray<>();
private final DrawableCache mDrawableCache = new DrawableCache(this);
private final DrawableCache mColorDrawableCache = new DrawableCache(this);
private final ConfigurationBoundResourceCache<ColorStateList> mColorStateListCache = new ConfigurationBoundResourceCache<>(this);
private final ConfigurationBoundResourceCache<Animator> mAnimatorCache = new ConfigurationBoundResourceCache<>(this);
private final ConfigurationBoundResourceCache<StateListAnimator> mStateListAnimatorCache = new ConfigurationBoundResourceCache<>(this);
将從mAsserts中取出的大資源進行緩存,避免讀取耗時和記憶體占用
看完6.0的源碼我們再找一份9.0的代碼來看下,9.0的資源管理基本上與7.0一脈相承,是以我們直接使用了9.0的源碼來進行分析。
相比于Android6.0 ,9.0源碼中Resources中不在維護AssertManager 而是将AssertManager與其他的一些緩存 封裝成了一個ResourcesImpl。
public class Resources {

    static final String TAG = "Resources";

    static Resources mSystem = null;

    private ResourcesImpl mResourcesImpl;

    private TypedValue mTmpValue = new TypedValue();

    final ClassLoader mClassLoader;
public class ResourcesImpl {

    private static final LongSparseArray<Drawable.ConstantState>[] sPreloadedDrawables;
    private static final LongSparseArray<Drawable.ConstantState> sPreloadedColorDrawables = new LongSparseArray<>();
    private static final LongSparseArray<android.content.res.ConstantState<ComplexColor>> sPreloadedComplexColors = new LongSparseArray<>();


    // These are protected by mAccessLock.
    private final Configuration mTmpConfig = new Configuration();
    private final DrawableCache mDrawableCache = new DrawableCache();
    private final DrawableCache mColorDrawableCache = new DrawableCache();
    private final ConfigurationBoundResourceCache<ComplexColor> mComplexColorCache = new ConfigurationBoundResourceCache<>();
    private final ConfigurationBoundResourceCache<Animator> mAnimatorCache = new ConfigurationBoundResourceCache<>();
    private final ConfigurationBoundResourceCache<StateListAnimator> mStateListAnimatorCache = new ConfigurationBoundResourceCache<>();


    final AssetManager mAssets;
    private final DisplayMetrics mMetrics = new DisplayMetrics();
    private final DisplayAdjustments mDisplayAdjustments;
    private PluralRules mPluralRule;

    private final Configuration mConfiguration = new Configuration();
}
ResourcesImpl 承擔着老版本裡面Resources的職責, 包裝AssertManager 和 維護資料緩存。
而Resources的代碼也變的更加簡單,其方法調用最終都是交給了ResourcesImpl來實作。
不變的是Resources的管理還是要交給ResourcesManager來管理的,跟Android6.0一樣ResourcesManager是一個單例模式。
那麼9.0的ResourcesManager與6.0的ResourcesManager有和不同?
還是從應用啟動開始看起,還是熟悉的ContextImpl。
2、9.0資源管理源碼解析
static ContextImpl createAppContext(ActivityThread mainThread, LoadedApk packageInfo) {
    if (packageInfo == null) throw new IllegalArgumentException("packageInfo");
    ContextImpl context = new ContextImpl(null, mainThread, packageInfo, null, null, null, 0, null);
    context.setResources(packageInfo.getResources());
    return context;
}
static ContextImpl createActivityContext(ActivityThread mainThread, LoadedApk packageInfo, ActivityInfo activityInfo, IBinder activityToken, int displayId, Configuration overrideConfiguration) {
     。。。。。。。。
     ContextImpl context = new ContextImpl(null, mainThread, packageInfo, activityInfo.splitName, activityToken, null, 0, classLoader);

     final ResourcesManager resourcesManager = ResourcesManager.getInstance();
     context.setResources(resourcesManager.createBaseActivityResources(activityToken, packageInfo.getResDir(), splitDirs, packageInfo.getOverlayDirs(), packageInfo.getApplicationInfo().sharedLibraryFiles, displayId, overrideConfiguration, compatInfo, classLoader));
     context.mDisplay = resourcesManager.getAdjustedDisplay(displayId, context.getResources());
     return context;
 }
無論是生成Application的Resource還是生成Activity的Resource最終調用的是ResourceManager中的方法差別。在于一個調用的是
ResourcesManager.getInstance().getResources ,另一個調用的是resourcesManager.createBaseActivityResources。
OK 我們看一下ResourcesManager的源碼。
先看下它提供的各種屬性,我們挑重要的放上來。
/**
     * ResourceImpls及其配置的映射。這些都是占用較大記憶體的資料
     * 應該盡可能重用。所有的由ResourcesManager生成的ResourcesImpl都會被緩存在這個map中
     */
    private final ArrayMap<ResourcesKey, WeakReference<ResourcesImpl>> mResourceImpls = new ArrayMap<>();

    /**
     *可以重用的資源引用清單。注意一下 這個list裡面存儲的并不是Activity的Resources緩存,按照我的了解,所有非Activcity的Resource都會被緩存在此處,比如Application的Resource
     */
    private final ArrayList<WeakReference<Resources>> mResourceReferences = new ArrayList<>();

    /**
     * 每個Activity都有一個基本覆寫配置,該配置應用于每個Resources對象,而這些對象又可以指定自己的覆寫配置。
        這個緩存裡面儲存的都是Actrivity的Resource的緩存,ActivityResources是一個對象,裡面包含了一個Activity所擁有的Configuration和所有可能擁有過的Resources,比如一個Activity,在某些情況下他的ResourcesImpl發生了變化,那麼這個時候就ActivityResources就可能會持有多個Resource引用
     */
    private final WeakHashMap<IBinder, ActivityResources> mActivityResourceReferences = new WeakHashMap<>();

    /**
     * 緩存的ApkAssets,這個可以先不看
     */
    private final LruCache<ApkKey, ApkAssets> mLoadedApkAssets = new LruCache<>(3);

    /**
     * 這也是ApkAssets的一個緩存 這個也可以先不看
     */
    private final ArrayMap<ApkKey, WeakReference<ApkAssets>> mCachedApkAssets = new ArrayMap<>();


    private static class ApkKey {
        public final String path;
        public final boolean sharedLib;
        public final boolean overlay;
    }

    /**
     * 與Activity關聯的資源和基本配置覆寫。
     */
    private static class ActivityResources {
        public final Configuration overrideConfig = new Configuration();
//按照正常的了解 一個Activity隻有一個Resources 但是這裡卻使用了一個list來存儲,這是考慮如果Activity發生變化,重新生成了Resource,這個清單就會将Activity曆史使用過的Resources都存在裡面,當然,如果沒有人再持有這些Resources,就會被回收
        public final ArrayList<WeakReference<Resources>> activityResources = new ArrayList<>();
    }
了解了這些重要的屬性之後,我們再來看一下ResourceManager提供的諸多方法。
ResourceManager提供了如下以寫public方法供調用。

先看getResources和createBaseActivityResources 最終都是使用一個ResourcesKey去調用getOrCreateResources。
Resources getResources(@Nullable IBinder activityToken, @Nullable String resDir, @Nullable String[] splitResDirs, @Nullable String[] overlayDirs, @Nullable String[] libDirs, int displayId, @Nullable Configuration overrideConfig, @NonNull CompatibilityInfo compatInfo, @Nullable ClassLoader classLoader) {
     try {
         final ResourcesKey key = new ResourcesKey(resDir, splitResDirs, overlayDirs, libDirs, displayId, overrideConfig != null ? new Configuration(overrideConfig) : null,compatInfo);
         classLoader = classLoader != null ? classLoader : ClassLoader.getSystemClassLoader();
         return getOrCreateResources(activityToken, key, classLoader);
     } finally {

     }
 }
Resources createBaseActivityResources(@NonNull IBinder activityToken, @Nullable String resDir, @Nullable String[] splitResDirs, @Nullable String[] overlayDirs, @Nullable String[] libDirs, int displayId, @Nullable Configuration overrideConfig, @NonNull CompatibilityInfo compatInfo, @Nullable ClassLoader classLoader) {
    try {
        final ResourcesKey key = new ResourcesKey(resDir, splitResDirs, overlayDirs, libDirs, displayId, overrideConfig != null ? new Configuration(overrideConfig) : null, compatInfo);
        classLoader = classLoader != null ? classLoader : ClassLoader.getSystemClassLoader();
        synchronized (this) {
            // 強制建立ActivityResources對象并放到緩存裡面
            getOrCreateActivityResourcesStructLocked(activityToken);
        }
        // 更新任何現有的Activity Resources引用。
        updateResourcesForActivity(activityToken, overrideConfig, displayId, false /* movedToDifferentDisplay */);
        // 現在請求一個實際的Resources對象。
        return getOrCreateResources(activityToken, key, classLoader);
    } finally {

    }
}
getOrCreateResources 我在各行代碼處都寫了注釋,大家注意看代碼中的注釋,部分注釋是對代碼中引文注釋的翻譯。
private @Nullable
Resources getOrCreateResources(@Nullable IBinder activityToken, @NonNull ResourcesKey key, @NonNull ClassLoader classLoader) {
    synchronized (this) {
        if (activityToken != null) {
            final ActivityResources activityResources = getOrCreateActivityResourcesStructLocked(activityToken);

            // 清理已經被回收的緩存
            ArrayUtils.unstableRemoveIf(activityResources.activityResources, sEmptyReferencePredicate);

            // Rebase the key's override config on top of the Activity's base override.
            if (key.hasOverrideConfiguration() && !activityResources.overrideConfig.equals(Configuration.EMPTY)) {
                final Configuration temp = new Configuration(activityResources.overrideConfig);
                temp.updateFrom(key.mOverrideConfiguration);
                key.mOverrideConfiguration.setTo(temp);
            }
            //根據對應的key 去擷取一個ResourcesImpl 有可能是新的也有可能是緩存裡面的
            ResourcesImpl resourcesImpl = findResourcesImplForKeyLocked(key);
            if (resourcesImpl != null) {
                //使用ResourcesImpl 去生成一個Resources
                return getOrCreateResourcesForActivityLocked(activityToken, classLoader, resourcesImpl, key.mCompatInfo);
            }

            // We will create the ResourcesImpl object outside of holding this lock.

        } else {
            // 清理 因為mResourceReferences裡面放的都是弱引用,要判斷這些弱引用是否都已經被釋放,如果釋放的話就要從Array裡面移除掉
            ArrayUtils.unstableRemoveIf(mResourceReferences, sEmptyReferencePredicate);

            // 不依賴于Activity,找到具有正确ResourcesImpl的共享資源 這裡就是根據key去mResourceImpls的緩存裡面找
            ResourcesImpl resourcesImpl = findResourcesImplForKeyLocked(key);
            if (resourcesImpl != null) {
                //如果找到resourcesImpl的話就去從mResourceReferences看有沒有可用的resources 如果類加載器和ResourcesImpl相同,則擷取現有的Resources對象,否則會建立一個新的Resources對象。
                return getOrCreateResourcesLocked(classLoader, resourcesImpl, key.mCompatInfo);
            }

            // 我們将在持有此鎖之外建立ResourcesImpl對象。
        }

        // 如果我們走到了這裡,我們找不到合适的ResourcesImpl來使用,是以現在建立一個。
        ResourcesImpl resourcesImpl = createResourcesImpl(key);
        if (resourcesImpl == null) {
            return null;
        }

        // 将此ResourcesImpl添加到緩存中。
        mResourceImpls.put(key, new WeakReference<>(resourcesImpl));

        final Resources resources;
        if (activityToken != null) {
            //從mActivityResourceReferences 裡面去找 看有沒有合适的Resources可用 如果沒有就建構一個Resources兵添加到mActivityResourceReferences裡面
            resources = getOrCreateResourcesForActivityLocked(activityToken, classLoader, resourcesImpl, key.mCompatInfo);
        } else {
            //使用建立出來的ResourcesImpl去比對一個Resource,具體是從緩存mResourceReferences裡面取(如果有的話)還是建立新的由下面的方法決定
            resources = getOrCreateResourcesLocked(classLoader, resourcesImpl, key.mCompatInfo);
        }
        return resources;
    }
}
畫個流程圖看下
看完這個圖基本上大體的邏輯就通我們使用如下的代碼 hook 系統ResourcesManger的幾個緩存 看一下當一個App啟動并且打開一個Activity時,這些緩存裡面都包含了哪些對象。
try {
    System.out.println("Application = " + getApplicationContext().getResources() + "  持有  " + Reflector.with(getApplicationContext().getResources()).method("getImpl").call());
    System.out.println("Activity = " + getResources() + "  持有  " + Reflector.with(getResources()).method("getImpl").call());
    System.out.println("System = " + Resources.getSystem() + "  持有  " + Reflector.with(Resources.getSystem()).method("getImpl").call());

    ResourcesManager resourcesManager = ResourcesManager.getInstance();

    System.out.println("--------------------------------mResourceImpls----------------------------------------------");
    ArrayMap<ResourcesKey, WeakReference<ResourcesImpl>> mResourceImpls = Reflector.with(resourcesManager).field("mResourceImpls").get();
    Iterator<ResourcesKey> resourcesKeyIterator = mResourceImpls.keySet().iterator();
    while (resourcesKeyIterator.hasNext()) {
        ResourcesKey key = resourcesKeyIterator.next();
        WeakReference<ResourcesImpl> value = mResourceImpls.get(key);
        System.out.println("key = " + key);
        System.out.println("value = " + value.get());
    }

    System.out.println("-----------------------------------mResourceReferences-------------------------------------------");
    ArrayList<WeakReference<Resources>> mResourceReferences = Reflector.with(resourcesManager).field("mResourceReferences").get();
    for (WeakReference<Resources> weakReference : mResourceReferences) {
        Resources resources = weakReference.get();
        if (resources != null) {
            System.out.println(resources + "  持有  " + Reflector.with(resources).method("getImpl").call());
        }
    }

    System.out.println("-------------------------------------mActivityResourceReferences-----------------------------------------");
    WeakHashMap<IBinder, Object> mActivityResourceReferences = Reflector.with(resourcesManager).field("mActivityResourceReferences").get();
    Iterator<IBinder> iBinderIterator = mActivityResourceReferences.keySet().iterator();
    while (iBinderIterator.hasNext()) {
        IBinder key = iBinderIterator.next();
        Object value = mActivityResourceReferences.get(key);
        System.out.println("key = " + key);
        System.out.println("value = " + value);
        Object overrideConfig = Reflector.with(value).field("overrideConfig").get();
        System.out.println("overrideConfig = " + overrideConfig);
        Object activityResources = Reflector.with(value).field("activityResources").get();
        try {
            ArrayList<WeakReference<Resources>> list = (ArrayList<WeakReference<Resources>>) activityResources;
            for (WeakReference<Resources> weakReference : list) {
                Resources resources = weakReference.get();
                System.out.println("activityResources = " + resources + "  持有  " + Reflector.with(resources).method("getImpl").call());
            }
        } catch (Reflector.ReflectedException e) {
            e.printStackTrace();
        }
    }
} catch (Exception e) {
    e.printStackTrace();
}
列印出來的結果如下圖:
分析完兩個不同api level的資源管理源碼,我們再來分析一下兩個不同apiLevel在加載完成一個webView元件之後Resource的差別。
先說以下6.0的 。
根據6.0 ResourceManager的代碼 我們先做一個測試:
編寫如下代碼 我們将mActiveResources中儲存的内容列印出來。
3、6.0 web資源注入分析
ResourcesManager resourcesManager = ResourcesManager.getInstance();
//6.0列印
try {
    ArrayMap<Object, WeakReference<Object>> map = Reflector.with(resourcesManager).field("mActiveResources").get();
    for (int i = 0; i < map.size(); i++) {
        Object a = map.keyAt(i);
        Object b = map.valueAt(i).get();
        System.out.println(Reflector.with(a).field("mResDir").get());
        System.out.println(b.toString());
    }
} catch (Exception e) {
    e.printStackTrace();
}
列印輸出
10-12 15:47:02.816 10785-10785/com.xxxx.res_manager_study I/System.out: /data/app/com.xxxx.res_manager_study-1/base.apk
10-12 15:47:02.816 10785-10785/com.xxxx.res_manager_study I/System.out: android.content.res.Resources@f911117
可以看到目前包的Resources已經被加入到mActiveResources中了。
再修改代碼:
在列印之前添加webView初始化 WebView webView = new WebView(context);
列印輸出:
10-12 15:48:48.586 10985-10985/com.xxxx.res_manager_study I/System.out: /data/app/com.google.android.webview-1/base.apk
10-12 15:48:48.586 10985-10985/com.xxxx.res_manager_study I/System.out: android.content.res.Resources@9bc9c4
10-12 15:48:48.586 10985-10985/com.xxxx.res_manager_study I/System.out: /data/app/com.xxxx.res_manager_study-2/base.apk
10-12 15:48:48.586 10985-10985/com.xxxx.res_manager_study I/System.out: android.content.res.Resources@b66d0ad
可以看到添加了webView初始化代碼之後 mActiveResources中增加了一個Resources執行個體,該執行個體指向webView元件安裝路徑。
WebView就是從這個Resources取到了自己所需要的資源。這也是7.0以下版本中替換Activity和Application的Resources不會出現Web元件崩潰的原因,因為在這個level的系統中,web元件資源與主apk資源是分離的。
OK 分析完6.0的再看9.0的。
9.0的ResourceManager相對複雜,我們也是使用反射的方法将兩種情況下的ResourceManager資料列印出來。
編寫列印代碼。
4、9.0 web資源注入分析
System.out.println(" 列印 mResourceImpls 中緩存的 ResourceImpl");
ResourcesManager resourcesManager = ResourcesManager.getInstance();
// 9.0源碼
try {
    ArrayMap map = Reflector.with(resourcesManager).field("mResourceImpls").get();
    for (int i = 0; i < map.size(); i++) {
        Object key = map.keyAt(i);
        WeakReference value = (WeakReference) map.get(key);
        System.out.println(value.get() + "  " + key);
    }
} catch (Reflector.ReflectedException e) {
    e.printStackTrace();
}
System.out.println(" 列印 mActivityResourceReferences 中緩存的 Activity Resources");
try {
    WeakHashMap<Object, Object> map = Reflector.with(resourcesManager).field("mActivityResourceReferences").get();
    for (Map.Entry<Object, Object> entry : map.entrySet()) {
        Object activityResources = entry.getValue();
        ArrayList<WeakReference<Resources>> list = Reflector.with(activityResources).field("activityResources").get();
        for (WeakReference<Resources> weakReference : list) {
            Resources resources = weakReference.get();
            Object resourcesImpl = Reflector.with(resources).field("mResourcesImpl").get();
            System.out.println(resourcesImpl);
        }
    }
} catch (Exception e) {
    e.printStackTrace();
}
列印輸出在這份列印代碼中 我們輸出了mResourceImpls和mActivityResourceReferences中的資料 不了解這兩個緩存作用的可以去看之前的文章。
I/System.out:  列印 mResourceImpls 中緩存的 ResourceImpl
I/System.out: android.content.res.ResourcesImpl@c0c1962  ResourcesKey{ mHash=8a5fac6a mResDir=null mSplitDirs=[] mOverlayDirs=[] mLibDirs=[] mDisplayId=0 mOverrideConfig=v28 mCompatInfo={480dpi always-compat}}
I/System.out: android.content.res.ResourcesImpl@4aedaf3  ResourcesKey{ mHash=bafccb1 mResDir=/data/app/com.xxxx.res_manager_study-_k1QRBE8jUyrPTVnJDIbsA==/base.apk mSplitDirs=[] mOverlayDirs=[] mLibDirs=[/system/framework/org.apache.http.legacy.boot.jar] mDisplayId=0 mOverrideConfig=v28 mCompatInfo={480dpi always-compat}}
I/System.out: android.content.res.ResourcesImpl@1b73b0  ResourcesKey{ mHash=30333beb mResDir=/data/app/com.xxxx.res_manager_study-_k1QRBE8jUyrPTVnJDIbsA==/base.apk mSplitDirs=[] mOverlayDirs=[] mLibDirs=[/system/framework/org.apache.http.legacy.boot.jar] mDisplayId=0 mOverrideConfig=en-rUS-ldltr-sw360dp-w360dp-h752dp-normal-long-notround-lowdr-nowidecg-port-notnight-xxhdpi-finger-keysexposed-nokeys-navhidden-nonav-v28 mCompatInfo={480dpi always-compat}}
I/System.out:  列印 mActivityResourceReferences 中緩存的 Activity Resources
I/System.out: android.content.res.ResourcesImpl@1b73b0
根據 mActivityResourceReferences中AcitvityResource 我們找到對應的ResourcesImpl并且根據ResourceKey得知了ResourcesImpl中的内容。
mResDir=/data/app/com.xxxx.res_manager_study-_k1QRBE8jUyrPTVnJDIbsA==/base.apk
mSplitDirs=[]
mOverlayDirs=[]
mLibDirs=[/system/framework/org.apache.http.legacy.boot.jar]
mDisplayId=0
mOverrideConfig=en-rUS-ldltr-sw360dp-w360dp-h752dp-normal-long-notround-lowdr-nowidecg-port-notnight-xxhdpi-finger-keysexposed-nokeys-navhidden-nonav-v28 mCompatInfo={480dpi always-compat}}
列印輸出下面我們在列印代碼之前添加初始化webView的源碼 WebView webView = new WebView(context);
I/System.out:  列印 mResourceImpls 中緩存的 ResourceImpl
I/System.out: android.content.res.ResourcesImpl@cbc1adc  ResourcesKey{ mHash=8a5fac6a mResDir=null mSplitDirs=[] mOverlayDirs=[] mLibDirs=[] mDisplayId=0 mOverrideConfig=v28 mCompatInfo={480dpi always-compat}}
I/System.out: android.content.res.ResourcesImpl@aa8a10  ResourcesKey{ mHash=25ddf2aa mResDir=/data/app/com.xxxx.res_manager_study-sVY46cDW2JT2hEkohn2GJw==/base.apk mSplitDirs=[] mOverlayDirs=[] mLibDirs=[/system/framework/org.apache.http.legacy.boot.jar,/data/app/com.android.chrome-dO2jAeCdfgkLjVHzK2yx0Q==/base.apk] mDisplayId=0 mOverrideConfig=v28 mCompatInfo={480dpi always-compat}}
I/System.out: android.content.res.ResourcesImpl@e6ea7e5  ResourcesKey{ mHash=4114b0be mResDir=/data/app/com.android.chrome-dO2jAeCdfgkLjVHzK2yx0Q==/base.apk mSplitDirs=[/data/app/com.android.chrome-dO2jAeCdfgkLjVHzK2yx0Q==/split_autofill_assistant.apk,/data/app/com.android.chrome-dO2jAeCdfgkLjVHzK2yx0Q==/split_autofill_assistant.config.en.apk,/data/app/com.android.chrome-dO2jAeCdfgkLjVHzK2yx0Q==/split_autofill_assistant.config.in.apk,/data/app/com.android.chrome-dO2jAeCdfgkLjVHzK2yx0Q==/split_autofill_assistant.config.ms.apk,/data/app/com.android.chrome-dO2jAeCdfgkLjVHzK2yx0Q==/split_autofill_assistant.config.zh.apk,/data/app/com.android.chrome-dO2jAeCdfgkLjVHzK2yx0Q==/split_config.en.apk,/data/app/com.android.chrome-dO2jAeCdfgkLjVHzK2yx0Q==/split_config.in.apk,/data/app/com.android.chrome-dO2jAeCdfgkLjVHzK2yx0Q==/split_config.ms.apk,/data/app/com.android.chrome-dO2jAeCdfgkLjVHzK2yx0Q==/split_config.zh.apk] mOverlayDirs=[] mLibDirs=[] mDisplayId=0 mOverrideConfig=v28 mCompatInfo={480dpi always-compat}}
I/System.out: android.content.res.ResourcesImpl@70dd909  ResourcesKey{ mHash=4a6161e4 mResDir=/data/app/com.xxxx.res_manager_study-sVY46cDW2JT2hEkohn2GJw==/base.apk mSplitDirs=[] mOverlayDirs=[] mLibDirs=[/system/framework/org.apache.http.legacy.boot.jar,/data/app/com.android.chrome-dO2jAeCdfgkLjVHzK2yx0Q==/base.apk] mDisplayId=0 mOverrideConfig=en-rUS-ldltr-sw360dp-w360dp-h752dp-normal-long-notround-lowdr-nowidecg-port-notnight-xxhdpi-finger-keysexposed-nokeys-navhidden-nonav-v28 mCompatInfo={480dpi always-compat}}
I/System.out: android.content.res.ResourcesImpl@81669ae  ResourcesKey{ mHash=578cb784 mResDir=/data/app/com.xxxx.res_manager_study-sVY46cDW2JT2hEkohn2GJw==/base.apk mSplitDirs=[] mOverlayDirs=[] mLibDirs=[/system/framework/org.apache.http.legacy.boot.jar] mDisplayId=0 mOverrideConfig=v28 mCompatInfo={480dpi always-compat}}
I/System.out: android.content.res.ResourcesImpl@52334f  ResourcesKey{ mHash=7c1026be mResDir=/data/app/com.xxxx.res_manager_study-sVY46cDW2JT2hEkohn2GJw==/base.apk mSplitDirs=[] mOverlayDirs=[] mLibDirs=[/system/framework/org.apache.http.legacy.boot.jar] mDisplayId=0 mOverrideConfig=en-rUS-ldltr-sw360dp-w360dp-h752dp-normal-long-notround-lowdr-nowidecg-port-notnight-xxhdpi-finger-keysexposed-nokeys-navhidden-nonav-v28 mCompatInfo={480dpi always-compat}}
I/System.out:  列印 mActivityResourceReferences 中緩存的 Activity Resources
I/System.out: android.content.res.ResourcesImpl@70dd909
同樣 根據 mActivityResourceReferences中AcitvityResource 我們找到對應的ResourcesImpl并且根據ResourceKey得知了ResourcesImpl中的内容。
對比沒有添加webview 執行個體化之前的代碼 我們發現mLibDirs中新增了/data/app/com.android.chrome-dO2jAeCdfgkLjVHzK2yx0Q==/base.apk
結論:9.0源碼中 android将Web元件資源作為libDir添加至Assert中,用于資源查找,沒有使用Resource分離的方式。
了解了這個原因之後 我們進一步尋找libDir添加web元件資源的地方。
webView在初始化階段 會調用WebViewDelegate的addWebViewAssetPath方法。
public void addWebViewAssetPath(Context context) {
    final String newAssetPath = WebViewFactory.getLoadedPackageInfo().applicationInfo.sourceDir;

    final ApplicationInfo appInfo = context.getApplicationInfo();
    final String[] libs = appInfo.sharedLibraryFiles;
    if (!ArrayUtils.contains(libs, newAssetPath)) {
        // Build the new library asset path list.
        final int newLibAssetsCount = 1 + (libs != null ? libs.length : 0);
        final String[] newLibAssets = new String[newLibAssetsCount];
        if (libs != null) {
            System.arraycopy(libs, 0, newLibAssets, 0, libs.length);
        }
        newLibAssets[newLibAssetsCount - 1] = newAssetPath;

        // Update the ApplicationInfo object with the new list.
        // We know this will persist and future Resources created via ResourcesManager
        // will include the shared library because this ApplicationInfo comes from the
        // underlying LoadedApk in ContextImpl, which does not change during the life of the
        // application.
        appInfo.sharedLibraryFiles = newLibAssets;

        // Update existing Resources with the WebView library.
        ResourcesManager.getInstance().appendLibAssetForMainAssetPath(
                appInfo.getBaseResourcePath(), newAssetPath);
    }
}
最終調用的方法是 ResourcesManager.getInstance().appendLibAssetForMainAssetPath(appInfo.getBaseResourcePath(), newAssetPath);
傳入兩個參數 第一個是目前應用的respath 第二個是webView的resPath 具體看如下源碼注釋。
public void appendLibAssetForMainAssetPath(String assetPath, String libAsset) {
    synchronized (this) {
        // Record which ResourcesImpl need updating
        // (and what ResourcesKey they should update to).
        final ArrayMap<ResourcesImpl, ResourcesKey> updatedResourceKeys = new ArrayMap<>();
        final int implCount = mResourceImpls.size();
        //周遊所有的ResourcesImpl ResourcesImpl是組成Rescource的核心 他們之間的關系是Resource包含ResourcesImpl包含AssertManager
        for (int i = 0; i < implCount; i++) {
            final ResourcesKey key = mResourceImpls.keyAt(i);
            final WeakReference<ResourcesImpl> weakImplRef = mResourceImpls.valueAt(i);
            final ResourcesImpl impl = weakImplRef != null ? weakImplRef.get() : null;
            //這裡首先進行判斷的ResourcesImpl是否包含assetPath 也就是說如果一個ResourcesImpl的mResDir不是目前應用的 則不會進行處理
            if (impl != null && Objects.equals(key.mResDir, assetPath)) {
                //還要判斷新的資源路徑是不是已經存在了 如果存在了就不做處理
                if (!ArrayUtils.contains(key.mLibDirs, libAsset)) {
                    final int newLibAssetCount = 1 + (key.mLibDirs != null ? key.mLibDirs.length : 0);
                    final String[] newLibAssets = new String[newLibAssetCount];
                    if (key.mLibDirs != null) {
                        //這裡就将新的路徑添加到需要添加的ResourcesImpl所對應的ResourcesKey的libDir上面了
                        System.arraycopy(key.mLibDirs, 0, newLibAssets, 0, key.mLibDirs.length);
                    }
                    newLibAssets[newLibAssetCount - 1] = libAsset;
                    updatedResourceKeys.put(impl, new ResourcesKey(key.mResDir, key.mSplitResDirs, key.mOverlayDirs, newLibAssets, key.mDisplayId, key.mOverrideConfiguration, key.mCompatInfo));
                }
            }
        }
        redirectResourcesToNewImplLocked(updatedResourceKeys);
    }
}
//這個方法是更新目前持有ResourcesImpl的Resource
 private void redirectResourcesToNewImplLocked(@NonNull final ArrayMap<ResourcesImpl, ResourcesKey> updatedResourceKeys) {
     // Bail early if there is no work to do.
     if (updatedResourceKeys.isEmpty()) {
         return;
     }

     // Update any references to ResourcesImpl that require reloading.
     final int resourcesCount = mResourceReferences.size();
     for (int i = 0; i < resourcesCount; i++) {
         final WeakReference<Resources> ref = mResourceReferences.get(i);
         final Resources r = ref != null ? ref.get() : null;
         if (r != null) {
             //首先是根據老的ResourcesImpl找到新的ResourcesKey
             final ResourcesKey key = updatedResourceKeys.get(r.getImpl());
             if (key != null) {
                 //然後根據新的ResourcesKey生成新的ResourcesImpl
                 final ResourcesImpl impl = findOrCreateResourcesImplForKeyLocked(key);
                 if (impl == null) {
                     throw new Resources.NotFoundException("failed to redirect ResourcesImpl");
                 }
                 //最後在替換掉Resources中的ResourcesImpl
                 r.setImpl(impl);
             }
         }
     }

     // Update any references to ResourcesImpl that require reloading for each Activity.
     //這邊跟上面是一樣的道理 隻不過這裡處理的是所有記錄的Activity的Resource
     for (ActivityResources activityResources : mActivityResourceReferences.values()) {
         final int resCount = activityResources.activityResources.size();
         for (int i = 0; i < resCount; i++) {
             final WeakReference<Resources> ref = activityResources.activityResources.get(i);
             final Resources r = ref != null ? ref.get() : null;
             if (r != null) {
                 final ResourcesKey key = updatedResourceKeys.get(r.getImpl());
                 if (key != null) {
                     final ResourcesImpl impl = findOrCreateResourcesImplForKeyLocked(key);
                     if (impl == null) {
                         throw new Resources.NotFoundException("failed to redirect ResourcesImpl");
                     }
                     r.setImpl(impl);
                 }
             }
         }
     }
 }
當appendLibAssetForMainAssetPath方法被調用時,邏輯順序如下好吧,不喜歡看源碼,還是來個畫個流程圖吧。
WebView就是通過這種方式,在Activity的Resource中加入了WebView的資源。
最終解決方案
這樣其實我們就已經分析出在7.0以上的機器中長按WebView 因為資源缺失導緻崩潰的原因了。
我們在資源替換方案中将Context的Resource替換成了我們的ProxyResources,而ProxyResources其實并沒有被ResourcesManager管理,也就是說webView資源注入的時候 我們的ProxyResources并沒有被更新。
了解了全部原理之後 解決方法一目了然。
見如下代碼:
// step 4 将代理的Resources合并到ResourcesManager中統一管控 因為我們的ProxyResourcess的ResPath是應用的path,是以webView資源注入的時候就會同步到這個Res裡面
if (Build.VERSION.SDK_INT >= Build.VERSION_CODES.N) {
    synchronized (ResourcesManager.getInstance()) {
        //不用擔心在list中不斷的添加會造成數量暴增,因為添加的是弱引用,如果頁面被關閉,會自動回收
        ArrayList<WeakReference<Resources>> list = Reflector.with(ResourcesManager.getInstance()).field("mResourceReferences").get();
        list.add(new WeakReference<Resources>(textRepairProxyResourcess));
    }
}
至此,webView崩潰問題解決。
六、問題回顧
問題一:
為什麼要在attachBaseContext中進行反射替換Resource?
回答:
不管替換的是Application還是Activity的mResources 一定是在attachBaseContext裡面對baseContext進行Hook,直接将Activity或者Application本身進行hook是不成功的 因為Activity或者Application本身并不是Context,他隻是一個ContextWapper。而ContextWapper中真正的Context其實就是在attachBaseContext時指派的。
問題二:
既然已經替換了Activity和Application的Resource,為什麼還要使用factory處理layout初始化,難道layout初始化不是使用Activity中的Resource嗎?
我們對Activity或者Application的mResources進行了替換,但是如果不實作流程5中的ActivtyLifecycleCallbacks,那麼XML中編寫的text無法實作替換,原因在于View使用TypedArray在進行指派的時候,并不是直接使用mResources,而是直接使用mResourcesImpl,是以直接hooke了mResources還是沒用,其實mResources的getText方法也是調用mResources中的mResourcesImpl的方法。
問題三:
對于已經使用了換膚模式的app(比如說浏覽器)如何做String線上更新?
隻需要修改原有換膚模式使用的SkinProxyResource,并getText,getString等方法代理到線上更新的TextProxyResources上即可。