Apache Guacamole(鳄梨醬)是一個基于HTML5 Web應用程式,可以随時通過浏覽器連接配接已經配置好的機器,它支援标準協定,例如VNC、RDP和SSH。
部分内容參考于官方文檔:
https://guacamole.apache.org/doc/gug/index.html Apache Guacamole分為服務端和用戶端,均在同一伺服器上部署,本文基于CentOS7進行搭建。Guacamole服務端安裝
1、安裝所需依賴
yum install cairo-devel libjpeg-turbo-devel libjpeg-devel libpng-devel uuid-devel wget gcc gcc-c++ 2、安裝可選依賴(可選)
預設Centos沒有FFmpeg軟體包,我這裡需要借助第三方的yum源
yum install         http://li.nux.ro/download/nux/dextop/el7/x86_64/nux-dextop-release-0-5.el7.nux.noarch.rpm
yum install ffmpeg-devel
yum install libvncserver-devel freerdp1.2-devel libssh2-devel openssl-devel pango-devel libtelnet-devel pulseaudio-libs-devel libvorbis-devel libwebp-devel
3、下載下傳guacamole-server
cd /usr/local/src
wget         https://mirrors.tuna.tsinghua.edu.cn/apache/guacamole/1.0.0/source/guacamole-server-1.0.0.tar.gz
4、編譯guacamole-server
tar xf guacamole-server-1.0.0.tar.gz
cd guacamole-server-1.0.0
./configure --with-init-dir=/etc/init.d
運作完畢後正常會看到如下内容
...... guacamole-server version 1.0.0
Library status:
freerdp ............. yes
 pango ............... yes
 libavcodec .......... yes
 libavutil ........... yes
 libssh2 ............. yes
 libssl .............. yes
 libswscale .......... yes
 libtelnet ........... yes
 libVNCServer ........ yes
 libvorbis ........... yes
 libpulse ............ yes
 libwebp ............. yes
 wsock32 ............. no
Protocol support:
RDP ....... yes
  SSH ....... yes
  Telnet .... yes
  VNC ....... yes
Services / tools:
guacd ...... yes
  guacenc .... yes
  guaclog .... yes
Init scripts: /etc/init.d
Systemd units: no
Type "make" to compile guacamole-server.
繼續進行編譯安裝
make
make install
ldconfig
5、啟動Guacamole服務
/etc/init.d/guacd start 啟動後預設會開啟4822端口
Guacamole用戶端安裝
1、安裝jdk
rpm -ivh         http://mirrors.wlnmp.com/centos/wlnmp-release-centos.noarch.rpm
yum install jdk1.8
官方已經提供了打包好的war包,可以直接下載下傳使用(如果你不嫌麻煩就自己去mvn打包)
2、下載下傳tomcat
可以去tomcat官網下載下傳,也可以直接通過yum來安裝,CentOS7上預設yum安裝的版本是tomcat7。
我這裡提供兩種方式(任選其一),建議使用yum方式安裝,友善!
<li><span style="color: #800000;">yum方式tomcat7</span></li> yum install tomcat
cd /usr/share/tomcat/webapps 下載下傳Guacamole官方打包好的war包
wget https://mirrors.tuna.tsinghua.edu.cn/apache/guacamole/1.0.0/binary/guacamole-1.0.0.war 啟動tomcat
systemctl start tomcat <li><span style="color: #800000;">tomcat8方式</span></li> 随着tomcat版本更新,該下載下傳位址可能随時失效
mkdir /data
wget         https://mirrors.tuna.tsinghua.edu.cn/apache/tomcat/tomcat-8/v8.5.47/bin/apache-tomcat-8.5.47.tar.gz
tar xf apache-tomcat-8.5.47.tar.gz
rm -rf /data/apache-tomcat-8.5.47/webapps/*
cd /data/apache-tomcat-8.5.47/webapps
wget https://mirrors.tuna.tsinghua.edu.cn/apache/guacamole/1.0.0/binary/guacamole-1.0.0.war
mv guacamole-1.0.0.war guacamole.war /data/apache-tomcat-8.5.47/bin/startup.sh 3、配置Guacamole-client
Guacamole預設認證方式由user-mapping.xml配置決定,當然你也可以通過資料庫、LDAP等其他更複雜的方式進行驗證,此處不深入探讨
預設配置目錄在/etc/guacamole,該目錄需要手動建立
mkdir /etc/guacamole 建立guacamole.properties檔案
vi /etc/guacamole/guacamole.properties 内容如下
# Hostname and port of guacamole proxy
guacd-hostname: localhost
guacd-port: 4822
enable-clipboard-integration: true
建立user-mapping.xml檔案
vi /etc/guacamole/user-mapping.xml 内容如下,其中username="admin" password="blog.whsir.com"為浏覽器登陸時的賬号密碼,rdp1是一個内網的windows主機,ssh1是一個内網的centos主機,white-black指ssh終端是黑底白字的,其他賬号密碼端口什麼的你應該看得懂,此處隻是為了快速示範用,過多參數詳細說明暫且不提。
<user-mapping>
<authorize username="admin" password="blog.whsir.com" >
<connection name="rdp1">
<protocol>rdp</protocol>
<param name="hostname">192.168.1.199</param>
<param name="port">3389</param>
<param name="username">user1</param>
<param name="password">12345678</param>
</connection>
<connection name="ssh1">
<protocol>ssh</protocol>
<param name="hostname">192.168.1.106</param>
<param name="port">22</param>
<param name="username">root</param>
<param name="password">blog.whsir.com</param>
<param name="color-scheme">white-black</param>
<param name="enable-sftp">true</param>
</connection> </authorize>
</user-mapping>
4、重新開機tomcat登陸驗證
我這裡是以yum安裝的,重新開機tomcat指令
systemctl restart tomcat 通路
http://192.168.1.139:8080/guacamole/ 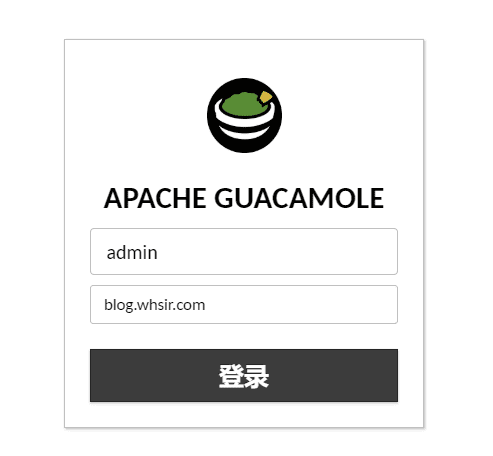
使用者名admin
密碼blog.whsir.com
至此一個基礎的Guacamole配置完成
![【MySQL資料庫】資料庫索引事務1.索引2.事務[圖]](data:image/gif;base64,R0lGODlhAQABAIAAAP///wAAACwAAAAAAQABAAACAkQBADs=)