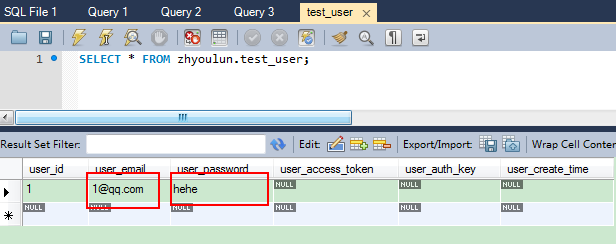
1、首先在mysql建立一個存使用者的表格
create table test_user
(
user_id bigint(20) unsigned not null auto_increment comment 'ID',
user_email varchar(100) not null comment '電子郵件',
user_password varchar(100) not null comment '密碼',
user_access_token varchar(200) comment 'access_token',
user_auth_key varchar(200) comment 'auth_key',
user_create_time datetime comment '建立時間',
primary key(user_id)
);
2、在表中插入一條登陸的賬号

3、建立模型models/MysqlUser.php
<?php

namespace app\models;

use yii\db\ActiveRecord;
use yii\web\IdentityInterface;

class MysqlUser extends ActiveRecord implements IdentityInterface
{
  public static function tableName()
  {
    //相應的表名
    return 'test_user';
  }


  public static function findIdentity($id)
  {
    //自己主動登陸時會調用
    $temp = parent::find()->where(['user_id'=>$id])->one();
    return isset($temp)?new static($temp):null;
  }

  public static function findIdentityByAccessToken($token, $type = null)
  {
    return static::findOne(['user_access_token' => $token]);
  }

  public function getId()
  {
    return $this->user_id;
  }

  public function getAuthKey()
  {
    return $this->user_auth_key;
  }

  public function validateAuthKey($authKey)
  {
    return $this->user_auth_key === $authKey;
  }


  public function validatePassword($password)
  {
    return $this->user_password === $password;
  }
}
4、建立模型models/MloginForm.php
<?php

namespace app\models;

use Yii;
use yii\base\Model;

//加上這一句,引用
use app\models\MysqlUser;

class MloginForm extends Model
{
  public $email;
  public $password;

  private $_user = false;

  public function rules()
  {
    return [
      ['email','email','message'=>'必須是郵件格式'],
      [['email','password'],'required','message'=>'必填'],
      ['password','validatePassword','message'=>'賬号或密碼不對'],
    ];
  }


  //登陸
  public function login()
  {
    if ($this->validate())
      return Yii::$app->user->login($this->getUser(), 3600*24*30);
    else
      return false;
  }


  //推斷賬号密碼是否正确
  public function validatePassword($attribute, $params)
  {
    if (!$this->hasErrors())
    {
      $user = $this->getUser();

      if (!$user)
      {
        $this->addError($attribute, '賬号或密碼不對');
      }

    }
  }

  //依據郵箱和密碼查詢資料庫
  public function getUser()
  {
    if ($this->_user === false)
    {
      $this->_user = MysqlUser::find()->where(['user_email'=>$this->email,'user_password'=>$this->password])->one();
    }
    return $this->_user;
  }

}

?>
5、建立視圖views/account/login.php
<?php
use yii\helpers\Html;
use yii\widgets\ActiveForm;
?>
<?php
echo '<h1>'.$status.'</h1>';
?>
<?php $form = ActiveForm::begin(); ?>
<?php echo $form->field($model, 'email'); ?>
<?php echo $form->field($model, 'password'); ?>
<?php echo Html::submitButton('登陸'); ?>
<?php ActiveForm::end(); ?>
6、建立控制器controllers/AccountController.php
<?php
namespace app\controllers;

use Yii;
use yii\filters\AccessControl;
use yii\web\Controller;
use yii\filters\VerbFilter;


//引用
use app\models\MloginForm;

class AccountController extends Controller
{
  function actionLogin()
  {
    $model = new MloginForm();
    if($model->load(Yii::$app->request->post()))
    {
      if($model->login())
        //登陸成功
        return $this->renderPartial('login',['model'=>$model,'status'=>'成功']);
      else
        //登陸失敗
        return $this->renderPartial('login',['model'=>$model,'status'=>'失敗']);
    }
    else
    {
      return $this->renderPartial('login',['model'=>$model,'status'=>'']);
    }
  }
}
另外,自己主動登陸配置的地方是config/web.php
效果例如以下所看到的
點選登陸button後
若賬号password不對
自己主動登陸還有點問題,等之後解決。