新安裝的MySQL5.7,登入時提示密碼錯誤,安裝的時候并沒有更改密碼,後來通過免密碼登入的方式更改密碼,輸入update mysql.user set password=password('123456') where user='root'時提示ERROR 1054 (42S22): Unknown column 'password' in 'field list',原來是mysql資料庫下已經沒有password這個字段了,password字段改成了
authentication_string
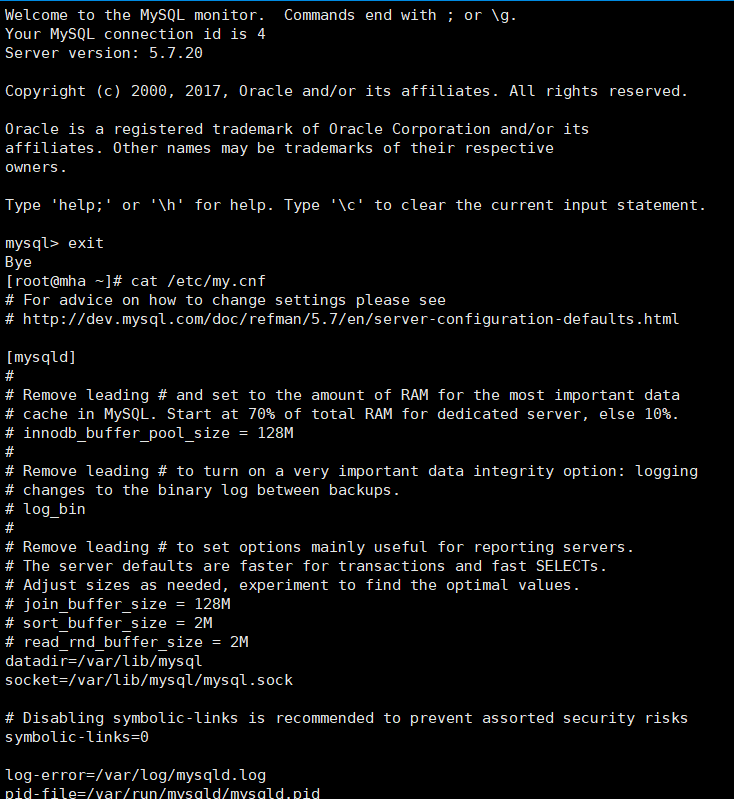
上圖是設定root密碼之後的加上注釋
進去mysql裡設定root密碼
mysql> update mysql.user set authentication_string=password('123456') where user='root' ;
Query OK, 1 row affected, 1 warning (0.09 sec)
Rows matched: 1 Changed: 1 Warnings: 1
mysql> exit
Bye
[root@mha ~]# vi /etc/my.cnf ###進去把skip-grant-tables注釋了
[root@mha ~]# systemctl restart mysqld

ERROR 1820 (HY000): You must reset your password using ALTER USER statement before executing this statement.
mysql> grant all privileges on zabbix.* to 'zabbix'@'localhost' identified by '123456';
ERROR 1819 (HY000): Your password does not satisfy the current policy requirements
有時候,隻是為了自己測試,不想密碼設定得那麼複雜,譬如說,我隻想設定root的密碼為123456。
必須修改兩個全局參數:
首先,修改validate_password_policy參數的值
mysql> set global validate_password_policy=0;
Query OK, 0 rows affected (0.00 sec)
這樣,判斷密碼的标準就基于密碼的長度了。這個由validate_password_length參數來決定。
mysql> select @@validate_password_length;
+----------------------------+
| @@validate_password_length |
| 8 |
1 row in set (0.00 sec)
validate_password_length參數預設為8,它有最小值的限制,最小值為:
validate_password_number_count
validate_password_special_char_count
(2 * validate_password_mixed_case_count)
其中,validate_password_number_count指定了密碼中資料的長度,validate_password_special_char_count指定了密碼中特殊字元的長度,validate_password_mixed_case_count指定了密碼中大小字母的長度。
這些參數,預設值均為1,是以validate_password_length最小值為4,如果你顯性指定validate_password_length的值小于4,盡管不會報錯,但validate_password_length的值将設為4。如下所示:
mysql> set global validate_password_length=1;
| 4 |
如果修改了validate_password_number_count,validate_password_special_char_count,validate_password_mixed_case_count中任何一個值,則validate_password_length将進行動态修改。
mysql> select @@validate_password_mixed_case_count;
+--------------------------------------+
| @@validate_password_mixed_case_count |
| 1 |
mysql> set global validate_password_mixed_case_count=2;
| 2 |
| 6 |
<a href="https://repo.mysql.com//mysql57-community-release-el7-11.noarch.rpm">https://repo.mysql.com//mysql57-community-release-el7-11.noarch.rpm</a>
初始化mysql時候改的密碼
5、允許Zabbix web console 對特定IP段可用 (可選)
編輯檔案 /etc/httpd/conf.d/zabbix.conf,
vi /etc/httpd/conf.d/zabbix.conf
添加允許通路 zabbix web interface的ip段. 如果設定 ‘Allow from All’, 這可以允許全部可以通路
#
Alias /zabbix /usr/share/zabbix
<Directory"/usr/share/zabbix">
Options FollowSymLinks
AllowOverride None
Require all granted
<IfModulemod_php5.c>
php_value max_execution_time 300
php_value memory_limit 128M
php_value post_max_size 16M
php_value upload_max_filesize 2M
php_value max_input_time 300
php_value date.timezone Asia/Shanghai
</IfModule>
</Directory>
<Directory"/usr/share/zabbix/conf">
Require all denied
<Directory"/usr/share/zabbix/include">
啟動zabbix-server 和zabbix-agent。重新開機httpd,,并設定zabbix-server和zabbix-agent開機自動啟動
systemctl start zabbix-server
systemctl start zabbix-agent
systemctl restart httpd
systemctl restart mariadb
systemctl enable zabbix-server
systemctl enable zabbix-agent ---- (可選)
6、安裝并部署zabbix
準備:
安裝:
yum install zabbix-server-mysql zabbix-web-mysql zabbix-agent zabbix-java-gateway
部署:
(1)編輯 file /etc/httpd/conf.d/zabbix:
更新時區:
重新開機httpd
(2)建立MySQL 資料庫和使用者
登入MariaDB:
mysql –u root –p
建立一個資料庫‘zabbixdb’和資料庫使用者‘zabbix’
MariaDB [(none)]> create database zabbix character set utf8;
MariaDB [(none)]> grant all privileges on zabbix.* to 'zabbix'@'localhost' identified by '123456';
MariaDB [(none)]> flush privileges;
(3)資料庫導入zabbix template
使用資料庫使用者zabbix登入資料庫
mysql –uzabbix –p
切換到zabbix資料庫
use zabbix
導入模闆資料
MariaDB [zabbix]> source /usr/share/doc/zabbix-server-mysql-2.4.8/create/schema.sql
MariaDB [zabbix]> source /usr/share/doc/zabbix-server-mysql-2.4.8/create/images.sql
MariaDB [zabbix]> source /usr/share/doc/zabbix-server-mysql-2.4.8/create/data.sql
(4)配置Zabbix server
編輯檔案/etc/zabbix/zabbix_server.conf,
vi /etc/zabbix/zabbix_server.conf
配置下面的三個參數
[...]
DBName=zabbix
DBUser=zabbix
DBPassword=123456
(5)配置zabbix-agent
vi /etc/zabbix/zabbix_agentd.conf
配置zabbix server 的ip
Server=127.0.0.1
ServerActive=127.0.0.1
Hostname=127.0.0.1
(6)修改PHP 設定
修改php.ini為zabbix 建議的設定
編輯檔案 php.ini,
vi /etc/php.ini
設定下面的參數.
max_execution_time = 600
max_input_time = 600
memory_limit = 256
Mpost_max_size = 32M
upload_max_filesize = 16M
date.timezone = Asia/Shanghai
(7)web頁面安裝zabbix
前期工作做好了,就都OK
web頁面預設登陸密碼和使用者名,Admin/zabbix
zabbix監控mysql
zabbix用戶端的mysql配置要把client配置好:
[client]
#socket=/app/mysql/lib/mysql.sock
socket=/var/lib/mysql/mysql.sock
user=root
host=localhost
password=123456
mysql的zabbix用戶端正确自定義key (如果按照百度出來的key:mysql.version mysql.status mysql.ping的這樣配置是錯誤導緻無法啟動zabbix-agent服務,可能是版本的原因吧),下面是正确配置:
UnsafeUserParameters=1
UserParameter=version,mysql -V
UserParameter=status[],/etc/zabbix/scripts/check_mysql.sh $1
UserParameter=ping[],mysqladmin -u zabbix -p123456 ping | grep -c alive
zabbix用戶端的mysql腳本:
[root@mariadb02 zabbix]# cat scripts/check_mysql.sh
#!/bin/bash
source /etc/profile
#MYSQL_USER='zabbix'
#MYSQL_PWD='123456'
#MYSQL_HOST='127.0.0.1'
#MYSQL_PORT='3306'
#mysqladmin=<code>/usr/bin/mysqladmin -u${MYSQL_USER} -p${MYSQL_PWD} -h${MYSQL_HOST} -P${MYSQL_PORT}</code>
mysqladmin=<code>which mysqladmin</code>
case $1 in
Uptime)
result=<code>${mysqladmin} status|cut -f2 -d":"|cut -f1 -d"T"</code>
echo $result
;;
Com_update)
result=<code>${mysqladmin} extended-status |grep -w "Com_update"|cut -d"|" -f3</code>
Slow_queries)
result=<code>${mysqladmin} status |cut -f5 -d":"|cut -f1 -d"O"</code>
Com_select)
result=<code>${mysqladmin} extended-status |grep -w "Com_select"|cut -d"|" -f3</code>
Com_rollback)
result=<code>${mysqladmin} extended-status |grep -w "Com_rollback"|cut -d"|" -f3</code>
Questions)
result=<code>${mysqladmin} status|cut -f4 -d":"|cut -f1 -d"S"</code>
Com_insert)
result=<code>${mysqladmin} extended-status |grep -w "Com_insert"|cut -d"|" -f3</code>
Com_delete)
result=<code>${mysqladmin} extended-status |grep -w "Com_delete"|cut -d"|" -f3</code>
Com_commit)
result=<code>${mysqladmin} extended-status |grep -w "Com_commit"|cut -d"|" -f3</code>
Bytes_sent)
result=<code>${mysqladmin} extended-status |grep -w "Bytes_sent" |cut -d"|" -f3</code>
Bytes_received)
result=<code>${mysqladmin} extended-status |grep -w "Bytes_received" |cut -d"|" -f3</code>
Com_begin)
result=<code>${mysqladmin} extended-status |grep -w "Com_begin"|cut -d"|" -f3</code>
;;
esac
zabbix服務端的log日志
本文轉自wsw26 51CTO部落格,原文連結:http://blog.51cto.com/wsw26/2063654,如需轉載請自行聯系原作者