????開始做一個安卓小遊戲,沒有想到要去熱更新它,結果做完才想到,有bug怎麼辦.....
于是就有了下面的踩坑之旅。
Unity 2020.3.20f1c1
Android Studio 4.1.3
建立一個Empty Activity項目
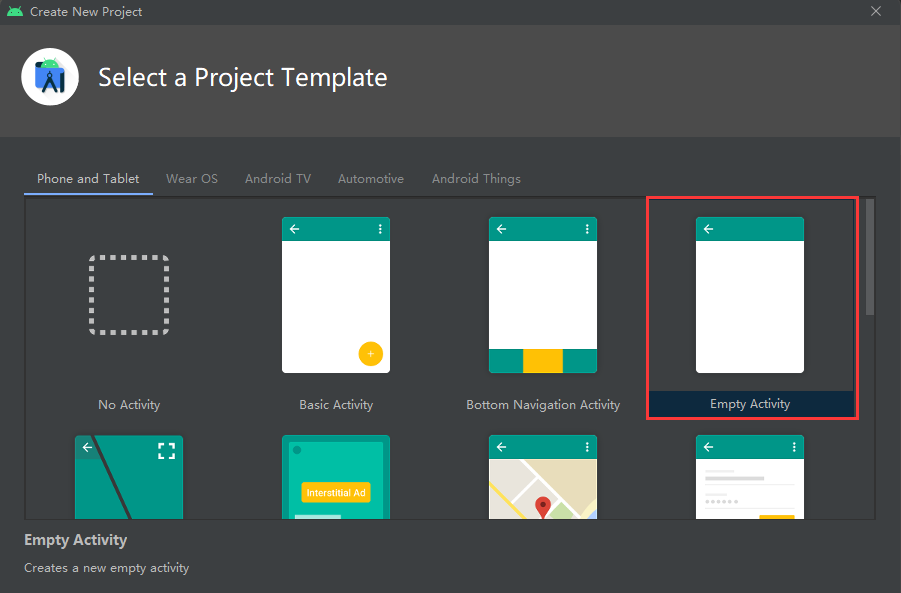

點選完成後,删除紅框内容無用内容
變更後的AndroidManifest.xml檔案
<code><?xml version="1.0" encoding="utf-8"?> <manifest xmlns:android="http://schemas.android.com/apk/res/android" package="cn.linyisonger.callme"> <application > <activity android:name=".MainActivity"> <intent-filter> <action android:name="android.intent.action.MAIN" /> </intent-filter> </activity> </application> </manifest></code>
添加一個測試的靜态方法
修改繼承自Activity
修改建構檔案
建構arr包
建立一個Unity工程
Build Settings... Ctrl+Shift+B
切換至Android平台
将生成好的arr包放入<code>Plugins\Android</code>目錄下
建立腳本調用它
建立Test腳本檔案
<code>using UnityEngine; using UnityEngine.UI; public class Test : MonoBehaviour { public Text showResult; private void Start() { var jo = new AndroidJavaObject("cn.linyisonger.android.MainActivity"); int sum = jo.CallStatic<int>("add", 1, 3); showResult.text = sum.ToString(); } }</code>
建立一個Text随便改改樣式、将腳本挂在Canvas上(????當然挂在那裡都是可以的,我就随便挂一下)、将Text元件拖至腳本的showResult字段上。
打包測試
添加場景、選擇運作裝置、建構并運作
效果
示意圖 ????有點糙
将<code>classes.jar</code>包引入項目中來<code>D:\Unity\2020.3.20f1c1\Editor\Data\PlaybackEngines\AndroidPlayer\Variations\mono\Release\Classes</code>
右鍵添加類庫
将classes.jar設定為僅編譯時建構,打包時不包含此檔案(Unity打包會帶上)
<code>implementation files('libs\\classes.jar') // 目前 compileOnly fileTree(dir: "libs",includes: ["*.jar"]) // 修改</code>
添加安裝方法
MainActivity.java
<code>package cn.linyisonger.callme; import androidx.core.content.FileProvider; import android.app.Activity; import android.content.Intent; import android.net.Uri; import android.os.Build; import android.os.Bundle; import com.unity3d.player.UnityPlayer; import java.io.File; public class MainActivity extends Activity { @Override protected void onCreate(Bundle savedInstanceState) { super.onCreate(savedInstanceState); } public static int add(int a, int b) { return a + b; } public static void install(String apkFullPath){ Intent intent = new Intent(Intent.ACTION_VIEW); File file = new File(apkFullPath); if (Build.VERSION.SDK_INT >= 24) { Uri apkUri = FileProvider.getUriForFile(UnityPlayer.currentActivity.getApplicationContext(), UnityPlayer.currentActivity.getPackageName() +".fileprovider", file); intent.addFlags(Intent.FLAG_GRANT_READ_URI_PERMISSION); intent.setDataAndType(apkUri, "application/vnd.android.package-archive"); } else { intent.setFlags(Intent.FLAG_ACTIVITY_NEW_TASK); Uri uri = Uri.fromFile(file); intent.setDataAndType(uri, "application/vnd.android.package-archive"); } UnityPlayer.currentActivity.startActivity(intent); } }</code>
建構arr包放置在Unity工程中
設定包名
添加filepaths.xml檔案,放在Android/res/xml下
<code><?xml version="1.0" encoding="utf-8"?> <paths xmlns:android="http://schemas.android.com/apk/res/android"> <external-path name="download" path="Android/data/cn.LinYisonger.CallAndroid/files/"/> </paths></code>
添加AndroidManifest.xml檔案,放在Android下
<code><?xml version="1.0" encoding="utf-8"?> <!-- GENERATED BY UNITY. REMOVE THIS COMMENT TO PREVENT OVERWRITING WHEN EXPORTING AGAIN--> <manifest xmlns:android="http://schemas.android.com/apk/res/android" package="com.unity3d.player" xmlns:tools="http://schemas.android.com/tools"> <uses-permission android:name="android.permission.INTERNET"></uses-permission> <uses-permission android:name="android.permission.WRITE_EXTERNAL_STORAGE"/> <uses-permission android:name="android.permission.ACCESS_FINE_LOCATION"/> <uses-permission android:name="android.permission.ACCESS_COARSE_LOCATION"/> <uses-permission android:name="android.permission.CALL_PHONE"/> <uses-permission android:name="android.permission.REQUEST_INSTALL_PACKAGES"/> <application> <provider android:name="androidx.core.content.FileProvider" android:authorities="cn.LinYisonger.CallAndroid.fileprovider" android:grantUriPermissions="true" android:exported="false" android:usesCleartextTraffic="true"> <meta-data android:name="android.support.FILE_PROVIDER_PATHS" android:resource="@xml/filepaths" /> </provider> <activity android:name="com.unity3d.player.UnityPlayerActivity" android:theme="@style/UnityThemeSelector"> <intent-filter> <action android:name="android.intent.action.MAIN" /> <category android:name="android.intent.category.LAUNCHER" /> </intent-filter> <meta-data android:name="unityplayer.UnityActivity" android:value="true" /> </activity> </application> </manifest></code>
添加更新腳本
<code>using System; using System.Collections; using System.IO; using UnityEngine; using UnityEngine.Networking; using UnityEngine.UI; public class Test1 : MonoBehaviour { /// <summary> /// 版本模型 /// </summary> public class VersionModel { /// <summary> /// Id /// </summary> public long id; /// <summary> /// 程式Key值 /// </summary> public string key; /// <summary> /// 編号 /// </summary> public string no; /// <summary> /// 描述 /// </summary> public string desc; /// <summary> /// 安卓包路徑 /// </summary> public string apkUrl; } public delegate void LoadingAction(float progress); public delegate void VersionAction(VersionModel version); private VersionModel CurrentVersion; private string path => Application.persistentDataPath + "/update.apk"; public Text UpdateText; private void Start() { StartCoroutine(GetCurrentVersion((v) => { if (v.no != Application.version) { StartCoroutine(Download((p) => { // 下載下傳進度 UpdateText.text = (p * 100).ToString("0.00"); }, () => { // 下載下傳完成 UpdateText.text = "下載下傳完成"; // 安裝 Install(); })); } })); } public IEnumerator GetCurrentVersion(VersionAction action) { UnityWebRequest webRequest = UnityWebRequest.Get("http://y.linyisonger.cn/api/version/GetTheLatestVersion?key=cn.LinYisonger.CallAndroid"); yield return webRequest.SendWebRequest(); CurrentVersion = JsonUtility.FromJson<VersionModel>(webRequest.downloadHandler.text); action.Invoke(CurrentVersion); } public IEnumerator Download(LoadingAction loading, Action done) { UnityWebRequest webRequest = UnityWebRequest.Get(CurrentVersion.apkUrl); webRequest.SendWebRequest(); while (!webRequest.isDone) { loading(webRequest.downloadProgress); yield return 0; } File.WriteAllBytes(path, webRequest.downloadHandler.data); done(); yield return null; } public void Install() { var jo = new AndroidJavaObject("cn.linyisonger.callme.MainActivity"); jo.CallStatic("install", path); } }</code>
建構調試然後就會報錯????
<code>WARNING: The option setting 'android.enableR8=false' is deprecated. It will be removed in version 5.0 of the Android Gradle plugin. You will no longer be able to disable R8</code>
将建構的版本調整為3.4.0
建構調試打開應用閃退啦! ????
找了很久原來是少引用了依賴庫
<code># 添加依賴支援 implementation 'androidx.legacy:legacy-support-v4:1.0.0'</code>
建構調試