快2個月沒寫部落格,最近一個是忙着開發docker平台,另外一個是接手了公司私有雲,是以比較忙。
公司最近有個新項目,想弄個技術的問答論壇,挑選了半天,選擇ruby語言的discourse,這個是完全開源的,界面簡潔,支援中文,有管理背景,滿足需求。
discourse的位址是https://www.discourse.org
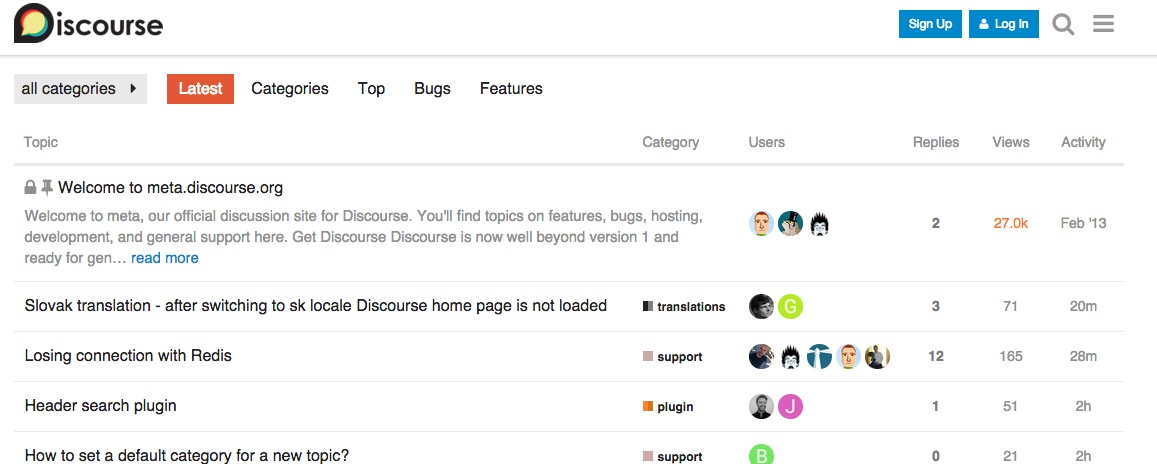
界面如下
下面是安裝過程
系統環境
官方推薦使用ubuntu,并且安裝的程式也是支援ubuntu系統,docker安裝模式,是以我選擇了雲主機ubuntu 14.04系統,discourse是最新的1.5.0版本。
安裝位址可以參考https://github.com/discourse/discourse/blob/master/docs/INSTALL-cloud.md
1、更新源
apt-get update 2、安裝依賴軟體
apt-get install ruby git 3、安裝docker
wget -qO- https://get.docker.com/ | sh 安裝完成後可以使用docker version檢視
root@i-chxjfvpy:/tmp# docker version
Client:
 Version:      1.9.1
 API version:  1.21
 Go version:   go1.4.2
 Git commit:   a34a1d5
 Built:        Fri Nov 20 13:12:04 UTC 2015
 OS/Arch:      linux/amd64

Server:
 Version:      1.9.1
 API version:  1.21
 Go version:   go1.4.2
 Git commit:   a34a1d5
 Built:        Fri Nov 20 13:12:04 UTC 2015
 OS/Arch:      linux/amd64
目前我的是1.9.1版本
4、安裝discourse
mkdir /data/discourse
git clone https://github.com/discourse/discourse_docker.git /data/discourse
cd /data/discourse
cp samples/standalone.yml containers/app.yml
ps:預設官方是放入/var目錄裡,我這裡放入/data是因為這個目錄是我雲主機挂載的盤
root@i-chxjfvpy:~# df -h
Filesystem      Size  Used Avail Use% Mounted on
/dev/vda1        18G  1.8G   15G  11% /
none            4.0K     0  4.0K   0% /sys/fs/cgroup
udev            3.9G  8.0K  3.9G   1% /dev
tmpfs           799M  412K  799M   1% /run
none            5.0M     0  5.0M   0% /run/lock
none            3.9G     0  3.9G   0% /run/shm
none            100M     0  100M   0% /run/user
/dev/vdb1       193G   60M  183G   1% /data
5、修改discourse配置
root@i-chxjfvpy:/data/discourse# grep -v "^  #" containers/app.yml |grep -v "^#"|sed '/^$/d'
templates:
  - "templates/postgres.template.yml"
  - "templates/redis.template.yml"
  - "templates/web.template.yml"
  - "templates/sshd.template.yml"
  - "templates/web.ratelimited.template.yml"
  - "templates/web.china.template.yml"
expose:
  - "80:80"   # fwd host port 80   to container port 80 (http)
  - "2222:22" # fwd host port 2222 to container port 22 (ssh)
params:
  db_default_text_search_config: "pg_catalog.english"
  db_shared_buffers: "2GB"
  db_work_mem: "40MB"
env:
  LANG: en_US.UTF-8
  UNICORN_WORKERS: 6
  DISCOURSE_DEVELOPER_EMAILS: '[email protected]'
  DISCOURSE_HOSTNAME: 'discuss.xxx.net'
  DISCOURSE_SMTP_ADDRESS: smtp.163.com         # (mandatory)
  DISCOURSE_SMTP_PORT: 25                        # (optional)
  DISCOURSE_SMTP_USER_NAME: xxx     # (optional)
  DISCOURSE_SMTP_PASSWORD: 123123               # (optional, WARNING the char '#' in pw can cause problems!)
  DISCOURSE_SMTP_AUTHENTICATION: login
  DISCOURSE_SMTP_OPENSSL_VERIFY_MODE: none
  DISCOURSE_SMTP_ENABLE_START_TLS: false           # (optional, default true)
volumes:
  - volume:
      host: /data/discourse/shared/standalone
      guest: /shared
  - volume:
      host: /data/discourse/shared/standalone/log/var-log
      guest: /var/log
hooks:
  after_code:
    - exec:
        cd: $home/plugins
        cmd:
          - git clone https://github.com/discourse/docker_manager.git
run:
  - exec: echo "Beginning of custom commands"
  - exec: echo "End of custom commands"
  - exec: awk -F\# '{print $1;}' ~/.ssh/authorized_keys | awk 'BEGIN { print "Authorized SSH keys for this container:"; } NF>=2 {print $NF;}'
下面是需要修改的
DISCOURSE_DEVELOPER_EMAILS是你郵件位址;
DISCOURSE_HOSTNAME是你web端打開的位址,可以是公網IP,也可以是dns域名;
DISCOURSE_SMTP_ADDRESS、DISCOURSE_SMTP_PORT、DISCOURSE_SMTP_USER_NAME、DISCOURSE_SMTP_PASSWORD是你郵箱資訊,這個郵箱是使用者注冊或其他行為時,發送給使用者進行驗證的郵箱,其中密碼DISCOURSE_SMTP_PASSWORD裡不能包含#,否則會被識别有問題;
預設authentication是plain,但我測試使用163郵箱的話,無法登陸,是以改為login;
預設enable_starttls_auto是開啟tls驗證,我這裡也給改為false;
另外在template裡加入一行
  - "templates/web.china.template.yml"
不加入的話,預設使用ruby的庫是國外的ruby.org鏡像源,加上這個後是使用國内taobao的ruby鏡像源
具體配置參考注釋,比如db_shared_buffers、db_work_mem、UNICORN_WORKERS根據你記憶體來配置。
6、生成鏡像
預設是先下載下傳一個公共的discourse/discourse鏡像,然後會根據你的配置生成一個本地的鏡像local_discourse/app,如下
root@i-su8g5dng:/tmp# docker p_w_picpaths
REPOSITORY            TAG                 IMAGE ID            CREATED             VIRTUAL SIZE
local_discourse/app   latest              4272aa220d69        2 hours ago         1.877 GB
discourse/discourse   1.0.15              cb7b58c22b11        2 weeks ago         1.265 GB
下面是生成的指令
./launcher bootstrap app 86c397191c205624ded7181c06b1d73ea1856abe126a717354dc308d2964282a
cfbab5cb2ff9745616cb0e604c47644d2a7041445fda6b0da0aa697714bf466b
Successfully bootstrapped, to startup use ./launcher start app
root@i-chxjfvpy:/data/discourse# ./launcher start app 然後使用./launcher start app啟動
root@i-chxjfvpy:/data/discourse# docker ps -a
CONTAINER ID        IMAGE                 COMMAND             CREATED             STATUS              PORTS                                      NAMES
d0b519f15db7        local_discourse/app   "/sbin/boot"        35 seconds ago      Up 33 seconds       0.0.0.0:80->80/tcp, 0.0.0.0:2222->22/tcp   app
之後直接在web裡輸入域名或者ip就可以直接通路
7、配置管理者使用者
參考https://meta.discourse.org/t/create-admin-account-from-console/17274
或者直接按照下面操作
進入容器
./launcher enter app 建立管理者賬戶
rake admin:create 下面是官方的介紹
You will be asked for Email, Password and Confirm Password.

After providing required information a new account will be created with random username.

Now you will be asked: Do you want to grant Admin privileges to this account? (Y/n). Press enter to continue.

You will see success message: Your account now has Admin privileges!.

That's it, you have created a new account with Admin privileges.
8、登陸驗證

登陸後的界面為
9、修改為中文界面
修改後重新整理,然後顯示為
10、FAQ
如果遇到無法發送驗證郵件,檢測問題為