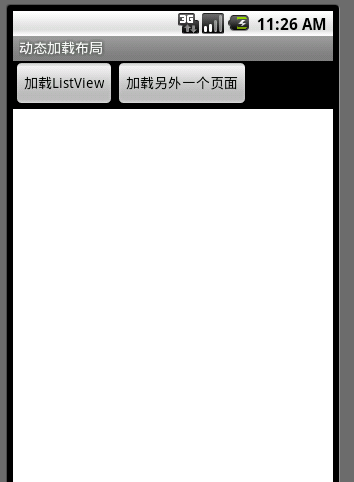
由于前段時間項目需要,需要在一個頁面上加載根據不同的按鈕加載不同的布局頁面,當時想到用 tabhot 。不過美工提供的界面圖完全用不上tabhot ,是以想到了動态加載的方法來解決這一需求。在這裡我整理了一下,寫了一個 DEMO 希望大家以後少走點彎路。
首先,我們先把界面的架構圖畫出來,示意圖如下:

中間白色部門是一個線性布局檔案,我喜歡在畫圖的時候用不同的顔色将一塊布局标示出來,友善檢視。布局檔案代碼如下:
<?xml version="1.0" encoding="utf-8"?>
<LinearLayout xmlns:android="http://schemas.android.com/apk/res/android"
android:orientation="vertical" android:layout_width="fill_parent"
android:layout_height="fill_parent">
<LinearLayout android:orientation="horizontal"
android:layout_width="wrap_content" android:layout_height="wrap_content">
<Button android:text="加載ListView" android:id="@+id/Button01"
android:layout_width="wrap_content" android:layout_height="wrap_content">
</Button>
<Button android:text="加載另外一個頁面" android:id="@+id/Button02"
android:layout_width="wrap_content" android:layout_height="wrap_content"></Button>
</LinearLayout>
<LinearLayout android:id="@+id/LinearLayout01" android:background="#FFFFFF"
android:layout_width="fill_parent" android:layout_height="fill_parent"></LinearLayout>
</LinearLayout>
從上面的效果圖可以看出,那塊白色的線性布局是用來動态加載傳進來的布局檔案。好了,我們就來做如果把布局檔案動态的加載進來。下面我們一步一步來實作這個效果,首先,先把需要的 XML 勾畫出來,分為步驟如下。
建立一個布局用來存放 ListView 頁面,代碼如下:
<?xml version="1.0" encoding="UTF-8"?>
<LinearLayout android:id="@+id/layout"
android:layout_width="fill_parent" android:layout_height="fill_parent"
xmlns:android="http://schemas.android.com/apk/res/android">
<ListView android:id="@+id/ListView01" android:layout_width="wrap_content"
android:layout_height="wrap_content"></ListView>
建立一個 ListView 每一行資料的樣式,代碼如下:
<LinearLayout android:id="@+id/LinearLayout01"
<TextView android:text="@+id/TextView01" android:id="@+id/TextView01"
android:layout_width="wrap_content" android:layout_height="wrap_content"></TextView>
建立另外一個頁面,用來區分此頁面是動态加載的,代碼如下:
<LinearLayout android:id="@+id/hellolayout"
<TextView android:text="HELLO"
package com.terry;
import java.util.ArrayList;
import java.util.HashMap;
import android.content.Context;
import android.view.LayoutInflater;
import android.view.View;
import android.view.ViewGroup;
import android.widget.BaseAdapter;
import android.widget.TextView;
public class listAdapter extends BaseAdapter {
ArrayList<HashMap<String, Object>> list = new ArrayList<HashMap<String, Object>>();
private LayoutInflater inflater;
public listAdapter(Context contex)
{
inflater=LayoutInflater.from(contex);
HashMap<String, Object> map=new HashMap<String, Object>();
for (int i = 0; i < 10; i++) {
map.put("name", "例子");
list.add(map);
}
}
@Override
public int getCount() {
// TODO Auto-generated method stub
return list.size();
public Object getItem(int position) {
return list.get(position);
public long getItemId(int position) {
return position;
public View getView(int position, View convertView, ViewGroup parent) {
final viewHolder myHolder;
if (convertView==null) {
myHolder=new viewHolder();
convertView=inflater.inflate(R.layout.list_view_row, null);
myHolder.tv=(TextView)convertView.findViewById(R.id.TextView01);
convertView.setTag(myHolder);
else
{
myHolder=(viewHolder)convertView.getTag();
myHolder.tv.setText(list.get(position).get("name").toString());
return convertView;
}
項目大綱如下圖:
好了,到此我們的準備工作就己經完成,接下來就是要教大家如何實作動态加載上面所畫的布局頁面了,先看一下效果圖:
點選第一個按鈕
點選第二個按鈕
動态加載代碼如下:
import android.app.Activity;
import android.graphics.Color;
import android.os.Bundle;
import android.view.View.OnClickListener;
import android.widget.Button;
import android.widget.LinearLayout;
import android.widget.ListView;
public class dynaActivity extends Activity {
/** Called when the activity is first created. */
public void onCreate(Bundle savedInstanceState) {
super.onCreate(savedInstanceState);
setContentView(R.layout.main);
final LayoutInflater inflater = LayoutInflater.from(this);
Button btn = (Button) findViewById(R.id.Button01);
Button btn2 = (Button) findViewById(R.id.Button02);
final LinearLayout lin = (LinearLayout) findViewById(R.id.LinearLayout01);
btn.setOnClickListener(new OnClickListener() {
@Override
public void onClick(View v) {
// TODO Auto-generated method stub
LinearLayout layout = (LinearLayout) inflater.inflate(
R.layout.listview, null).findViewById(R.id.layout);
ListView lv=(ListView)layout.getChildAt(0);
lv.setAdapter(new listAdapter(dynaActivity.this));
lin.removeAllViews();
lin.addView(layout);
}
});
btn2.setOnClickListener(new OnClickListener() {
R.layout.hello, null).findViewById(R.id.hellolayout);
TextView lv=(TextView)layout.getChildAt(0);
lv.setTextColor(Color.RED);
上面通過使用LayoutInflater 每次點選按鈕時候去讀取布局檔案,然後找到布局檔案裡面的各個VIEW 操作完VIEW 後加載進我們setContentView 方面裡面的要放的布局檔案裡面,每次動态加載檔案必需 調用 removeAllViews方法,清除之前的加載進來的 View 。是不是很簡單?當然動态加載VIEW 還有許多種方法,多嘗試不同寫法。可能會領會不一樣的心得,祝你早上掌握android 的開發技術。
Tip:因為是基于VIEW 操作,是以你可以用 Animation 的動畫效果使其更換界面更為自然,觀賞性更強。