昨天在发布博客园的第一篇花了很多时间和精力编写的博客后《模块化利器: 一篇文章掌握RequireJS常用知识》,有博友问个人的博客风格是如何自定义的,今天特将月前整理博客时用到的一些方法总结如下,希望能对你设计自己的博客有一些帮助:)
第一步,上传自定义的css
在浏览器中直接打开https://files.cnblogs.com/files/lyzg/cnblogs.css,然后按ctrl + s,即可将本人博客用到的自定义css下载下来。接着在博客的管理页面,找到文件选项卡,上传刚刚下载的文件:
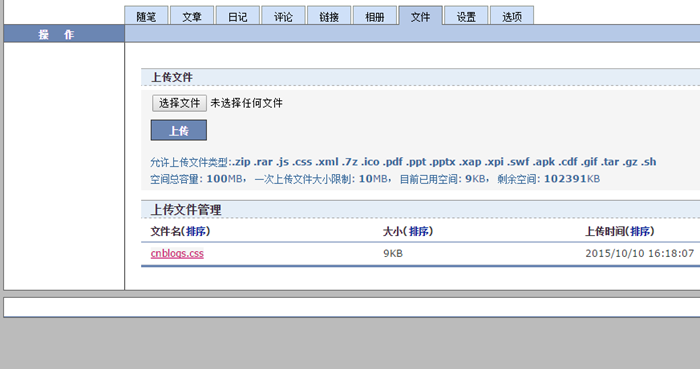
上传之后,记下该文件的url,如上图中的红框所示。注:上图中的url为本人博客的自定义css文件地址,你在后面设置的时候虽然也可以用它,但是最好还是不用,万一将来我把这个文件删了,你的博客就访问不到这个css了。
第二步,设置页面定制的css和页首html
在博客管理页面,找到设置选项卡:

在该选项卡下面,先修改标题,在标题文本前面先添加下面的一段html:
<span class="portrait"></span> 页面效果如下:
这段html,在后面的步骤中用来设置头像。
接着在博客皮肤配置处,选择下面的皮肤,因为第一步上传的css文件是在该皮肤下修改得到的,部分css可能还是得依赖该皮肤的原来的css文件:
接着在页面定制css部分,粘贴下面的代码:
div.post div.entry {
    font-family: Georgia, "Times New Roman", Times, sans-serif
}

div.post div.entry h1, div.post div.entry h2, div.post div.entry h3 {
    margin-top: 24px;
    margin-bottom: 12px;
}

div.post div.entry h1 {
    padding: 5px;
    color: white;
    background-color: gray;
}

div.post h2 {
    font-size: 22px;
    line-height: 100%;
}

div.post div.entry pre.code {
    font-family: Consolas border-style : dashed;
    border-left: solid 5px #6ce26c
}

div#information {
    background-color: #f8f8ee;
    border: solid 1px #e8e7d0;
    padding: 5px 10px 0px 10px;
    min-height: 10px;
    margin-top: -15px;
    margin-bottom: 30px;
    color: #666666
}

.cnblogs_code {
    border-left: #58CE60 5px solid !important;
}

#site_nav_under, .c_ad_block, #under_post_news, #under_post_kb {
    display: none !important;
} 接着在页首html区域,粘贴如下代码:
<link href="https://files.cnblogs.com/files/lyzg/cnblogs.css" rel="stylesheet" />
<style type="text/css">
body {
    background: #98C17B url('http://images2015.cnblogs.com/blog/459873/201509/459873-20150919175458742-1697781612.jpg') no-repeat top center;
    background-size: 100% 100%;
    background-attachment: fixed;
}
input[type="button"].btn_my_zzk {
  width: 60px;
}

#home {
  border-top-right-radius: 0;
}
#blogTitle .title {
    position: relative;
    background: none;
}
.portrait {
    display: block;
    position: absolute;
    left: 0;
    top: 0;
    width: 100px;
    height: 100px;
    border-radius: 50px;
    overflow: hidden;
    background: white url('http://pic.cnblogs.com/avatar/459873/20150917085709.png') no-repeat left center;
    background-size: contain;
   transition: all 0.8s;
   -moz-transition: all 0.8s; /* Firefox 4 */
   -webkit-transition: all 0.8s; /* Safari 和 Chrome */
   -o-transition: all 0.8s;
}

.headermaintitle:hover .portrait {
   -moz-transform:scale(1.2,1.2);
   -webkit-transform:scale(1.2,1.2);
   -o-transform:scale(1.2,1.2);
   transform:scale(1.2,1.2);
}
::-webkit-scrollbar {
    width: 6px;
    height: 6px;
}

::-webkit-scrollbar-thumb {
    background-color: #55895B;
    border-radius: 5px;
}

::-webkit-scrollbar-thumb:hover {
    background-color: #55895B;
}

::selection {
    color: white;
    background: #018ee8;
}
#topics a:hover {
    padding: 1px 3px 1px 3px;;
    text-decoration: none;
    color: #018ee8;
    border-radius: none;
    background-color: transparent;
}

.postTitle {
    padding-left: 0;
    background: none;
}

.subtitle {
    padding-left: 0;
}

#blogTitle {
   padding-bottom: 0;
}

#nav_q,#nav_ing,#nav_newpost {
   display:none !important;
}

#sideBar {
    border-top-width: 1px !important;
}

#navigator {
    margin-bottom: 0;
}

#sideBarMain {
    margin: 0;
    padding-right: 20px;
    padding-left: 5px;
}

.catListTitle {
    border-top-color: #CECECE;
    border-right-color: #CECECE;
    border-bottom-color: #CECECE;
}

#home {
   margin: 150px auto 50px auto;
   //width: 80%;
}

#green_channel {
    width: auto;
}

#tbCommentBody {
  width: 100%;
  display: block;
  box-sizing: border-box;
}
</style> 需要注意的是这段代码中,有3处需要改成你自己博客相关的文件。第一处的文本是:
https://files.cnblogs.com/files/lyzg/cnblogs.css 你要在代码中搜索该段文本,并替换为第一步中你在自己博客中上传的css。
第二处是:
http://images2015.cnblogs.com/blog/459873/201509/459873-20150919175458742-1697781612.jpg 这张图片时博客的背景图片,是我从百度上下下来的分辨率比较大的图片,以便呈现出一个大图的网页背景。由于博客管理页面允许上传的文件不包括图片文件,所以这张图片是插入在一篇草稿博客中的:
这篇博客不会发布,所以外面看不到,在里面插入图片文件,然后记下图片文件的地址,就可以在css中被引用了。如果你也想要这样一个网页背景大图的话,可以通过这个方式上传一张自己喜欢的图片,然后替换第二处所示的文本即可。
第三处是:
http://pic.cnblogs.com/avatar/459873/20150917085709.png 这个文件是头像的url,你需要用自己图像的url替换掉它。
第三步,设置页脚html
找到页脚html部分,粘贴进下面的代码:
<div class="scrollBtn" id="scrollBtn">
  <ul class="clearfix"><li class="sB-goTop" id="goTop" style="display: list-item;">
      <a href="#top" title="回顶部"></a>
    </li>
  </ul>
</div>
<script language="javascript" type="text/javascript">
  //生成目录索引列表
  function GenerateContentList() {
    var jquery_h3_list = $('#cnblogs_post_body h2');//如果你的章节标题不是h4,只需要将这里的h4换掉即可
    if (jquery_h3_list.length > 0) {
      var content = '';
      content += '<div id="navCategory" style="background-color: #BDBDBD;padding:10px 5px;">';
      content += '<p style="font-size:18px;margin:0;line-height:30px;"><b>阅读目录</b></p>';
      content += '<ul>';
      for (var i = 0; i < jquery_h3_list.length; i++) {
        var go_to_top = '<div style="text-align: right;    text-align: right;height: 0;padding: 0;overflow: hidden;visibility: hidden;"><a name="_label' + i + '"></a></div>';
        $(jquery_h3_list[i]).before(go_to_top);
        var li_content = '<li><a href="#_label' + i + '">' + $(jquery_h3_list[i]).text() + '</a></li>';
        content += li_content;
      }
      content += '</ul>';
      content += '</div>';
      if ($('#cnblogs_post_body').length != 0) {
        $($('#cnblogs_post_body')[0]).prepend(content);
      }
    }
  }
  GenerateContentList();
</script>

<!-- JiaThis Button BEGIN -->
<script type="text/javascript" src="http://v3.jiathis.com/code/jiathis_r.js?move=0" charset="utf-8"></script>
<!-- JiaThis Button END -->
这段js包含了返回顶部,分享组件以及博文页面生成目录的功能。需要注意的是这个生成目录的功能,它的原理是去博文里面寻找h2元素把它作为每一个目录项,所以你在编辑博客的时候,大的标题一定是要用h2,小的标题应该用h3,不能混用,推荐使用live writter编辑博客,在编辑的时候,它的标题2和标题3在源代码中显示的就是h2和h3:
以上就是我当时自定义博客时用的所有方法了,有的细节没有讲太多,相信你在使用这些方法后,查看博客页面的源代码就能明白其中的原理了,当然有疑问的,还是欢迎你在评论区与我交流。
如果您觉得本文对你有用,不妨帮忙点个赞,或者在评论里给我一句赞美,小小成就都是今后继续为大家编写优质文章的动力,流云拜谢!
欢迎您持续关注我的博客:)
作者:流云诸葛
出处:http://www.cnblogs.com/lyzg/
版权所有,欢迎保留原文链接进行转载:)