(1) 安装Apache
<1> 下载Apache源码文件
wget http://mirror.bit.edu.cn/apache//httpd/httpd-2.2.34.tar.gz
注释:
如果提示-bash: wget : command not found 请安装 yum install wget
(2) 解压httpd文件
<1> 下载的压缩文件,默认存放在Linux的根目录下
<2> tar -xzf 解压tar.gz的文件 tar -xjf 解压tar.bz2的文件
(3) ./configure(预编译)
<1> 进入Apache安装目录 cd httpd-2.2.34
<2> ./configure --prefix=/usr/local/apache2/ --enable-rewrite --enable-so --enable-ssl
注释:
预编译过程中,如果出现
configure:error: in `/usr/local/src/httpd-2.2.21/srclib/apr':
configure:error:
no acceptable C compiler found in $PATH
解决办法是安装 yum install gcc -y
预编译的过程中,如果出现,no SSL-C headers found
configure: error: ...No recognized SSL/TLS toolkit detected
解决办法是 yum install openssl-devel -y
<4> make (编译)
<5> make install (安装)
(4) 预编译时,Apache被安装在 /usr/local/Apache2目录下
<1> Apache的主配置文件
① [root@localhost apache2]# cd conf
② [root@localhost apache2]# cat httpd.conf
注释: httpd.conf是Apache的主配置文件
★ apache配置文件解析:
ServerRoot "/usr/local/apache2/" apache服务的根目录
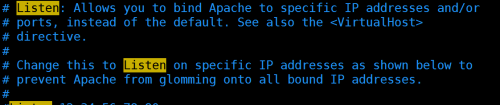
Listen 80 apache监听的是80端口
ServerAdmin [email protected] 管理员邮箱
DocumentRoot "/usr/local/apache2//htdocs" 网站根目录
对apache根目录做的权限设置
<Directory />
Options FollowSymLinks
AllowOverride None
Order deny,allow
Deny from all
</Directory>
对网站根目录做的权限设置
<Directory "/usr/local/apache2//htdocs">
Options Indexes FollowSymLinks
注释:
如果网站根目录下没有默认首页,会把网站根目录下所有的文件都罗列出来
如果没有Indexes,会报权限被拒绝
AllowOverride None
Order allow,deny
Allow from all
设置网站的默认首页
<IfModule dir_module>
DirectoryIndex index.html
</IfModule>
对.htaccess做的权限设置
<FilesMatch "^\.ht">
Order allow,deny
Deny from all
Satisfy All
</FilesMatch>
ErrorLog "logs/error_log" 错误日志路径
LogLevel warn 日志记录的级别
Include conf/extra/httpd-vhosts.conf Include文件设置
对ssl的配置
<IfModule ssl_module>
SSLRandomSeed startup builtin
SSLRandomSeed connect builtin
<2> Apache的启动文件
① [root@localhost apache2]# cd bin
注释: httpd apachectl 是apache的启动文件
(5) Apache监听的是80端口
(6) Apache发布网站的根目录
/usr/local/apache2/htdocs
(7) 启动Apache
① /usr/local/apache2/bin/apachectl start
② /usr/local/apache2/bin/httpd -k start | graceful (平滑重启)
③
重启apache进行检查 /usr/local/apache2/bin/apachectl -t
如果出现Syntax ok 表示apache配置没有错误
Apache启动遇到的错误总结
apache2: Could not reliably determine the server's fully qualified domain name 解决方法
在 vim httpd.conf 配置文件中, 加入ServerName localhost:80
(8) 访问服务器ip ,查看访问是否成功
(9) 过滤 http.conf配置文件中的空格和#号
① grep -v "#" httpd.conf | grep -v "^$" >> httpd.conf.bak
② mv httpd.conf.bak httpd.conf
(10) 查看Apache进程是否启动 ps -ef | grep httpd
(11) 查看Apache端口是否监听 netstat -ntl | grep 80
------------------------------ apache虚拟主机配置-----------------------------------------------
(1) apache虚拟主机就是在一个ip地址上配置了多个域名,我们通过域名来访问,域名访问的前提是要进行DNS解析,把ip地址和域名对应起来。操作系统规定,在进行DNS请求以前,先检查自己的hosts文件中是否有ip地址的映射关系,如果没有,在像DNS发出解析请求
(2) hosts文件路径 c:\\windows\System32\drivers\etc
(3) 把ip地址和要解析的域名放到hosts文件中即可实现解析
(4) 配置虚拟主机
① 进入虚拟主机配置目录(httpd-vhosts.conf是虚拟主机配置文件)
[root@localhost apache2]# cd conf
[root@localhost conf]# cd extra
[root@localhost extra]# cat httpd-vhosts.conf
② 修改配置文件
NameVirtualHost *:80 虚拟主机监听本地网卡的80端口
<VirtualHost *:80> 虚拟主机配置开始
ServerAdmin [email protected] 管理员邮箱
DocumentRoot "/usr/local/apache2/htdocs/jf1" 网站发布的根目录
ServerName www.jf1.com 虚拟主机的域名
ErrorLog "logs/www.jf1.com-error_log" 错误日志的路径及文件名
CustomLog "logs/www.jf1.com-access_log" common 日志的路径及文件名
</VirtualHost> 虚拟主机配置结束
③ 创建www.jf1.com 和 www.jf2.com的发布目录
mkdir -p /usr/local/apache2/htdocs/jf1 mkdir -p /usr/local/apache2/htdocs/jf2
④ 在2个发布目录下,分别创建index.html文件
⑤ 在httpd.conf配置文件中引入httpd-vhosts.conf配置文件
Include conf/extra/httpd-vhosts.conf
⑥ 重启网卡,验证配置结果
/usr/local/apache2/bin/httpd -k start
--------------------------------- apache虚拟主机企业配置方式------------------------------------
① 在htppd.conf配置文件中,引入 Include conf/vhosts/*
② 创建vhosts目录 mkdir vhosts
③ 在vhosts目录下把虚拟主机配置文件拷贝过来
④ 拷贝的虚拟主机配置文件,去掉NameVirtualHost *:80
⑤ 在httpd.conf配置文件中,把NameVirtualHost *:80添加上
⑥ 重启apache验证配置结果
![搭建httpd服务[图]](data:image/gif;base64,R0lGODlhAQABAIAAAP///wAAACwAAAAAAQABAAACAkQBADs=)