Mitterrod Survival Fear follows Mitterrod Sams Returns in terms of combat, and the boss battles may be difficult for some players.
The game encourages players to be aggressive and respond to boss attacks by cleverly using Sams' abilities. There are a total of 10 different bosses in the game, and we will introduce the playing style of each boss one by one below.
Note: It is inevitable that there will be some degree of spoiler for the introduction of the different stages of the boss.
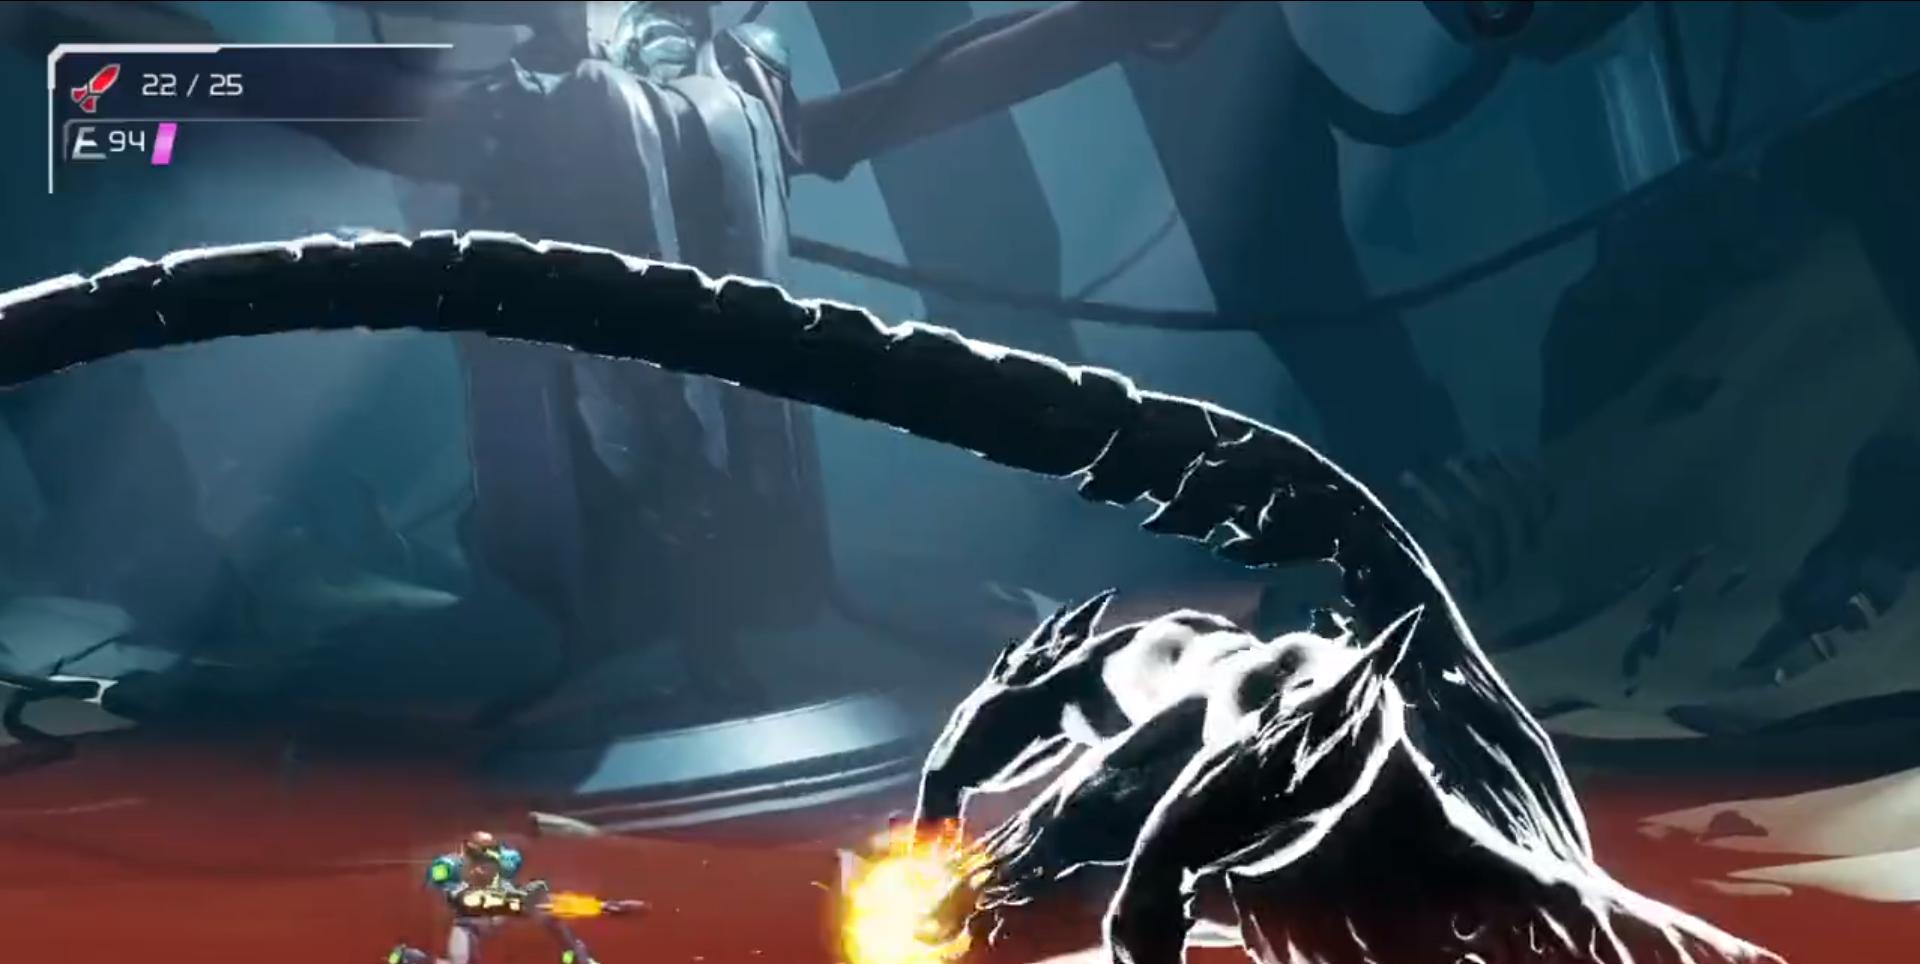
Coppis (Big Reptile)
Kolpis's weakness is in the head, but normal attacks cannot deal damage to it, requiring the use of charge lasers or missiles.
The boss's tail has two attack states, and it is important to note whether its tail is abrupt or sweeping, and it is easy to dodge by walking and jumping. For attacks that spit acid balls, dodge or shoot.
Bosses will become invisible in the second stage, playing the same way as in the first stage, except that dodging boss attacks will be more difficult. Attacking the head and tail in this state is equally effective, but the tail will be easier.
When the boss's attack flashes, be careful to use the x key to bounce back. After successful bounce, you can kill the boss.
In later battles, there will be a lot of use of x-bullet counter phases. And some bosses can skip some stages by using bounce, significantly reducing the difficulty.
Cred (the one in the magma)
The first stage is not difficult, only need to use a beam or missile attack to continuously output into its mouth after the cutscene is over, and normal attacks cannot deal damage.
During this period, it will spit balls and flames upwards, at this time, be sure to pay attention to the ball, you can get missiles and HP supplies. The number of flames is not much, just pay attention to dodge. You can also shoot the nozzle when the head is facing up, but it is not easy to aim, it is recommended to play steadily and steadily, and then output it when it is down.
The second stage requires care of three attacks in its abdomen. Venom jumps to dodge, or hides in a small hidden brick on the far left. The orb can be knocked out with a normal beam. Triple spikes turn into balls to dodge.
This stage requires a sustained shot at the boss's abdominal weakness (which will slowly turn white, as well as with normal y-rays). Hit to a certain extent, it will shoot out a thorn, at which point an elevator will fall on the left side. Adsorbs on the elevator and continuously attacks the boss's mouth. At this time, the boss will attack the player, there is a big forward shake, do not greedy output, see it is charging up and quickly jump down.

Robot Birdman Soldier
After the plot takes place, you will enter a battle with the Robot Birdman soldiers.
Unlike other bosses, Birdman soldiers can take all of Sams' attack damage, including normal beam attacks. Its three-emitting ball and charge ray are easier to dodge, remember to keep your distance from it.
Be aware of its two charge-up physical attacks. When charging, you can see that its arm emits a very thick light, one is blue, the other is red.
Blue can bounce by pressing x the moment he attacks, and when successful, it will enter a hard straight state. This is a good time to make a big output!
Red is incapable of bouncing back, and the damage is high, making it easy to gameover when hit. This move requires us to use the teleport we got earlier, and when we see it charged red, we quickly press b in front of him to jump, followed by two a teleportations in the air, and then go around to the back to dodge the attack.
Dorogyga (big octopus)
The boss was in the water, but at this point we hadn't gotten the gravity suit yet, and the action was hampered.
After entering the battle, first make a crazy output of the charged tentacles above, and the boss will enter a hard straight state. You can attack the green button on the left at this point, and half of the room's water will drain out.
At this time, you can point to the blue elevator at the top and use the hook cable (hold down zr+y) to the right side of the room. There is also a button on the right side, and after shooting at it again, the water in the room will be drained.
When the boss mouth is fully open, the core is exposed and quickly output, and then the process can be cycled. This boss is more like a boss from Zelda than the others, and the old Zelda player should be easy to deal with.
Birdman soldiers
Birdman soldiers and robotic birdmen soldiers are not the same, you can distinguish them by appearance, that is, the long gun is. But all Birdmen can output with normal attacks, and if you are fast enough in your hands, the ultra-high-speed triple rays will do more damage than missiles.
Birdman soldiers like to climb on walls to make spikes, and when they are on the ceiling, they will spike downwards, so as not to be pricked by it.
In the second stage, it will spit black rays on the wall to attack, usually 3 times at a time, pay attention to the use of jumps to dodge.
At this stage it will also stab at the ground, and it will be accompanied by attacks that spread to both sides, and we try to keep ourselves in the air as much as possible.
Since its maneuverability is very high, it is recommended that missiles are not used here, and fast and continuous ordinary attacks are more affordable.
After entering the animation, pay attention to the flash qte immediately, press x to successfully bounce back to end.
The main thing is to see the timing and use x for bounce back. The battle can be ended after success, which is not difficult overall.
Ashjo (Big Flying Worm)
The first stage of the boss is more disgusting, especially the dense small bullets, which will make the scalp of many novices tingle. And when the boss is charged, any of our attacks have no effect.
When playing the first stage, it is recommended to run back and forth between the two corners to dodge the black ball. Some black balls will burst open, producing a lateral attack, be careful to use jumps to dodge. When the boss fires a small bullet, it can dodge by doing a dip and teleporting (a) on the side of the wall.
After the boss collides, it will enter a brief unpowered state, which is the time to output, using a missile or a charged beam.
After entering the second stage, it will turn into a ball (x). After using a missile attack, many x's will fall out, at which point we can eat these x's to restore hp. In this state, the boss will only fly slowly and crash, there is no means of attack, and there are a large number of x to restore, and there is almost no threat.
Test body z-57 (large reptile on the engine)
This boss is more difficult and lasts a long time, which will be quite difficult for novices. At the beginning of the battle, it is very likely that it will be given twice, so be sure to pay attention.
Its attack forward shake is also relatively large, be sure to pay attention and decisively move. The tentacle sweep attack on both sides, because it is a near-fan attack range, need to be dodged with a two-stage jump or air teleportation, and it is easy to be hit by just one jump.
When you spit frozen light at the ground, you will spit all the way to the end in the direction of the spray, but there will be a pause during this time. We need to take advantage of this gap and use jump teleportation (b+a).
At this time, you should have already got the lock-in missile, but if you are not very confident in your own technology, it is still recommended to use a single-shot frozen bomb attack and fight steadily.
When the boss uses the frozen light from the side, it can hide under its mouth for continuous output.
But beware of it spitting out on the side and biting forward. At this point, there will be a flash on the mouth, and use the x button to bounce back and enter a cutscene. This cutscene can be continuously output huge, at this time just hold down r+y!
After cycling through this process, the second stage is entered, with four feet lying on all sides of the map. Missiles can be launched after locking on to four feet using l+r, or you can use missiles to break them one by one as soon as possible.
What is more disgusting at this stage is that the monster will spit a lot of rays towards the right wall, accompanied by a strong wind blowing to the left. We need to run to the right while dodging attacks blowing from the right by jumping (note the dipterodo jump). Pay attention to the freezing on the leftmost wall, and if you touch it, you will also snap hp. After the monster spits out, the wind will still last for a few seconds, do not release the joystick.
This stage is very easy to lose hp, if the early operation is not done properly, it is likely to lose here.
Repeat this process later to kill the boss. This boss has a thick amount of health and requires patience and calm coping.
Gozner (three-stage evolutionary beetle)
Gozner is the most bizarre of all the bosses, the first stage is killed at once, the second stage is not difficult, by sliding the shovel before his attack to the back can be killed, focusing on the third form.
In the third form, when it is spanked on the ass behind the detour with a sliding shovel, it will rewind and press down to Sams, pay attention to two hits and run, keeping a distance.
It also fires some purple bullets, which float in the air for a while and then explode in a cross shape. What we need to do is use a multi-segment jump before it explodes, all the way to the other side, and it won't blow us up.
Another purple bullet will track us and require us to move quickly to avoid its explosion.
This boss is not difficult, the main thing is to dodge the purple cross bomb and attack its butt little by little.
Elite Birdman soldiers
Elite Birdman is mainly one more shield than the normal, and the other moves are basically the same.
You can hit the shield first, or you can see the timing and use the x key to bounce back the shield. After breaking the shield, the playing style is basically the same, and I will not repeat it here
Idorasio (Final Boss)
The first stage is mainly based on dodging, do not actively attack it.
The black ball must be knocked out, and you will get a missile and hp reply. Most other attacks, like normal birdmen, use jump teleportation (b+a). When he suddenly moves away from you with a red bright spot in his hand to charge attack, use the x-button to bounce it back. At this time, an animation will be entered, which can be output using r+y continuous missiles.
After repeatedly carrying out three times of anti-output, you can enter the second stage, and the boss has more attack methods.
When the boss uses a continuous missile that is aimed, it can use jumps and teleports to dodge around the boss in a circle.
The charge light cannon has a forward shake but is very short, pay attention to the use of a dodge to move position.
When charging at high speed, we need to use a sliding shovel or turn into a ball to dodge.
In the second stage, you must be patient and try not to make mistakes, and then move on to the third stage. The third stage is relatively light, similar to the first stage, but will have one more big sun skill. When seeing it unleash the skill is to turn into a ball as soon as possible, then press R and release a bombshell that can blow up the sun and get supplies.
After the successful counter-attack, it will enter the final stage. The final stage is very brainless, long press x attack.
That's how Mitterrod's 10 biggest bosses play.
When fighting, be sure to pay more attention to the boss's attack style, and be calm and calm. All monster attacks throughout the game have ways to dodge or bounce back, and theoretically it is possible to pass the level without injury. Familiar with the x-button bounce can make your battle difficulty a lot less.