Author: Four Xiaoyue
The last handmade leather goods into the pit introduction thank you very much. This time, I would like to talk about the production of leather clips when I first entered the pit, because my skills are limited, and I can only say that I am throwing bricks and jade. I also know that it is worth buying a lot of gods, everyone sprays lightly, has a good experience can tell me, let me also take fewer detours. What I wrote is not necessarily detailed enough, and I hope that everyone will refer to each other in the posts that are worth buying.
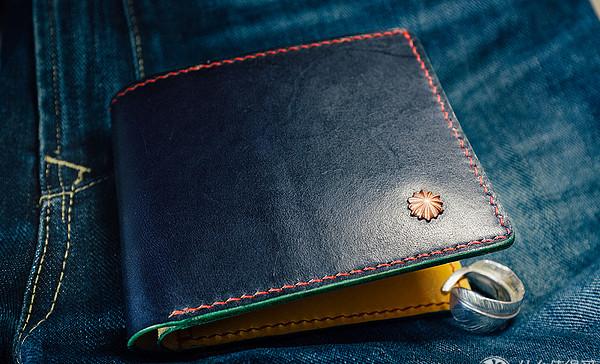
Anyone who has entered the pit I think has done a short clip, I have actually done a short clip is not much, this is the second, even if I have a little experience, I think I can talk to you. This short clip is for good buddies, before doing it I said, the color I myself give you to play, you can not pick. I myself like to dye with dye toning colors. Finally there is this color matching special short clip. First of all, the finished product drawing.
<h2>First, the production steps</h2>
<h3>1. Pattern dyeing and cutting</h3>
I like to play the board by myself, because one is that it is a bit painful to buy the version by yourself, and the other is that in the process of making the plate, you also have a better learning of the grasp of the size. I use AI, the simplest to use, everyone download one, casually study it will be. Buy thicker A4 whiteboard paper, print it out and take the art knife and cut it out. A short clip is generally six card slots, so you need 6 card slots, one lipid and one outer skin. Lippi I recommend using all 1.0, the outer skin depends on the hardness of the leather, 1.6 or 2.0 it.
I first drew the place that needs to be cut on the skin, and then cut it whole and dyed it, so that one is convenient for dyeing, and the other is how much to avoid a little deformation, and the skin will be a little deformed after the alcohol dye volatilizes. Here to share a my experience as a hand-dead star, what should I do when the plate is cut and the paper is not neat enough, and the edges are not straight? You can put the paper plate on the leather, tie the awl at each corner of the cardboard, and then use the ruler to scratch point to point.

The following is the result of the dyeing after the entire endothelium is painted, I will only talk about my own experience, the leather just dyed after the feeling of unevenness will be improved after the dye is dried, the color after drying will become a little lighter, but it will be a little darker after oiling. The oil should be completely dried up and then go to the three anti-agents, three-proof this thing I still recommend everyone to buy, one is that the leather will generally make the skin more shiny, and the other is that you do not have to wear gloves carefully when you do the follow-up work. At this time, you can also use the bed noodles on the meat surface, remember that the bed surface agent must be wiped off immediately when it is on the skin surface.
When the dye dries, the skin will harden, and oil will be needed. Liquid mink oil or cow's foot oil can be, it is best to go to a reliable store to buy, before buying a cheap cow's foot oil is not easy to use, let me throw it away. When putting liquid mink oil, there is a point to pay attention to, when you pour the oil on the cloth, you should wait for the oil to soak in the bristle and then rub it on the skin, and the speed of rubbing should be fast, otherwise there will be places where too much oil will lead to different shades. But if you oil with solid mink oil, you can avoid a problem, of course, the price of solid mink oil is also higher.
After this is all done, it is cut, there is nothing to say about the skin, after a few more times your hand will be stable. The longest one in the picture below is the endothelium, and the others are the card slots. The short clip is relatively simple and belongs to the structure that can be understood at a glance.
In fact, for novices, the card slot does not necessarily need to be thinned, because the skin itself is relatively thin. But I also talked about thinning, I was not good at thinning, basically the thinning knife was not good, and then I got a wide shovel.
Basically, the edge shovel is a little thinner, and it is also saved to grind the rough bond.
<h3>2. Inside production</h3>
First of all, you have to band the upper parts of all the card slots, because after the card slots are sewn, you can't get them again. Similarly, if you want to add a margin to the card slot, you must also get it before suturing. The edge is mainly decorative, I still recommend a fixed edge. Here I say a little bit of my experience, 1.0 leather drawing edge line does not need to be cut again, fixed edge device directly pressed out of the arc, and then polished on the edge sealant can be. The specific edge banding sanding process is left for later.
Below is the stitching card slot, because I didn't do a hidden sandwich, so I can now draw a line on the inside before stitching, which is easy to cut. Here I say, can you beat the straight a lot of conditions affect each other, first of all, your skin should be cut straight, if there is an undulation, you can use the grinding strip to grind it; then it is to take the twist or the edge of the line spacing rules or what the line, at this time to ensure that the hand does not shake, do not push too hard, muscle tension is easy to go crooked. I put a few card slots away and gently took the hold and twisted them away.
Stitching of the card slot. Let's start with the picture
These diagrams basically illustrate the stitching process of the inner card bit, but the first step is missing, which is the determination of the position. You have to first compare the card position on the inner skin, draw the positioning line with the awl, and then suture.
The first step of stitching is to draw a good chopped line on the card slot, and then use double-sided adhesive to do the card position fixation, the reason why you can use double-sided tape here is because your card position is forced by the line as long as it is borne by the line, it is invisible inside, and the double-sided adhesive can be done relatively quickly. Of course, you can also use glue to glue, remember to grind the glossy surface, otherwise the glue will not stick. The second part is to cut it, and everyone can see that I have punched an extra hole at the left and right ends of the line that the card position sutures, just to fix it on the inner skin better after suturing. A backslim has been made at both ends of the head and tail to ensure firmness. I will not talk about the stitching skills, everyone went to see the teaching video of Muyetang, and it was very well told.
After the two card slots are stitched, the outermost card slot is glued, and the two sides of the inner card slot are also glued here, and the smooth leather surface is thickened, I use coarse sandpaper, of course, there are special tools, but I did not buy it.
After bonding, take the shaping rod and press the adhesive part inside, because the clip cannot be clamped in this position. Just take a dovetail clip outside. The dovetail clip can be used as a leather pad to prevent marks on the skin. For glue I say more, I recommend is directly on the good leather glue, fast adhesion, but also easy to deal with. Cheap white glue needs to be pressed vigorously to ensure adhesion, and yellow glue is easy to get everywhere, which is more disgusting. A jar of glue can last a long time and is worth buying. There is also that kind of white film must be bought, the thinner the glue coating, the better, and it is not easy to see the glue marks. Then sew the inside of the card slot to the inside, even if the inside is handled. By the way, the top of the inner skin should also be sealed in advance.
<h3>3. Inner and outer skin fit</h3>
I seem to have forgotten to take photos of the inner and outer skin gluing........ In fact, as with the previous bonding, there is a point to pay attention to, first of all, the outer skin is a little higher than the inner skin, as for how much higher depends on your mood, in order to be beautiful, it is best to attach a leather strip inside the outer skin, and the width of the leather is a little more than the height difference between the inner and outer skin. There is also the outer skin is about 1.5 cm longer than the inner skin, otherwise you can't put money, this reason you look at the short clip in your hand you know.
If you are new to it, don't ask for a complete fit between the leather strip and the outer skin edge. In fact, I also thinned the position of the sticker inside the outer skin.
You see the above two corners have a meat surface that covers the outer skin, in fact, some professional leather craftsmen's works are only a leather skin, the upper left corner and the upper right corner will expose a little meat noodles, that is not ugly, I recommend novices to get it that way. I have limited language skills, but by the time you do it, you'll know what I'm talking about.
After the inner and outer skin are bonded, the final stitches are polished.
Be sure to level the inner and outer skin before stitching!!!! Everyone looks at the position in the middle of the card slot, that position is not glued, that is to say, first draw the place that needs to be glued on the flesh surface of the inner skin and outer skin, and then aim to glue, I am half glued first. I think for normal humans, there must be no place of complete alignment after bonding, at this time you can use a knife to correct the uneven place, and then use the grinding strip to grind it wildly, grind the four sides flat, only in this way can you ensure that you are straight when you press the groove. Sorry, I forgot to take pictures here too. It is the same as the front twisting crimping trunking. If you cut it, I think it is very simple, to ensure that the chop is perpendicular to the skin surface, if the skin is thick, my habit is to tilt it slightly inside, so as to avoid sometimes the skin will slide and cause the internal line hole to be crooked.
Stitching skills I suggest is all or learn the basics of double wave stitching, Muyetang teaching video is very good, everyone go to see it. Stitching is a skilled worker, sewing more fast and good. The length of the stitch is four times the length of the suture, I suggest that the line is more than less, the double-sided end of the twin-sided hemp thread needs a certain length of the thread, I was short so a little disgusted, especially uncomfortable. The overall length of the line should not exceed your arm span.
If novices think that the twine is troublesome, then the nylon line, I guess everyone started with the Yuraku line.
I still use the diamond chop, the stitches will be better if the law chop, last night just placed a knife slash order, said to wait for three months ...
Finally, the edge banding, many times, the details of the handmade leather goods small pieces are to see the edges and stitches. I can't say how good the edges are, but I think I can give beginners a little experience. And listen to me slowly.
Here I recommend everyone to buy a trimmer, generally speaking, the edge trimmer is a large, medium, and small one, if it is the beginning of the heartache of silver to buy a medium size, recommended west wind, not much more expensive than the green handle elle, but it is easy to use a lot.
The key to the edge banding is grinding, and then after cutting the edge, first use coarse sandpaper to grind the four sides round, at this time it is already necessary to take a cotton swab dipped in water to sand, if you want to color I recommend direct dye grinding.
When the cotton swab is dipped in water or dye when the edge is coated, please pay attention to a little, do not paint too much, plant tan leather is particularly absorbent, if there is more water, it is easy to wet the edge. After the coarse sandpaper is polished, the general sanding strip is one side thick, one side is fine, if it is convenient, take the fine sanding strip to grind it well, and then continue to smear dye, on the 1000 mesh sandpaper sanding. I directly grinded this five times, coarse sandpaper, sanding strip front and back, 1000 mesh, 2000 mesh. In fact, I think three times is enough, not so meticulous. After grinding the strip, sometimes the leather edge will be pressed out of a raw edge, take a small edge cutter to walk.
This is the way I polished it, and you will find that there is already a sense of light, so that the edge will look good.
At this time, I will sacrifice the artifact of my edge sealing agent!!!
Many tool stores will sell high-density sponges, which are used to make leather carvings soaked in wet skins for a few dollars. Each time you cut a little bit, take it and dip it in the edge sealant, which is particularly easy to use. It can be applied thin and flat, and does not exude too much on the surface of the skin. The thin coat is quickly dry, reducing the waiting time.
Generally, after the edge banding agent is half dry, start grinding the rod, apply the edge sealing twice, and then apply the beeswax again. Then go to the finished product drawing.
Finally, let's talk about the problem of typing. Making my own version and dyeing is a troublesome thing, I missed the version, I have spent dyeing, and the price of each mistake is that the skin is scrapped and the silver is directly lost. But I think it's fun to type and dye and have a long experience. I'll also share a little bit of my own experience. Take the card slot as an example, it is better to say that the length and width of a card is 10 * 6, the width of the stitch is generally 0.5, that is to say, the length of the stitches on both sides of your side is more than 11, the card position is 1 cm, plus the width of the bottom stitch, the width should be about 5.5. In the same way, if you want to ensure that the rmb does not show its head, 100 yuan Mao Grandpa is 8cm wide, your inner skin should be at least 8.5 or more, and you must also consider the thickness of the inner paper banknote, and the inner skin may be suitable for 9.
<h2>Second, the following is the link that makes me pretend to let me fly</h2>
The stinky po photo of the face began. After making this wallet, I made a big bag and belt for my daughter-in-law, as well as my small bracelet, and the hair photos stink.
It has been nearly five months since I entered the pit, and my level is limited, and I don't know when the next experience post will be written. Fortunately, the original intention has not changed so far, or an entertaining mentality to make skins, willing to learn and willing to share. I hope that my experience can help my friends who have just entered the pit, and if you have anything to communicate, you can leave a message.
If you think what I wrote is OK, reward me with some silver.