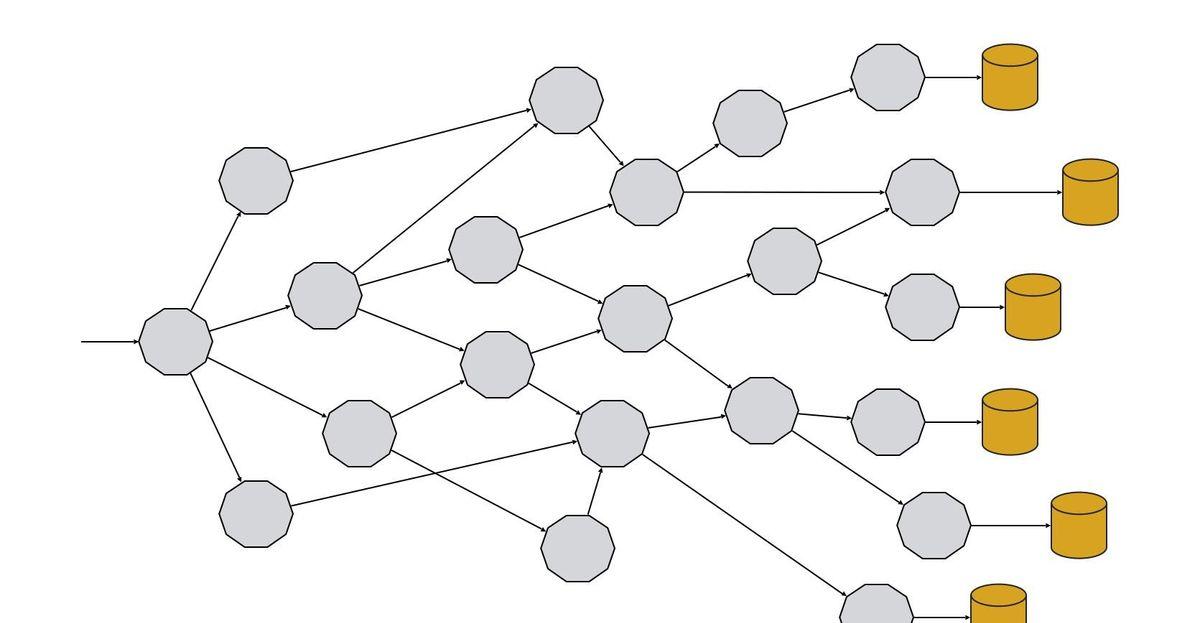
In a microservices architecture, an application is made up of multiple interconnected services that work together to achieve the required business functions. So, a typical enterprise-class microservices architecture looks like this:
Initially, we might think it would be easy to implement an application using a microservices architecture. However, it will not be easy to accomplish this properly, as we will face some new challenges that the monolithic architecture has not encountered. Such challenges include, for example, fault tolerance, service discovery, scalability, logging, and tracing.
To address these challenges, each microservice needs to implement what is called "microservicility" in Red Hat. The term refers to a cross-cutting list of concerns that a service must implement in addition to business logic.
These concerns are summarized as shown in the following figure:

Business logic can be implemented in any language (Java, Go, or JavaScript) or any framework (Spring Boot, Quarkus), but around business logic, we should implement the following concerns:
API: Services can be accessed through a predefined set of API operations. For example, in the case of a RESTful web API, HTTP is used as the protocol. In addition, APIs can be documented using tools like Swapper.
Discovery: A service needs to discover other services.
Invocation: After the service is discovered, it needs to be called with a set of parameters and may return a response.
Elasticity: One of the important features of a microservices architecture is that each service is elastic, which means that it can scale and scale independently based on parameters such as the importance of the system or the current workload.
Resiliency: In a microservices architecture, we should develop with failures in mind, especially when communicating with other services. In a single architecture, the app starts and closes as a whole. However, when we split an application into a microservices architecture, the application becomes composed of multiple services, all of which are connected to each other over the network, which means that some parts of the application may be functioning properly, while other parts may have failed. In this case, it is important to contain the failure and avoid the spread of errors through other services. Resilience (or applied resilience) is the ability of an app/service to respond to a problem it faces and still provide the best possible outcome when a problem arises.
Pipeline: Services should be able to be deployed independently and do not require any form of deployment orchestration. Based on this, each service should have its own deployment pipeline.
Authentication: In a microservices architecture, when it comes to security, an important aspect is how to authenticate/authorize calls between internal services. Web tokens (and generic tokens) are the preferred way to declare security between internal services.
Logging: In a single application, logging is a simple matter because all components of the application run in the same node. Components are now distributed across multiple nodes as a service, so to get a full picture of what happens to log tracing, we need a unified logging system/data collector.
Monitoring: An important aspect of ensuring that a microservices-based application is running correctly is measuring the health of the system, understanding the overall health of the application, and alerting you when something goes wrong. Monitoring is an important aspect of controlling an application.
Tracing: Tracking is used to visualize the flow and data progress of a program. It's especially useful for developers or ops when we need to examine what the user is doing throughout the app.
Kubernetes is becoming the de facto standard tool for deploying microservices. It is an open source system for automating, orchestrating, scaling, and managing containers.
But of the ten microservice features we mentioned, only three of them can be covered by using Kubernetes.
Discovery is achieved through _Kubernetes Service_ philosophy. It provides a way to group _Kubernetes Pod_ (as a whole) with stable virtual IP and DNS names. To discover a service, you only need to use the service name of Kubernetes as the host name when sending the request.
Using the Kubernetes Invocation service is very easy because the platform itself provides the required network to invoke arbitrary services.
Elasticity (or scalability) is something Kubernetes considered from the start, for example, if you run the kubectl scale deployment myservice --replicas=5 command, the myservice deployment will scale up to five replicas or instances. The Kubernetes platform is responsible for finding the right nodes, deploying services, and keeping the required number of replicas running.
But what about the remaining microservice features? Kubernetes only covers three of them, so how do we implement the remaining ones?
In the first article in this series, I covered one way to implement them by using Java to embed them inside a service.
The following diagram shows the service that implements cross-cutting concerns inside the code:
As explained in the previous article, this approach works fine and has many advantages, but it also has some drawbacks. We introduce a few main issues:
The underlying code of a service becomes a mixture of business logic (which brings value to the company) and infrastructure code (required by microservices).
Services in a microservices architecture may be developed in different languages, such as Service A using the Java language and Service B using the Go language. The challenge with multilingual services is to learn how to implement these microservice features for each language. For example, which library to use in Java for resilience, which library to use in Go, and so on.
In the case of Java, for each microservice feature, we might add new libraries (and all of their transitive dependencies), for example, to introduce Resiliency4J for resilience, Jaeger for tracking, or Microometer for monitoring. Although there is nothing wrong with doing so, the process of adding different kinds of libraries under the classpath increases the chance of classpath conflicts. In addition to this, memory consumption and startup time also increase. Last but not least, maintaining versions of these libraries across all Java services is also an issue, and we want to keep them the same version.
At the end of the day, we might be wondering, why do we need to implement these microservice features?
In a microservices architecture, an application is made up of multiple services that are connected to each other, all of which work together to generate the business functionality we need. These services are all connected to each other using the network, so we actually implement a model of distributed computing. Since it is distributed, observability (monitoring, tracing, logging) becomes somewhat complicated because all the data is spread across multiple services. Because the network is unreliable, or the network latency cannot be zero, services need to be resilient in the event of a failure.
Therefore, we can assume that the need for microservices features is due to decisions made at the infrastructure layer (we need to use the network's distributed services to communicate, rather than monomers). So why should we implement these microservice features at the application level, rather than at the infrastructure level? The problem is here, and there is a very simple answer to this question, and that is the service grid.
<h1 class="pgc-h-arrow-right" data-track="31" >what is a service mesh and Istio? </h1>
A service mesh is a dedicated infrastructure layer designed to make service-to-service communication secure, fast, and reliable.
Service meshes are typically implemented as lightweight network proxies and are deployed with service code that intercepts all inbound/outbound network traffic for the service.
Istio is an open source service mesh implementation for Kubernetes. Istio's strategy is to integrate a network traffic proxy into the Kubernetes Pod, a process that is implemented with the help of sidecar containers. The sidecar container runs on the same Pod as the service container. Because they run in the system's pods, the two containers share IP, lifecycle, resources, network, and storage.
Istio uses the Envy Proxy as the network proxy in the sidecar container and configures the pod to send all inbound/outbound traffic through the Envoy proxy ( sidecar container ) .
When using Istio, communication between services is not direct, but through a sidecar container (i.e. Envoy), and when service A requests service B, the request is sent to its proxy container via service A's DNS. Subsequently, the proxy container for service A sends a request to the proxy container for service B, and the proxy container eventually calls the real service B. The response follows the exact opposite path.
The sidecar container of the Envoy proxy implements the following features:
Intelligent routing and load balancing across services.
Fault injection.
Resilience: Retry and circuit breaker.
Observability and telemetry: metrics and tracking.
Security: Encryption and authorization.
Fleet-wide policy execution.
As we can see from the following diagram, the features implemented by the sidecar container match the five microservice features very well: service discovery, resiliency, authentication, monitoring, and tracking.
The logic of implementing microservice features in containers has several benefits:
The business code is completely isolated from the microservices feature.
All services use the exact same implementation because they use the same container.
Its code is self-contained. Services can be implemented in any language, but the concerns of these cross-cutting are always the same.
The configuration process and parameters are the same for all services.
But how does Istio work internally, and why do we need Istio instead of using the Envoy agent directly?
<h1 class="pgc-h-arrow-right" data-track="51" > architecture</h1>
The Envoy agent is a lightweight network proxy that can be used alone, but if there are ten services to deploy, we need to configure ten Envoy agents. The process can become somewhat complicated and cumbersome. Istio simplifies this process.
Architecturally, the Istio service mesh consists of a data plane and a control plane.
The data plane consists of envoy agents deployed as sidecars. This proxy intercepts communication between all networks. It also collects and reports telemetry for all mesh traffic.
The control plane is responsible for managing and configuring the Envoy agent.
The following diagram depicts these two components:
<h1 class="pgc-h-arrow-right" data-track="57" install Istio ></h1>
We need a Kubernetes cluster with Istio installed. For the purposes of this article, we'll use Minikube, but any other Kubernetes cluster will work.
Run the following command to start the cluster:
Copy the code
✨ Build on existing profiles and use virtualbox drivers
❗ For an existing minikube cluster, we cannot change its memory size. If needed, delete the cluster first.
Once the Kubernetes cluster is up and running, we can download the istioctl CLI tool to install Istio into the cluster. In this example, we download Istio 1.9.4 from the version release page.
Once the istioctl tool is installed, we can deploy Istio into the cluster. Istio comes with different profiles, but when it comes to learning Istio, the demo profile is the most appropriate.
istioctl install --set profile=demo -y
Detected that your cluster does not support third party JWT authentication. Falling back to less secure first party JWT. See https://istio.io/docs/ops/best-practices/security/#configure-third-party-service-account-tokens for details.
<small>✔ Istio core installed</small>
<small>✔ Istiod installed</small>
<small>✔ Egress gateways installed</small>
<small>✔ Ingress gateways installed</small>
<small>✔ Addons installed</small>
<small>✔ Installation complete</small>
We have to wait until all the Pods in the istio-system namespace are running.
In order to play all the functions of Istio, the Pods in the grid must run an Istio sidecar agent.
We have two ways to inject Istio sidecar into a pod: manually using the istioctl command or automatically when deploying the Pod to a configured namespace.
For simplicity, we configure the default automation sidecar injection for the default namespace by executing the following command:
kubectl label namespace default istio-injection=enabled
namespace/default labeled
Istio is now installed in a Kubernetes cluster and is ready for use in the default namespace.
In the following sections, we'll see how to "Istioize" an app and deploy one of these apps.
< h1 class="pgc-h-arrow-right" data-track="86" > application overview</h1>
An application consists of two services, a book service and a rating service. The Book service returns information about a book and its rating. Rating service Returns the rating for a given book. We have two versions of the rating service: v1 returns a fixed rating (i.e. 1) for all books, and v2 returns a random rating value.
< h1 class="pgc-h-arrow-right" data-track="88" > deployment</h1>
Because sidecar injection is already enabled, we don't need to make any changes to the Kubernetes deployment file. Next, we deploy these three services into an "Istio-based" namespace.
For example, the deployment file for _book service_ looks like this:
As we can see, there is neither Istio-related content in the file nor the configuration of the sidecar container. The injection of Istio features occurs automatically by default.
We deploy the application to a Kubernetes cluster:
After a few seconds, the app will launch. To verify, we run the following command and observe the number of containers the Pod has:
Note that each Pod contains two running containers, one of which is the service itself and the other is the Istio proxy.
If we describe this Pod, we will find:
Because we use Minikube and the Kubernetes service is of type LoadBalancer, minikube's IP and service port are required to access the app. To find these values, you can execute the following command:
Next, we can execute the curl command on the service:
From the output we can see the change in the rating value, that is, for the id of the same book, the rating value will change between 1 and 3. By default, Istio uses round-robin to balance calls to services. In this case, the request balances between rising:v1 (which returns a fixed rating value of 1) and rating:v2 (which performs a random scoring calculation at startup, in this case, returns 3 for a book with ID 1).
The application is now deployed and "Istio-based", but so far no microservice features have been enabled. Let's start by creating some Istio resources to enable and configure microservice features on the Istio proxy container.
<h1 class="pgc-h-arrow-right" data-track="112" > Istio microservice feature</h1>
<h1 class="pgc-h-arrow-right" data-track="113" > service discovery</h1>
Kubernetes Service_ implements the concept of service discovery. It provides a way to give a set of _Kubernetes pods (as a whole) a stable virtual IP and DNS name. When a Pod accesses other Pods, it can use the _Kubernetes Service_ name as the hostname. This only allows us to implement basic service discovery strategies, but we may need more advanced discovery/deployment strategies such as canary releases, grayscale releases, or shadowing traffic, and Kubernetes Service can't help.
Istio allows us to easily control network traffic between services through two concepts, destinyRule and VirtualService.
DestinationRule defines policies for how to service network traffic after routing occurs. In the destination rule we can configure something like this:
Network traffic policy
Load balancing policy
Connection pool settings
mTLS
Resilience
Use the label to specify a subset of services that will be used in VirtualService.
Let's create a file called destiny-rule-v1-v2.yml to register two subsets, one for _rating service v1_ and the other for _rating service v2_:
Here, we set the host field to rating because this is the DNS name defined in the _Kubernetes Service_. Subsequently, in the subsets section, we define multiple subsets in the form of a labels set and group them into a "virtual" name. For example, in the previous example, we defined two groups, one for version 1 of the rating service and one for version 2.
VirtualService allows us to configure how requests are routed to the service in the Istio service mesh. With virtual services, it's easy to implement a strategy like A/B testing, blue/green deployment, canary release, or grayscale release.
We create a file named virtual-service-v1.yml to send all traffic to v1:
In the preceding file, we configure that all requests to the rating host are sent to the Pod to which the version-v1 subset belongs. We need to remember that the subset is created in the DestinyRule file.
Now, we can execute some curl commands to the service again, but the biggest difference in output is that all the requests are sent to the _rating v1_.
Obviously, we can create another virtual service file that points to rating v2:
In this way, all traffic is sent to _rating_ v2:
Now, the rating field is not set to 1 because all requests are handled by version 2.
By modifying the weight field of the virtual service, we can achieve canary publishing.
Now, we execute some curl commands on the application:
Rating v1 has more visits than rating v2, which follows the percentage set in the weight field.
Now, let's remove the virtual service resource and return it to the default behavior (i.e. the round-robin policy):
<h1 class="pgc-h-arrow-right" data-track="160" > resilience</h1>
In a microservices architecture, we always develop with possible failures in mind, especially when communicating with other services. In a monolithic application, our application as a whole will either be all available or all down, but in a microservices architecture, this is not the case, because some services are available and others may already be down. Resilience (or applied resilience) is the ability of an app/service to respond to a problem it faces and still provide the best possible outcome when a problem arises.
Let's take a look at how Istio helps us implement resiliency policies and how to configure them.
<h1 class="pgc-h-arrow-right" data-track="163" > failure</h1>
The rating service implements a special endpoint that, when accessed, causes the service to start returning a 503 HTTP error code.
Execute the following command (replace the pod name with your own) to cause the service rating v2 to start failing when accessed:
<h1 class="pgc-h-arrow-right" data-track="168" > retry</h1>
Currently, Istio is configured to have no virtual service, which means it balances requests between the two versions.
We send some requests and verify rating v2 will fail:
One of the requests did not produce a response because _rating v2_ did not return a legitimate response, but instead produced an error.
Istio supports retries, which is achieved by configuring them in virtualService resources. Create a file named virtual-service-retry.yml with the following contents:
As configured, if the rating service (regardless of version) returns a 5XX HTTP error code, it will automatically retry twice.
Next, we send some requests and check the output:
Now, we can see that all requests are responded to by rating v1. The simple reason is that when a request for a rating service is sent to v1, it gets a legitimate response. However, if the request is sent to v2, an error occurs and a retry is performed automatically.
Because the call is load balanced between the two services, the retry request is sent to v1, resulting in a legitimate response.
For this reason, all of the above requests return a response from v1.
<h1 class="pgc-h-arrow-right" data-track="186" > circuit breaker</h1>
Automatic retries are a great way to handle network failures or occasional errors, but what happens if multiple concurrent users send requests to a faulty system with automatic retry?
We simulate this scenario by using Siege, an HTTP load testing tool, but first, we use the kubectl command to probe the logs for rating v2:
These log lines show the number of requests processed by the service. Currently, the service processes 34 requests.
To simulate four concurrent users, and each user sends ten requests to the application, we can execute the siege command as follows:
Of course, no errors are sent to the caller here, because there is an automatic retry mechanism, but let's probe the log of rating v2 again:
Although rating v2 cannot produce a legitimate response, the service is still accessed 25 times, which can have a big impact on the application because:
If the service is already overloaded, sending more requests is not a good idea for its recovery. Perhaps, the best way is to put the instance in a quarantine zone.
If the service happens to fail at this point because of a defect, retrying will not improve the situation.
For each retry, a socket is built, a file descriptor is assigned, and some packets are sent over the network, but what ends up is a failure. This process affects other services in the same node (CPU, memory, file descriptors, etc.) or the network (increased unwanted traffic, latency, etc.).
To solve this problem, we need a way to make calls fail automatically and quickly in the event of repeated execution failures. Circuit breaker design patterns and bulkhead patterns are the solutions to this problem. The former provides a strategy for rapid failure when encountering concurrency errors, while the latter limits the number of concurrent executions.
Now, create a file called destiny-rule-circuit-breaker.yml with the following content:
The first thing we need to note is that DestinyRule is configured with a circuit breaker. In addition to configuring circuit breakers, subsets also need to be specified. Restrictions on concurrent connections are implemented in the ConnectionPool field.
To configure the circuit breaker, we need to use outboundDetection. In this case, if an error occurs in a one-second time window, the circuit breaker will turn on, causing the service to trip temporarily for three minutes. After this time, the circuit breaker will be half-open, which means that the real logic will be executed. If it fails again, the circuit breaker remains open, otherwise, it will shut down.
Now that we've configured the circuit breaker pattern in Istio, we're executing the siege command again and probing the logs _rating v2_ v2.
Probe the logs again. Note that in the previous run, we have reached Request 59.
_Rating v2_ only received one request, because the first time the request was processed an error was returned, the circuit breaker opened, so no more requests were sent to rating v2.
Now we've seen how to use Istio for resiliency. Here, instead of implementing the relevant logic in the service and mixing it with the business logic, we let the sidecar container implement the logic.
Finally, execute the following command to return the rating v2 service to its previous state.
<h1 class="pgc-h-arrow-right" data-track="221" > authentication</h1>
One of the problems we may find when implementing a microservices architecture is how to secure communication between internal services. Are we going to use mTLS? Do you want to authenticate the request? Do you want to authenticate the request? The answer to all these questions is yes! Next, we'll take a step-by-step look at how Istio helps us implement these features.
<h1 class="pgc-h-arrow-right" data-track="223" > authentication</h1>
Istio automatically upgrades all network traffic between the proxy and the workload to mTLS, a process that does not require any service code modifications. At the same time, as developers, we implement services using the HTTP protocol. When a service is "Istio", the communication between the services is HTTPS. Istio is responsible for managing certificates, acting as a certificate authority, and revoking/renewing certificates.
To verify that mTLS is enabled, we can use the istioctl tool to execute the following command:
The book-service is hosted on port 8080 and mTLS is configured with a permissive policy.
<h1 class="pgc-h-arrow-right" data-track="229" > authorized</h1>
Next, let's look at how to enable End-User Authentication for Istio using the JSON Web Token (JWT) format.
The first thing we're going to do is apply a RequestAuthentication resource. This policy ensures that if the Authentication header information contains a JWT token, it must be legitimate, unexpired, issued by the correct user, and not tampered with.
The key fields are:
issuer: The legal issuer of the token. If the supplied token does not specify the issuer in the iss JWT field, then the token is illegal.
jwksUri: The URL of the jwks file that specifies the address of the public key registration to verify the signature of the token.
We now use an illegal token to run the curl command:
Because the token is illegal, the request is rejected and an HTTP/1.1 401 Unauthorized status code is returned.
Repeat the previous request with a valid token:
Now, we can see a legitimate response, because the token is correct at this point.
So far, we've only authenticated the request (only a valid token is needed), and Istio also supports authorization based on the role-based access control (RBAC) model. We're next going to create an AuthenticationPolicy policy that only allows requests with a legitimate JSON web token and claim role set to customer. Create a file named honorization-policy-jwt.yml:
Then execute the same curl command as above:
This time the response was decidedly different. Although the token is legitimate, access is denied because there is no claim role with the value customer in the token.
Then, we use a token like this:
curl 192.168.99.116:31304/book/1 -H "Authorization: Bearer eyJhbGciOiJSUzI1NiIsImtpZCI6IkRIRmJwb0lVcXJZOHQyenBBMnFYZkNtcjVWTzVaRXI0UnpIVV8tZW52dlEiLCJ0eXAiOiJKV1QifQ.eyJleHAiOjI1NDkwNTY4ODgsImlhdCI6MTU0OTA1Njg4OSwiaXNzIjoidGVzdGluZ0BzZWN1cmUuaXN0aW8uaW8iLCJyb2xlIjoiY3VzdG9tZXIiLCJzdWIiOiJ0ZXN0aW5nQHNlY3VyZS5pc3Rpby5pbyJ9. VM9VOHD2NwDjQ6k7tszB3helfAn5wcldxe950BveiFVg43pp7x5MWTjMtWQRmQc7iYul19PXsmGnSSOiQQobxdn2UnhHJeKeccCdX5YVgX68tR0R9xv_wxeYQWquH3roxHh2Xr2SU3gdt6s7gxKHrW7Zc4Z9bT-fnz3ijRUiyrs-HQN7DBc356eiZy2wS7O539lx3mr-pjM9PQtcDCDOGsnmwq1YdKw9o2VgbesfiHDDjJQlNv40wnsfpq2q4BgSmdsofAGwSNKWtqUE6kU7K2hvV2FvgwjzcB19bbRYMWxRG0gHyqgFy-uM5tsC6Cib-gPAIWxCdXDmLEiqIdjM3w"
{"bookId":1,"name":"Book 1","rating":3}
Now, we see a valid response because the token is correct and contains a valid role value.
<h1 class="pgc-h-arrow-right" data-track="260" > observability</h1>
Istio comes with four components to suit the need for observability:
Prometheus: For monitoring.
Grafana: For visualization.
Jaeger + Zipkin: For tracking.
Kiali: Used to provide a global overview of your app.
We can see all the Pods in the istio-system namespace:
<h1 class="pgc-h-arrow-right" data-track="269" > monitoring</h1>
Istio integrates with Prometheus to send various messages related to network traffic and services. In addition to that, it provides an instance of Grafana to visualize all the collected data.
To access Grafana, we can use the port-forward command to expose the Pod:
Open a browser and navigate to localahost:3000 to access Grafana's dashboard.
Kiali is another tool that runs in Istio and manages Istio and observes service mesh parameters such as how services are connected, how they are executed, and how Istio resources are registered.
To access Kiali, we can use the port-forward command to expose the Pod:
Open a browser, access the Istio dashboard, and navigate to locahost:20001.
<h1 class="pgc-h-arrow-right" data-track="280" > tracking</h1>
Tracking is used to visualize the flow and data progress of a program. Istio intercepts all requests/responses and sends them to Jaeger.
Here we can use istioctl instead of the port-forward command to expose the port and open the page automatically.
istioctl dashboard jaeger
<h1 class="pgc-h-arrow-right" data-track="284" > conclusion</h1>
Developing and implementing a microservices architecture is more challenging than developing monolithic applications. We believe that microservices features enable you to properly develop services in terms of application infrastructure.
Istio implements microservices features in a sidecar container that enable them to be reused across all services, independent of the programming language used by the application.
In addition, the Istio approach allows us to change the behavior of a service without redeploying it.
If you plan to develop microservices and deploy them into Kubernetes, Istio is a practical solution because it integrates seamlessly with Kubernetes.
The source code used in this article can be found in GitHub's repository, as can the source code for the first article in this series.
About the Author:
Alex Soto is Director of Developer Experience at Red Hat. He is passionate about java, software automation, and believes in open source software models. Soto is a co-author of Manning's Testing Java Microservices and O'Reilly's Quarkus Cookbook, and a contributor to several open source projects. He has been a Java Champion since 2017, an international speaker and a teacher at Salle URL University. You can follow him (Alex Soto ⚛️) on Twitter to stay up-to-date with what's happening in Kubernetes and Java.
Original link:
Implementing Microservicilites with Istio