1. 概述
Java NIO (New IO) 由以下三個核心元件組成:
- Channels (通道)
- Buffers (緩沖區)
- Selectors (選擇器)
通常,在NIO中,IO從一個Channel開始。資料可以從Channel中讀到Buffer,也可以從Buffer中寫道Channel。而Selector允許單個線程處理多個Channel。
2. Channel
Channels和Streams很像,但還是有一些不同的:
- 在一個Channels上既可以讀又可以寫,而Streams隻能讀或寫;
- Channels可以異步讀寫;
- Channels總是從Buffer中讀,或寫到Buffer中;
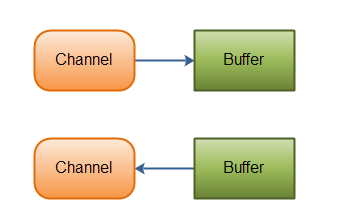
如上所述,資料從通道讀取到緩沖區中,從緩沖區寫入通道中,如下圖所示:
Channel最重要的四種實作:
- FileChannel : 從檔案中讀資料
- DatagramChannel : 可以通過UDP在網絡上讀寫資料
- SocketChannel : 可以通過TCP在網絡上讀寫資料
- ServerSocketChannel : 監聽TCP連接配接
3. Buffer
在Java NIO中Buffer用來和Channel互動,資料從channel讀到buffer中,從buffer寫到channel中。
Buffer本質上是一個記憶體塊,可以在其中寫入資料,然後在以後再次讀取。該記憶體塊包裝在NIO Buffer對象中,該對象提供了一組方法,可以更輕松地使用該記憶體塊。
使用Buffer讀寫資料,典型地分為四步:
- 寫資料到Buffer
- 調用buffer.flip()
- 從Buffer中讀資料
- 調用 buffer.clear() 或者 buffer.compact()
當你向一個buffer中寫資料時,buffer會跟蹤你已經寫了多少資料了。一旦你需要讀取資料,你需要調用flip()方法将buffer從寫入模式切換為讀取模式。在讀取模式下,buffer使你可以讀取寫入緩沖區的所有資料。
一旦你已經讀取了所有資料,你需要清除buffer,以使得它可以再次被寫入資料。有兩個方法可以達到這個效果:clear()或者compact()。clear()方法會清理整個buffer,compact()方法隻清理你已經讀過的資料。任何未讀的資料都将移至緩沖區的開頭,并且将來寫入buffer的資料在現在未讀的資料之後。
1 RandomAccessFile aFile = new RandomAccessFile("data/nio-data.txt", "rw");
 2 FileChannel inChannel = aFile.getChannel();
 3
 4 // create buffer with capacity of 48 bytes
 5 ByteBuffer buf = ByteBuffer.allocate(48);
 6
 7 int bytesRead = inChannel.read(buf); //read into buffer.
 8 while (bytesRead != -1) {
 9
10   buf.flip();  //make buffer ready for read
11
12   while(buf.hasRemaining()){
13       System.out.print((char) buf.get()); // read 1 byte at a time
14   }
15
16   buf.clear(); //make buffer ready for writing
17   bytesRead = inChannel.read(buf);
18 }
19 aFile.close();
Buffer有三個屬性:
- capacity
- position
- limit
position和limit的含義取決于Buffer是處于讀模式還是寫模式,無論哪種模式下capacity的含義總是不變的。
Capacity
作為一個記憶體塊,Buffer有一個固定大小,也被稱作“capacity”。一旦Buffer滿了,就需要清空它(讀取資料或清除資料),然後才能将更多資料寫入其中。
Position
當你将資料寫入Buffer時,你需要在一個明确的位置寫入。初始位置是0,當有資料被寫入後,position會向前移動以指向下一個可寫入的位置。position的最大值是capacity-1。
當你從Buffer中讀取資料時,也需要從一個給定的位置處開始讀取。當你将Buffer從寫模式切換為讀模式時,position會被重置為0。
Limit
在寫模式下,limit表示你可以寫多少資料到Buffer。在寫模式下,limit的值等于capacity。
在讀模式下,limit表示你可以從Buffer中讀多少資料。是以,當從寫模式切換為讀模式時,limit被設定為在寫模式是的position。換言之,寫了多少就能讀多少。
3.1. 配置設定一個緩沖區
為了獲得一個Buffer,首先必須先給它配置設定空間。每種類型的Buffer都有一個allocate()方法來做這件事。
1 // 配置設定位元組緩沖區,容量為48位元組
2 ByteBuffer buf = ByteBuffer.allocate(48);
3 // 配置設定字元緩沖區,容量為1024個字元
4 CharBuffer buf = CharBuffer.allocate(1024);
3.2. 寫資料到Buffer
有兩種方式向Buffer中寫資料:
- 從Channel中向Buffer寫資料
- 從Buffer本身向自己寫資料,通過put()方法
1 //read into buffer
2 int bytesRead = inChannel.read(buf);
3
4 buf.put(127);
flip()
flip()方法将Buffer從寫模式切換為讀模式,調用flip()将設定position為0,limit不變還是在剛才的位置。
3.3. 從Buffer中讀資料
有兩種方式從Buffer中讀資料:
- 從Buffer中讀資料到Channel
- 從Buffer自身讀取,通過get()方法
1 //read from buffer into channel
2 int bytesWritten = inChannel.write(buf);
3
4 byte aByte = buf.get();
rewind()
Buffer.rewind()設定position為0,以至于你可以從頭再讀一遍Buffer中的所有資料。
clear()
clear()方法将position置為0,并且limit與capacity相等。換句話說,Buffer被清除了。其實,Buffer上的資料并沒有被真正清除,隻是告訴你你可以将資料寫到哪裡。
compact()
compact()方法将所有未讀的資料複制到Buffer的開頭,然後它将position設定在最後一個未讀元素的右側,limit仍然等于capacity。現在,Buffer可以寫了,隻不過你不能覆寫之前那些未讀的資料。
mark() 和 reset()
通過調用Buffer.mark()你可以标記一個給定的位置。你可以在随後調用Buffer.reset()傳回到剛才标記的位置那裡。

4. Selector
Selector是一個元件,它可以檢查一個或多個Channel執行個體,并決定哪些Channel已經準備好讀或寫。通過這種方式,一個線程可以管理多個通道,進而實作管理多個網絡連接配接(PS:Selelctor可以确定哪些Channel可讀或可寫,這樣隻需要一個線程就能管理多個網絡連接配接)
4.1. 為什麼要用Selector
使用單個線程來處理多個通道的優點是,處理通道所需的線程更少。事實上,你可以使用一個線程來處理所有的通道。對于作業系統來說,線程之間的切換非常昂貴,而且每個線程也會占用作業系統中的一些資源(記憶體)。是以,使用的線程越少越好。(PS:但是請記住,現代作業系統和CPU在多任務處理方面變得越來越好,是以,随着時間的推移,多線程的開銷會越來越小。)
4.2. 建立Selector
1 //  建立一個Selector
2 Selector selector = Selector.open();
3
4 //  注冊Channel到Selector
5 channel.configureBlocking(false);
6 SelectionKey key = channel.register(selector, SelectionKey.OP_READ);
Channel必須是非阻塞模式才能和Selector一起使用。這就意味着FileChannel不能和Selector一起用,因為FileChannel不能切換成非阻塞模式。
register()方法的第二個參數表示你希望通過Selector在Channel中監聽的事件。有四種不同的事件可以被監聽:
- Connect
- Accept
- Read
- Write
這四種事件用SelectionKey的四個常量來表示:
- SelectionKey.OP_CONNECT
- SelectionKey.OP_ACCEPT
- SelectionKey.OP_READ
- SelectionKey.OP_WRITE
如果你對多個事件都感興趣,可以這樣寫:
1 int interestSet = SelectionKey.OP_READ | SelectionKey.OP_WRITE;
4.3. 通過Selector選擇Channel
在調用任意一個select()方法以後,會傳回你感興趣的并且相應事件已經準備好的channel給你。簡單地來說就是,如果你對已經為讀取做好準備的channel感興趣,那麼你将從select()方法中接收到這樣的channel。
- select() : 阻塞,直到至少有一個你注冊的事件準備好的channel
- select(long timeout) : 跟select()很像,多了一個逾時時間
- selectNow() : 不阻塞,無論有沒有已經準備好的channel都立刻傳回
select()方法的傳回值是一個int值,表示有多少個準備好的channel。也就是說,在上一次調用select()以後有多少個channel變成已準備好。
完整的示例:
1 Selector selector = Selector.open();
 2
 3 channel.configureBlocking(false);
 4
 5 SelectionKey key = channel.register(selector, SelectionKey.OP_READ);
 6
 7 while (true) {
 8
 9     int readyChannels = selector.selectNow();
10
11     if (readyChannels == 0) continue;
12
13
14     Set<SelectionKey> selectedKeys = selector.selectedKeys();
15
16     Iterator<SelectionKey> keyIterator = selectedKeys.iterator();
17
18     while (keyIterator.hasNext()) {
19
20         SelectionKey key = keyIterator.next();
21
22         if (key.isAcceptable()) {
23             // a connection was accepted by a ServerSocketChannel.
24
25         } else if (key.isConnectable()) {
26             // a connection was established with a remote server.
27
28         } else if (key.isReadable()) {
29             // a channel is ready for reading
30
31         } else if (key.isWritable()) {
32             // a channel is ready for writing
33         }
34
35         keyIterator.remove();
36     }
37 }
5. SocketChannel
Java NIO SocketChannel是連接配接到TCP網絡Socket的通道。
建立SocketChannel有兩種方式:
- 打開一個SocketChannel并連接配接到伺服器上
- 當一個輸入連接配接到達ServerSocketChannel時,也會建立一個SocketChannel
1 //  Opening a SocketChannel
2 SocketChannel socketChannel = SocketChannel.open();
3 socketChannel.connect(new InetSocketAddress("localhost", 9000));
4
5 //  Closing a SocketChannel
6 socketChannel.close();
5.1. 從SocketChannel中讀取
1 ByteBuffer buf = ByteBuffer.allocate(48);
2 int bytesRead = socketChannel.read(buf);
SocketChannel.read()方法将資料從SocketChannel讀到Buffer中,其傳回值表示有多少位元組被寫道Buffer中。如果傳回-1,則表示到達流的末尾。
5.2. 寫資料到SocketChannel
1 String newData = "hahaha";
 2
 3 ByteBuffer buf = ByteBuffer.allocate(48);
 4 buf.clear();
 5 buf.put(newData.getBytes());
 6
 7 buf.flip();
 8
 9 while(buf.hasRemaining()) {
10     channel.write(buf);
11 }
注意,SocketChannel.write()是放在while循環體中的。由于無法保證write()方法将多少位元組寫入SocketChannel,是以,要重複調用write()方法,直到緩沖區沒有位元組可寫為止。
5.3. 非阻塞模式
當一個SocketChannel被設定為非阻塞模式時,你就可以異步地調用connect(), read(), write()方法了。
connect()
如果SocketChannel是非阻塞模式,那麼當你調用connect()方法時,該方法可能在建立連接配接之前傳回。為了确定連接配接是否已經成功建立,可以調用finishConnect()方法。
1 socketChannel.configureBlocking(false);
2 socketChannel.connect(new InetSocketAddress("localhost", 9000));
3
4 while(! socketChannel.finishConnect() ){
5     //wait, or do something else...
6 }
write() 和 read()
在非阻塞模式下,write()方法可能會在未寫入任何内容的情況下傳回,是以需要在循環中調用write()。同樣的,在非阻塞模式下,read()方法可能在沒有讀取任何資料的情況下就傳回了,是以,需要注意傳回的int,它告訴我們讀取了多少位元組。
6. ServerSocketChannel
Java NIO ServerSocketChannel是一個可以監聽輸入TCP連接配接的通道,就像标準Java網絡中的ServerSocket一樣。
1 ServerSocketChannel serverSocketChannel = ServerSocketChannel.open();
2
3 serverSocketChannel.socket().bind(new InetSocketAddress(9999));
4
5 while(true){
6     SocketChannel socketChannel = serverSocketChannel.accept();
7     //do something with socketChannel...
8 }
6.1. Listening for Incoming Connections
通過調用ServerSocketChannel.accept()方法可以監聽輸入的連接配接。當accept()方法有傳回的時候,它傳回一個帶有輸入連接配接的SocketChannel。是以,accept()會阻塞直到有輸入連接配接到來為止。通常的做法是這樣的:
1 while(true){
2     SocketChannel socketChannel = serverSocketChannel.accept();
3     //do something with socketChannel...
4 }
6.2. 非阻塞模式
ServerSocketChannel可以設定為非阻塞模式。在非阻塞模式下,調用accept()方法會立即傳回,是以如果沒有輸入連接配接到達,它傳回的可能是null。是以,必須檢查傳回的SocketChannel是否為null,下面是一個例子:
1 ServerSocketChannel serverSocketChannel = ServerSocketChannel.open();
 2
 3 serverSocketChannel.socket().bind(new InetSocketAddress(9999));
 4 serverSocketChannel.configureBlocking(false);
 5
 6 while(true){
 7     SocketChannel socketChannel = serverSocketChannel.accept();
 8
 9     if(socketChannel != null){
10         //do something with socketChannel...
11     }
12 }
7. Java NIO vs. IO
7.1. Stream Oriented vs. Buffer Oriented
Java NIO和IO之間的第一個大差別是IO是面向流的,而NIO是面向緩沖區的。 那是什麼意思呢?
面向流的Java IO意味着你一次從流中讀取一個或多個位元組。如何處理讀取的位元組由你自己決定。它們不會被緩存到任何地方。此外,你不能在流中的資料中來回移動。如果需要來回移動從流中讀取的資料,需要首先将其緩存到緩沖區中。
Java NIO的面向緩沖區的方法略有不同。資料被讀入緩沖區,以後再從緩沖區中進行處理。你可以根據需要在緩沖區中來回移動。這使得在處理過程中更具靈活性。但是,你還需要檢查緩沖區是否包含你需要的所有資料,以便對其進行完全處理。并且,你需要確定在将更多資料讀入緩沖區時,不會覆寫緩沖區中尚未處理的資料。
7.2. Blocking vs. Non-blocking IO
Java IO的各種流被阻塞。這意味着,當線程調用read()或write()時,該線程将被阻塞,直到有一些資料需要讀取,或者資料被完全寫入。 在此期間,線程無法執行其他任何操作。
Java NIO的非阻塞模式允許線程請求從通道讀取資料,并且隻擷取目前可用的資料,如果目前沒有可用的資料,則什麼也得不到。在資料可以讀取之前,線程不會一直處于阻塞狀态,而是可以繼續執行其他操作。
非阻塞寫入也是如此。線程可以請求将某些資料寫入通道,但不等待将其完全寫入。然後線程可以繼續運作,同時執行其他操作。
當線程在IO調用中沒有被阻塞時,它們的空閑時間通常在其他通道上執行IO。也就是說,單個線程現在可以管理輸入和輸出的多個通道。
7.3. Selectors
Java NIO的Selector允許單個線程監視多個輸入通道。可以使用Selector注冊多個通道,然後使用一個線程“select”具有可用于處理輸入的通道,或者選擇準備好進行寫入的通道。這種選擇器機制使單個線程可以輕松管理多個通道。
7.4. 不同的資料讀取方式
Java IO: Reading data from a blocking stream
Java NIO: Reading data from a channel until all needed data is in buffer
8. 示例
ChatServer.java
1 package com.cjs;
 2
 3 import java.io.IOException;
 4 import java.net.InetSocketAddress;
 5 import java.nio.ByteBuffer;
 6 import java.nio.channels.SelectionKey;
 7 import java.nio.channels.Selector;
 8 import java.nio.channels.ServerSocketChannel;
 9 import java.nio.channels.SocketChannel;
10 import java.nio.charset.Charset;
11 import java.util.Iterator;
12 import java.util.Set;
13
14 public class ChatServer {
15
16     private ServerSocketChannel serverSocketChannel;
17     private Selector selector;
18
19     private ByteBuffer readBuffer = ByteBuffer.allocate(1024);
20     private ByteBuffer writeBuffer = ByteBuffer.allocate(1024);
21
22     private static final Charset CHARSET = Charset.forName("UTF-8");
23
24     public ChatServer(int port) {
25         try {
26             serverSocketChannel = ServerSocketChannel.open();
27             serverSocketChannel.socket().bind(new InetSocketAddress(port));
28             serverSocketChannel.configureBlocking(false);
29
30             selector = Selector.open();
31             serverSocketChannel.register(selector, SelectionKey.OP_ACCEPT);
32
33         } catch (IOException e) {
34             e.printStackTrace();
35         }
36     }
37
38     /**
39      * 監聽用戶端連接配接
40      */
41     public void listen() throws IOException {
42         System.out.println("伺服器啟動成功");
43         while(true) {
44
45             int readyChannels = selector.selectNow();
46
47             if(readyChannels == 0) {
48                 continue;
49             }
50
51             Set<SelectionKey> selectedKeys = selector.selectedKeys();
52
53             Iterator<SelectionKey> keyIterator = selectedKeys.iterator();
54
55             while(keyIterator.hasNext()) {
56
57                 SelectionKey key = keyIterator.next();
58
59                 if(key.isAcceptable()) {
60                     // a connection was accepted by a ServerSocketChannel.
61                     SocketChannel socketChannel = serverSocketChannel.accept();
62                     socketChannel.configureBlocking(false);
63                     socketChannel.register(selector, SelectionKey.OP_READ);
64                     socketChannel.write(CHARSET.encode("來自伺服器的問候: 你好!"));
65                 } else if (key.isConnectable()) {
66                     // a connection was established with a remote server.
67                 } else if (key.isReadable()) {
68                     // a channel is ready for reading
69                     SocketChannel socketChannel = (SocketChannel) key.channel();
70                     String msg = "";
71                     while (socketChannel.read(readBuffer) > 0) {
72                         readBuffer.flip();
73                         msg += CHARSET.decode(readBuffer).toString();
74                     }
75                     System.out.println(msg);
76                     readBuffer.clear();
77
78                     //  給用戶端回複消息
79                     writeBuffer.put("伺服器對你說: 收到".getBytes());
80                     writeBuffer.flip();
81                     socketChannel.write(writeBuffer);
82                     writeBuffer.clear();
83
84                 } else if (key.isWritable()) {
85                     // a channel is ready for writing
86                 }
87
88                 keyIterator.remove();
89             }
90         }
91     }
92
93     public static void main(String[] args) throws IOException {
94         ChatServer chatServer = new ChatServer(9000);
95         chatServer.listen();
96     }
97 }
ChatClient.java
1 package com.cjs;
  2
  3 import java.io.IOException;
  4 import java.net.InetSocketAddress;
  5 import java.nio.ByteBuffer;
  6 import java.nio.channels.SelectionKey;
  7 import java.nio.channels.Selector;
  8 import java.nio.channels.SocketChannel;
  9 import java.nio.charset.Charset;
 10 import java.util.Iterator;
 11 import java.util.Scanner;
 12
 13 public class ChatClient {
 14
 15     private SocketChannel socketChannel;
 16     private Selector selector;
 17
 18     private ByteBuffer readBuffer = ByteBuffer.allocate(1024);
 19
 20     private static final Charset CHARSET = Charset.forName("UTF-8");
 21
 22     public ChatClient(String host, int port) {
 23         try {
 24             socketChannel = SocketChannel.open();
 25             socketChannel.configureBlocking(false);
 26             socketChannel.connect(new InetSocketAddress(host, port));
 27
 28             while (!socketChannel.finishConnect()) {
 29                 System.out.println("正在等待連接配接");
 30             }
 31
 32             System.out.println("連接配接成功");
 33
 34             selector = Selector.open();
 35             socketChannel.register(selector, SelectionKey.OP_READ);
 36
 37             new Thread(new Handler(selector)).start();
 38
 39         } catch (IOException e) {
 40             e.printStackTrace();
 41         }
 42     }
 43
 44     /**
 45      * 給伺服器發消息
 46      */
 47     public void start() throws IOException {
 48         Scanner scanner = new Scanner(System.in);
 49         while (scanner.hasNext()) {
 50             String line = scanner.nextLine();
 51             if (null != line && !"".equals(line.trim())) {
 52                 socketChannel.write(CHARSET.encode(line));
 53             }
 54         }
 55     }
 56
 57     /**
 58      * 接收來自伺服器的消息
 59      */
 60     class Handler implements Runnable {
 61
 62         private Selector selector;
 63
 64         public Handler(Selector selector) {
 65             this.selector = selector;
 66         }
 67
 68         @Override
 69         public void run() {
 70             try {
 71                 while (true) {
 72
 73                     int readyChannels = selector.selectNow();
 74
 75                     if (readyChannels == 0) continue;
 76
 77                     Iterator<SelectionKey> keyIterator = selector.selectedKeys().iterator();
 78
 79                     while (keyIterator.hasNext()) {
 80
 81                         SelectionKey key = keyIterator.next();
 82
 83                         if (key.isReadable()) {
 84                             SocketChannel socketChannel = (SocketChannel) key.channel();
 85                             String msg = "";
 86                             while (socketChannel.read(readBuffer) > 0) {
 87                                 //  從寫模式切換為讀模式
 88                                 readBuffer.flip();
 89                                 msg += CHARSET.decode(readBuffer);
 90                             }
 91                             System.out.println(msg);
 92                             readBuffer.clear();
 93                         }
 94
 95                         keyIterator.remove();
 96                     }
 97                 }
 98             } catch (IOException e) {
 99                 e.printStackTrace();
100             }
101         }
102     }
103
104     public static void main(String[] args) throws IOException {
105         ChatClient chatClient = new ChatClient("127.0.0.1", 9000);
106         chatClient.start();
107     }
108 }
控制台
9. 參考
http://tutorials.jenkov.com/java-nio/index.html
http://tutorials.jenkov.com/java-nio/socketchannel.html