原文: 好玩的WPF第二彈:電子表字型顯示時間+多彩呼吸燈特效按鈕 版權聲明:轉載請聯系本人,感謝配合!本站位址:http://blog.csdn.net/nomasp https://blog.csdn.net/NoMasp/article/details/46457923
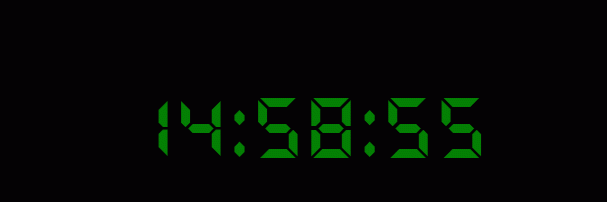

我們先來看看Quartz MS字型動态顯示系統時間的效果,難度相較于上一篇也要簡單許多。
首先是定義一個TextBlock如下。
<Grid>
     <TextBlock Name="tBlockTime" HorizontalAlignment="Center"
         VerticalAlignment="Center" FontSize="68" Foreground="Green"/>
</Grid>
背景代碼如下:
private DispatcherTimer dispatcherTimer;

public MainWindow()
{
     InitializeComponent();

     dispatcherTimer = new System.Windows.Threading.DispatcherTimer();
     // 當間隔時間過去時發生的事件
     dispatcherTimer.Tick += new EventHandler(ShowCurrentTime);
     dispatcherTimer.Interval = new TimeSpan(0, 0, 0, 1);
     dispatcherTimer.Start();
}


public void ShowCurrentTime(object sender, EventArgs e)
{
      //獲得星期
      //this.tBlockTime.Text = DateTime.Now.ToString("dddd", new System.Globalization.CultureInfo("zh-cn"));
      //this.tBlockTime.Text += "\n";

      //獲得年月日
      //this.tBlockTime.Text = DateTime.Now.ToString("yyyy:MM:dd");   //yyyy年MM月dd日
      //this.tBlockTime.Text += "\n";

      //獲得時分秒
      this.tBlockTime.Text = DateTime.Now.ToString("HH:mm:ss");
}
注意在這個時間的設定時,第一步顯示的時間是”=”,随後都是”+=”。比如說要先顯示星期,再顯示時分秒,就是這樣的:
//獲得星期
this.tBlockTime.Text = DateTime.Now.ToString("dddd", new System.Globalization.CultureInfo("zh-cn"));
this.tBlockTime.Text += "\n";

//獲得時分秒
this.tBlockTime.Text += DateTime.Now.ToString("HH:mm:ss");
然後還需要字型,然而字型并不可能是寫出來的……我們都需要需要引用資源。
<Window x:Class="WpfApplication2.MainWindow"
        xmlns="http://schemas.microsoft.com/winfx/2006/xaml/presentation"
        xmlns:x="http://schemas.microsoft.com/winfx/2006/xaml"
        Title="MainWindow"
        Width="500" Height="200"
        WindowStyle="None"
        AllowsTransparency="True"
        Background="Black">

    <Window.Resources>
        <Style x:Key="QuartzMSFont">
            <Setter Property="TextElement.FontFamily" Value="Resources/#Quartz MS"/>
        </Style>
    </Window.Resources>

    <Grid>
        <TextBlock Name="tBlockTime" Style="{DynamicResource QuartzMSFont}"
                   HorizontalAlignment="Center"
                   VerticalAlignment="Center" FontSize="68" Foreground="Green"/>
    </Grid>

</Window>
這裡我隻是給大家一個啟發,如果系統自帶的字型已經不能滿足你的藝術感,你完全可以另外找字型。甚至也可以創造字型,近來谷歌蘋果都在做這個。
我已經把字型放到項目中了,需要源碼/字型的童鞋直接留郵箱……
這一篇内容不多,也算不上精彩,但童鞋們可以看看上一篇:
好玩的WPF第一彈:視窗抖動+邊框陰影效果+倒計時顯示文字,也可以今明天再來看看第三篇~
沒想到這篇部落格被推薦了啦,内容這麼少……絕不能讓如此不堪的文章放在首頁啦,是以就來添加一點東西咯——也就是前文中的第二個GIF(個人感覺還是蠻炫酷的)。
首先給窗體設定一下吧:
<Window x:Class="WPFButton.Window1"
    xmlns="http://schemas.microsoft.com/winfx/2006/xaml/presentation"
    xmlns:x="http://schemas.microsoft.com/winfx/2006/xaml"
     Title="MainWindow"
        Width="600" Height="400"
        WindowStyle="None"
        AllowsTransparency="True"
        Background="Wheat">
這段代碼中的屬性在前一篇中都有介紹,大家可以看看。
我定義了這麼多的Button,是為了後面的示範效果而已,實際中可能用不到這麼多按鈕吧,哈哈。
<Grid>
        <Button Content="Yellow"
                Style="{StaticResource ResourcesButtonStyle}"
                Background="Yellow" Margin="90,37,450,323"/>

        <Button Content="Purple"
                Style="{StaticResource ResourcesButtonStyle}"
                Background="Purple" Margin="450,230,90,130" />

        <Button Content="Green"
                Style="{StaticResource ResourcesButtonStyle}"
                Background="Green" Margin="90,130,450,230" />

        <Button Content="DarkCyan"
                Style="{StaticResource ResourcesButtonStyle}"
                Background="DarkCyan" Margin="450,37,90,323" />

        <Button Content="Black"
                Style="{StaticResource ResourcesButtonStyle}"
                Background="Black" Margin="90,230,450,130"  />

        <Button Content="OrangeRed"
                Style="{StaticResource ResourcesButtonStyle}"
                Background="OrangeRed" Margin="450,136,90,224"/>

        <Button Content="Violet"
                Style="{StaticResource ResourcesButtonStyle}"
                Background="Violet" Margin="270,37,270,323" />

        <Button Content="CornflowerBlue"
                Style="{StaticResource ResourcesButtonStyle}"
                Background="CornflowerBlue" Margin="270,230,270,130"  />

        <Button Content="Lime"
                Style="{StaticResource ResourcesButtonStyle}"
                Background="Lime" Margin="270,136,270,224"/>

        <Button Content="Azure"
            Style="{StaticResource ResourcesButtonStyle}"
            Background="Azure" Margin="90,323,450,37"  />

        <Button Content="Turquoise"
            Style="{StaticResource ResourcesButtonStyle}"
            Background="Turquoise" Margin="270,323,270,37"  />

        <Button Content="Tomato"
            Style="{StaticResource ResourcesButtonStyle}"
            Background="Tomato" Margin="450,323,90,37" />
    </Grid>
這裡面用了資源,不要着急,後面會慢慢道來~
如果不用資源它是長這樣的:
好吧,廢話不多說,上資源。
<Window.Resources>
        <Style x:Key="ResourcesButtonStyle" TargetType="{x:Type FrameworkElement}" >
            <Setter Property="Width" Value="60"/>
            <Setter Property="Height" Value="40"/>
            <Setter Property="Effect">
                <Setter.Value>
                    <DropShadowEffect x:Name="OSE" BlurRadius="10"
                                      Color="Lime" Direction="0"
                                      Opacity="1"
                                      RenderingBias="Performance"
                                      ShadowDepth="0" >
                        <Storyboard.TargetProperty>
                            BlurRadius
                        </Storyboard.TargetProperty>
                    </DropShadowEffect>
                </Setter.Value>
            </Setter>
      </Style>
</Window.Resources>
C#比較好學的一點就是這些屬性呀什麼的都可以通過名字來猜出來意思,即便猜不出來也可以通過不斷的嘗試來發現這些屬性是做什麼的。
屬性RenderingBias可以設定側重于性能還是品質,就像電腦上的顯示卡設定裡那樣。
其他那些屬性強烈推薦大家不斷的修改數值觀察最終調試出來程式的反應,這也算是小小的實驗了。
上面的資源是靜态,還需要加上Storyboard動畫,動畫嘛,可以以各種屬性為參照,這裡我以BlurRadius和Color。前者可以間接做出呼吸燈效果(不過後面我将其數值最大設定成了100,要是哪個呼吸燈像這樣那就算是喘氣了),後者可以更換“呼吸”的色彩。
<Style.Triggers>
   <EventTrigger RoutedEvent="GotFocus">
       <BeginStoryboard>
           <Storyboard>
               <DoubleAnimation
                  Storyboard.TargetProperty="(FrameworkElement.Effect).(DropShadowEffect.BlurRadius)"
                  From="0" To="100"
                  BeginTime="00:00:00" Duration="00:00:01"
                  AutoReverse="True"  RepeatBehavior="Forever"/>

              <ColorAnimationUsingKeyFrames
                  Storyboard.TargetProperty="(FrameworkElement.Effect).(DropShadowEffect.Color)"
                  RepeatBehavior="Forever" AutoReverse="True">
                  <EasingColorKeyFrame KeyTime="0" Value="Yellow"/>
                  <EasingColorKeyFrame KeyTime="0:0:0.4" Value="Purple"/>
                  <EasingColorKeyFrame KeyTime="0:0:0.8" Value="Green"/>
                  <EasingColorKeyFrame KeyTime="0:0:1.2" Value="DarkCyan"/>
                  <EasingColorKeyFrame KeyTime="0:0:1.6" Value="Black"/>
                  <EasingColorKeyFrame KeyTime="0:0:2.0" Value="OrangeRed"/>
                  <EasingColorKeyFrame KeyTime="0:0:2.4" Value="Violet"/>
                  <EasingColorKeyFrame KeyTime="0:0:2.8" Value="CornflowerBlue"/>
                  <EasingColorKeyFrame KeyTime="0:0:3.2" Value="Lime"/>
                  <EasingColorKeyFrame KeyTime="0:0:3.6" Value="Azure"/>
                  <EasingColorKeyFrame KeyTime="0:0:4.0" Value="Turquoise"/>
                  <EasingColorKeyFrame KeyTime="0:0:4.4" Value="Tomato"/>
              </ColorAnimationUsingKeyFrames>
          </Storyboard>
      </BeginStoryboard>
  </EventTrigger>
</Style.Triggers>
BeginTime是起始時間,KeyTime類似于Flash裡的關鍵幀的時間。
前面是BlurRadius的變化,可以用From=”0” To=”100” ;而後面是Color,則需要用Value。
由于CSDN部落格上最多隻能上傳2M的圖檔,是以這些GIF都很短啦。大家應該多動手嘗試呢。我再來貼兩張GIF吧~
真實的程式中可不是這樣的哦!因為錄制GIF的時候為了考慮2M的限制而不得不将錄制的幀數調低,是以就“卡頓”成了這樣,有明顯的“波濤”效果。大家可以用源碼調試看看。
感謝您的通路,希望對您有所幫助。 歡迎大家關注、收藏以及評論。
為使本文得到斧正和提問,轉載請注明出處:
http://blog.csdn.net/nomasp