ElasticSearch 入門
本篇為 ElasticSearch 入門學習總結筆記,課程視訊位址:ElasticSearch 入門
一、ElasticSearch 簡介
1.1、什麼是ElasticSearch
簡稱 ES
- 基于Apache Lucene 建構的 開源搜尋引擎,提供一個分布式多使用者能力的全文搜尋引擎
- 采用 JAVA 編寫的 ,提供簡單易用的 RESTFul API(RESTFul web接口),目前流行的企業級搜尋引擎
- 輕松的 橫向擴充,可支援PB級 的結構化或非結構化資料處理
- 可以準實時地快速存儲、搜尋、分析海量的資料。(用于雲計算中,能夠達到實時搜尋)
1.2、應用場景
- 海量資料分析引擎(聚合搜尋)
- 站内搜尋引擎
- 資料倉庫
1.3、誰在用ES呢?
英國衛報— 實時分析公衆對文章的回應
維基百科、GitHub - 站内實時搜尋
百度—實時日志監控平台
阿裡、Google、小米、京東…
1.4、環境要求
| 工具 | 版本 |
|---|---|
| IDE | IDEA或Eclipse |
| JAVA | JDK8 |
| Maven | 3.x 以上 |
| NodeJS | 6.0以上 |
二、ElasticSearch 安裝
2.1、ES版本問題
- 版本曆史 : 1.x-》2.x-》5.x -》最新6.0
- 版本選擇 : 選擇6.0進行演練!
2.2、ES安裝-單執行個體
下載下傳位址:ES Downloads,windows環境下載下傳
ZIP sha
,Linux或者Mac環境下,下載下傳
TAR sha
。
windows 下安裝elasticsearch(有通路頁面)
ElasticSearch安裝部署(Windows)(添加到windows)
2.2.1 單執行個體的安裝(Windows)
1、下載下傳ES zip包
2、安裝Jdk8,并檢視環境變量配置
3、解壓ES包
- 目錄說明:
| 目錄名 | 說明 |
|---|---|
| config | 配置檔案 |
| modules | 子產品存放目錄 |
| bin | 腳本 |
| lib | 第三方庫 |
| plugins | 第三方插件 |
4、啟動驗證服務
windows環境在/bin 下載下傳輕按兩下 `elasticsearch.bat` 。啟動成功,看到starting....最後是started!
[2018-08-18T22:18:41,578][INFO ][o.e.n.Node               ] [-Jy0w6-] starting ...
[2018-08-18T22:18:44,044][INFO ][o.e.t.TransportService   ] [-Jy0w6-] publish_address {127.0.0.1:9300}, bound_addresses {127.0.0.1:9300}, {[::1]:9300}
{ml.machine_memory=8441524224, xpack.installed=true, ml.max_open_jobs=20, ml.enabled=true}, reason: apply cluster state (from master [master {-Jy0w6-}{-Jy0w6-QTKquaudbtTAQMQ}
[2018-08-18T22:18:48,923][INFO ][o.e.x.s.t.n.SecurityNetty4HttpServerTransport] [-Jy0w6-] publish_address {127.0.0.1:9200}, bound_addresses {127.0.0.1:9200}, {[::1]:9200}
[2018-08-18T22:18:48,924][INFO ][o.e.n.Node               ] [-Jy0w6-] started
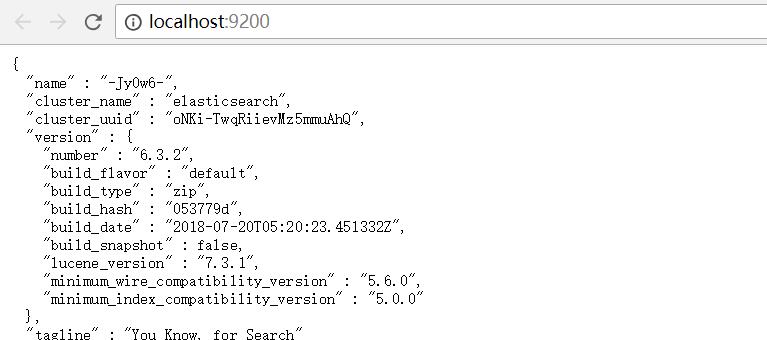
然後通路 http://localhost:9200/ ,頁面響應json格式資料,服務啟動正常!
2.2.2 實用插件Head安裝(Windows)
ES 預設傳回的資訊在頁面上是Json格式顯示!不太友好!
Head插件的優點:
- 提供了友好的web界面,解決資料在界面顯示問題
- 實作基本資訊的檢視和Restful 請求的模拟以及資料的基本檢索
1、安裝Head的步驟
【ElasticSearch-5.0安裝head插件】
【ES6.0版本安裝head插件】
1)、安裝Node 6.x以上J環境,安裝  執行指令` npm install -g grunt  -cli `進行安裝grunt。

2)、 下載下傳elasticsearch-head包,在Github【[elasticsearch-head](https://github.com/mobz/elasticsearch-head)】上面,直接選擇下載下傳的DownLoad zip到本地!

3)、儲存在 F:\elasticsearch_learn\ 檔案夾下面并對 elasticsearch-head 進行解壓!

4)、在  F:\elasticsearch_learn\elasticsearch-head-master檔案夾目錄下面,使用 `npm install` !
注意:第一次==執行失敗了!==報了下面的錯誤(可能是網絡不好的原因,網絡好的時候在嘗試執行一次),但是服務啟動沒有問題!
npm WARN optional SKIPPING OPTIONAL DEPENDENCY: fsevents@^1.0.0
npm ERR! node v6.10.3
npm ERR! npm  v3.10.10
npm ERR! code ELIFECYCLE
npm ERR! [email protected] install: `node install.js`
npm ERR! Exit status 1
....
npm ERR! Please include the following file with any support request:
npm ERR!     F:\elasticsearch_learn\elasticsearch-head-master\npm-debug.log
5)、doc視窗 在 F:\elasticsearch_learn\elasticsearch-head-master檔案夾目錄下面執行
# npm run start  或者  grunt server
 F:\elasticsearch_learn\elasticsearch-head-master>npm run start
6)、驗證服務,預設通路位址http://localhost:9100,如下圖顯示:

2、修改相應的配置
ElasticSearch和 elasticsearch-head 本質上是兩個服務程序,通路存在跨域問題,需要進行一些設定。
在 elasticsearch安裝目錄
/config/elasticsearch.yml
,在這個配置檔案的末尾追加下面兩行配置資訊并儲存!
http.cors.enabled: true
http.cors.allow-origin: "*"
| 屬性 | 預設值 | 描述 |
|---|---|---|
| http.cors.enabled | true | 如果啟用了 HTTP 端口,那麼此屬性會指定是否允許跨源 REST 請求。 |
| http.cors.allowed.origin | localhost | 如果 http.cors.enabled 的值為 true,那麼該屬性會指定允許 REST 請求來自何處。 |
更多屬性配置,請檢視 【Elasticsearch 服務配置屬性】
3、驗證elasticsearch和 elasticsearch-head
- 啟動 elasticsearch服務
- 啟動elasticsearch-head 服務
通路 http://localhost:9100 位址!檢視elasticsearch 叢集健康值是否正常!正常如下圖:
注: 叢集健康值
red(差):叢集 健康狀況很差,雖然可以查詢,但是已經出現了丢失資料的現象 ;
yellow(中):叢集健康狀況不是很好,但是叢集可以正常使用 ;
green(優):叢集健康狀況良好,叢集正常使用。
2.3、ES安裝-分布式安裝
1)、安裝說明,安裝三個節點,一個master ,兩個slave。
| 叢集名稱 | ip-端口 |
|---|---|
| myEsCluster (master) | 127.0.0.1:9500 |
| myEsCluster(slave) | 127.0.0.1:9600 |
| myEsCluster(slave) | 127.0.0.1:9700 |
2)、Es安裝包解壓出三份ES,修改每個 elasticsearch安裝目錄
/config/elasticsearch.yml
這個配置檔案
master配置說明:
# 設定支援elasticsearch-head
http.cors.enabled: true
http.cors.allow-origin: "*"

# 設定叢集master配置資訊
# 首先要指定 叢集的名字 ,名字随便起,符合正常命名規則
cluster.name: myEsCluster
# 節點的名字,一般為master 或者 slave
node.name: master
# 節點是否為master,設定為true的話,說明此節點為master節點
node.master: true
# 設定網絡,如果是本機的話就是127.0.0.1,其他伺服器配置對應的IP位址即可
network.host: 127.0.0.1
# 預設端口為 9200,可以修改預設設定
http.port: 9500
slave配置說明:
# 設定叢集slave配置資訊
# 首先要指定 叢集的名字 ,名字随便起,符合正常命名規則
cluster.name: myEsCluster
# 節點的名字,一般為master 或者 slave
node.name: slave1
# 節點是否為master,設定為true的話,說明此節點為master節點
node.master: false
# 預設端口為 9200,可以修改預設設定
http.port: 9600
# 設定網絡,如果是本機的話就是127.0.0.1,其他伺服器配置對應的IP位址即可
network.host: 127.0.0.1
# 設定叢集中master節點的初始清單,可以通過這些節點來自動發現新加入叢集的節點。可以是一個數組。
# #discovery.zen.ping.unicast.hosts: ["host1", "host2"]
discovery.zen.ping.unicast.hosts: ["127.0.0.1"]
兩個slave配置隻需要改相應的端口号即可!一個slave1:9600 ,一個slave2:9700。
更多配置參考:
- 【分布式搜尋elasticsearch配置檔案詳解】
- 【elasticsearch-.yml(中文配置詳解)】
3)、配置後完成後,啟動master的,然後啟動Slave,也啟動elasticsearch-head服務,此時頁面可以檢視Es叢集的狀态!如下圖所示:
2.4、 總結
從上面的安裝來看,Es的安裝相對還是比較簡單,并且在安裝分布式的時候,通過簡單的配置就可以快速擴充多個ES節點,能夠快速的進行擴容,非常靈活,友善!
三、ElasticSearch 基礎概念
3.1、基本概念
叢集和節點
叢集:是由一個或者多個ES節點組成的集合。 每一個叢集都有一個唯一的名字,預設是ElasticSearch。每個節點也都有唯一名字。
索引
索引: 含有相同屬性的文檔集合,比如産品的索引,使用者的索引等
類型:索引可以定義一個或多個類型,文檔必須屬于一個類型(一般會定義有相同字段的文檔為一個類型)
文檔:文檔是可以被所有的基本資料機關,是整個ES中最小的存儲機關
索引在Es中是通過一個名字來識别的,而且它的名字必須是 英文字母小寫,且不能有中劃線。
都是通過這個名字來進行增删查改。
| ES | 資料庫 |
|---|---|
| 索引 | 執行個體database |
| 類型 | 表-table |
| 文檔(字段) | 一行記錄 |
舉例:圖書索引 —> 文學類型、技能類型…---->每一本書可以看成一個文檔
分片和備份
分片: 每個索引都有多個分片,每個分片是一個Lucene索引
分片的好處:假如資料量很大的話,就會造成硬碟的壓力很大,同時搜尋速度也會出現瓶頸,将索引分成多個分片,進而分攤壓力提供效率。
備份:拷貝一份分片就完成了分片的備份,提供可用性
ES預設在建立索引的時候,會建立5個分片,1個備份。這個預設的數量是可以修改的。
number_of_shards: 每個索引的主分片數,預設值是 5 。這個配置在索引建立後不能修改。

  number_of_replicas:每個主分片的副本數,預設值是 1 。對于活動的索引庫,這個配置可以随時修改。
注意:索引的分片隻能在建立索引的時候指定,而不能再後期進行修改。備份是可以動态修改的。
四、ElasticSearch 基本用法
ES是以Restful API的風格來命名的。
- API 的基本格式
http://:/<索引>/<類型>/<文檔id>
- 常用HTTP動詞
GET/PUT/POST/DELETE
4.1、索引的建立
問題:如何确定一個索引是非結構化還是結構的化的呢?
結合Head插件,索引–>索引資訊,檢視JSON資料中mappings,如果資料為空,則說明是非結構化索引。
非結構化建立
使用Head插件進行索引的建立,在tab标簽上,選擇
索引
,點
建立索引
,輸入索引的名稱,注意名稱的命名規則。(我自己驗證,中文、有中劃線的索引名字都可以建立成功!但是字母必須是小寫!)
建立成功每個框框,都是Es索引的分片,粗線框是主分片 和 細線框 是分片的備份。
結構化建立
1)、使用Head插件進行索引的建立,在tab标簽上,選擇
複合查詢
,進行如下配置:
2)、或者使用PostMan工具進行索引的建立
說明:
在Elasticsearch 6.0.0或更高版本中建立的索引隻包含一個mapping type。 在5.x中使用multiple mapping types建立的索引将繼續像以前一樣在Elasticsearch 6.x中運作。 Mapping types将在Elasticsearch 7.0.0中完全删除。

Indices created in Elasticsearch 6.0.0 or later may only contain a single mapping type. Indices created in 5.x with multiple mapping types will continue to function as before in Elasticsearch 6.x. Mapping types will be completely removed in Elasticsearch 7.0.0.
PUT 127.0.0.1:9500/people
請求參數:
{
	"settings":{
		"number_of_shards":3,
		"number_of_replicas":1
	},
	"mappings":{
		"man":{
			"properties":{
				"name":{
					"type":"text"
				},
				"age":{
					"type":"integer"
				},
				"birth":{
					"type":"date",
					"format":"yyyy-MM-dd HH:mm:ss||yyyy-MM-dd||epoch_millis"
				},
				"country":{
					"type":"keyword"
				}
			}
		},
		"woman":{}

	}
}
結果:
{
    "acknowledged": true,
    "shards_acknowledged": true,
    "index": "people"
}
如果一個mappings中有兩個type的話,在送出的時候會報如下錯誤:
PUT 127.0.0.1:9500/people2
參數:
{
	"settings":{
		"number_of_shards":3,
		"number_of_replicas":1
	},
	"mappings":{
		"man":{
			"properties":{
				"name":{
					"type":"text"
				},
				"age":{
					"type":"integer"
				},
				"birth":{
					"type":"date",
					"format":"yyyy-MM-dd HH:mm:ss||yyyy-MM-dd||epoch_millis"
				},
				"country":{
					"type":"keyword"
				}
			}
		},
		"woman":{}

	}
}
結果:
{
    "error": {
        "root_cause": [
            {
                "type": "illegal_argument_exception",
                "reason": "Rejecting mapping update to [people2] as the final mapping would have more than 1 type: [woman, man]"
            }
        ],
        "type": "illegal_argument_exception",
        "reason": "Rejecting mapping update to [people2] as the final mapping would have more than 1 type: [woman, man]"
    },
    "status": 400
}
4.2、插入
文檔ID是一個唯一索引值,指向我們的文檔資料。
指定文檔ID插入
PUT 127.0.0.1:9500/people/man/1
指定插入文檔的ID為 1.
參數:
{
	"name":"dufy",
	"age":27,
	"birth":"1992-09-28",
	"country":"China"
}
請求結果:
{
    "_index": "people",
    "_type": "man",
    "_id": "1", # id 為1
    "_version": 1,
    "result": "created", # 辨別建立一個文檔
    "_shards": {
        "total": 2,
        "successful": 2,
        "failed": 0
    },
    "_seq_no": 0,
    "_primary_term": 1
}
使用Head插件檢視資料:
自動産生文檔ID插入
自動産生ID和上面指定ID插入不同的兩個地方是:
(1)、在請求位址上不需要指定 ID,讓ES自動幫我們建立ID!
(2)、請求方式為POST方式
POST 127.0.0.1:9500/people/man
請求參數:
{
	"name":"dufy_auto_id",
	"age":37,
	"birth":"1982-09-28",
	"country":"China"
}
請求結果:
{
    "_index": "people",
    "_type": "man",
    "_id": "zmLSUGUBWifqa4luPRp5", # 自動建立ID
    "_version": 1,
    "result": "created", # 辨別建立一個文檔
    "_shards": {
        "total": 2,
        "successful": 2,
        "failed": 0
    },
    "_seq_no": 1,
    "_primary_term": 1
}
使用Head插件檢視資料:
4.3 、修改
直接修改文檔
POST 127.0.0.1:9500/people/man/1/_update
注意:需要在請求的位址後面加上
_update
,辨別是一個修改操作。
請求參數:
{
    "doc":{
        "name":"dufy_update"
    }
}
請求響應結果:
{
    "_index": "people",
    "_type": "man",
    "_id": "1", # 辨別文檔的ID為1
    "_version": 2,
    "result": "updated", # 辨別修改一個文檔
    "_shards": {
        "total": 2,
        "successful": 2,
        "failed": 0
    },
    "_seq_no": 2,
    "_primary_term": 1
}
通過Head插件檢視,發現文檔ID為1 name已經修改了。
腳本修改文檔
腳本修改和直接修改的API是一樣的,隻是參數有些差別。
POST 127.0.0.1:9500/people/man/1/_update
第一種方式請求參數:
{
    "script":{
        "lang":"painless" , # ES 腳本語言
        "inline":"ctx._source.age += 10" #ctx:es上下文,_source:代表es目前的文檔,age:字段
    }
}
第二種方式請求參數:
{
    "script":{
        "lang":"painless" ,
        "inline":"ctx._source.age = params.age",
        "params":{  #使用params 指定資料值
        	"age":80
        }
    }
}
4.4、删除
删除文檔
DELETE 127.0.0.1:9500/people/man/1
使用delete請求,通過文檔的ID進行删除操作。
{
    "_index": "people",
    "_type": "man",
    "_id": "1",
    "_version": 5,
    "result": "deleted", # 辨別删除一個文檔
    "_shards": {
        "total": 2,
        "successful": 2,
        "failed": 0
    },
    "_seq_no": 5,
    "_primary_term": 1
}
删除索引
删除操作是一個比較危險的操作,因為索引一旦删除,對應的所有資料全部被删除了。
- 可以通過Head插件删除。确認輸入
删除
- 使用 PostMan進行删除,使用 請求,隻輸入請求的索引
127.0.0.1:9500/people
4.5、查詢-重點
查詢功能是使用過操作比較頻繁的。
首先進行資料初始化,建立一個book 的索引,然後插入一些資料。具體的建立索引和插入資料,檢視之前内容。
PUT 127.0.0.1:9500/book
結構化建立:
{
	"mappings":{
		"novel":{
			"properties":{
				"author":{
					"type":"text"
				},
				"word_count":{
					"type":"integer"
				},
				"publish_date":{
					"type":"date",
					"format":"yyyy-MM-dd HH:mm:ss||yyyy-MM-dd||epoch_millis"
				},
				"title":{
					"type":"keyword"
				}
			}
		}
	}
}
插入文檔資料:
POST 127.0.0.1:9500/book/novel/1
{
	"title":"Nginx",
	"word_count":5000,
	"publish_date":"2992-09-28",
	"author":"zhangyc"
}
簡單查詢
GET 127.0.0.1:9500/book/novel/4
{
    "_index": "book",
    "_type": "novel",
    "_id": "4",
    "_version": 1,
    "found": true,
    "_source": {  # 查詢出來索引為book,類型是novel的ID=4 的文檔資料
        "title": "Dubbo",
        "word_count": 8000,
        "publish_date": "1992-09-28",
        "author": "alibb"
    }
}
條件查詢
POST 127.0.0.1:9500/book/_search
- 查詢全部資料
{
	"query":{ # 查詢是以query為關鍵詞的
		"match_all":{} # 查詢全部的資料
	}
}
傳回結果:
{
    "took": 8, # 接口響應花費的時間/ms
    "timed_out": false,
    "_shards": {
        "total": 5,
        "successful": 5,
        "skipped": 0,
        "failed": 0
    },
    "hits": {
        "total": 5,  # 總共資料5條
        "max_score": 1,
        "hits": [ # 擊中,也就是響應的全部資料,hits預設傳回的資料為10條,可以修改!
            {
                "_index": "book",
                "_type": "novel",
                "_id": "5",
                "_score": 1,
                "_source": {
                    "title": "Nginx",
                    "word_count": 5000,
                    "publish_date": "2992-09-28",
                    "author": "zhangyc"
                }
            },
            {....} #其他的資料資訊
            }
        ]
    }
}
修改 hits預設傳回資料的總數。
{
	"query":{ # 查詢是以query為關鍵詞的
		"match_all":{} # 查詢全部的資料
	},
	"size":2 # 傳回資料的總數
}
- 關鍵詞查詢
POST 127.0.0.1:9500/book/_search
{
	"query":{
        "match":{
            "title": "Redis實戰"
        },
        # 預設 排序 使用 _score
        "sort":[ # 如何查詢資料較多,可以進行排序操作
            {"publish_date":{"order":"desc"}}
        ]
	}
}
{
    "took": 7,
    "timed_out": false,
    "_shards": {
        "total": 5,
        "successful": 5,
        "skipped": 0,
        "failed": 0
    },
    "hits": {
        "total": 1,
        "max_score": 0.2876821,
        "hits": [
            {
                "_index": "book",
                "_type": "novel",
                "_id": "3",
                "_score": 0.2876821,
                "_source": {
                    "title": "Redis實戰",
                    "word_count": 2000,
                    "publish_date": "1582-09-28",
                    "author": "marry"
                }
            }
        ]
    }
}
聚合查詢
POST 127.0.0.1:9500/book/_search
- 對書籍的字數進行聚合
查詢參數:
{
	"aggs":{
		"groud_word_count":{ # 自定義聚合名稱
			"terms":{
				"field":"word_count"
			}
		}
	}
}
傳回結果:
{
    # 其他資料省略
    "aggregations": {
        "groud_word_count": {
            "doc_count_error_upper_bound": 0,
            "sum_other_doc_count": 0,
            "buckets": [
                {
                    "key": 5000,
                    "doc_count": 2 # 文檔總數
                },
                {
                    "key": 2000,
                    "doc_count": 1
                },
                {
                    "key": 8000,
                    "doc_count": 1
                },
                {
                    "key": 10000,
                    "doc_count": 1
                }
            ]
        }
    }
}
上面這個是單個聚合,多個聚合同理:
{
	"aggs":{
		"groud_word_count":{ # 自定義聚合名稱
			"terms":{
				"field":"word_count"
			}
		},
    	"groud_title":{ # 自定義聚合名稱
			"terms":{
				"field":"title"
			}
		}
	}
}
- 進行函數計算
{
	"aggs":{
		"grades_word_count":{
			"stats":{  #統計資料 min 、max、avg、avg
				"field":"word_count"
			}
		}
	}
}
傳回結果:
"aggregations": { # 聚合
        "grades_word_count": {
            "count": 5,
            "min": 2000,
            "max": 10000,
            "avg": 6000,
            "sum": 30000
        }
    }
五、ElasticSearch 進階查詢
Elasticsearch Reference 6
子條件查詢
特定字段查詢 所指特定值
1、Query Context
在查詢過程中,除了判斷文檔是否滿足查詢條件外,ES還會計算一個**_score來辨別比對的程度,旨在判斷目标文檔和查詢條件比對的有多好**(比對度)!
- 全文本查詢 —— 針對文本類型資料
- 字段級别查詢——針對結構化資料,如數字、日期等
{
	"query":{
		"multi_match":{ # 多條件查詢
			"query":"Redis",
			"fields":["title","author"]
		}
	}

}
文法查詢:
{
	"query":{
		"query_string":{
			"query":"入門 OR Redis",
			"fields":["title","author"]
		}
	}

}
字段級别的查詢:
{
	"query":{
		"term":{
			"word_count":5000
		}
	}

}
字數或者日期範圍:
{
	"query":{
		"range":{
            "word_count":{
                "gte":1000,
                "lte":5000
            }
		}
	}

}
2、Filter Context
{
	"query":{
		"bool":{
            "filter":{
                "term":{
                	"word_count":5000
                }
            }
		}
	}

}
複合條件查詢
以一定的邏輯組合子條件查詢,結合了Query和Filter Context
- 固定分數查詢
- 布爾查詢
六、ElasticSearch 實戰演練
1、配置Spring boot ElasticSearch開發環境
1、建立Spring boot web項目,spring boot 使用2.0.4版本, elasticsearch為5.6.10
<parent>
        <groupId>org.springframework.boot</groupId>
        <artifactId>spring-boot-starter-parent</artifactId>
        <version>2.0.4.RELEASE</version>
        <relativePath/> <!-- lookup parent from repository -->
    </parent>

 <!--引入ELasticSearch的依賴包,預設使用elasticsearch5.6.10版本-->
        <dependency>
            <groupId>org.springframework.boot</groupId>
            <artifactId>spring-boot-starter-data-elasticsearch</artifactId>
        </dependency>
 <!--需要引入transport-netty3-client,否則會啟動報錯-->
        <dependency>
            <groupId>org.elasticsearch.plugin</groupId>
            <artifactId>transport-netty3-client</artifactId>
            <version>5.6.10</version>
        </dependency>
2、配置代碼
/**
 * ES 配置類
 * @author:dufyun
 * @version:1.0.0
 * @date 2018/8/19
 * @update:[日期YYYY-MM-DD] [更改人姓名][變更描述]
 */
@Configuration
public class ElasticSearchConfig {

	private static final Logger logger = LoggerFactory.getLogger(ElasticSearchConfig.class);

	@Bean
	public TransportClient transportClient() {
		logger.info("初始化開始。。。。。");
		TransportClient client = null;
		try {
			TransportAddress transportAddress = new InetSocketTransportAddress(InetAddress.getByName("localhost"),
					Integer.valueOf(9300));

			// 配置資訊
			Settings esSetting = Settings.builder()
					.put("cluster.name","myEsCluster")
					.build();

			//配置資訊Settings自定義,下面設定為EMPTY
			client = new PreBuiltTransportClient(esSetting);

			client.addTransportAddresses(transportAddress);


		} catch (Exception e) {
			logger.error("elasticsearch TransportClient create error!!!", e);
		}

		return client;
	}
}
也可以使用配置檔案!
es.hostName=localhost
es.transport=9300
es.cluster.name=myEsCluster
@Configuration
@PropertySource(value={"classpath:elasticsearch.properties"}) // 加載 指定的配置,隻支援properti
public class ElasticSearchConfig {

	private static final Logger logger = LoggerFactory.getLogger(ElasticSearchConfig.class);

	@Value("${es.hostName}")
	private String hostName;

	@Value("${es.transport}")
	private Integer transport;

	@Value("${es.cluster.name}")
	private String clusterName;

	@Bean
	public TransportClient transportClient() {
		LOGGER.info("初始化開始。。。。。");
		TransportClient client = null;
		try {
			TransportAddress transportAddress = new InetSocketTransportAddress(InetAddress.getByName(hostName),
					Integer.valueOf(transport));

			// 配置資訊
			Settings esSetting = Settings.builder()
					.put("cluster.name",clusterName)
					.build();

			//配置資訊Settings自定義,下面設定為EMPTY
			client = new PreBuiltTransportClient(esSetting);

			client.addTransportAddresses(transportAddress);


		} catch (Exception e) {
			logger.error("elasticsearch TransportClient create error!!!", e);
		}

		return client;
	}
}
3、使用單元測試進行驗證
@Autowired
	private TransportClient client;

	@Test
	public void contextLoads() {

		System.out.println(client);
       //org[email protected]
	}
2、接口開發
1、新增圖書資訊功能開發
2、修改圖書資訊功能開發
3、删除功能開發
4、綜合查詢接口開發
代碼如下:
/**
 * ES book索引 控制器
 * @author:dufyun
 * @version:1.0.0
 * @date 2018/8/19
 * @update:[日期YYYY-MM-DD] [更改人姓名][變更描述]
 */
@Controller
public class BookController {

	@Autowired
	private TransportClient client;

	/**
	 * http://localhost:8080/get/book/novel?id=2
	 * 擷取Es中資料
	 * @param id
	 * @return
	 */
	@GetMapping(value = "/get/book/novel")
	@ResponseBody
	public ResponseEntity getBook(@RequestParam("id") String id) {
		if (StringUtils.isEmpty(id)) {
			return new ResponseEntity("ID不能為空!", HttpStatus.NOT_FOUND);
		}
		GetResponse result = client.prepareGet("book", "novel", id).get();

		if (!result.isExists()) {
			return new ResponseEntity("資源沒有找到!", HttpStatus.NOT_FOUND);
		}

		return new ResponseEntity(result.getSource(), HttpStatus.OK);

	}

	/**
	 * 添加文檔資料
	 *  http://localhost:8080/add/book/novel
	 *  form-data
	 * @param title
	 * @param author
	 * @param word_count
	 * @param publish_date
	 * @return
	 */
	@PostMapping(value = "/add/book/novel")
	@ResponseBody
	public ResponseEntity addBook(@RequestParam("title") String title, @RequestParam("author") String author,
			@RequestParam("word_count") Integer word_count,
			@RequestParam("publish_date") String publish_date) {

		try {
			/**
			 * 要加 startObject,否則出現 Can not write a field name, expecting a value 錯誤!
			 */
			XContentBuilder builder = XContentFactory.jsonBuilder().startObject().field("title", title)
					.field("author", author).field("word_count", word_count)
					.field("publish_date", publish_date).endObject();

			IndexResponse indexResponse = client.prepareIndex("book", "novel").setSource(builder).get();

			return new ResponseEntity(indexResponse.getId(), HttpStatus.INTERNAL_SERVER_ERROR);
		} catch (IOException e) {
			e.printStackTrace();
			new ResponseEntity("内部服務錯誤!", HttpStatus.INTERNAL_SERVER_ERROR);
		}
		return new ResponseEntity("插入出錯!", HttpStatus.INTERNAL_SERVER_ERROR);

	}


	/**
	 * 删除Es中資料
	 * localhost:8080/del/book/novel?id=sdfhUWUB1-6vN1-K8u5f
	 * @param id
	 * @return
	 */
	@DeleteMapping(value = "/del/book/novel")
	@ResponseBody
	public ResponseEntity delBook(@RequestParam("id") String id) {
		if (StringUtils.isEmpty(id)) {
			return new ResponseEntity("ID不能為空!", HttpStatus.NOT_FOUND);
		}
		DeleteResponse result = client.prepareDelete("book", "novel", id).get();

		return new ResponseEntity(result.toString(), HttpStatus.OK);

	}

	/**
	 * 更新文檔
	 *
	 * @param id
	 * @param title
	 * @param author
	 * @param word_count
	 * @param publish_date
	 * @return
	 */
	@PutMapping(value = "/update/book/novel")
	@ResponseBody
	public ResponseEntity updateBook(@RequestParam("id") String id,
			@RequestParam(value = "title",required = false) String title,
			@RequestParam(value = "author",required = false) String author,
			@RequestParam(value = "word_count",required = false) Integer word_count,
			@RequestParam(value = "publish_date",required = false) String publish_date) {
		if (StringUtils.isEmpty(id)) {
			return new ResponseEntity("ID不能為空!", HttpStatus.NOT_FOUND);
		}
		UpdateRequest updateRequest = new UpdateRequest("book","novel",id);

		try {
			XContentBuilder builder = XContentFactory.jsonBuilder().startObject();
			if (!StringUtils.isEmpty(title)){
				builder.field("title", title);
			}
			if (!StringUtils.isEmpty(author)){
				builder.field("author", author);
			}
			if (!StringUtils.isEmpty(word_count)){
				builder.field("word_count", word_count);
			}
			if (!StringUtils.isEmpty(publish_date)){
				builder.field("publish_date", publish_date);
			}

			builder.endObject();

			updateRequest.doc(builder);

			UpdateResponse updateResponse = client.update(updateRequest).get();

			return new ResponseEntity(updateResponse.getId(), HttpStatus.OK);
		} catch (Exception e) {
			e.printStackTrace();
			return new ResponseEntity("内部錯誤!", HttpStatus.INTERNAL_SERVER_ERROR);
		}

	}

	/**
	 * localhost:8080/query/book/novel
	 * 複合查詢接口
	 * @param title
	 * @param author
	 * @param gt_word_conut
	 * @param lt_word_conut
	 * @return
	 */
	@PostMapping(value = "/query/book/novel")
	@ResponseBody
	public ResponseEntity queryBook(
			@RequestParam(value = "title",required = false) String title,
			@RequestParam(value = "author",required = false) String author,
			@RequestParam(value = "gt_word_conut",defaultValue = "0") int gt_word_conut,
			@RequestParam(value = "lt_word_conut",required = false) Integer lt_word_conut) {


		BoolQueryBuilder boolQuy = QueryBuilders.boolQuery();

		if(!StringUtils.isEmpty(title)){
			boolQuy.must(QueryBuilders.matchQuery("title", title));
		}
		if(!StringUtils.isEmpty(author)){
			boolQuy.must(QueryBuilders.matchQuery("author", author));
		}

		RangeQueryBuilder rangeQueryBuilder = QueryBuilders.rangeQuery("word_count").from(gt_word_conut);

		if(lt_word_conut != null && gt_word_conut >0){
			rangeQueryBuilder.to(lt_word_conut);
		}
		boolQuy.filter(rangeQueryBuilder);

		SearchRequestBuilder searchRequestBuilder = client.prepareSearch("book")
				.setTypes("novel")
				.setSearchType(SearchType.DFS_QUERY_THEN_FETCH)
				.setQuery(boolQuy)
				.setFrom(0)
				.setSize(10);
		SearchResponse searchResponse = searchRequestBuilder.get();
		List<Map<String, Object>> lists = new ArrayList<>();
		for (SearchHit hit:searchResponse.getHits().getHits()) {
			lists.add(hit.getSource());
		}

		return new ResponseEntity(lists,HttpStatus.OK);
	}

}
七、ElasticSearch 總結
- ES簡介——使用場景(重要性),提高競争力
- 安裝ES-單機-分布式
- 核心基礎概念
- 基本使用方法 ——增删查改
- 進階查詢文法——重點和難點
- 實戰演練
實戰演練源碼
springboot-elasticsearch
如果您覺得這篇博文對你有幫助,請點贊或者喜歡,讓更多的人看到,謝謝!
如果帥氣(美麗)、睿智(聰穎),和我一樣簡單善良的你看到本篇博文中存在問題,請指出,我虛心接受你讓我成長的批評,謝謝閱讀!
祝你今天開心愉快!
歡迎通路我的csdn部落格,我們一同成長!
不管做什麼,隻要堅持下去就會看到不一樣!在路上,不卑不亢!
部落格首頁 : http://blog.csdn.net/u010648555
© 每天都在變得更好的阿飛