轉載 https://blog.csdn.net/eson_15/article/details/51689648
上一篇博文主要介紹了springmvc的整個架構執行流程,對springmvc有了宏觀上的把握,這一篇博文主要以案例作為驅動,帶你走進springmvc的世界。案例中的需求很簡單:對商品清單的查詢。表的話還是使用我在學習mybatis時候用的表,具體可以參見這篇博文中的建表語句。
1. 環境的搭建
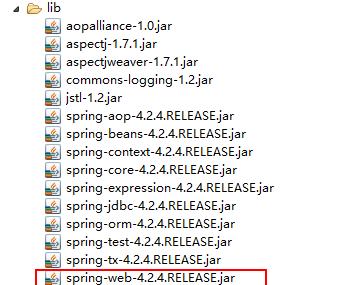
需要導入spring的jar包,單純的入門springmvc的話不需要導入所有的spring jar包,但是核心包和spring-web/spring-webmvc是一定要導入的,考慮到後面還會和mybatis整合,是以也導入了持久操作的包和aop的包,總共如下:
2. 配置前端控制器DispatcherServlet
前端控制器要配置在WEB-INF/web.xml中,如下:
<?xml version="1.0" encoding="UTF-8"?>
<web-app xmlns:xsi="http://www.w3.org/2001/XMLSchema-instance" xmlns="http://java.sun.com/xml/ns/javaee" xsi:schemaLocation="http://java.sun.com/xml/ns/javaee http://java.sun.com/xml/ns/javaee/web-app_3_0.xsd" id="WebApp_ID" version="3.0">
  <display-name>SpringMVC_Study</display-name>
  <welcome-file-list>
    <welcome-file>index.jsp</welcome-file>
  </welcome-file-list>
  <!-- 配置前端控制器DispatcherServlet -->
  <servlet>
    <servlet-name>springmvc</servlet-name>
    <servlet-class>org.springframework.web.servlet.DispatcherServlet</servlet-class>
    <init-param>
        <param-name>contextConfigLocation</param-name>
        <param-value>classpath:springmvc.xml</param-value>
          <!-- springmvc.xml名字可以随便起,如果不配置此節點的話springmvc 架構會預設找/WEB/INFO/<serlvet-name>-servlet.xml 檔案
本例中預設的配置檔案名是:springmvc-servlet.xml 如果指定了名字就可以随便起了-->
    </init-param>
  </servlet>

  <servlet-mapping>
    <servlet-name>springmvc</servlet-name>
    <url-pattern>*.action</url-pattern><!-- 注意可以配置成"/",不能配置成"/*",會導緻handler或者Action向jsp 傳遞資料時被攔截 -->
  </servlet-mapping>
</web-app>
從上面的配置中可以看出,和以前學習servlet時候的配置基本上一模一樣,前端控制器就相當于一個servlet,要注意的是,需要我們配置contextConfigLocation。contextConfigLocation是用來加載springmvc的配置檔案(配置處理器映射器、擴充卡等) 的,如果不配置contextConfigLocation,則預設加載的是
WEB-INF/[DispatcherServlet的Servlet名字]-servlet.xml
。是以處理器映射器和處理器擴充卡都會配在classpath下我們指定的springmvc.xml中。
還有一個要說明的地方就是DispatcherServlet的攔截方式,主要有三種攔截方式,如下:
- *.action,可以通路以.action結尾的位址,由DispatcherServlet進行解析。此方法最簡單,不會導緻靜态資源(jpg,js,css)被攔截。
- /,所有通路的位址都由DispatcherServlet進行解析,此方法可以實作REST風格的url,很多網際網路類型的應用使用這種方式。但是此方法會導緻靜态檔案(jpg,js,css)被攔截後不能正常顯示,是以對靜态檔案的解析需要配置不讓DispatcherServlet進行解析。
- /*,這樣配置是不對的,使用這種配置,最重要轉發到一個jsp頁面時,仍然會由DispatcherServlet解析jsp位址,不能根據jsp頁面找到Handler,會報錯。
這裡采用的是第一種方式。
3. 配置處理器擴充卡HandlerAdapter
因為處理器Handler要根據擴充卡的要求來開發,是以我們先配置一下擴充卡HandlerAdapter,在springmvc.xml中配置:
<?xml version="1.0" encoding="UTF-8"?>
<beans xmlns="http://www.springframework.org/schema/beans"
       xmlns:xsi="http://www.w3.org/2001/XMLSchema-instance"
       xmlns:mvc="http://www.springframework.org/schema/mvc"
       xmlns:context="http://www.springframework.org/schema/context"
       xmlns:aop="http://www.springframework.org/schema/aop"
       xmlns:tx="http://www.springframework.org/schema/tx"
       xsi:schemaLocation="http://www.springframework.org/schema/beans
        http://www.springframework.org/schema/beans/spring-beans-4.2.xsd
        http://www.springframework.org/schema/mvc
        http://www.springframework.org/schema/mvc/spring-mvc-4.2.xsd
        http://www.springframework.org/schema/context
        http://www.springframework.org/schema/context/spring-context.xsd
        http://www.springframework.org/schema/aop
        http://www.springframework.org/schema/aop/spring-aop-4.2.xsd
        http://www.springframework.org/schema/tx
        http://www.springframework.org/schema/tx/spring-tx.xsd">

    <!-- 處理器擴充卡:HandlerAdapter。所有處理器擴充卡都實作了HandlerAdapter接口-->
    <!-- SimpleControllerHandlerAdapter擴充卡能執行實作了Controller接口的Handler
    是以,現在配置了這個擴充卡的話,所有的處理器Handler必須要實作Controller接口才行。
-->
    <bean class="org.springframework.web.servlet.mvc.SimpleControllerHandlerAdapter" />
</beans>
擴充卡SimpleControllerHandlerAdapter能執行實作了Controller接口的Handler,為什麼呢?看下部分源碼就知道了:

既然這個擴充卡能執行實作了Controller接口的Handler,那我們趁熱打鐵,把Handler給寫了。
4. 處理器Handler開發
這裡為了友善,不涉及到mybatis查詢資料庫,我用靜态資料模拟一下:
public class ItemsController1 implements Controller {

    @Override
    public ModelAndView handleRequest(HttpServletRequest request,
            HttpServletResponse response) throws Exception {

        //實際中是調用service查找資料庫,查詢商品清單,這裡直接使用靜态資料來模拟了
        List<Items> itemsList = new ArrayList<Items>();
        //向list中填充靜态資料
        Items items_1 = new Items();
        items_1.setName("聯想筆記本");
        items_1.setPrice(6000f);
        items_1.setDetail("ThinkPad T430 聯想筆記本電腦!");

        Items items_2 = new Items();
        items_2.setName("蘋果手機");
        items_2.setPrice(5000f);
        items_2.setDetail("iPhone6蘋果手機!");

        itemsList.add(items_1);
        itemsList.add(items_2);

        //傳回ModelAndView
        ModelAndView modelAndView = new ModelAndView();

        //相當于request的setAttribute,在jsp頁面中通過itemsList取資料
        modelAndView.addObject("itemaList", itemsList);

        //指定視圖
        modelAndView.setViewName("/WEB-INF/jsp/items/itemsList.jsp");

        return modelAndView;
    }
}
程式中後面的視圖部分就跟之前學習servlet時差不多,隻不過換種寫法而已。
5. 配置處理器Handler
寫好了Handler,我們需要在springmvc.xml中對該Handler進行配置,如下:
<!-- 配置Handler -->
<bean name="/queryItems.action" class="ssm.controller.ItemsController1" />
先不說這個配置,在下面映射器配完了一起說。
6. 配置處理器映射器HandlerMapping
HandlerMapping也是在springmvc.xml中配置,如下:
<!-- 配置處理器映射器
    将bean的name作為url進行查找,需要在配置Handler時指定beanname(就是url)
 -->
<bean class="org.springframework.web.servlet.handler.BeanNameUrlHandlerMapping" />
BeanNameUrlHandlerMapping:表示将定義的Bean的name作為請求的url,需要将編寫的controller在spring容器中進行配置(即上面的Handler配置),且指定bean的name為請求的url,且必須以.action結尾。是以當請求的位址為:
上下文/queryItems.action
時,映射器BeanNameUrlHandlerMapping就會找到這個Handler配置中指定的class,也就是IntemsController1.java去執行,傳回ModelAndView。這樣就打通了請求->Handler這條線了。
7. 配置視圖解析器ViewResolver
最後一步就是在springmvc.xml中配置ViewResolver了,如下:
<!-- 配置視圖解析器
    進行jsp解析,預設使用jstl标簽,classpath下得有jstl的包
-->
<bean class="org.springframework.web.servlet.view.InternalResourceViewResolver" />
這樣就可以解析jsp了。最後貼上itemsList.jsp的代碼,主要是顯示一下Handler中自定義的靜态資料,用來測試的。
<%@ page language="java" contentType="text/html; charset=UTF-8"
    pageEncoding="UTF-8"%>
<%@ taglib uri="http://java.sun.com/jsp/jstl/core" prefix="c"%>
<%@ taglib uri="http://java.sun.com/jsp/jstl/fmt" prefix="fmt"%>
<!DOCTYPE html PUBLIC "-//W3C//DTD HTML 4.01 Transitional//EN" "http://www.w3.org/TR/html4/loose.dtd">
<html>
<head>
<meta http-equiv="Content-Type" content="text/html; charset=UTF-8">
<title>查詢商品清單</title>
</head>
<body>
    <form
        action="${pageContext.request.contextPath }/item/queryItem.action"
        method="post">
        查詢條件:
        <table width="100%" border=1>
            <tr>
                <td><input type="submit" value="查詢" /></td>
            </tr>
        </table>
        商品清單:
        <table width="100%" border=1>
            <tr>
                <td>商品名稱</td>
                <td>商品價格</td>
                <td>生産日期</td>
                <td>商品描述</td>
                <td>操作</td>
            </tr>
            <c:forEach items="${itemsList }" var="item">
                <tr>
                    <td>${item.name }</td>
                    <td>${item.price }</td>
                    <td><fmt:formatDate value="${item.createtime}"
                            pattern="yyyy-MM-dd HH:mm:ss" /></td>
                    <td>${item.detail }</td>

                    <td><a
                        href="${pageContext.request.contextPath }/item/editItem.action?id=${item.id}" target="_blank" rel="external nofollow" >修改</a></td>

                </tr>
            </c:forEach>

        </table>
    </form>
</body>

</html>
- 1
- 2
- 3
- 4
- 5
- 6
- 7
- 8
- 9
- 10
- 11
- 12
- 13
- 14
- 15
- 16
- 17
- 18
- 19
- 20
- 21
- 22
- 23
- 24
- 25
- 26
- 27
- 28
- 29
- 30
- 31
- 32
- 33
- 34
- 35
- 36
- 37
- 38
- 39
- 40
- 41
- 42
- 43
- 44
- 45
- 46
- 47
- 48
8. 部署項目工程
最後部署以下項目工程,打開tomcat,在浏覽器中輸入:http://localhost:8080/SpringMVC_Study/queryItems.action時就會出現itemsList.jsp中的内容,說明測試成功!
通過這個小案例,基本上已經走入了springmvc的世界了,接下來就是學習springmvc中其他的知識了,下一篇博文主要來總結一下springmvc中注解和非注解的使用。