上一篇:Android 天氣APP(三十二)快捷切換常用城市
語音播報
- 前言
- 正文
- 一、引入訊飛語音SDK
- 二、配置訊飛SDK
- 三、使用訊飛SDK
- 四、語音播報設定
- 文末
前言
在這篇文章中我将給天氣APP加入語音功能,首當其沖的就是這個語音播報功能。語音使用了第三方SDK,做語音開發不可能不知道訊飛,是以我這裡用的也是訊飛的SDK,下面開始吧。
正文
在我們正式寫APP的時候需要先做一個事情,那就是登入訊飛開放平台,然後進入控制台,點選建立新應用
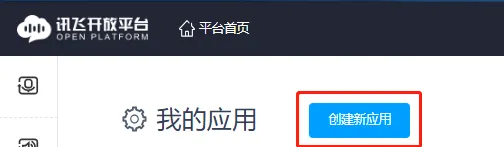
建立項目。

建立好之後會生成一個APPID
點選這個應用名字之後會進入可使用的SDK功能頁面,然後點選語音合成,之後下滑,找到Android的SDK,如下圖所示。
點選下載下傳,你會看到這個檔案夾的名字中包含了你的APPID,這裡是于剛才建立應用生成的是一樣的,是以你要自己去建立一次應用,下載下傳後解壓。
一、引入訊飛語音SDK
找到libs檔案夾,這裡有兩個檔案夾和一個jar檔案,複制粘貼到你的項目中app子產品的libs下。
這裡面已經有了百度地圖和定位的一些SDK檔案,不過你不用擔心沖突的問題,粘貼後如下所示,
此時你看到Msc.jar檔案是沒有展開的,說明還沒有引入進來。是以你需要同步配置一下項目
然後就展開了。
如果你發現并沒有展開,那麼你可以在你的app子產品下的build.gradle中的android閉包中添加如下代碼(這句代碼其實在我添加百度SDK的時候就已經加了,而你如果是一路看過來的話,肯定也是添加了的。)
{
        main {
            jniLibs.srcDir 'libs'
            jni.srcDirs = []    //disable automatic ndk-build
        }
    }
然後點選右上角的Sync Now 進行同步,此時Msc.jar包就會展開了。
之後複制解壓包下的assets下的iflytek檔案夾到你的項目的assets下,如下圖所示
至此導入就完成了,下面就是如何去使用的問題了。
二、配置訊飛SDK
既然是初始化,那麼肯定和我們在訊飛開放平台上建立應用時生成的APPID有關,那麼初始化應該要放在程式初始化的過程中,而不是頁面初始化。這裡最好的選擇就是放在自定義的Application的onCreate方法中,打開WeatherApplication類,找到onCreate方法,在裡面增加如下代碼:
//配置訊飛語音SDK
SpeechUtility.createUtility(this, SpeechConstant.APPID +"=6018c2cb"); 這裡你需要注意的是6018c2cb是我的APPID,你應該使用自己的APPID,如果你使用我的那麼你初始化不會成功的,這與你自己的訊飛平台開發者賬号是有關聯的。然後準備正式寫代碼了,首先明确一點我不希望把代碼都放在MainActivity中,尤其是在它裡面已經摻雜了很多代碼之後,是以我會寫一個工具類把功能和方法都放在這個工具類裡面,MainActivity中隻需要調用就可以了,同時這個工具類和設定頁面有關聯,因為播報是可以提供使用者自行去修改的,那麼這些修改值可以作為全局緩存值。下面在Constant類中新增如下幾個常量。
/**
     * 播報人
     */
    public static final String VOICE_NAME = "voiceName";

    /**
     * 語速
     */
    public static final String SPEED = "speed";

    /**
     * 音調
     */
    public static final String PITCH = "pitch";

    /**
     * 音量
     */
    public static final String VOLUME = "volume";
下面寫工具類,工具類裡面要完成SDK的初始化配置,音頻文字的合成,然後是播放。在com.llw.goodweather下的utils包下新增一個SpeechUtil類,代碼如下:
package com.llw.goodweather.utils;

import android.content.Context;
import android.graphics.Color;
import android.os.Bundle;
import android.os.MemoryFile;
import android.text.Spannable;
import android.text.SpannableStringBuilder;
import android.text.style.BackgroundColorSpan;
import android.util.Log;
import android.widget.ArrayAdapter;
import android.widget.TextView;
import android.widget.Toast;

import com.iflytek.cloud.ErrorCode;
import com.iflytek.cloud.InitListener;
import com.iflytek.cloud.SpeechConstant;
import com.iflytek.cloud.SpeechError;
import com.iflytek.cloud.SpeechEvent;
import com.iflytek.cloud.SpeechSynthesizer;
import com.iflytek.cloud.SynthesizerListener;
import com.iflytek.cloud.msc.util.FileUtil;
import com.iflytek.cloud.msc.util.log.DebugLog;

import java.util.Vector;

/**
 * 語音工具類
 *
 * @author llw
 */
public class SpeechUtil {

    private static final String TAG = "SpeechUtil";

    private static Context mContext;

    // 語音合成對象
    public static SpeechSynthesizer mTts;

    //播放的文字
    private static String defaultText = "富強、明主、文明、和諧、自由、平等、公正、法制、愛國、敬業、誠信、友善。";


    // 引擎類型
    private static String mEngineType = SpeechConstant.TYPE_CLOUD;

    private static Vector<byte[]> container = new Vector<>();

    //記憶體檔案
    private static MemoryFile memoryFile;
    //總大小
    public static volatile long mTotalSize = 0;


    // 預設發音人
    private static String voicer = "xiaoyan";
    //語速
    private static String speedValue = "50";
    //音調
    private static String pitchValue = "50";
    //音量
    private static String volumeValue = "50";

    private static TextView tvState;


    /**
     * 初始化監聽。
     */
    private static InitListener mTtsInitListener = code -> {
        Log.i(TAG, "InitListener init() code = " + code);
        if (code != ErrorCode.SUCCESS) {
            Log.i(TAG, "初始化失敗,錯誤碼:" + code);
        } else {
            Log.i(TAG, "初始化成功");
        }
    };

    /**
     * 初始化
     *
     * @param context
     */
    public static void init(Context context) {
        mContext = context;
        // 初始化合成對象
        mTts = SpeechSynthesizer.createSynthesizer(mContext, mTtsInitListener);
    }

    /**
     * 合成回調監聽。
     */
    private static SynthesizerListener mTtsListener = new SynthesizerListener() {
        //開始播放
        @Override
        public void onSpeakBegin() {
            Log.i(TAG, "開始播放");
        }

        //暫停播放
        @Override
        public void onSpeakPaused() {
            Log.i(TAG, "暫停播放");
        }

        //繼續播放
        @Override
        public void onSpeakResumed() {
            Log.i(TAG, "繼續播放");
        }

        //合成進度
        @Override
        public void onBufferProgress(int percent, int beginPos, int endPos, String info) {
            Log.i(TAG, "合成進度:" + percent + "%");
        }

        //播放進度
        @Override
        public void onSpeakProgress(int percent, int beginPos, int endPos) {
            // 播放進度
            Log.i(TAG, "播放進度:" + percent + "%");
            tvState.setText("播報中");
        }

        //播放完成
        @Override
        public void onCompleted(SpeechError error) {
            tvState.setText("播報完成");
            if (error == null) {
                Log.i(TAG, "播放完成," + container.size());
                DebugLog.LogD("播放完成," + container.size());
                for (int i = 0; i < container.size(); i++) {
                    //寫入檔案
                    writeToFile(container.get(i));
                }
                //儲存檔案
                FileUtil.saveFile(memoryFile, mTotalSize, mContext.getExternalFilesDir(null) + "/1.pcm");
            } else {
                //異常資訊
                showTip(error.getPlainDescription(true));
            }
            tvState.setText("");
        }

        //事件
        @Override
        public void onEvent(int eventType, int arg1, int arg2, Bundle obj) {
            //   以下代碼用于擷取與雲端的會話id,當業務出錯時将會話id提供給技術支援人員,可用于查詢會話日志,定位出錯原因
            //   若使用本地能力,會話id為null
            if (SpeechEvent.EVENT_SESSION_ID == eventType) {
                String sid = obj.getString(SpeechEvent.KEY_EVENT_SESSION_ID);
                Log.i(TAG, "session id =" + sid);
            }

            //當設定SpeechConstant.TTS_DATA_NOTIFY為1時,抛出buf資料
            if (SpeechEvent.EVENT_TTS_BUFFER == eventType) {
                byte[] buf = obj.getByteArray(SpeechEvent.KEY_EVENT_TTS_BUFFER);
                Log.i(TAG, "bufis =" + buf.length);
                container.add(buf);
            }
        }
    };

    /**
     * 寫入檔案
     */
    private static void writeToFile(byte[] data) {
        if (data == null || data.length == 0) {
            return;
        }
        try {
            if (memoryFile == null) {
                Log.i(TAG, "memoryFile is null");
                String mFilepath = mContext.getExternalFilesDir(null) + "/1.pcm";
                memoryFile = new MemoryFile(mFilepath, 1920000);
                memoryFile.allowPurging(false);
            }
            memoryFile.writeBytes(data, 0, (int) mTotalSize, data.length);
            mTotalSize += data.length;
        } catch (Exception e) {
            e.printStackTrace();
        }
    }

    /**
     * 參數設定
     *
     * @return
     */
    private static void setParam() {
        // 清空參數
        mTts.setParameter(SpeechConstant.PARAMS, null);
        // 根據合成引擎設定相應參數
        if (mEngineType.equals(SpeechConstant.TYPE_CLOUD)) {
            mTts.setParameter(SpeechConstant.ENGINE_TYPE, SpeechConstant.TYPE_CLOUD);
            //支援實時音頻傳回,僅在synthesizeToUri條件下支援
            mTts.setParameter(SpeechConstant.TTS_DATA_NOTIFY, "1");

            //擷取緩存值
            voicer = SPUtils.getString(Constant.VOICE_NAME, "xiaoyan", mContext);
            speedValue = SPUtils.getString(Constant.SPEED, "50", mContext);
            pitchValue = SPUtils.getString(Constant.PITCH, "50", mContext);
            volumeValue = SPUtils.getString(Constant.VOLUME, "50", mContext);

            // 設定線上合成發音人
            mTts.setParameter(SpeechConstant.VOICE_NAME, voicer);
            //設定合成語速
            mTts.setParameter(SpeechConstant.SPEED, speedValue);
            //設定合成音調
            mTts.setParameter(SpeechConstant.PITCH, pitchValue);
            //設定合成音量
            mTts.setParameter(SpeechConstant.VOLUME, volumeValue);
        } else {
            mTts.setParameter(SpeechConstant.ENGINE_TYPE, SpeechConstant.TYPE_LOCAL);
            mTts.setParameter(SpeechConstant.VOICE_NAME, "");
        }
        // 設定播放合成音頻打斷音樂播放,預設為true
        mTts.setParameter(SpeechConstant.KEY_REQUEST_FOCUS, "false");
        // 設定音頻儲存路徑,儲存音頻格式支援pcm、wav
        mTts.setParameter(SpeechConstant.AUDIO_FORMAT, "pcm");
        mTts.setParameter(SpeechConstant.TTS_AUDIO_PATH, mContext.getExternalFilesDir(null) + "/msc/tts.pcm");
    }

    /**
     * 開始語音預報
     */
    public static void startVoiceBroadcast(String text, TextView textView) {
        tvState = textView;
        if (mTts == null) {
            showTip("建立對象失敗,請确認 libmsc.so 放置正确,且有調用 createUtility 進行初始化");
            return;
        }
        if (text == null || text.isEmpty()) {
            text = defaultText;
        }
        //設定參數
        setParam();
        //開始合成播放
        int code = mTts.startSpeaking(text, mTtsListener);
        if (code != ErrorCode.SUCCESS) {
            showTip("語音合成失敗,錯誤碼: " + code);
        }
    }


    /**
     * Toast提示
     *
     * @param msg
     */
    private static void showTip(String msg) {
        Toast.makeText(mContext, msg, Toast.LENGTH_SHORT).show();
    }


} 這裡面的内容其實都是我在寫使用訊飛語音播報時都寫過的代碼,文章裡面講的比較的細,有興趣的可以去看看訊飛語音合成、語音播報,然後在我自己的項目中我肯定不會像那樣去使用,更多的是要結合項目自身情況而定,上面的代碼其實也是比較好了解的,每次播放時都會配置參數,參數中擷取緩存值,而MainActivity中隻需要做兩步操作即可。
三、使用訊飛SDK
使用前要先修改一下activity_main.xml的布局代碼。如下圖所示,我在原來的星期的後面加了兩個控件,一個用于觸發播放方法,一個用于顯示播放狀态。
下面我粘貼一下布局的代碼:
android:animateLayoutChanges="true"
                            android:layout_width="match_parent"
                            android:layout_height="wrap_content"
                            android:gravity="center_vertical">
                            <!--星期-->
                            <TextView
                                android:id="@+id/tv_week"
                                android:layout_width="wrap_content"
                                android:layout_height="wrap_content"
                                android:layout_marginEnd="@dimen/dp_12"
                                android:paddingLeft="16dp"
                                android:text="星期一"
                                android:textColor="@color/white"
                                android:textSize="18sp" />
                            <!--播放圖示-->
                            <ImageView
                                android:id="@+id/iv_voice_broadcast"
                                android:layout_width="20dp"
                                android:layout_height="20dp"
                                android:background="@mipmap/icon_broadcast"
                                android:visibility="gone" />

                            <!--播報狀态-->
                            <TextView
                                android:layout_marginStart="@dimen/dp_12"
                                android:id="@+id/tv_broadcast_state"
                                android:layout_width="wrap_content"
                                android:layout_height="wrap_content"
                                android:textColor="@color/white_4"
然後回到MainActivity中,綁定控件
@BindView(R.id.iv_voice_broadcast)
    ImageView ivVoiceBroadcast;//語音播報天氣
    @BindView(R.id.tv_broadcast_state)
    TextView tvBroadcastState;//播報狀态
然後要生成播報的内容,這個我們需要自己生成才行,是以我建立了好幾個對象
private String dateDetailStr, tempStr, tempMaxMin, precStr, airStr;
    //災害預警内容
    private String warnStr = "";
    //播放的内容
    private String voiceStr = "";
下面先來看點選事件
上圖中的代碼你需要自己去添加,然後下面要去改變voiceStr的值,
下面先指派dateDetailStr,在搜尋城市傳回中。
//日期所在地
dateDetailStr = "今天是" + DateUtils.getNowDateStr() + ","
+ DateUtils.getWeekOfDate(new Date()) + ",目前所在地:" + locationBean.getName() + "。"; 然後是tempStr ,在實況天氣傳回中。
tempStr = "目前溫度:" + data.getNow().getTemp() + "度,天氣" + data.getNow().getText() + "。"; 然後tempMaxMin ,天氣預報資料傳回中。
tempMaxMin = "今日最高溫:" + data.get(0).getTempMax() + "度," +
"最低溫:" + data.get(0).getTempMin() + "度。"; 然後precStr ,在分鐘級降水傳回中。
precStr = response.body().getSummary() + “。”;
然後airStr ,在空氣品質傳回中。
airStr = "空氣品質:" + data.getAqi() + ",空氣" + data.getCategory() + "。"; 最後就是拼接了,在生活資料傳回中。
//字元串拼接
            voiceStr = dateDetailStr + tempStr + tempMaxMin + precStr +
                    airStr + tvComf.getText().toString() +
                    tvAir.getText().toString() + warnStr;
            //圖示顯示
            ivVoiceBroadcast.setVisibility(View.VISIBLE);
當拼接完成之後顯示這個圖示。
下面稍微修改一下一些方法的請求順序,在搜尋城市的傳回中。
那麼現在你進入頁面的時候就可以點選這個廣播圖示播放音頻了。不過這裡的示範我就隻能放視訊連結了,GIF是聽不到聲音的。
示範視訊位址
四、語音播報設定
現在你還都隻是預設的播報人這樣當然不符合使用者的使用習慣,但是訊飛SDK的免費發音人也是有限的,隻有五個,是以我也是要利用起來,而且回顧之前的設定頁面頁面隻有一個孤零零的每日彈窗設定,好像太單調了,是以我把語音播報的設定加進去,豐富一下這個頁面。
不過在修改布局之前,先在mvplibrary的build.gradle的dependencies閉包下增加如下依賴:
//下拉框
    api 'com.github.arcadefire:nice-spinner:1.4.3'
然後Sync Now同步一下。
那麼下面進入到activity_setting.xml,在裡面增加如下代碼:
android:orientation="vertical"
        android:layout_width="match_parent"
        android:layout_height="wrap_content">
        <TextView
            android:layout_width="wrap_content"
            android:layout_height="wrap_content"
            android:padding="@dimen/dp_12"
            android:text="語音播報" />

        <LinearLayout
            android:layout_width="match_parent"
            android:layout_height="wrap_content"
            android:background="@color/white"
            android:gravity="center_vertical"
            android:paddingLeft="@dimen/dp_16">

            <TextView
                android:layout_width="0dp"
                android:layout_height="wrap_content"
                android:layout_weight="1"
                android:text="播報人"
                android:textColor="@color/black"
                android:textSize="@dimen/sp_16" />

            <org.angmarch.views.NiceSpinner
                android:id="@+id/ns_voicer"
                android:layout_width="0dp"
                android:layout_height="48dp"
                android:layout_weight="1"
                app:arrowTint="#000"
                app:textTint="#000" />
        </LinearLayout>

        <LinearLayout
            android:layout_marginTop="@dimen/dp_1"
            android:orientation="vertical"
            android:background="@color/white"
            android:paddingStart="@dimen/dp_16"
            android:paddingEnd="@dimen/dp_16"
            android:layout_width="match_parent"
            android:layout_height="wrap_content">
            <!--設定語速-->
            <LinearLayout
                android:layout_width="match_parent"
                android:layout_height="@dimen/dp_50"
                android:gravity="center_vertical">

                <TextView
                    android:layout_width="wrap_content"
                    android:layout_height="wrap_content"
                    android:text="語速"
                    android:layout_marginEnd="@dimen/dp_12"
                    android:textColor="#000"
                    android:textSize="16sp" />

                <com.google.android.material.slider.Slider
                    android:id="@+id/slider_speed"
                    android:layout_width="match_parent"
                    android:layout_height="wrap_content"
                    android:theme="@style/Theme.MaterialComponents.Light"
                    android:value="50"
                    app:haloColor="@color/blue_one"
                    app:thumbColor="@color/blue"
                    app:trackColorActive="@color/blue"
                    app:trackColorInactive="@color/blue_one"
                    android:valueFrom="0"
                    android:valueTo="100" />
            </LinearLayout>

            <!--設定音調-->
            <LinearLayout
                android:layout_width="match_parent"
                android:layout_height="@dimen/dp_50"
                android:gravity="center_vertical">

                <TextView
                    android:layout_width="wrap_content"
                    android:layout_height="wrap_content"
                    android:text="音調"
                    android:layout_marginEnd="@dimen/dp_12"
                    android:textColor="#000"
                    android:textSize="16sp" />

                <com.google.android.material.slider.Slider
                    android:id="@+id/slider_pitch"
                    android:layout_width="match_parent"
                    android:layout_height="wrap_content"
                    android:theme="@style/Theme.MaterialComponents.Light"
                    android:value="50"
                    android:valueFrom="0"
                    app:haloColor="@color/blue_one"
                    app:thumbColor="@color/blue"
                    app:trackColorActive="@color/blue"
                    app:trackColorInactive="@color/blue_one"
                    android:valueTo="100" />
            </LinearLayout>

            <!--設定音調-->
            <LinearLayout
                android:layout_width="match_parent"
                android:layout_height="@dimen/dp_50"
                android:gravity="center_vertical">

                <TextView
                    android:layout_width="wrap_content"
                    android:layout_height="wrap_content"
                    android:text="音量"
                    android:layout_marginEnd="@dimen/dp_12"
                    android:textColor="#000"
                    android:textSize="16sp" />

                <com.google.android.material.slider.Slider
                    android:id="@+id/slider_volume"
                    android:layout_width="match_parent"
                    android:layout_height="wrap_content"
                    android:theme="@style/Theme.MaterialComponents.Light"
                    android:value="50"
                    android:valueFrom="0"
                    app:haloColor="@color/blue_one"
                    app:thumbColor="@color/blue"
                    app:trackColorActive="@color/blue"
                    app:trackColorInactive="@color/blue_one"
android:valueTo="100" 然後進入到SettingActivity,綁定控件
@BindView(R.id.ns_voicer)
    NiceSpinner nsVoicer;//設定播報人
    @BindView(R.id.slider_speed)
    Slider sliderSpeed;//語速
    @BindView(R.id.slider_pitch)
    Slider sliderPitch;//音調
    @BindView(R.id.slider_volume)
    Slider sliderVolume;//音量
然後建立一些變量
//播報人
    private List<String> nameList = new LinkedList<>(Arrays.asList(
            "小燕", "許久", "小萍", "小婧", "許小寶"
    ));

    //發音人值
    private static final String[] arrayValue = {"xiaoyan", "aisjiuxu", "aisxping", "aisjinger", "aisbabyxu"};

    //語速
    private static String speedValue = "50";
    //音調
    private static String pitchValue = "50";
    //音量
    private static String volumeValue = "50";
上面的名字和值都是來源于訊飛SDK,首先寫一個方法初始化播報人下拉框
/**
     * 初始化Spinner
     */
    private void initSpinner() {
        //設定下拉資料
        nsVoicer.attachDataSource(nameList);

        //擷取緩存值
        String voiceName = SPUtils.getString(Constant.VOICE_NAME, "xiaoyan", context);

        //查找在數組中的位置
        int index = Arrays.asList(arrayValue).indexOf(voiceName);
        //擷取選中的值
        nsVoicer.setSelectedIndex(index);
        //選中監聽
        nsVoicer.setOnSpinnerItemSelectedListener((parent, view, position, id) ->
                SPUtils.putString(Constant.VOICE_NAME, arrayValue[position], context));
    }
這裡的下拉點選事件使用lambda表達式進行了簡化。就是通過點選item然後通過下标擷取數組的值放入緩存中,
然後設定滑動條,Slider是Seekbar的增強版。
/**
     * 設定Slider
     */
    private void setSlider(Slider slider, final int type) {
        //擷取之前設定的進度
        speedValue =  SPUtils.getString(Constant.SPEED,"50",context);
        pitchValue = SPUtils.getString(Constant.PITCH,"50",context);
        volumeValue = SPUtils.getString(Constant.VOLUME,"50",context);
        //設定進度
        sliderSpeed.setValue(Float.parseFloat(speedValue));
        sliderPitch.setValue(Float.parseFloat(pitchValue));
        sliderVolume.setValue(Float.parseFloat(volumeValue));

        //數值改變監聽
        slider.addOnChangeListener((slider1, value, fromUser) -> {
            switch (type) {
                case 1://設定語速 範圍 1~100
                    SPUtils.putString(Constant.SPEED,Float.toString(value),context);
                    break;
                case 2://設定音調  範圍 1~100
                    SPUtils.putString(Constant.PITCH,Float.toString(value),context);
                    break;
                case 3://設定音量  範圍 1~100
                    SPUtils.putString(Constant.VOLUME,Float.toString(value),context);
                    break;
                default:
                    break;
            }
        });
    }
最後在onCreate方法中調用。
那麼下面來運作一下吧。
OK
文末
語音播報就到這裡結束了,感謝您的閱讀,希望沒有浪費你的時間。
源碼位址:GoodWeather 歡迎 Star 和 Fork