文章目錄
- 下載下傳uni-app開發工具HBuilderX
- 學習 uni-app 教程
- 筆記
- 1、顯示 hello word 的幾種方式
- 2、綁定樣式的寫法
- 3、事件綁定
- 4、條件渲染
- 5、清單渲染
- 6、v-model
下載下傳uni-app開發工具HBuilderX
1、HBuilderX下載下傳位址: 下載下傳位址 2、下載下傳後解壓,輕按兩下解壓後的 HBuilderX.exe 即可打開
HBuilderX學習更多
學習 uni-app 教程
1、uni-app官方視訊教程 2、開發uni-app需要的vue2教程 3、uni-app零基礎入門到項目實戰
筆記
1、顯示 hello word 的幾種方式
<template>
  <view class="content">
    {{text}}
    <view v-text="text" class="content"></view>
    <view v-html="text" class="content"></view>
  </view>
</template>

<script>
  export default {
    data() {
      return {
        text:"<p>hello wold</p>"
      }
    },
  }
</script>

<style>

</style> 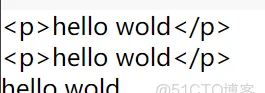
2、綁定樣式的寫法
<template>
  <view :class="myclass" v-bind:style="mystyle">
    Hello world
  </view>
</template>

<script>
  export default {
    data() {
      return {
        mystyle:"font-size:35px;color: #FFFFFF;",
        myclass:"content"
      }
    },
  }
</script>

<style>
  .content{background:red;}
</style> 
3、事件綁定
<template>
  <view :class="myclass" v-bind:style="mystyle" v-on:click="myclick">
    Hello world
  </view>
</template>

<script>
  export default {
    data() {
      return {
        mystyle:"font-size:35px;color:#fff",
        myclass:"content"
      }
    },
    methods:{
      myclick:function(){
        this.mystyle = "font-size:35px;color:#000",
        this.myclass = ""
      }
    }
  }
</script>

<style>
  .content{background:red;}
</style> 4、條件渲染
<template>
  <view>
    <view :class="myclass" v-bind:style="mystyle" v-if="show">
      Hello world
    </view>
    <view v-else>你好,世界</view>
    <button @click="click">按鈕</button>
  </view>
</template>

<script>
  export default {
    data() {
      return {
        mystyle: "font-size:35px;color:#fff",
        myclass: "content",
        show: true
      }
    },
    methods: {
      click() {
        this.show = !this.show;
      }
    }
  }
</script>

<style>
  .content {
    background: red;
  }
</style>
v-if
的 false 隐藏,預設是把所在的 view 給删除
v-show
則是直接更改樣式,
display:block;
->
display:none;
是以對于頻繁進行切換狀态,選擇
v-show
性能更好
需要注意的是
v-if
和
v-else
元素必須是相鄰的才能正常編譯
5、清單渲染
<template>
  <view>
    <view class="" v-for="item in list">
      Hello world
      {{item}}
    </view>

  </view>
</template>

<script>
  export default {
    data() {
      return {
        list:[1,2,3,4,5]
      }
    },
    methods: {

    }
  }
</script>

<style>
</style>
可以顯示索引
<template>
  <view>
    <view class="" v-for="(item,index) in list" :key="index">
      {{item}}:{{index}}
    </view>

  </view>
</template>

<script>
  export default {
    data() {
      return {
        list:[
          'Hello',
          'World',
          '你好',
          '世界'
        ]
      }
    },
    methods: {

    }
  }
</script>

<style>
</style>
6、v-model
<template>
  <view>
    <input type="text" value="" v-model="text" />
    <button type="primary" @click="click">送出</button>
    <view v-for="(item,index) in list">
      {{item}}
    </view>

  </view>
</template>

<script>
  export default {
    data() {
      return {
        text: "",
        list: ["hello", "world"]
      }
    },
    methods: {
      click() {
        this.list.push(this.text)
        this.text = ""
      }
    }
  }
</script>

<style>
</style>