- Linux Grub的相關問題
- GRUB2 配置工具Grub Customizer 修改啟動引導界面
- win7和Ubuntu雙系統開機出現grub該如何修複
- 進入Ubuntu系統
- 修複引導檔案
- win7裡裝了Ubuntu後開機出現grub rescure 用livecd修複grub2
Linux Grub的相關問題
我的電腦是雙系統的,分别是:win7和Ubuntu12.04.5LTS
GRUB2 配置工具Grub Customizer 修改啟動引導界面
作用:
可以修改開機引導項,删除,更改順序等 。
sudo add-apt-repository ppa:danielrichter2007/grub-customizer
sudo apt-get update
sudo apt-get install grub-customizer
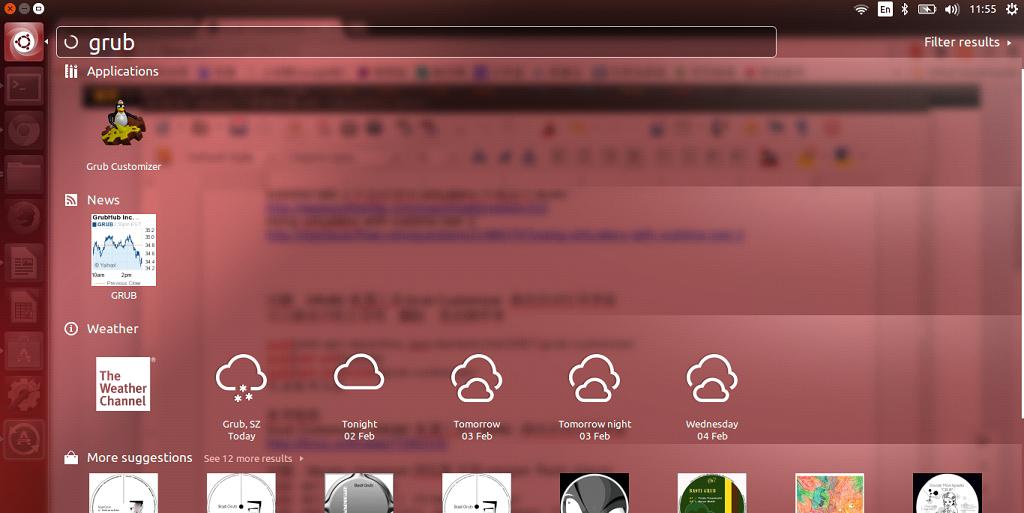
之後就可以在應用中心搜尋到:

參考連結:
1. Grub Customizer :GRUB2 配置工具 | BURG :修改啟動引導界面
http://linux.cn/thread/7195/1/1/
win7和Ubuntu雙系統開機出現grub>,該如何修複
由于Ubuntu系統重新安裝了,導緻引導檔案menu.lst缺失,開機出現grub>,這次我用liveCD重新安裝了grub,還是沒解決問題,看來要進入系統修複了。
這裡要分兩步:
1. 首先進入Ubuntu系統
2. 修複grub缺失檔案
進入Ubuntu系統
要想進入win7是比較簡單的,隻需下面的grub指令就可以了.
grub> rootnoverify (hd0,)  #f由于我的win7安裝在C槽
grub> chainloader +
grub> makeactive  #C槽如果是活動分區的話這一步可以省略
grub> boot
對于Ubuntu來說,根據/boot目錄有沒有單獨分區,分為兩種不同情況
1, /boot和Linux的/根在同一個分區
這時可以用類似的如下grub指令
grub> root (hd0,)  #包含/boot的分區
grub> kernel /boot/vmlinuz-version ro root=/dev/sda6         #/dev/sda6為  /根目錄 所在的分區
#由于(hd0,y)從0,1,2,3,開始計數,而 sda[y]從1,2,3開始計數,是以一般這個數值比上面的大1
grub> initrd /boot/initrd-version.img
grub> boot
2, /boot獨立一個分區,和Linux的根分區不是同一個分區
這時可以用類似的如下grub指令
grub> root (hd0,) #/boot所在的分區
grub> kernel /vmlinuz-version ro root=/dev/sda10     #/dev/sda10為  /根目錄 所在的分區
grub> initrd /initrd-version.img
grub> boot
我的Ubuntu是後來裝的,新手,是以分區較亂,總共分了三個區swap, /boot(分區名為(hd0,7),/dev/sda8), /(分區名為(hd0,9), /dev/sda10).當然如果不知道,通過下面的方法會找到的.
你可以利用通過cat指令+TABTAB鍵來檢視你的各個分區及分區裡面檔案,進而判斷哪個是/boot所在的分區,哪個/所在的分區.
比如
grub> cat (hd0,TAB鍵
會列出你的各個分區資訊,如圖
再通過
gurb> cat (hd0,)/TAB鍵
grub> cat (hd0,)/TAB鍵
可以看到其中的兩個linux分區裡的檔案,如圖:
這時就能判斷出/boot 所在分區為(hd0,7), / 所在分區為(dh0,9).
如何判斷/boot和/的/dev/sday分區名呢,可以用下面的指令檢視挂載資訊(當然也可以用U盤制作的LiveCD,進入U盤裡的Ubuntu系統通過 fdisk -l, cat /etc/fstab,df -lh 指令判斷出分區資訊).
這時就能判斷我的/boot在/dev/sda8, / 在/dev/sda10
接下來,根據上面所說第二種情況,以用cat出的(hd0,7)中的vmlinuz和initrd檔案名,就可以利用下面指令進入我的Ubuntu了
grub> root (hd0,) #/boot所在分區
grub> kernel /mlinuz---generic ro root=/dev/hda10 (/ 所在分區, ro表示隻讀)
grub> initrd /initrd.img---generic
grub> boot
也可以寫成
grub> kernel (hd0,)/mlinuz---generic ro root=/dev/hda10 (/ 所在分區, ro表示隻讀)
grub> initrd (hd0,)/initrd.img---generic
grub> boot
OK,成功進入我的Ubuntu系統
修複引導檔案
執行指令
$ls -la /boot/grub/
發現我有grub.cfg檔案,但是沒有menu.lst檔案(下面的指令執行中出現Could not find /boot/grub/menu.lst file)。這時你當然自己寫一個menu.lst檔案就可以了。
我是通過更新grub,再寫入mbr實作的。
[email protected]:~$ sudo update-grub
[sudo] password for zsh:
Searching for GRUB installation directory ... found: /boot/grub
Searching for default file ... found: /boot/grub/default
Testing for an existing GRUB menu.lst file ...

Could not find /boot/grub/menu.lst file. Would you like /boot/grub/menu.lst generated for you? (y/N) y
Searching for splash image ... none found, skipping ...
Found kernel: /memtest86+.bin
Found kernel: /vmlinuz---generic.efi.signed
Found kernel: /vmlinuz---generic
Found kernel: /vmlinuz---generic
Found kernel: /memtest86+.bin
Updating /boot/grub/menu.lst ... done

[email protected]:~$ sudo grub-install /dev/sda
Searching for GRUB installation directory ... found: /boot/grub
Installing GRUB to /dev/sda as (hd0)...
Installation finished. No error reported.
This is the contents of the device map /boot/grub/device.map.
Check if this is correct or not. If any of the lines is incorrect,
fix it and re-run the script `grub-install'.

(fd0)   /dev/fd0
(hd0)   /dev/sda
(hd1)   /dev/sdb
這樣就好了,你可以根據自己的情況更改menu.lst裡面的檔案,加入win7引導項,設定等待時間等。
開機效果(按ESC進入選單界面):
參考連結
1. fedora和ubuntu共存問題,修改grub的menu.lst (
很全面
)
http://blog.csdn.net/yueyinggufan/article/details/4342396
2. GRUB入門教程
http://www.linuxeden.com/forum/thread-72651-1-1.html (樓)
win7裡裝了Ubuntu後開機出現grub rescure>, 用livecd修複grub2
用LiveCD修複Grub2的具體方法如下:
1. 用Ubuntu9.10 Grub2CD光牒啟動系統;
2. 打開終端,輸入終端指令:sudo fdisk -l (檢視計算機分區清單)
請記錄下來根分區 / 和 /boot 分區安裝的位置(我的根分區位于/dev/sda6,/boot沒有單獨分區(若有則假設位于/dev/sda7)),
下面就以我的分區為例說明,請大家根據自己的磁盤分區情況進行相應修改;
3. 在終端輸入指令:
sudo -i        (取得root特權)
mount /dev/sda6 /mnt
mount /dev/sda7 /mnt/boot  (如果/boot沒有單獨分區則不要執行這個指令)
grub-install --root-directory=/mnt/ /dev/sda   (注意此指令中root前面是兩個減号橫杠)
輸入以後如果出現“Installation finished.No Error Reported.”字元的時候,就表示操作成功了。
參考連結:
1. 用livecd修複grub2
http://www.douban.com/note/93786640/
2. Ubuntu Grub2修複LiveCD實作方法詳解
http://blog.sina.com.cn/s/blog_8020e4110101cc0r.html