2018年9月27日筆記
jieba中文叫做結巴,是一款中文分詞工具,官方文檔連結:https://github.com/fxsjy/jieba
TfidfVectorizer中文叫做___ 詞頻逆文檔頻率向量化模型,是用來文章内容向量化的工具,官方文檔連結:http://sklearn.apachecn.org/cn/0.19.0/modules/generated/sklearn.feature_extraction.text.TfidfVectorizer.html
LogisticRegression中文叫做邏輯回歸模型___,是一種基礎、常用的分類方法。
建議讀者安裝anaconda,這個內建開發環境自帶了很多包。
到2018年9月27日仍為最新版本的anaconda下載下傳連結: https://pan.baidu.com/s/1pbzVbr1ZJ-iQqJzy1wKs0A 密碼: g6ex
官網下載下傳位址:https://repo.anaconda.com/archive/Anaconda3-5.2.0-Windows-x86_64.exe
下面代碼的開發環境為jupyter notebook,使用在jupyter notebook中的截圖表示運作結果。
0.打開jupyter
在桌面建立檔案夾命名為基于TfidfVectorizer的垃圾分類,如下圖所示:
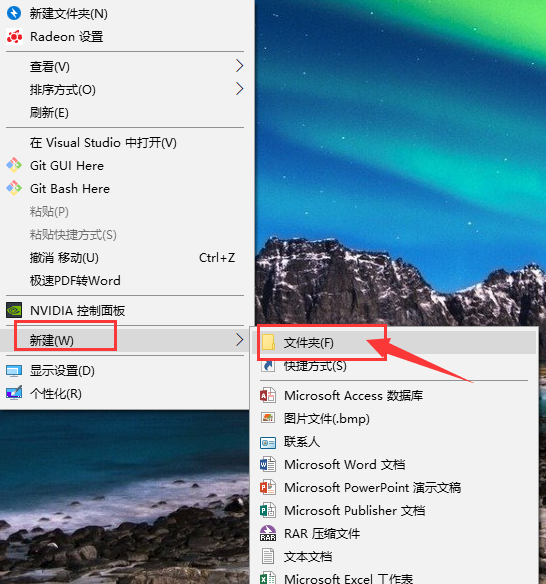
image.png
打開基于TfidfVectorizer的垃圾郵件分類檔案夾,在按住Shift鍵的情況下,點選滑鼠右鍵,出現如下圖所示。
選擇在此處打開PowerShell視窗,之後會在此路徑下打開PowerShell。

image.png
在PowerShell中輸入指令并運作:jupyter notebook
image.png
PowerShell運作指令後,會自動打開網頁,點選如下圖所示網頁中的按鈕:
image.png
spam中文叫做垃圾郵件
代碼檔案重命名為spamMailTest,重命名按鈕位置如下圖所示:
image.png
1.資料下載下傳
資料檔案下載下傳連結: https://pan.baidu.com/s/1kqOFq8Ou_2D3fIKp0l62qQ 提取碼: eu5x
壓縮檔案trec06c.zip當中含有64000多個包含郵件内容的文本檔案。
使用軟體Winrar無法解壓,使用軟體7zip或Bandizip可以解壓,需要3分鐘左右。
選擇解壓到trec06c,如下圖所示:
image.png
解壓完成後,檔案夾中目錄結構如下圖所示:
image.png
2.資料觀察
檢視檔案需要安裝Notepad++,安裝軟體後滑鼠右擊檔案,從Notepad++中打開按鈕如下圖所示:
image.png
trec06c檔案夾中的data/000/001檔案内容如下圖所示。
篇幅有限,本文作者隻示範其中一篇郵件的内容。
通過檢視多篇郵件的内容,發現郵件頭和郵件内容以一個空行分隔。
在代碼中找到第一個
\n\n
分隔成2段,第1段為郵件頭,第2段為郵件内容。
image.png
trec06c檔案夾中的full/index檔案内容如下圖所示。
每1行按照空格分隔成2段,第1段是郵件是否為垃圾郵件,标簽值為spam則是垃圾郵件,标簽值為ham則是正常郵件;
第2段是此郵件對應的路徑,代碼中通過字元串切片和拼接稍作修改成為能夠讀取檔案的路徑。
image.png
3.資料準備
3.1 預測目标值
預測目标值指派給變量y,代碼如下:
with open('./trec06c/full/index') as file:
    y = [k.split()[0] for k in file.readlines()]
print(len(y))
複制
上面一段代碼的運作結果如下:
64620
從上面的運作結果可以看出,共有64620個樣本。
3.2 郵件文本檔案路徑
郵件文本檔案路徑清單指派給變量filePath_list。
本文作者使用3種方法擷取文本檔案路徑,讀者可以參考。
3.2.1 使用trec06c檔案夾中的full/index檔案
第1種是直接使用trec06c檔案夾中的full/index檔案,代碼如下:
with open('./trec06c/full/index') as file:
    filePath_list = ['./trec06c' + k.strip().split()[1][2:] for k in file.readlines()]
print(filePath_list[0])
print(filePath_list[1])
複制
上面一段代碼的運作結果如下:
64620
./trec06c/data/000/000
./trec06c/data/000/001
3.2.2 定義getFilePathList函數
第2種是定義getFilePathList函數,函數中主要使用os.path.listdir、os.path.isdir、os.path.isdir這3個方法,擷取根目錄下的所有檔案。
os.path.listdir方法需要1個參數,參數是路徑,參數資料類型為字元串,方法可以找出路徑下所有檔案夾和檔案。
os.path.isdir方法需要1個參數,參數是路徑,參數資料類型為字元串,方法可以判斷此路徑是否為檔案夾。
os.path.isfile方法需要1個參數,參數是路徑,參數資料類型為字元串,方法可以判斷此路徑是否為檔案。
import os
import time

def getFilePathList(rootDir):
    filePath_list = []
    fileOrDir_list = os.listdir(rootDir) #列出檔案夾下所有的目錄與檔案
    for fileOrDir in fileOrDir_list:
        path = os.path.join(rootDir, fileOrDir)
        if os.path.isdir(path):
            filePath_list.extend(getFilePathList(path))
        if os.path.isfile(path):
            filePath_list.append(path)
    return filePath_list

startTime = time.time()
filePath_list = getFilePathList('./trec06c/data')
print(len(filePath_list))
print(filePath_list[0])
print(filePath_list[1])
print('function use %.2f seconds' %(time.time()-startTime))
複制
上面一段代碼的運作結果如下:
64620
./trec06c/data\000\000
./trec06c/data\000\001
function use 24.47 seconds
3.2.3 定義getFilePathList2函數
第3種是定義getFilePathList2函數,函數中主要使用os.walk方法,擷取目錄下所有的檔案。
os.walk方法的傳回結果的資料類型是清單,清單中的元素的資料類型是元組。
元組的第1個元素為表示路徑的字元串;
元組的第2個元素為第1個元素所表示路徑下的檔案夾;
元組的第3個元素為第1個元素所表示路徑下的檔案;
import os
import time

def getFilePathList2(rootDir):
    filePath_list = []
    for walk in os.walk(rootDir):
        part_filePath_list = [os.path.join(walk[0], file) for file in walk[2]]
        filePath_list.extend(part_filePath_list)
    return filePath_list

startTime = time.time()
filePath_list = getFilePathList2('./trec06c/data')
print(len(filePath_list))
print(filePath_list[0])
print(filePath_list[1])
print('function use %.2f seconds' %(time.time()-startTime))
複制
上面一段代碼的運作結果如下:
64620
./trec06c/data\000\000
./trec06c/data\000\001
function use 0.64 seconds
3.2.4 本節小結
對比3.2.2節和3.2.3節的運作時間,使用内置的os.walk方法效率高出很多。
24.47/0.64=38.2344
,在效率上,使用os.walk方法為自己實作方法的38倍。
3.3 郵件内容
3.3.1 加載郵件内容
本文作者在此項目開發中,采用快速疊代開發政策。
第1個疊代版本丢棄郵件頭隻使用郵件内容作為特征,就取得98%左右的準确率。
郵件内容清單指派給變量mailContent_list,代碼如下:
mailContent_list = []
for filePath in filePath_list:
    with open(filePath, errors='ignore') as file:
        file_str = file.read()
        mailContent = file_str.split('\n\n', maxsplit=1)[1]
        mailContent_list.append(mailContent)
print(mailContent_list[1])
複制
上面一段代碼的運作結果如下:
講的是孔子後人的故事。一個老上司回到家鄉,跟兒子感情不和,跟貪财的孫子孔為本和睦。
老上司的弟弟魏宗萬是趕馬車的。
有個洋妞大概是考察民俗的,在他們家過年。
孔為本總想出國,被爺爺教育了。
最後,一家人基本和解。
順便問另一類電影,北京青年電影制片廠的。中越戰背景。一軍人被介紹了一個對象,去相親。女方是軍隊醫院的護士,猶豫不決,總是在回憶戰場上負傷的男友,好像還沒死。最後
男方表示了解,歸隊了。
從上面的運作結果可以看出,擷取郵件内容清單成功。
3.3.2 正規表達式去除多餘空格
re.sub('\s+', ' ', k)
可以把變量k中多個空格或換行替換為單個空格。
import re

mailContent_list = [re.sub('\s+', ' ', k) for k in mailContent_list]
複制
4.分詞
4.1 加載停頓詞
停頓詞檔案下載下傳連結: https://pan.baidu.com/s/1JWQFy84wN_jhU9H2P1Ig7g 提取碼: uk4m
停頓詞檔案stopwords.txt檔案下載下傳完成後,放在代碼檔案的同級目錄。
with open('./stopwords.txt', encoding='utf8') as file:
    file_str = file.read()
    stopword_list = file_str.split('\n')
    stopword_set = set(stopword_list)
print(len(stopword_list))
print(len(stopword_set))
複制
上面一段代碼的運作結果如下:
1233
1231
從上面的運作結果可以看出,停頓詞清單中有2個停頓詞重複。
4.2 去除停頓詞效率對比
jie.lcut(mail)
與
list(jie.cut(mail))
兩種寫法效果相同。
每篇郵件的分詞結果的資料類型為清單,本文作者使用了2種方法去除分詞結果中的停頓詞。
不去除停頓詞的代碼寫法
cutWords = [k for k in jieba.lcut(mail)]
第1種去除停頓詞的代碼寫法
cutWords = [k for k in jieba.lcut(mail) if k not in stopword_list]
import time
import jieba

cutWords_list = []
startTime = time.time()
i = 0
for mail in mailContent_list[:3000]:
    cutWords = [k for k in jieba.lcut(mail) if k not in stopword_list]
    cutWords_list.append(cutWords)
    i += 1
    if i % 1000 == 0:
        print('前%d篇郵件分詞共花費%.2f秒' %(i, time.time()-startTime))
複制
上面一段代碼的運作結果如下:
前1000篇郵件分詞共花費14.74秒
前2000篇郵件分詞共花費27.88秒
前3000篇郵件分詞共花費43.70秒
第2種去除停頓詞的代碼寫法
cutWords = [k for k in jieba.lcut(mail) if k not in stopword_set]
import time
import jieba

cutWords_list = []
startTime = time.time()
i = 0
for mail in mailContent_list[:3000]:
    cutWords = [k for k in jieba.lcut(mail) if k not in stopword_set]
    cutWords_list.append(cutWords)
    i += 1
    if i % 1000 == 0:
        print('前%d篇郵件分詞共花費%.2f秒' %(i, time.time()-startTime))
複制
上面一段代碼的運作結果如下:
前1000篇郵件分詞共花費5.50秒
前2000篇郵件分詞共花費10.37秒
前3000篇郵件分詞共花費16.20秒
從上面2種方法運作時間的對比可以看出,判斷1個元素是否在集合中比判斷1個元素是否在清單中效率要高。
判斷1個元素是否在集合中,使用hash算法,時間複雜度為O(1);
判斷1個元素是否在清單中,使用循環周遊對比的方法,時間複雜度為O(n)。
在此次分詞結果去除停頓詞的實踐中,使用判斷1個元素是否在集合中的方法,效率是判斷1個元素是否在清單中的3倍左右。
64000多篇郵件分詞去除停頓詞共花費350秒左右,即6分鐘左右。
4.3 儲存分詞結果
第1行代碼導入pickle庫
第3行代碼open方法中的'wb'表示檔案以二進制形式寫入。
第4行代碼調用pickle.dump方法将python中的對象儲存到檔案中。
import pickle

with open('cutWords_list.pickle', 'wb') as file:
    pickle.dump(cutWords_list, file)
複制
4.4 加載分詞結果
本文作者提供已經完成的分詞結果,下載下傳連結: https://pan.baidu.com/s/1bjPgrsXKkovdgbdpzNXOmQ 提取碼: x71b
壓縮檔案cutWords_list.zip下載下傳完成後,其中的檔案cutWords_list.pickle解壓到代碼檔案同級目錄。
import pickle

with open('cutWords_list.pickle', 'rb') as file:
    cutWords_list = pickle.load(file)
複制
5.TfidfVectorizer模型
調用sklearn.feature_extraction.text庫的TfidfVectorizer方法執行個體化模型對象。
TfidfVectorizer方法需要3個參數。
第1個參數是分詞結果,資料類型為清單,其中的元素也為清單;
第2個關鍵字參數min_df是詞頻低于此值則忽略,資料類型為int或float;
第3個關鍵字參數max_df是詞頻高于此值則忽略,資料類型為Int或float。
檢視TfidfVectorizer方法的更多參數用法,官方文檔連結:http://sklearn.apachecn.org/cn/0.19.0/modules/generated/sklearn.feature_extraction.text.TfidfVectorizer.html
from sklearn.feature_extraction.text import TfidfVectorizer

tfidf = TfidfVectorizer(cutWords_list, min_df=100, max_df=0.25)
複制
6.訓練資料準備
模型需要的訓練資料是純數字的特征矩陣和預測目标值。
特征矩陣通過TfidfVectorizer模型獲得,預測目标值是标簽編碼的結果。
6.1 特征矩陣
第1行代碼調用TfidfVectorizer對象的fit_transform方法獲得特征矩陣;
第2行代碼列印檢視TfidfVectorizer對象的詞表大小;
第3行代碼檢視特征矩陣的形狀。
X = tfidf.fit_transform(mailContent_list)
print('詞表大小:', len(tfidf.vocabulary_))
print(X.shape)
複制
6.2 預測目标值
第1行代碼導入sklearn.preprocessing庫的LabelEncoder類;
第3行代碼調用LabelEncoder()執行個體化标簽編碼對象;
第4行代碼調用标簽編碼對象的fit_transform方法擷取預測目标值。
from sklearn.preprocessing import LabelEncoder

labelEncoder = LabelEncoder()
y_encode = labelEncoder.fit_transform(y)
複制
7.邏輯回歸模型
7.1 模型訓練
最後1行代碼ndarray對象的round方法表示小數點保留位數。
from sklearn.linear_model import LogisticRegressionCV
from sklearn.model_selection import train_test_split

train_X, test_X, train_y, test_y = train_test_split(X, y, test_size=0.2)
logistic_model = LogisticRegressionCV()
logistic_model.fit(train_X, train_y)
logistic_model.score(test_X, test_y).round(4)
複制
上面一段代碼的運作結果如下:
0.9791
7.2 模型儲存
儲存模型需要先安裝pickle庫,安裝指令:
pip install pickle
調用pickle庫的dump方法儲存模型,需要2個參數。
第1個參數是儲存的對象,可以為任意資料類型,因為有3個模型需要儲存,是以下面代碼第1個參數是字典。
第2個參數是儲存的檔案對象,資料類型為_io.BufferedWriter
import pickle

with open('allModel.pickle', 'wb') as file:
    save = {
        'labelEncoder' : labelEncoder,
        'tfidfVectorizer' : tfidf,
        'logistic_model' : logistic_model
    }
    pickle.dump(save, file)
複制
7.3 模型加載
本文作者提供已經完成的模型檔案,下載下傳連結: https://pan.baidu.com/s/1lMbDgxBrGPsXACA_26c75g 提取碼: vve6
import pickle

with open('allModel.pickle', 'rb') as file:
    allModel = pickle.load(file)
    labelEncoder = allModel['labelEncoder']
    tfidfVectorizer = allModel['tfidfVectorizer']
    logistic_model = allModel['logistic_model']
複制
8.模型評估
8.1 交叉驗證
from sklearn.linear_model import LogisticRegressionCV
from sklearn.model_selection import cross_val_score
from sklearn.model_selection import ShuffleSplit

cv_split = ShuffleSplit(n_splits=5)
logisticCV_model = LogisticRegressionCV()
score_ndarray = cross_val_score(logisticCV_model, X, y, cv=cv_split)
print(score_ndarray)
print(score_ndarray.mean())
複制
上面一段代碼的運作結果如下:
[0.97833488 0.97756113 0.97384711 0.97709687 0.97709687]
0.9767873723305479
8.2 混淆矩陣
此節代碼能夠成功運作的前提是先運作7.1節或7.3節的代碼。
繪制混淆矩陣的代碼如下:
from sklearn.metrics import confusion_matrix
import pandas as pd

predict_y = logistic_model.predict(X)
pd.DataFrame(confusion_matrix(y, predict_y),
            columns=labelEncoder.classes_,
            index=labelEncoder.classes_)
複制
上面一段代碼的運作結果如下圖所示:
image.png
8.3 報告表
繪制precision、recall、f1-score、support報告表,代碼如下:
import numpy as np
from sklearn.metrics import precision_recall_fscore_support

def eval_model(y_true, y_pred, labels):
    # 計算每個分類的Precision, Recall, f1, support
    p, r, f1, s = precision_recall_fscore_support(y_true, y_pred)
    # 計算總體的平均Precision, Recall, f1, support
    tot_p = np.average(p, weights=s)
    tot_r = np.average(r, weights=s)
    tot_f1 = np.average(f1, weights=s)
    tot_s = np.sum(s)
    res1 = pd.DataFrame({
        u'Label': labels,
        u'Precision': p,
        u'Recall': r,
        u'F1': f1,
        u'Support': s
    })
    res2 = pd.DataFrame({
        u'Label': ['總體'],
        u'Precision': [tot_p],
        u'Recall': [tot_r],
        u'F1': [tot_f1],
        u'Support': [tot_s]
    })
    res2.index = [999]
    res = pd.concat([res1, res2])
    return res[['Label', 'Precision', 'Recall', 'F1', 'Support']]

eval_model(y, predict_y, labelEncoder.classes_)
複制
上面一段代碼的運作結果如下:
image.png
9.結論
本文是作者第3個NLP小型項目,資料共有64000多條。
經過交叉驗證,模型平均得分為0.98左右。
最後在全部樣本的f1-score名額為0.98,總體來說這個分類模型較優秀,能夠投入實際應用。