源碼已經上傳至我的github上:https://github.com/junmei520/MyChristmas
同時我在微網誌上也以視訊的形式展示了Demo的運作效果:http://weibo.com/u/5323593409?refer_flag=1005055010_&is_all=1
聖誕将至,閑來無事,于是,便做了一個聖誕祝福小Demo,也祝大家聖誕快樂,每天開心~
由于靈感來的比較遲,是以demo做的很簡陋,還請見諒。但我覺得,我的想法還是很好的~
運作效果圖:
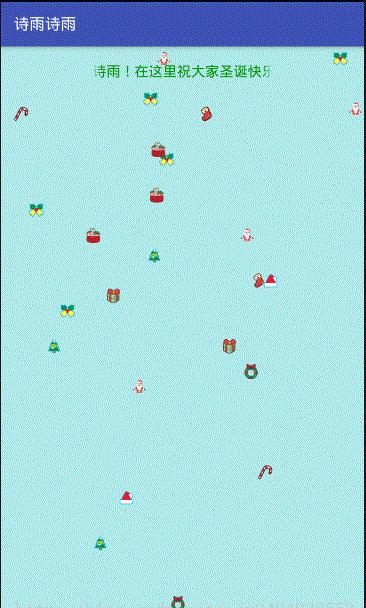
Demo特點描述:
①一打開Demo便有背景音樂響起。
②具有帶閃爍變換的禮物下落效果。
③跑馬燈顯示滾動文本。
Demo涉及的知識點:
① 使用Service開啟背景音樂Jingle Bells。
②自定義View實作禮物閃爍變換的下落。
③自定義TextView實作跑馬燈效果展示文本。
具體實作如下(由于代碼都十分簡單,這裡我隻做簡略說明):
一、使用Service開啟背景音樂Jingle Bells:
先寫一個音樂播放的服務類:
public class MusicService extends Service {
    @Override
    public IBinder onBind(Intent intent) {
        return null;
    }

    MediaPlayer player;

    @Override
    public int onStartCommand(Intent intent, int flags, int startId) {
        String action = intent.getStringExtra("action");
        if ("play".equals(action)) {
            //播放
            play();
        } else if ("stop".equals(action)) {
            //停止
            stop();
        }

        return super.onStartCommand(intent, flags, startId);
    }


    private void stop() {
        if (player != null) {
            player.stop();
            player.reset();
            player.release();//釋放加載的檔案
            player = null;//不要忘了!
        }
    }

    private void play() {
        if (player == null) {
            player = MediaPlayer.create(this, R.raw.jinglebells);
            player.setLooping(true);

        }
        if (player != null && !player.isPlaying()) {
            player.start();

        }
    }

    @Override
    public void onDestroy() {
        super.onDestroy();
        stop();//停止音樂
    }
音樂檔案放在raw中:

在功能清單檔案中進行注冊:
<!--功能清單檔案中注冊服務-->
        <service android:name=".service.MusicService" />
在MainAcitivity中啟動、停止服務:
public class MainActivity extends AppCompatActivity {
    private Intent intent;

    @Override
    protected void onCreate(Bundle savedInstanceState) {
        super.onCreate(savedInstanceState);
        setContentView(R.layout.activity_main);

        //應用一進入就開啟服務,啟動音樂播放
        intent = new Intent(this, MusicService.class);
        intent.putExtra("action", "play");
        startService(intent);
    }

    @Override
    protected void onDestroy() {
        super.onDestroy();
        //此處我們簡潔化,當activity退出時就直接停止音樂的播放
        intent.putExtra("action", "stop");
        startService(intent);
        stopService(intent);
    }
}
至此,背景音樂的播放完成了。
二、自定義View實作禮物閃爍變換的下落
自定義GiftView繼承View:
/**
 * 自定義禮物散落的view
 */
public class GiftView extends View{
    public GiftView(Context context) {
        this(context,null);
    }

    public GiftView(Context context, AttributeSet attrs) {
        this(context, attrs,0);
    }

    public GiftView(Context context, AttributeSet attrs, int defStyleAttr) {
        super(context, attrs, defStyleAttr);
    }

    private static final Random random = new Random();

    //準備禮物的圖檔數組
    private int[] drawables={R.drawable.p0,R.drawable.p1,R.drawable.p2,R.drawable.p3,R.drawable.p5,
            R.drawable.p6,R.drawable.p7,R.drawable.p8,R.drawable.p9,R.drawable.p10};

    // 用于畫禮物的畫筆
    private final Paint myPaint = new Paint();

    //坐标類的數組---禮物的位置
    private Coordinate[] gifts = new Coordinate[80];

    //窗體的初始高寬
    int sHeight = 0;
    int sWidth = 0;
    //記錄禮物的個數
    private int giftCount = 0;

    /**
     * 設定目前窗體的實際寬高
     */
    public void SetView(int height, int width) {
        sHeight = height - 100;
        sWidth = width;
    }

    /**
     * 随機的産生禮物的位置
     */
    public void produceGiftRandom(int count) {
        giftCount = count;
        for (int i = 0; i < count; i++) {
            //橫坐标和縱坐标都是随機産生的
            gifts[i] = new Coordinate(random.nextInt(sWidth), -random.nextInt(sHeight));
        }
    }

    /**
     * 通過畫筆将禮物繪制上去
     */
    @Override
    public void onDraw(Canvas canvas) {
        super.onDraw(canvas);
        for (int x = 0; x < giftCount; x += 1) {
            if (gifts[x].mY >= sHeight) {
                gifts[x].mY = 0;
            }
            // 禮物下落的數值速度
            gifts[x].mY += 10;
            // 讓禮物飄動起來
            if (random.nextBoolean()) {
                //讓水準方向有一個随機移動的速度
                int ran = random.nextInt(12);
                gifts[x].mX += 2 - ran;
                if(gifts[x].mX < 0){
                    gifts[x].mX = sWidth;
                }else if(gifts[x].mX > sWidth){
                    gifts[x].mX = 0;
                }
            }
            Resources mResources = getResources();
            int drawableIndex=random.nextInt(10);

            //不斷的切換十張圖檔造成閃爍的效果
            canvas.drawBitmap(((BitmapDrawable) mResources.getDrawable(drawables[drawableIndex])).getBitmap(), ((float) gifts[x].mX),
                    ((float) gifts[x].mY), myPaint);
        }
    }

    /**
     * 自定義一個坐标類
     */
    private class Coordinate{
        public int mX;
        public int mY;

        public Coordinate(int x, int y) {
            mX = x;
            mY = y;
        }
    }

}
在布局中使用自定義View:
<!--在布局中使用自定義View-->
    <com.chrismas.shiyu.mychristmas.view.GiftView
        android:id="@+id/gift"
        android:layout_width="match_parent"
        android:layout_height="match_parent" />
在MainActivity中進行相關操作:
public class MainActivity extends AppCompatActivity {
    private Intent intent;
    //禮物總個數
    private int GIFTCOUNT = 30;
    GiftView giftView = null;

    //使用handler進行消息的處理,不斷進行重繪
    private Handler mHandler = new Handler() {
        @Override
        public void handleMessage(Message msg) {
            if (msg.what == 1) {
                //重繪
                giftView.invalidate();
                mHandler.sendEmptyMessageDelayed(1, 100);
            }
        }
    };

    @Override
    protected void onCreate(Bundle savedInstanceState) {
        super.onCreate(savedInstanceState);
        setContentView(R.layout.activity_main);

        //應用一進入就開啟服務,啟動音樂播放
        intent = new Intent(this, MusicService.class);
        intent.putExtra("action", "play");
        startService(intent);

        //産生禮物灑落效果
        giftView = (GiftView) findViewById(R.id.gift);

        // 擷取目前螢幕的高寬
        DisplayMetrics dm = new DisplayMetrics();
        getWindowManager().getDefaultDisplay().getMetrics(dm);
        giftView.SetView(dm.heightPixels, dm.widthPixels);
        // 不斷更新禮物
        update();

    }

    public void update() {
        giftView.produceGiftRandom(GIFTCOUNT);
        //發送延遲消息
        mHandler.sendEmptyMessageDelayed(1, 100);
    }

    @Override
    protected void onDestroy() {
        super.onDestroy();
        //此處我們簡潔化,當activity退出時就直接停止音樂的播放
        intent.putExtra("action", "stop");
        startService(intent);
        stopService(intent);
    }
}
好了,帶閃爍效果的禮物下落也實作了。
三、自定義TextView實作跑馬燈效果展示文本
自定義TextView:
public class MyTextView extends TextView {

    public MyTextView(Context context) {
        super(context);
    }

    public MyTextView(Context context, AttributeSet attrs) {
        super(context, attrs);
    }

    public MyTextView(Context context, AttributeSet attrs, int defStyle) {
        super(context, attrs, defStyle);
    }

    //關鍵在這
    @Override
    public boolean isFocused() {
        return true;
    }

}
在布局中使用,并進行相關設定(如無限循環滾動等)
<!--跑馬燈效果-->
    <com.chrismas.shiyu.mychristmas.view.MyTextView
        android:layout_width="230dp"
        android:layout_height="wrap_content"
        android:layout_centerHorizontal="true"
        android:layout_marginTop="20dp"
        android:ellipsize="marquee"
        android:marqueeRepeatLimit="marquee_forever"
        android:singleLine="true"
        android:text="Hello,我是詩雨!在這裡祝大家聖誕快樂,開心快樂每一天!"
        android:textColor="#009900"
        android:textSize="18sp" />
其實跑馬燈效果的實作也可以不用自定義TextView,隻要在代碼中在進行相關設定就可以了。但是我個人比較喜歡用自定義。
後記:
我也深知自己是Android界的小菜鳥,還有好多東西需要去學習。
也希望各位前輩多多指教,我一定虛心接納并認真地進行改正!