Spring Cloud OAuth2 認證流程
本文基于官方提供的示例進行講解,文中部分源碼使用的 5.0 版本,基本上沒太大差别。
建議配合本文提供的關鍵代碼和官方示例結合檢視,可以運作官方示例檢視效果。
認證伺服器:https://github.com/spring-cloud-samples/authserver
SSO用戶端:https://github.com/spring-cloud-samples/sso
想要知道如何配置認證伺服器和用戶端,可以參考官方的這兩個示例。
由于 Spring 封裝的東西太多,是以看到 Spring 這麼簡單的配置時,你根本不知道他做了什麼,在不了解整個流程的情況下,你很難對其中的過程進行定制,是以本文就是在上述兩個示例上,對 Spring OAuth2 的部配置設定置和關鍵的認證流程做一個詳細的介紹。
一、服務端配置
服務端最主要的一個配置就是使用
@EnableAuthorizationServer
注解,該注解的作用就是引入了一些 OAuth2 相關的端點,包含以下的端點:
-
AuthorizationEndpoint
-
/oauth/authorize
-
/oauth/authorize
-
TokenEndpoint
-
/oauth/token
-
/oauth/token
-
CheckTokenEndpoint
-
/oauth/check_token
-
WhitelabelApprovalEndpoint
-
/oauth/confirm_access
-
WhitelabelErrorEndpoint
-
/oauth/error
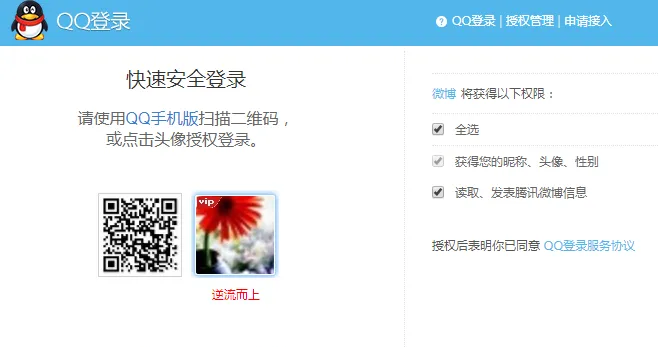
這些端點有個特點,如果你自己實作了上面的方法,他會優先使用你提供的方法,利用這個特點,通常都會根據自己的需要來設計自己的授權确認頁面,例如使用 QQ 登入微網誌的認證頁面:
在官方的示例中,通過下面代碼直接指定了視圖:
registry.addViewController("/oauth/confirm_access").setViewName("authorize"); 如果想跳過這個認證确認的過程,可以看本文後面的
autoApprove
配置。
除了這麼些端點外,還引入了主要的配置
AuthorizationServerSecurityConfiguration
,這個配置在這裡并沒有做太多的事,示例中提供的
OAuth2Config
真正幹了有用的事,關于這個配置的詳細資訊可以參考 Spring Security 的文檔。
示例中使用的 jwt,關于這個可以閱讀下面的文章:
JSON Web Token - 在Web應用間安全地傳遞資訊
http://blog.leapoahead.com/2015/09/06/understanding-jwt/
二、用戶端配置
最簡單的情況下,隻需要
@EnableOAuth2Sso
注解和配置檔案中配置的認證伺服器資訊,使用這個注解有兩種情況,使用預設配置或者自定義配置:
第1種,通過
@EnableOAuth2Sso
注解開啟,全部使用預設的配置。
第2種,使用
@EnableOAuth2Sso
注解标記一個
WebSecurityConfigurerAdapter
類,如下所示。
@Component
@EnableOAuth2Sso
public static class LoginConfigurer extends WebSecurityConfigurerAdapter
想要自定義,必須按照上面的方式定義,這麼定義的原因在于
@EnableOAuth2Sso
注解。
/**
 * Enable OAuth2 Single Sign On (SSO). If there is an existing
 * {@link WebSecurityConfigurerAdapter} provided by the user and annotated with
 * {@code @EnableOAuth2Sso}, it is enhanced by adding an authentication filter and an
 * authentication entry point. If the user only has {@code @EnableOAuth2Sso} but not on a
 * WebSecurityConfigurerAdapter then one is added with all paths secured and with an order
 * that puts it ahead of the default HTTP Basic security chain in Spring Boot.
 *
 * @author Dave Syer
 * @since
@Target(ElementType.TYPE)
@Retention(RetentionPolicy.RUNTIME)
@Documented
@EnableOAuth2Client
@EnableConfigurationProperties(OAuth2SsoProperties.class)
@Import({ OAuth2SsoDefaultConfiguration.class, OAuth2SsoCustomConfiguration.class,
        ResourceServerTokenServicesConfiguration.class })
public @interface EnableOAuth2Sso 代碼注釋中說的就是上面說的這兩種情況,分别對應
@Import
中的配置:
-
OAuth2SsoDefaultConfiguration
-
OAuth2SsoCustomConfiguration
這兩個配置上的注解分别如下。
預設配置
OAuth2SsoDefaultConfiguration
。
@Configuration
@Conditional(NeedsWebSecurityCondition.class)
public class OAuth2SsoDefaultConfiguration extends WebSecurityConfigurerAdapter
        implements Ordered
自定義配置
OAuth2SsoCustomConfiguration
。
@Configuration
@Conditional(EnableOAuth2SsoCondition.class)
public class OAuth2SsoCustomConfiguration
        implements ImportAware, BeanPostProcessor, ApplicationContextAware
這兩個配置上的條件分别如下。
protected static class NeedsWebSecurityCondition extends EnableOAuth2SsoCondition
    @Override
    public ConditionOutcome getMatchOutcome(ConditionContext context,
            AnnotatedTypeMetadata metadata) {
        return ConditionOutcome.inverse(super.getMatchOutcome(context, metadata));
    }
}
和
class EnableOAuth2SsoCondition extends SpringBootCondition {
    @Override
    public ConditionOutcome getMatchOutcome(ConditionContext context,
            AnnotatedTypeMetadata metadata) {
        String[] enablers = context.getBeanFactory()
                .getBeanNamesForAnnotation(EnableOAuth2Sso.class);
        ConditionMessage.Builder message = ConditionMessage
                .forCondition("@EnableOAuth2Sso Condition");
        for (String name : enablers) {
            if (context.getBeanFactory().isTypeMatch(name,
                    WebSecurityConfigurerAdapter.class)) {
                return ConditionOutcome.match(message
                        .found("@EnableOAuth2Sso annotation on WebSecurityConfigurerAdapter")
                        .items(name));
            }
        }
        return ConditionOutcome.noMatch(message.didNotFind(
                "@EnableOAuth2Sso annotation " + "on any WebSecurityConfigurerAdapter")
                .atAll());
    }
}
NeedsWebSecurityCondition
繼承的
EnableOAuth2SsoCondition
,并且對結果取反了,是以這兩者隻會有一種情況生效。
EnableOAuth2SsoCondition
條件中對自定義的要求就是在一個繼承
WebSecurityConfigurerAdapter
的類上添加
@EnableOAuth2Sso
注解。
一句話概括:隻有繼承的類上帶 WebSecurityConfigurerAdapter
注解時,這個配置最後生成的過濾器鍊中才會有 oauth2 的過濾器 @EnableOAuth2Sso
OAuth2ClientAuthenticationProcessingFilter
。
在
配置中的 WebSecurityConfigurerAdapter
會決定某個請求能否被這些過濾器鍊進行處理。假設 oauth2 登入的請求 url 被别的配置攔截時,由于那個配置的攔截器鍊中沒有 oauth2 的攔截器,是以就沒法跳轉到認證伺服器。http.antMatcher("xxx")
上面這段邏輯可以看
FilterChainProxy
中:
private void doFilterInternal(ServletRequest request, ServletResponse response,
        FilterChain chain) throws IOException, ServletException {

    FirewalledRequest fwRequest = firewall
            .getFirewalledRequest((HttpServletRequest) request);
    HttpServletResponse fwResponse = firewall
            .getFirewalledResponse((HttpServletResponse) response);
    List<Filter> filters = getFilters(fwRequest);
    if (filters == null || filters.size() == 0) {
        if (logger.isDebugEnabled()) {
            logger.debug(UrlUtils.buildRequestUrl(fwRequest)
                    + (filters == null ? " has no matching filters"
                            : " has an empty filter list"));
        }
        fwRequest.reset();
        chain.doFilter(fwRequest, fwResponse);
        return;
    }
    VirtualFilterChain vfc = new
其中比對過濾器鍊在:
List<Filter> filters = getFilters(fwRequest);
//getFilters 如下
private List<Filter> getFilters(HttpServletRequest request) {
    for (SecurityFilterChain chain : filterChains) {
        if (chain.matches(request)) {
            return chain.getFilters();
        }
    }
    return null;
}
其中
filterChains
的個數和項目中實作
WebSecurityConfigurerAdapter
的個數相同(除了自己建立的,系統預設也有),當不包含 oauth2 過濾器的
chain
比對到認證請求時,就沒法正常工作。
三、用戶端關鍵配置
在 application.properties或 yml 配置檔案中配置 oauth2 的登入位址:
security.oauth2.sso.login-path=/dashboard/login 和這個配置有關的内容如下,oauth2 配置屬性:
配置 oauth2 登入位址。
/**
 * Configuration properties for OAuth2 Single Sign On (SSO).
 *
 * @author Dave Syer
 * @since
@ConfigurationProperties("security.oauth2.sso")
public class OAuth2SsoProperties

    public static final String DEFAULT_LOGIN_PATH = "/login";

    /**
     * Path to the login page, i.e. the one that triggers the redirect to the OAuth2
     * Authorization Server.
     */
    private
預設的
/login
,這個值會在建立 OAuth2ClientAuthenticationProcessingFilter 過濾器時用到。
private OAuth2ClientAuthenticationProcessingFilter oauth2SsoFilter(
        OAuth2SsoProperties sso) {
    OAuth2RestOperations restTemplate = this.beanFactory
            .getBean(OAuth2RestOperations.class);
    ResourceServerTokenServices tokenServices = this.beanFactory
            .getBean(ResourceServerTokenServices.class);
    OAuth2ClientAuthenticationProcessingFilter filter = new
            OAuth2ClientAuthenticationProcessingFilter(
            sso.getLoginPath());//這裡
    filter.setRestTemplate(restTemplate);
    filter.setTokenServices(tokenServices);
    return
是以後續在 Spring Security 過濾器鍊中,當比對到這個位址時,就會根據目前是否認證過,來跳轉到認證伺服器。
四、認證流程
這裡開始完整的認證流程。
(一) 初始階段,用戶端的權限校驗和登入頁面的跳轉
除了直接通路用戶端的
/dashboard/login
位址外,如果通路了一個受限的資源,也會跳轉到這個登入頁面,然後又會根據 oauth2 的過濾器跳轉到認證伺服器。
從受限資源跳轉到
/dashboard/login
的處理過程如下。
看下面這個方法,上面的
oauth2SsoFilter
也是在下面方法中調用的,在這個方法後面還有一個添加
entrypoint
的方法。
public void configure(HttpSecurity http) throws Exception {
    OAuth2SsoProperties sso = this.beanFactory.getBean(OAuth2SsoProperties.class);
    // Delay the processing of the filter until we know the
    // SessionAuthenticationStrategy is available:
    http.apply(new
addAuthenticationEntryPoint
方法。
private void addAuthenticationEntryPoint(HttpSecurity http, OAuth2SsoProperties sso)
            throws Exception {
    ExceptionHandlingConfigurer<HttpSecurity> exceptions = http.exceptionHandling();
    ContentNegotiationStrategy contentNegotiationStrategy = http
      .getSharedObject(ContentNegotiationStrategy.class);
    if (contentNegotiationStrategy == null) {
      contentNegotiationStrategy = new HeaderContentNegotiationStrategy();
    }
    MediaTypeRequestMatcher preferredMatcher = new MediaTypeRequestMatcher(
      contentNegotiationStrategy, MediaType.APPLICATION_XHTML_XML,
      new MediaType("image", "*"), MediaType.TEXT_HTML, MediaType.TEXT_PLAIN);
    preferredMatcher.setIgnoredMediaTypes(Collections.singleton(MediaType.ALL));
    exceptions.defaultAuthenticationEntryPointFor(
      new LoginUrlAuthenticationEntryPoint(sso.getLoginPath()),
      preferredMatcher);
    // When multiple entry points are provided the default is the first one
    exceptions.defaultAuthenticationEntryPointFor(
      new HttpStatusEntryPoint(HttpStatus.UNAUTHORIZED),
      new RequestHeaderRequestMatcher("X-Requested-With", "XMLHttpRequest"));
}
看着兩行。
exceptions.defaultAuthenticationEntryPointFor(
      new
這裡設定了
ExceptionTranslationFilter
過濾器的幾個屬性。
最終在
ExceptionHandlingConfigurer
執行
config
方法時,使用了這裡添加的兩個端點。
@Override
public void configure(H http) throws Exception {
  AuthenticationEntryPoint entryPoint = getAuthenticationEntryPoint(http);
  ExceptionTranslationFilter exceptionTranslationFilter = new ExceptionTranslationFilter(
    entryPoint, getRequestCache(http));
  if (accessDeniedHandler != null) {
    exceptionTranslationFilter.setAccessDeniedHandler(accessDeniedHandler);
  }
  exceptionTranslationFilter = postProcess(exceptionTranslationFilter);
  http.addFilter(exceptionTranslationFilter);
}
getAuthenticationEntryPoint(http)
如下。
AuthenticationEntryPoint getAuthenticationEntryPoint(H http) {
  AuthenticationEntryPoint entryPoint = this.authenticationEntryPoint;
  if (entryPoint == null) {
    entryPoint = createDefaultEntryPoint(http);
  }
  return entryPoint;
}

private AuthenticationEntryPoint createDefaultEntryPoint(H http) {
  if (defaultEntryPointMappings.isEmpty()) {
    return new Http403ForbiddenEntryPoint();
  }
  if (defaultEntryPointMappings.size() == 1) {
    return defaultEntryPointMappings.values().iterator().next();
  }
  DelegatingAuthenticationEntryPoint entryPoint = new DelegatingAuthenticationEntryPoint(
    defaultEntryPointMappings);
  //這裡的 values 就是前面添加的兩個端點
  entryPoint.setDefaultEntryPoint(defaultEntryPointMappings.values().iterator()
                                  .next());
  return
是以在出現通路異常時,能夠擷取要跳轉到目前登入位址的資訊。
ExceptionTranslationFilter
中的關鍵代碼如下:
public void doFilter(ServletRequest req, ServletResponse res, FilterChain chain)
        throws IOException, ServletException {
    HttpServletRequest request = (HttpServletRequest) req;
    HttpServletResponse response = (HttpServletResponse) res;

    try {
        chain.doFilter(request, response);

        logger.debug("Chain processed normally");
    }
    catch (IOException ex) {
        throw ex;
    }
    catch (Exception ex) {
        // Try to extract a SpringSecurityException from the stacktrace
        Throwable[] causeChain = throwableAnalyzer.determineCauseChain(ex);
        RuntimeException ase = (AuthenticationException) throwableAnalyzer
                .getFirstThrowableOfType(AuthenticationException.class, causeChain);

        if (ase == null) {
            ase = (AccessDeniedException) throwableAnalyzer.getFirstThrowableOfType(
                    AccessDeniedException.class, causeChain);
        }

        if (ase != null) {
            handleSpringSecurityException(request, response, chain, ase);
        }
        else {
            //省略
在這個過濾器的
try
部分中會繼續執行過濾器鍊中剩餘的過濾器,正常情況下,後面會執行的一個過濾器是
FilterSecurityInterceptor
,這個過濾器是用來處理授權的,就是驗證使用者是否有權通路某個資源,如果沒有權限,就會抛出
AccessDeniedException
,此時就會進入
handleSpringSecurityException
方法執行。這個方法就會發送 302跳轉到認證頁面。
跳轉位址,仍然在用戶端上:
Location:http://localhost:9999/dashboard/login 此時的位址就會比對用戶端的 OAuth2ClientAuthenticationProcessingFilter 過濾器。
然後嘗試擷取認證資訊。
accessToken = restTemplate.getAccessToken(); 擷取token。因為擷取不到 token 而抛出異常(
UserRedirectRequiredException
):
throw 異常會一直抛到
OAuth2ClientContextFilter
(這個過濾器來自
@EnableOAuth2Sso
上的
@EnableOAuth2Client
中導入的
OAuth2ClientConfiguration
)中。
try {
  chain.doFilter(servletRequest, servletResponse);
} catch (IOException ex) {
  throw ex;
} catch (Exception ex) {
  // Try to extract a SpringSecurityException from the stacktrace
  Throwable[] causeChain = throwableAnalyzer.determineCauseChain(ex);
  UserRedirectRequiredException redirect = (UserRedirectRequiredException) throwableAnalyzer
    .getFirstThrowableOfType(
    UserRedirectRequiredException.class, causeChain);
  if (redirect != null) {
    redirectUser(redirect, request, response);
  } else {
    if (ex instanceof ServletException) {
      throw (ServletException) ex;
    }
    if (ex instanceof RuntimeException) {
      throw (RuntimeException) ex;
    }
    throw new NestedServletException("Unhandled exception", ex);
  }
}
redirectUser(redirect, request, response);
跳轉到下面位址。
http://localhost:8080/uaa/oauth/authorize?client_id=acme&redirect_uri=http://localhost:9999/dashboard/login&response_type=code&state=O53UrS
此時oauth2用戶端的操作已經結束,除資源檔案外,産生的請求如下。

由于這裡使用的 ajax 方式,是以頁面不會真正跳轉。
并且這些個請求是因為請求了受限的
引發的。/dashboard/user
(二) OAuth2 認證開始
經過前面的内容,我們應該知道通路登入頁面或者需要授權的頁面時會跳轉到認證伺服器。
下面是 authorization code 方式的認證流程。
詳細内容參考:
http://www.ruanyifeng.com/blog/2014/05/oauth_2_0.html
http://www.rfcreader.com/#rfc6749_line1027
+----------+
     | Resource |
     |   Owner  |
     |          |
     +----------+
          ^
          |
         (B)
     +----|-----+          Client Identifier      +---------------+
     |         -+----(A)-- & Redirection URI ---->|               |
     |  User-   |                                 | Authorization |
     |  Agent  -+----(B)-- User authenticates --->|     Server    |
     |          |                                 |               |
     |         -+----(C)-- Authorization Code ---<|               |
     +-|----|---+                                 +---------------+
       |    |                                         ^      v
      (A)  (C)                                        |      |
       |    |                                         |      |
       ^    v                                         |      |
     +---------+                                      |      |
     |         |>---(D)-- Authorization Code ---------'      |
     |  Client |          & Redirection URI                  |
     |         |                                             |
     |         |<---(E)----- Access Token -------------------'
     +---------+       (w/ Optional Refresh Token)
A. 導向認證伺服器
首先,在前一步中,我們知道了,用戶端會根據 oauth2 配置下面的資訊去擷取授權:
security:
  oauth2:
    client:
      accessTokenUri: http://localhost:8080/uaa/oauth/token
      userAuthorizationUri: http://localhost:8080/uaa/oauth/authorize
當使用者已經在認證伺服器登入時,能夠直接認證,如果使用者沒有登入,根據認證服務端的配置,也會把使用者導向到登入頁面。
初始狀态時,使用者沒有登入,由于請求位址
/oauth/authorize
(完整位址如下)沒有通路權限,是以 uaa 服務端又會跳轉到登入頁面(和上面用戶端跳轉到
/login
一樣)。
請求位址:http://localhost:8080/uaa/oauth/authorize?client_id=acme&redirect_uri=http://localhost:9999/dashboard/login&response_type=code&state=O53UrS
跳轉。
登入位址:http://localhost:8080/uaa
當通過非 ajax 方式請求受限位址時,會真正跳轉到這個位址。
B. 登入授權
在授權伺服器中,預設是存在
UsernamePasswordAuthenticationFilter
過濾器,還有預設的登入頁面過濾器。
在該登入頁面輸入帳号密碼後,會進入
UsernamePasswordAuthenticationFilter
過濾器。
在登入頁面輸入使用者名密碼認證成功後,在
SavedRequestAwareAuthenticationSuccessHandler
過濾器中會擷取到跳轉到登入頁面前的請求資訊。
SavedRequest savedRequest = requestCache.getRequest(request, response); 從該請求擷取跳轉位址然後跳轉過去:
String targetUrl = savedRequest.getRedirectUrl();
getRedirectStrategy().sendRedirect(request, response, targetUrl);
此時跳轉位址可能是下面這樣的:
http://localhost:8080/uaa/oauth/authorize?client_id=acme&redirect_uri=http://localhost:9999/dashboard/login&response_type=code&state=vEFlOH
這個位址仍然是認證服務的,
AuthorizationEndpoint
會處理
/oauth/authorize
請求。
根據上面 url 中的資訊對用戶端進行驗證,處理
redirect_uri
請求中的參數。
下面有段關鍵的代碼。
boolean approved = userApprovalHandler.isApproved(authorizationRequest, (Authentication) principal);
authorizationRequest.setApproved(approved);
if (authorizationRequest.isApproved()) {
    if (responseTypes.contains("token")) {
        return getImplicitGrantResponse(authorizationRequest);
    }
    if (responseTypes.contains("code")) {
        return new ModelAndView(getAuthorizationCodeResponse(authorizationRequest,
                (Authentication) principal));
    }
}
model.put("authorizationRequest", authorizationRequest);
return
如果
approved = true
,那麼就直接跳轉到用戶端頁面,如果不是,就會跳轉到使用者确認授權頁面。
apporved
預設值可以通過下面的方式設定:
@Override
public void configure(ClientDetailsServiceConfigurer clients) throws Exception {
    clients.inMemory()
            .withClient("acme")
            .secret("acmesecret").autoApprove(true)
            ...;
}
C. 擷取授權碼
當使用者同意授權時,會轉發到用戶端:
http://localhost:9999/dashboard/login?code=8FbLWt&state=7Fw78E
此時用戶端得到了授權碼
code=8FbLWt
。
D, E. 使用授權碼擷取 token
用戶端通過這個授權碼,使用
AuthorizationCodeAccessTokenProvider
,通過
RestTemplate
向認證伺服器發送請求擷取 token。
服務端的
TokenEndpoint
會處理這個請求。
根據請求資訊生成 token 後傳回給用戶端。
使用 jwt 的情況下,生成的 token 類似下面這樣:
eyJhbGciOiJSUzI1NiIsInR5cCI6IkpXVCJ9.eyJleHAiOjE1MDYyNzQ0NzEsInVzZXJfbmFtZSI6InVzZXIiLCJhdXRob3JpdGllcyI6WyJST0xFX0FETUlOIiwiUk9MRV9VU0VSIl0sImp0aSI6IjUyZDM4Y2U2LTMxNjMtNDZjOC1iYjg0LTJhNjNjNjc5OWY2ZCIsImNsaWVudF9pZCI6ImFjbWUiLCJzY29wZSI6WyJvcGVuaWQiXX0.mEWQ2V3NAHDjxsSrFin1_ooNo8F4GKrtIIlOrGlBWr-HTcVDQJ-0OERAET5JyyBtxxtP1OEYgRT5uoyX4RKulwnmV83hLk5o_rSWV5uZQ67lqRvG5M_HL8ATRALpQaaz93o2j1ottpjmDNNw2Jxuk6IrKhRnSvdw5Ss9m_pZvcwva2FXTzEjmBFaNs6MHncNkMXorrLtljWp6b55pm5IUIAVmwj8EIbJPKlzTBGUBJff1c1urrtlhUHU-_ezoG-5Te15sneCcM48I-UuQFugfBnj1ij4EicGW_4UPu3HAZxfVLBpZvYd4aZqN9QQc5pMHn9G_q8xIdiC3hByL1L8OA
用戶端通過
DefaultTokenServices
的
loadAuthentication
方法對上面的 token 進行處理,使用
JwtTokenStore
解析上面的 token 值,結果如下:
{“alg”:”RS256”,”typ”:”JWT”} {“exp”:1506274471,”user_name”:”user”,”authorities”:[“ROLE_ADMIN”,”ROLE_USER”],”jti”:”52d38ce6-3163-46c8-bb84-2a63c6799f6d”,”client_id”:”acme”,”scope”:[“openid”]} [256 crypto bytes]