下面安裝以Docker Compose方式安裝為例,介紹怎麼安裝NextCloud,選擇MySQL作為資料庫。
這裡就不介紹,怎麼安裝Docker和Docker Compose了,具體請自行學習。
1、建立NextCloud項目檔案夾和Nginx conf.d檔案夾
1)為nginx的配置檔案建立一個conf.d檔案夾
mkdir -p /opt/nextcloud/conf.d 2)建立 nextcloud.conf nginx 配置檔案
nano /opt/nextcloud/conf.d/nextcloud.conf 3)将以下資訊複制到 nextcloud.conf 檔案中。
upstream php-handler {
    server app:9000;
}

server {
    listen       80;
    listen       443 ssl http2;
    server_name  ${FQDN};
    # Max allowed upload file in web page
    client_max_body_size 20G;
    if ($server_port !~ 443){
        rewrite ^(/.*)$ https://$host$1 permanent;
    }

    # SSL and Support TLSv1.3
    ssl_certificate    /etc/letsencrypt/live/${FQDN}/fullchain.pem;
    ssl_certificate_key    /etc/letsencrypt/live/${FQDN}/privkey.pem;
    ssl_protocols TLSv1 TLSv1.1 TLSv1.2 TLSv1.3;
    ssl_ciphers TLS13-AES-256-GCM-SHA384:TLS13-CHACHA20-POLY1305-SHA256:TLS13-AES-128-GCM-SHA256:TLS13-AES-128-CCM-8-SHA256:TLS13-AES-128-CCM-SHA256:ECDHE-RSA-AES128-GCM-SHA256:HIGH:!aNULL:!MD5:!RC4:!DHE;
    ssl_prefer_server_ciphers on;
    ssl_session_cache shared:SSL:10m;
    ssl_session_timeout 10m;
    error_page 497  https://$host$request_uri;

    # add header information to fix Nextcloud console warning messages
    add_header X-Content-Type-Options nosniff;
    add_header X-XSS-Protection "1; mode=block";
    add_header X-Robots-Tag none;
    add_header X-Download-Options noopen;
    add_header X-Frame-Options "SAMEORIGIN" always;
    add_header X-Permitted-Cross-Domain-Policies none;
    add_header Referrer-Policy no-referrer;
    add_header Strict-Transport-Security "max-age=31536000; includeSubDomains" always;
    fastcgi_hide_header X-Powered-By;

    root /var/www/html;

    location = /robots.txt {
        allow all;
        log_not_found off;
        access_log off;
    }

    location = /.well-known/carddav {
      return 301 $scheme://$host/remote.php/dav;
    }
    location = /.well-known/caldav {
      return 301 $scheme://$host/remote.php/dav;
    }

    # Enable gzip compression
    gzip on;
    gzip_vary on;
    gzip_comp_level 4;
    gzip_min_length 256;
    gzip_proxied expired no-cache no-store private no_last_modified no_etag auth;
    gzip_types application/atom+xml application/javascript application/json application/ld+json application/manifest+json application/rss+xml application/vnd.geo+json application/vnd.ms-fontobject application/x-font-ttf application/x-web-app-manifest+json application/xhtml+xml application/xml font/opentype image/bmp image/svg+xml image/x-icon text/cache-manifest text/css text/plain text/vcard text/vnd.rim.location.xloc text/vtt text/x-component text/x-cross-domain-policy;

    # redirection and disable to access backend sensitive folders and resources
    location / {
        rewrite ^ /index.php$request_uri;
    }

    location ~ ^\/(?:build|tests|config|lib|3rdparty|templates|data)\/ {
        deny all;
    }
    location ~ ^\/(?:\.|autotest|occ|issue|indie|db_|console) {
        deny all;
    }

    # PHP configuration
    location ~ ^\/(?:index|remote|public|cron|core\/ajax\/update|status|ocs\/v[12]|updater\/.+|ocs-provider\/.+)\.php(?:$|\/) {
        fastcgi_split_path_info ^(.+?\.php)(\/.*|)$;
        include fastcgi_params;
        fastcgi_param SCRIPT_FILENAME $document_root$fastcgi_script_name;
        fastcgi_param PATH_INFO $fastcgi_path_info;
        fastcgi_param HTTPS on;
        #Avoid sending the security headers twice
        fastcgi_param modHeadersAvailable true;
        fastcgi_param front_controller_active true;
        fastcgi_pass php-handler;
        fastcgi_intercept_errors on;
        fastcgi_request_buffering off;
    }

    location ~ ^\/(?:updater|ocs-provider)(?:$|\/) {
        try_files $uri/ =404;
        index index.php;
    }

    location ~ \.(?:css|js|woff2?|svg|gif)$ {
        try_files $uri /index.php$request_uri;
        add_header Cache-Control "public, max-age=15778463";
        add_header X-Content-Type-Options nosniff;
        add_header X-XSS-Protection "1; mode=block";
        add_header X-Robots-Tag none;
        add_header X-Download-Options noopen;
        add_header X-Permitted-Cross-Domain-Policies none;
        add_header Referrer-Policy no-referrer;
        access_log off;
    }

    location ~ \.(?:png|html|ttf|ico|jpg|jpeg)$ {
        try_files $uri /index.php$request_uri;
        # Optional: Don't log access to other assets
        access_log off;
    }
}
2、 建立一個新的Nextcloud docker-compose檔案
nano /opt/nextcloud/docker-compose.yml 1)用DB建立一個新的Nextcloud docker-compose檔案
将以下資訊複制到剛才建立好的檔案中
version: '3'

volumes:
    letsencrypt:
    nextcloud:

services:
    proxy:
        image: staticfloat/nginx-certbot
        ports:
            - 80:80
            - 443:443
        environment:
            CERTBOT_EMAIL: [email protected]
            ENVSUBST_VARS: FQDN
            FQDN: nextcloud.itmao.club
        volumes:
            - ./conf.d:/etc/nginx/user.conf.d:ro
            - letsencrypt:/etc/letsencrypt
            - nextcloud:/var/www/html
        restart: unless-stopped

    db:
        image: mariadb
        environment:
            - MYSQL_ROOT_PASSWORD=Password1234!@
            - MYSQL_PASSWORD=Password1234!@
            - MYSQL_DATABASE=nextcloud
            - MYSQL_USER=nextcloud
        volumes:
            - ./mysql:/var/lib/mysql
        restart: unless-stopped

    app:
        image: nextcloud:fpm
        volumes:
            - nextcloud:/var/www/html
            - ./app/data:/var/www/html/data
            - ./app/config:/var/www/html/config
        restart: unless-stopped

    cron:
        image: rcdailey/nextcloud-cronjob
        environment:
            - NEXTCLOUD_CRON_MINUTE_INTERVAL=15
            - NEXTCLOUD_CONTAINER_NAME=app
            - NEXTCLOUD_PROJECT_NAME=nextcloud
        volumes:
            - /var/run/docker.sock:/var/run/docker.sock:ro
            - /etc/localtime:/etc/localtime:ro
        restart: always
2)上述配置檔案中,你需要修改的有以下幾個地方:
需要修改郵箱和綁定的域名
CERTBOT_EMAIL: [email protected]
ENVSUBST_VARS: FQDN
FQDN: nextcloud.itmao.club
MySQL密碼和使用者配置
- MYSQL_ROOT_PASSWORD=Password1234!@
 - MYSQL_PASSWORD=Password1234!@
 - MYSQL_DATABASE=nextcloud
 - MYSQL_USER=nextcloud
注釋事項:
運作之前,要先建立DNS,域名A記錄,上述檔案的示例域名為:nextcloud.itmao.club,指向你需要配置的伺服器的公網IP。
在打開防火牆的80和443端口,這些配置完成後,可以執行docker-compose指令啟動你的docker。
cd /opt/nextcloud
docker-compose up -d
耐心等待安裝并且啟動結束後,可以用浏覽器通路域名:https://nextcloud.itmao.club
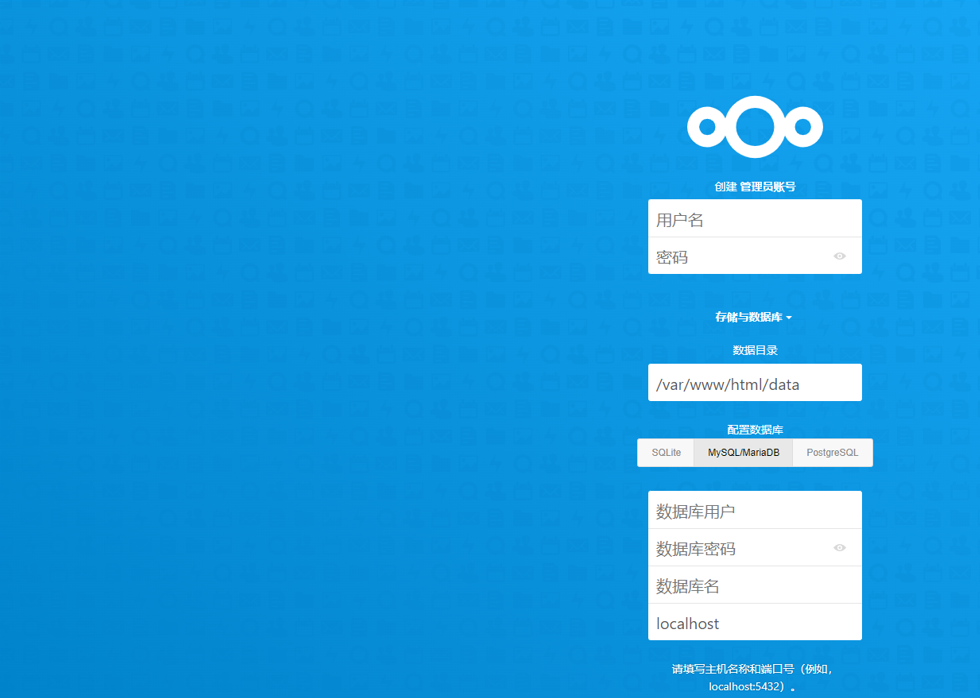
輸入剛才的docker compose配置檔案的配置資訊進行安裝。
3、安裝完成後
1)安裝完成後,有幾件事情需要清理和進一步配置。
安裝Docker後,我們将不得不運作以下兩個指令來修複設定警告。
docker-compose exec -u www-data app php occ db:add-missing-indices
docker-compose exec -u www-data app php occ db:convert-filecache-bigint
2)在您的 nextCloud 使用者下添加本地檔案夾
例如,如果您的 nextcloud 使用者是管理者,您想在該使用者下添加您的本地檔案,您需要将所有檔案複制到以下檔案夾
/opt/nextcloud/app/data/admin/files 3)将所有檔案複制到這個檔案夾後,使用下面的指令來掃描它們。
docker-compose exec -u www-data app php occ files:scan --all 4)如果你想安裝ffmpeg,請按照這些指令。
docker exec -it nextcloud_app_1 bash
apt -y update
apt -y install ffmpeg
4、備份和恢複
以下是備份和恢複你的NextCloud系統的一些步驟。
1)使用docker-compose指令停止所有正在運作的dockers。
cd /opt/nextcloud
docker-compose stop
2)從/opt/nextcloud檔案夾打包所有檔案
cd /opt
tar -zcvf nextcloud.tar.gz nextcloud
3)傳輸tar檔案到新機器
scp nextcloud.tar.gz root@serverip:/opt 3)在新機器上安裝Docker和Docker Compose
cd /opt
tar -xzvf nextcloud.tar.gz
4)用剛才的配置檔案啟動docker
cd nextcloud
docker-compose up -d