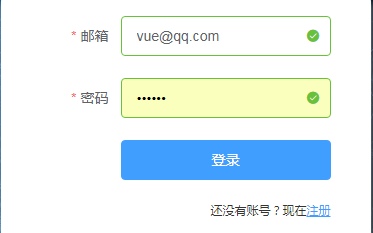
token一種身份的驗證,在大多數網站中,登入的時候都會攜帶token,去通路其他頁面,token就想當于一種令牌。可以判斷使用者是否登入狀态。本次頁面是通過Element-ui搭建的登入界面

import axios from 'axios'
import { Loading ,Message} from 'element-ui'  //引入了element-ui架構庫
import router from './router/index.js'
let loading;

function startLoading() {
	loading =Loading.service({
		lock: true,
        text: '加載中...',
        background: 'rgba(0, 0, 0, 0.7)'
	});
}

function endLoading() {
	loading.close()
}

// 請求攔截

axios.interceptors.request.use(config => {

    startLoading()
    //設定請求頭
    if(localStorage.eleToken) {
    	config.headers.Authorization = localStorage.eleToken
    }

    return config
  }, error => {
    return Promise.reject(error)
  })


// 響應攔截
axios.interceptors.response.use(response => {
    endLoading()
    return response
}, error => {
	Message.error(error.response.data)
	endLoading();

	//擷取狀态碼
	const {status} = error.response;

	if(status === 401) {
		Message.error("token失效,請重新登入");
		//清除token
		localStorage.removeItem('eleToken');
		//重新登入
		router.push('/login')
	}

    return Promise.reject(error)
})

export default axios;
存儲vuex
如果頁面過多,不想資料來回傳遞,這時候就可以用到vuex來存儲資料了,這樣每個頁面都可以通過store擷取使用者資訊了。當使用者拿到token令牌的時候,會得到使用者的資訊,
import Vue from 'vue'
import Vuex from 'vuex'

Vue.use(Vuex)

const type = {
	SET_AUTHORIZATION:"set_authorization",
	SET_USER:"set_user"
}

const state = {
	isAuthorization:false,
	user:{}
}

const getters = {  //擷取state狀态
 isAuthorization: state => state.isAuthorization,
 user: user => state.user
}

const mutations= {
	[type.SET_AUTHORIZATION](state,isAuthorization){
		if(isAuthorization){
			state.isAuthorization = isAuthorization
		} else {
			isAuthorization = false
		}
	},

	[type.SET_USER](state,user) {
		if(user) {
			state.user = user
		} else {
			user={}
		}
	}
}
const actions = {
	setAuthorization:({commit},isAuthorization) => {
		commit(type.SET_AUTHORIZATION,isAuthorization)
	},
	setsuer:({commit},user) => {
		commit(type.SET_USER,user)
	}
}

export const store = new Vuex.Store({
	state,
	getters,
	mutations,
	actions
})
通過以上vuex設定,我們可以吧得到的token和使用者的一些資訊存儲到vuex中,友善其他頁面進行調用
submitForm(formName) {
      this.$refs[formName].validate((valid) => {
        if (valid) {
          this.$axios.post('/api/users/login',this.loginUser).then(res => {

            const {token} = res.data;
            //存儲token
            localStorage.setItem('eleToken',token)
            //解析token
            const decode = jwt_decode(token)
            console.log(res)
             // 存儲到vuex
            this.$store.dispatch("setAuthorization", !this.isEmpty(decode));
            this.$store.dispatch("setsuer",decode)

            // this.$router.push('/index')
          })
        }
      })
    },
//封裝的驗證方法
    isEmpty(value) {
      return (
        value === undefined ||
        value === null ||
        (typeof value === "object" && Object.keys(value).length === 0) ||
        (typeof value === "string" && value.trim().length === 0)
      );
    }
雖然token和使用者資訊存儲到vuex中了,當我們重新整理浏覽器的時候,存儲的vuex資料都沒有了,
這時候。我們需要在跟元件app.vue元件進行判斷,token是否存在本地,存在就存放到vuex中
export default {
  name: 'App',
  created(){
    if(localStorage.setItem) {
      const decode = jwt_decode(localStorage.eleToken)

      // 存儲到vuex
      this.$store.dispatch("setAuthorization", !this.isEmpty(decode));
      this.$store.dispatch("setsuer",decode)
    }
  },
  methods:{
    isEmpty(value) {
      return (
        value === undefined ||
        value === null ||
        (typeof value === "object" && Object.keys(value).length === 0) ||
        (typeof value === "string" && value.trim().length === 0)
      );
    }
  }
}
路由守衛
路由跳轉前做一些驗證,比如登入驗證,購物車,是網站中的普遍需求,在使用者沒有登入的狀态下,是無法通路其他頁面的,這是時候我們就可以通過beforeEach來判斷使用者是否登入,(原理不需要細講,官方文檔有,直接上代碼),還是直接通過token去驗證是否登入或者沒有登入狀态
router.beforeEach((to,from,next) => {
  const isLogin = localStorage.eleToken ? true : false
  if(to.path === '/login' || to.path === 'register') {
    next()
  } else {
    isLogin ? next() : next('/login')
  }
})
以上都是這次部落格中所有的内容,如果喜歡,可以關注一下!!!