一、前言
Autofac是.NET領域最為流行的IOC架構之一,微軟的Orchad開源程式使用的就是Autofac,Nopcommerce開源程式也是用的Autofac。
Orchad和Nopcommerce在用Autofac的時候進行封裝,看過源碼的都知道Autafac使用簡單,功能強大。
建議下載下傳Orchad和Nopcommerce學習下源碼:附上下載下傳位址
http://www.orchardproject.net/
http://www.nopcommerce.com/
和其他IOC對比:
Unity:微軟patterns&practicest團隊開發的IOC依賴注入架構,支援AOP橫切關注點。
MEF(Managed Extensibility Framework):是一個用來擴充.NET應用程式的架構,可開發插件系統。
Spring.NET:依賴注入、面向方面程式設計(AOP)、資料通路抽象,、以及ASP.NET內建。
PostSharp:實作靜态AOP橫切關注點,使用簡單,功能強大,對目标攔截的方法無需任何改動。
Autofac:最流行的依賴注入和IOC架構,輕量且高性能,對項目代碼幾乎無任何侵入性。
下面介紹Autofac的使用
二、Autofac使用
建立一個mvc的項目,使用nuget安裝Autofac,需要安裝Autofac和Autofac ASP.NET MVC5 Intergration
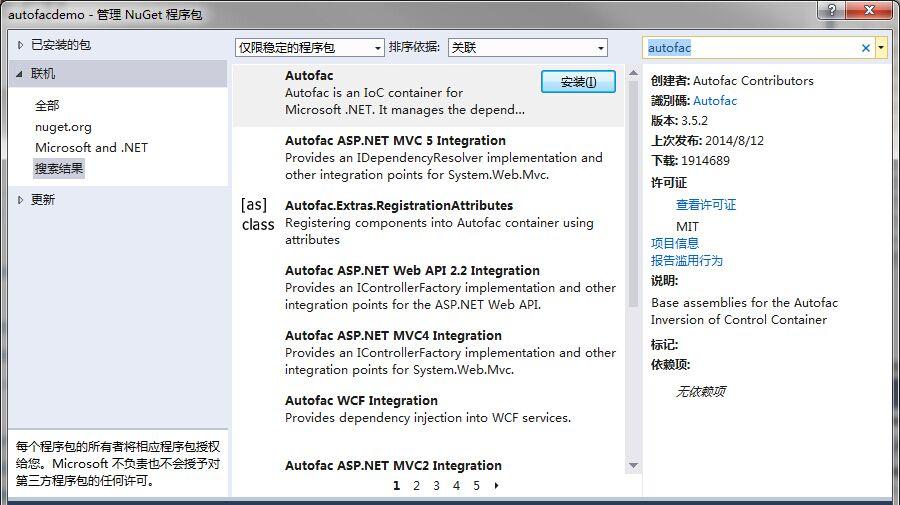
安裝完成後引用裡面就多了Autofac.dll和Autofac.Intergration.MVC,如果是在webApi裡使用Autofac需要安裝Autofac ASP.NET Web API2.2 Intergration 才可以。
建立一個person實體類

public class Person
    {
        public int Id { get; set; }
        public string Name { get; set; }
        public int Age { get; set; }
        public string Address { get; set; }
} 建立一個person倉儲接口
public interface IPersonRepository
    {
        IEnumerable<Person> GetAll();
        Person Get(int id);
        Person Add(Person item);
        bool Update(Person item);
        bool Delete(int id);
} 建立實作
public class PersonRepository : IPersonRepository
    {
        List<Person> person = new List<Person>();

        public PersonRepository()
        {
            Add(new Person { Id = 1, Name = "joye.net1", Age = 18, Address = "中國上海" });
            Add(new Person { Id = 2, Name = "joye.net2", Age = 18, Address = "中國上海" });
            Add(new Person { Id = 3, Name = "joye.net3", Age = 18, Address = "中國上海" });
        }
        public IEnumerable<Person> GetAll()
        {
            return person;
        }
        public Person Get(int id)
        {
            return person.Find(p => p.Id == id);
        }
        public Person Add(Person item)
        {
            if (item == null)
            {
                throw new ArgumentNullException("item");
            }
            person.Add(item);
            return item;
        }
        public bool Update(Person item)
        {
            if (item == null)
            {
                throw new ArgumentNullException("item");
            }

            int index = person.FindIndex(p => p.Id == item.Id);
            if (index == -1)
            {
                return false;
            }
            person.RemoveAt(index);
            person.Add(item);
            return true;
        }
        public bool Delete(int id)
        {
            person.RemoveAll(p => p.Id == id);
            return true;
        }
} Global屬性注入
public class MvcApplication : System.Web.HttpApplication
    {
        private void SetupResolveRules(ContainerBuilder builder)
        {
            builder.RegisterType<PersonRepository>().As<IPersonRepository>();
        }
        protected void Application_Start()
        {
            var builder = new ContainerBuilder();
            SetupResolveRules(builder);
            builder.RegisterControllers(Assembly.GetExecutingAssembly()).PropertiesAutowired();
            var container = builder.Build();
            DependencyResolver.SetResolver(new AutofacDependencyResolver(container));

            AreaRegistration.RegisterAllAreas();
            FilterConfig.RegisterGlobalFilters(GlobalFilters.Filters);
            RouteConfig.RegisterRoutes(RouteTable.Routes);
            BundleConfig.RegisterBundles(BundleTable.Bundles);
        }
} 最好擷取資料結果;
三、總結
文中隻是給出了一個簡單的注入實作,剩下的可以自己去研究下,構造函數注入,方法注入
泛型注入,所有程式集注入,都可以看下,
也可以把文章開頭的兩個開源的項目下載下傳下來研究裡面的Autofac注入方式。