iOS頁面間傳值的方式(NSUserDefault/Delegate/NSNotification/Block/單例)
實作了以下iOS頁面間傳值:1.委托delegate方式;2.通知notification方式;3.block方式;4.UserDefault或者檔案方式;5.單例模式方式;6.通過設定屬性,實作頁面間傳值
在iOS開發中,我們經常會遇到頁面間跳轉傳值的問題,現歸納總結一下:
情況1:A頁面跳轉到B頁面
方法:
在B頁面的控制器中,編寫對應的屬性,在A頁面跳轉到B頁面的地方,給B的屬性指派即可
//SecondViewController.h @property(nonatomic) NSInteger flag;//目前系統标示(0:其他傳值方式;1:block傳值方式) 在A頁面的試圖控制器中
//RootViewController.m - (IBAction)showSecondView:(id)sender {
SecondViewController *second = [[SecondViewController alloc] initWithNibName:@"SecondViewController" bundle:nil];
second.delegate = self;
second.flag = 0;
[self presentViewController:second animated:YES completion:nil];
} 情況2:A頁面跳轉到B頁面,B頁面再跳轉回A頁面
主流方案:
(1)通過委托delegate的方式實作
設定協定及方法
//SecondViewController.h @protocol secondViewDelegate
-(void)showName:(NSString *)nameString;
@end 設定代理(為防止循環引用,此處采用了weak)
//SecondViewController.h @interface SecondViewController : UIViewController
@property (nonatomic, weak)id<secondViewDelegate> delegate;
@property (nonatomic, copy) ablock block;
@end 調用
//SecondViewController.m
- (IBAction)delegateMethod:(id)sender {
    if ([self notEmpty]) {
        [self.delegate showName:self.nameTextField.text];
        [self dismissViewControllerAnimated:YES completion:nil];
    }else{
        [self showAlert];
    }
}
顯示
//RootViewController.m
-(void)showName:(NSString *)nameString{
    self.nameLabel.text = nameString;
}
最重要也是最容易忽略的,就是一定要設定delegate的指向。
(2)通過通知notification的方式實作
在B頁面的控制器中,發送通知:
//SecondViewController.m
- (IBAction)notificationMethod:(id)sender {
    if ([self notEmpty]) {
        [[NSNotificationCenter defaultCenter] postNotificationName:@"ChangeNameNotification" object:self userInfo:@{@"name":self.nameTextField.text}];
        [self dismissViewControllerAnimated:YES completion:nil];
    }else{
        [self showAlert];
    }
}
在A頁面的控制器中,注冊通知:
//RootViewController.m
- (void)viewDidLoad
{
    [super viewDidLoad];
    // Do any additional setup after loading the view from its nib.
    [[NSNotificationCenter defaultCenter] addObserver:self selector:@selector(ChangeNameNotification:) name:@"ChangeNameNotification" object:nil];
}
當我們不使用時,要記得删掉通知:
//RootViewController.m
-(void)dealloc{
    [[NSNotificationCenter defaultCenter] removeObserver:self];
}
調用,顯示
//RootViewController.m

-(void)ChangeNameNotification:(NSNotification*)notification{
    NSDictionary *nameDictionary = [notification userInfo];
    self.nameLabel.text = [nameDictionary objectForKey:@"name"];
}
(3)block方式實作
block介紹:http://blog.csdn.net/totogo2010/article/details/7839061
連結一篇描述block回調挺有意思的文章: http://blog.csdn.net/mobanchengshuang/article/details/11751671
分析:
在B試圖控制器中,定義一個block,參數為字元串
//SecondViewController.h
typedef void (^ablock)(NSString *str);
//SecondViewController.h
@property (nonatomic, copy) ablock block; 在B試圖控制器中,當輸入名字,點選對應的确定按鈕後
- (IBAction)blockMethod:(id)sender {
    if ([self notEmpty]) {
        if (self.block) {
            self.block(self.nameTextField.text);
            [self dismissViewControllerAnimated:YES completion:nil];
        }
    }else{
        [self showAlert];
    }
}
在A試圖顯示,回調block
- (IBAction)showSecondWithBlock:(id)sender {
    SecondViewController *second = [[SecondViewController alloc] initWithNibName:@"SecondViewController" bundle:nil];
    [self presentViewController:second animated:YES completion:nil];
    second.block = ^(NSString *str){
        self.nameLabel.text = str;
    };
}
(4)KVO方式實作
KVO實作原理介紹:http://blog.csdn.net/kesalin/article/details/8194240
在A視圖中,編寫以下代碼
//A視圖
//一個指向B視圖的成員變量
@property (nonatomic, strong) SecondViewController *second;

//在A視圖跳轉到B視圖的地方添加如下代碼
    self.second = [[SecondViewController alloc] initWithNibName:@"SecondViewController" bundle:nil];
    [self.second addObserver:self forKeyPath:@"userName" options:NSKeyValueObservingOptionNew context:nil];
    [self presentViewController:self.second animated:YES completion:nil];


-(void)observeValueForKeyPath:(NSString *)keyPath ofObject:(id)object change:(NSDictionary *)change context:(void *)context
{
//此處監聽key對應值的變化情況
    if ([keyPath isEqualToString:@"userName"]) {
        self.myLabel.text = self.second.userName;
    }
}

//清理觀察
- (void)dealloc
{
    [self.second removeObserver:self forKeyPath:@"userName"];
}
在B視圖編寫以下代碼
//在B視圖
//.h檔案

@property (nonatomic, strong) NSString *userName;//待監聽的成員變量

//可以在兩處修改userName的值。一個是設定textfield的UITextFieldDelegate。實作一下方法

-(void)textFieldDidEndEditing:(UITextField *)textField{
self.userName = self.myField.text;
}

//或者在B視圖,點選确定按鈕,跳轉回A視圖的時候,修改userName的值也可以

- (IBAction)buttonPressed:(id)sender {
    self.userName = self.myField.text;
    [self dismissViewControllerAnimated:YES completion:nil];
}
在查閱資料的過程中,我還看到了以下幾種方案:
(1)使用SharedApplication,定義一個變量來傳遞(感覺和單例的方式一樣)
(2)使用檔案,或者NSUserdefault來傳遞
//通過檔案或者UserDefault方式存值(感覺不太适合此類傳值,如果要用檔案或者UserDefault方式存值的話,可以考慮此方式)
- (IBAction)userDefaultMethod:(id)sender {
    if ([self notEmpty]) {
        [[NSUserDefaults standardUserDefaults] setObject:self.nameTextField.text forKey:@"myNameText"];
        [self dismissViewControllerAnimated:YES completion:nil];
    }else{
        [self showAlert];
    }
}
在A試圖控制器顯示
-(void)viewDidAppear:(BOOL)animated{
    [super viewDidAppear:animated];
    //如果想測試通過UserDefault方式傳值或者通過單例方式傳值,取消以下注釋即可
/*
    if ([[[NSUserDefaults standardUserDefaults] objectForKey:@"myNameText"] length] != 0) {
        self.nameLabel.text = [[NSUserDefaults standardUserDefaults] objectForKey:@"myNameText"];
        [[NSUserDefaults standardUserDefaults] setObject:@"" forKey:@"myNameText"];
    }
    DataSource *dataSource = [DataSource sharedDataSource];
    if ([dataSource.myName length] != 0) {
        self.nameLabel.text = dataSource.myName;
        dataSource.myName = @"";
    }
*/
}
(3)通過一個單例的class來傳遞
B試圖控制器
//通過單例方式傳值(感覺不太适合此類傳值,如果要用單例方式傳值的話,可以考慮此方式)
- (IBAction)singletonMethod:(id)sender {
    if ([self notEmpty]) {
        DataSource *dataSource = [DataSource sharedDataSource];
        dataSource.myName = self.nameTextField.text;
        [self dismissViewControllerAnimated:YES completion:nil];
    }else{
        [self showAlert];
    }
}
A試圖控制器顯示
-(void)viewDidAppear:(BOOL)animated{
    [super viewDidAppear:animated];
    //如果想測試通過UserDefault方式傳值或者通過單例方式傳值,取消以下注釋即可
/*
    if ([[[NSUserDefaults standardUserDefaults] objectForKey:@"myNameText"] length] != 0) {
        self.nameLabel.text = [[NSUserDefaults standardUserDefaults] objectForKey:@"myNameText"];
        [[NSUserDefaults standardUserDefaults] setObject:@"" forKey:@"myNameText"];
    }
    DataSource *dataSource = [DataSource sharedDataSource];
    if ([dataSource.myName length] != 0) {
        self.nameLabel.text = dataSource.myName;
        dataSource.myName = @"";
    }
*/
}
@end
這裡面用到了單例模式,編寫了DataSource這個類,存放資料
//
//  DataSource.h
//  TestCallBack
//
//  Created by csdc-iMac on 14-7-17.
//  Copyright (c) 2014年 JuneWang. All rights reserved.
//

#import <Foundation/Foundation.h>

@interface DataSource : NSObject
@property (nonatomic, strong) NSString *myName;
+(DataSource*)sharedDataSource;
@end
//
// DataSource.m
// TestCallBack
//
// Created by csdc-iMac on 14-7-17.
// Copyright (c) 2014年 JuneWang. All rights reserved.
//
#import "DataSource.h"
@implementation DataSource
+(DataSource *)sharedDataSource{
static DataSource *dataSource = nil;
static dispatch_once_t once;
dispatch_once(&once, ^{
dataSource = [DataSource new];
});
return dataSource;
}
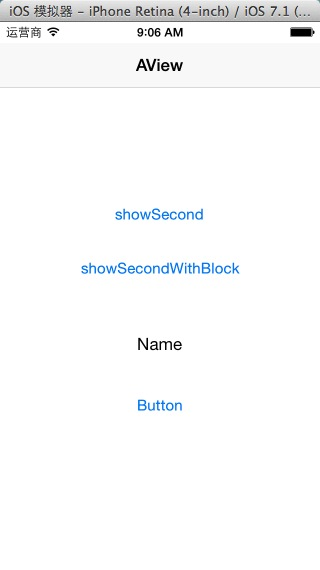
@end 程式運作截圖
A視圖:
B視圖

當輸入姓名,并點選對應的确認按鈕後,會回到A視圖,并顯示在B視圖中輸入的姓名
PS:用全局變量的方式也可以實作頁面傳值的效果。
祝:玩得開心,有什麼别的辦法或者不正确的地方,歡迎指正。
如果寫得不詳細,可以通過源碼分析。
參考:http://blog.csdn.net/cocoarannie/article/details/11857141
http://www.cnblogs.com/heri/archive/2013/03/18/2965815.html
源碼位址:https://github.com/wangtao169447/PassValue
轉載請注明出處:http://www.cnblogs.com/JuneWang/p/3850859.html