SonarQube簡介
Sonar 是一個用于代碼品質管理的開放平台。通過插件機制,Sonar 可以內建不同的測試工具,代碼分析工具,以及持續內建工具。比如pmd-cpd、checkstyle、findbugs、Jenkins。通過不同的插件對這些結果進行再加工處理,通過量化的方式度量代碼品質的變化,進而可以友善地對不同規模和種類的工程進行代碼品質管理。同時 Sonar 還對大量的持續內建工具提供了接口支援,可以很友善地在持續內建中使用 Sonar。
此外,Sonar 的插件還可以對 Java 以外的其他程式設計語言(支援的語言包括:Java、PHP、C#、C、Cobol、PL/SQL、Flex等)提供支援,對國際化以及報告文檔化也有良好的支援。可以說Sonar是目前最強大的代碼品質管理工具之一。
安裝環境
系統環境:centos7.0 -x86_64(最小化安裝)
前置條件:jdk1.8 , mysql-5.6
軟體下載下傳目錄:/data/packages/
軟體安裝目錄:/usr/local/
軟體版本:sonarqube-6.7,sonar-runner-dist-2.4 sonar-scanner-3.0.3.778
預置條件
1、(可選) 解除安裝已有的open jdk,安裝最新版本的java jdk,為後續內建maven服務做準備
# rpm -qa | grep jdk
  java-1.6.0-openjdk-1.6.0.0-1.45.1.11.1.el6.i686
# yum -y remove java-1.6.0-openjdk-1.6.0.0-1.45.1.11.1.el6.i686
  remove java-1.6.0-openjdk-1.6.0.0-1.45.1.11.1.el6.i686
安裝JAVA, 請見 http://qiangsh.blog.51cto.com/3510397/1771748
2、安裝Mysql資料庫
//需要Mysql資料庫支援;雖然SonarQube自帶了H2資料庫,但是為了友善管理資料推薦使用Mysql資料庫
安裝MySQL,請見 https://blog.51cto.com/qiangsh/1767495
3、資料庫配置
使用InnoDB引擎,首先要做的是使用innodb_buffer_pool_size 參數為MySQL執行個體配置設定最大量的RAM,并為 參數提供至少15Mb query_cache_size 。有關 更多資訊,請閱讀有關InnoDB性能優化基礎知識的文章 。
進入資料庫
#建立sonar資料庫
mysql> CREATE DATABASE sonar CHARACTER SET utf8 COLLATE utf8_general_ci;
mysql> GRANT ALL ON sonar.* TO 'sonar'@'localhost' IDENTIFIED BY 'sonar@pw';
mysql> GRANT ALL ON sonar.* TO 'sonar'@'%' IDENTIFIED BY 'sonar@pw';
mysql> FLUSH PRIVILEGES;
在安裝之前,介紹一下SonarQube和SonarQube Runner之間的關系。
SonarQube是伺服器端,它主要有兩個功能:1.分析源代碼;2.因為它内嵌了Apache子產品,是以提供Web端的界面通路。
SonarQube Runner是一個利用SonarQube服務端分析代碼的指令行工具,可以把它簡單了解為用戶端。
是以,為了安裝和調試友善,建議SonarQube和SonarQube Runner都下載下傳。
4、安裝SonarQube
第一步:下載下傳
sonarqube下載下傳位址:http://www.sonarqube.org/downloads/
sonar-runner下載下傳位址: http://repo1.maven.org/maven2/org/codehaus/sonar/runner/sonar-runner-dist/2.4/sonar-runner-dist-2.4.zip
sonar-scanner下載下傳掃描器位址:https://docs.sonarqube.org/display/SCAN/Analyzing+with+SonarQube+Scanner
我已下載下傳并上傳百度雲盤: https://pan.baidu.com/s/1Cq44IpHSy70_X3tIgBf9VA 密碼:1mt0
wget https://binaries.sonarsource.com/Distribution/sonarqube/sonarqube-6.7.6.zip
wget http://repo1.maven.org/maven2/org/codehaus/sonar/runner/sonar-runner-dist/2.4/sonar-runner-dist-2.4.zip
wget https://binaries.sonarsource.com/Distribution/sonar-scanner-cli/sonar-scanner-cli-3.3.0.1492-linux.zip
unzip sonarqube-6.7.6.zip
unzip sonar-runner-dist-2.4.zip
unzip sonar-scanner-cli-3.3.0.1492-linux.zip
mv sonarqube-6.7.6 /usr/local/sonarqube
mv sonar-runner-2.4 /usr/local/sonar-runner
mv sonar-scanner-3.3.0.1492-linux /usr/local/sonar-scanner
第二步:配置環境變量
[root@qsh local]# vim /etc/profile
#--------------------------------------------------------------------
export SONAR_HOME=/usr/local/sonarqube
export SONAR_RUNNER_HOME=/usr/local/sonar-runner
export SONAR_SCANNER_HOME=/usr/local/sonar-scanner
PATH=$PATH:$SONAR_HOME/bin:$SONAR_RUNNER_HOME/bin:$SONAR_SCANNER_HOME/bin

[root@qsh local]# source /etc/profile
第三步:配置sonar.properties
[root@Nginx-Jenkins-Server sonarqube]# cd /usr/local/sonarqube/conf/
[root@Nginx-Jenkins-Server conf]# vim sonar.properties
#修改連接配接資料庫使用者密碼
sonar.jdbc.username=sonar
sonar.jdbc.password=sonar@pw
#取消注釋,修改資料庫位址
sonar.jdbc.url=jdbc:mysql://127.0.0.1:3306/sonar?useUnicode=true&characterEncoding=utf8&rewriteBatchedStatements=true&useConfigs=maxPerformance&useSSL=false
#取消下面兩行注釋
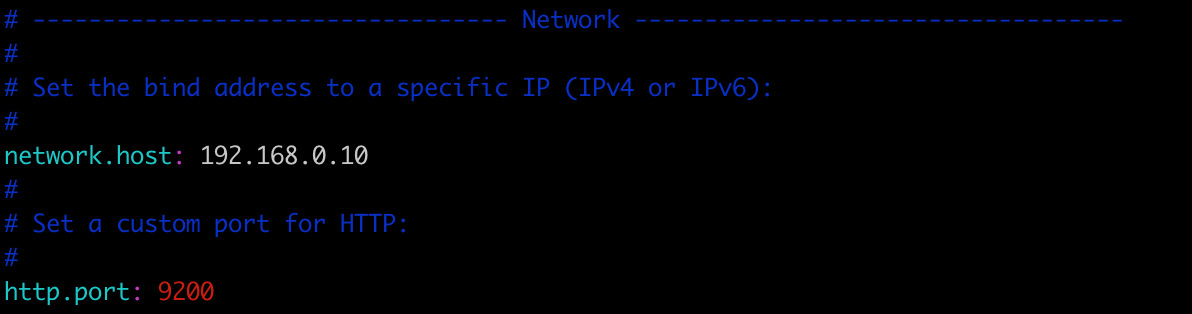
sonar.web.host=192.168.0.10
sonar.web.port=9000 sonarqube啟動參數,修改配置: /usr/local/sonarqube/conf/wrapper.conf
ES啟動參數,修改配置:/usr/local/sonarqube/elasticsearch/config/jvm.options
第四步:配置SonarQube Runner
[root@qsh conf]# cd /usr/local/sonar-runner/conf/
[root@qsh conf]# vim sonar-runner.properties
#----- Default SonarQube server
sonar.host.url=http://192.168.0.10:9000
#----- PostgreSQL
#sonar.jdbc.url=jdbc:postgresql://localhost/sonar
#----- MySQL
sonar.jdbc.url=jdbc:mysql://127.0.0.1:3306/sonar?useUnicode=true&characterEncoding=utf8
#----- Oracle
#sonar.jdbc.url=jdbc:oracle:thin:@localhost/XE
#----- Microsoft SQLServer
#sonar.jdbc.url=jdbc:jtds:sqlserver://localhost/sonar;SelectMethod=Cursor
#----- Global database settings
sonar.jdbc.username=sonar
sonar.jdbc.password=sonar@pw
#----- Default source code encoding
sonar.sourceEncoding=UTF-8
#----- Security (when 'sonar.forceAuthentication' is set to 'true')
sonar.login=admin
sonar.password=admin [root@qsh sonar-runner]# cd /usr/local/sonar-runner
[root@qsh sonar-runner]# mkdir /data/sonar-runner
[root@qsh sonar-runner]# vim sonar-project.properties
#-------------------------------------------------
#Required metadata
#對于較大的工程項目,經常出現記憶體不夠的問題,需要利用環境變量設定虛拟機的記憶體
SONAR_RUNNER_OPTS=-Xmx512m-XX:MaxPermSize=128m
sonar.projectKey=my:project
sonar.projectName=yaok
sonar.projectVersion=1.0
#Paths to source directories.
#Paths are relative to the sonar-project.properties file. Replace "\" by "/" on Windows.
#Do not put the "sonar-project.properties" file in the same directory with the source code.
#(i.e. never set the "sonar.sources" property to ".")
sonar.sources=/data/sonar-runner
#The value of the property must be the key of the language.
sonar.language=java
#Encoding of the source code
sonar.sourceEncoding=UTF-8
#Additional parameters
sonar.my.property=value 5、安裝後啟動SonarQube
用root無法啟動lSonarQube,需要另外建立普通使用者來啟動
[root@qsh ~]# useradd esadmin
[root@qsh ~]# chown -R esadmin.esadmin /usr/local/sonarqube
[root@qsh ~]# vim /usr/local/sonarqube/elasticsearch/config/elasticsearch.yml
//開啟以下兩行
//切換使用者,啟動
[root@qsh ~]# su - esadmin
[esadmin@qsh ~]$ cd /usr/local/sonarqube/
[esadmin@qsh sonarqube]$ ./bin/linux-x86-64/sonar.sh start
Starting SonarQube...
Started SonarQube.
//檢查是否正常啟動
[esadmin@qsh sonarqube]$ ps -aux |grep sonar //啟動日志檢視
#sonarqube
tail -f /usr/local/sonarqube/logs/sonar.log

#Es
tail -f /usr/local/sonarqube/logs/es.log 
附:啟動的時候報錯
1,錯誤:max file descriptors [4096] for elasticsearch process is too low, increase to at least
解決方法:
[root@qsh ]#vim /etc/security/limits.conf
#在檔案最後添加下面兩行
esadmin hard nofile 65536
esadmin soft nofile 65536

#檢視檔案限制指令
[esadmin@qsh sonarqube]$ ulimit -Hn
655350
2,錯誤,max virtual memory areas vm.max_map_count [65530] is too low, increase to at least [262144]
切換到root使用者修改配置sysctl.conf
[root@qsh]#vim /etc/sysctl.conf
#添加下面配置:
vm.max_map_count=655360

并執行指令:
[root@qsh]# sysctl -p
6、安裝後啟動Sonar-Runner
[root@qsh sonar-runner]$ cd /usr/local/sonar-runner
[root@qsh sonar-runner]$ ./bin/sonar-runner -e -X 如果能夠看到下面的輸出資訊,證明你的SonarQube Runner安裝并配置正确啦。
7、使用浏覽器就可以直接登陸
http://192.168.0.39:9000/projects
//安裝中文語言包
選擇語言包,點選安裝,安裝好後重新開機,重新進入就是漢化版了 插件安裝位置: /usr/local/sonarqube/extensions/plugins/
8、配置SonarQube Scanner代碼掃描工具
[root@qsh sonar-scanner]# cd /usr/local/sonar-scanner/conf/
[root@Nginx-Jenkins-Server conf]# vim sonar-scanner.properties
#Configure here general information about the environment, such as SonarQube server connection details for example
#No information about specific project should appear here
#----- Default SonarQube server
sonar.host.url=http://192.168.0.10:9000
#----- Default source code encoding
sonar.sourceEncoding=UTF-8 # 拉取sonar示例代碼
[root@qsh ]# mkdir /data/sonar-examples
[root@qsh ]# cd /data/sonar-examples
[root@qsh sonar-examples]# git clone https://github.com/SonarSource/sonar-scanning-examples.git
#在項目的根目錄中建立配置檔案: sonar-project.properties
[root@qsh sonar-examples]# cd sonar-scanning-examples/sonarqube-scanner-maven/
[root@qsh sonarqube-scanner-maven]# vim sonar-project.properties
#------------------------------------------------------------------
# must be unique in a given SonarQube instance
sonar.projectKey=devops-demo
# this is the name and version displayed in the SonarQube UI. Was mandatory prior to SonarQube 6.1.
sonar.projectName=devops-demo
sonar.projectVersion=1.0

# Path is relative to the sonar-project.properties file. Replace "\" by "/" on Windows.
# This property is optional if sonar.modules is set.
sonar.sources=.
sonar.java.binaries=.

# Encoding of the source code. Default is default system encoding
sonar.sourceEncoding=UTF-8
#代碼掃描測試
[root@qsh sonarqube-scanner-maven]# sonar-scanner //使用浏覽器打開http://192.168.0.39:9000/projects ,檢視掃描結果