一. ElementUI簡介/使用
1. 簡介
Element,一套為開發者、設計師和産品經理準備的基于 Vue 的桌面端元件庫
(1). 基于Vue2.x版本:https://element.eleme.cn/#/zh-CN
(2). 基于Vue3.x版本:https://element-plus.gitee.io/#/zh-CN (在3.x版本中,叫Elemnet-plus)
2. 基于指令行的方式引入
(1). 在項目根目錄下運作指令【npm i element-ui –S】 等價于【npm install element-ui -save】,安裝到生産環境中。
// 手動配置 element-ui
//導入元件庫(這裡是完整導入)
import ElementUI from 'element-ui';//導入元件樣式
import 'element-ui/lib/theme-chalk/index.css';//配置使用
Vue.use(ElementUI);
(3). 在app.vue頁面複制一段ElementUI的button代碼,運作項目進行檢視。

<template>
  <div id="app">
    <!-- 下面是ElementUI的button代碼 -->
    <el-row>
      <el-button>預設按鈕</el-button>
      <el-button type="primary">主要按鈕</el-button>
      <el-button type="success">成功按鈕</el-button>
      <el-button type="info">資訊按鈕</el-button>
      <el-button type="warning">警告按鈕</el-button>
      <el-button type="danger">危險按鈕</el-button>
    </el-row>

    <div id="nav">
      <router-link to="/">Home</router-link> |
      <router-link to="/about">About</router-link>
    </div>
    <router-view/>
  </div>
</template>
View Code
效果圖:
3. 基于圖形化界面方式引入
(1). 運作 vue ui 指令,打開圖形化界面
(2). 通過 Vue 項目管理器,進入具體的項目配置面闆
(3).點選 插件 -> 添加插件,進入插件查詢面闆
(4).搜尋 vue-cli-plugin-element 并安裝
(5).配置插件,實作按需導入,進而減少打包後項目的體積
PS:這裡引入後,在packeage.json檔案中顯示的elementui的版本号為 2.5.4,很低,
但經過查詢引入包的代碼發現,用的是2.15.1, 如果你是強迫症,可以執行【npm uninstall element-ui】【npm install [email protected] -save】
(6). 完成安裝後,檢視代碼
main.js代碼如下:
element.js中代碼如下:
import Vue from 'vue'
import { Button } from 'element-ui'

Vue.use(Button)
按需引入會在根目錄下的 babel.config.js 檔案中進行添加如下代碼,則不需要再檔案中單獨引入css樣式了
module.exports = {
  presets: [
    '@vue/cli-plugin-babel/preset'
  ],
  plugins: [
    [
      'component',
      {
        libraryName: 'element-ui',
        styleLibraryName: 'theme-chalk'
      }
    ]
  ]
}
注:
上述是通過UI界面實作按需引入的,這裡也可用通過指令行【npm install babel-plugin-component -D】,然後再babel.config.js檔案中添加上述代碼即可。詳細說明可參考:https://element.eleme.cn/#/zh-CN/component/quickstart
(7). 在app.vue頁面複制一段ElementUI的button代碼,運作項目進行檢視。
<template>
  <div id="app">
    <img src="./assets/logo.png">
    <!-- 下面是ElementUI的button代碼 -->
    <el-row>
      <el-button>預設按鈕</el-button>
      <el-button type="primary">主要按鈕</el-button>
      <el-button type="success">成功按鈕</el-button>
      <el-button type="info">資訊按鈕</el-button>
      <el-button type="warning">警告按鈕</el-button>
      <el-button type="danger">危險按鈕</el-button>
    </el-row>
    <div>
      <p>
        If Element is successfully added to this project, you'll see an
        <code v-text="'<el-button>'"></code>
        below
      </p>
      <el-button>el-button</el-button>
    </div>
    <HelloWorld msg="Welcome to Your Vue.js App"/>
  </div>
</template>
View Code
效果圖如下:
補充 :element按需引入的規則
凡是元件 el-xxx,xxx都需要引入,通常有這麼兩種情況,
比如 el-input ,則需要 import Input ,首字母大寫
比如 el-table-column, 這需要import TableColumn, 去掉-,兩個組合的首字母都大寫
二. Git版本管理
詳見:https://www.cnblogs.com/yaopengfei/p/14931700.html
https://www.cnblogs.com/yaopengfei/p/14945185.html
三. 基本環境搭建
1. 安裝nodejs環境,切換npm下載下傳路徑為taobao
(步驟參考:https://www.cnblogs.com/yaopengfei/p/14478126.html)
2. 安裝mysql資料庫,導入MyVueDB資料庫,運作指令【node ./app.js】啟動服務端程式。
3. 全局安裝Vue腳手架【npm install -g @vue/cli】,安裝完成後,檢視版本。
4. 在項目檔案夾下運作指令【vue ui】,進入圖形化界面,建立【MyVueSystem】項目,建立過程參考:https://www.cnblogs.com/yaopengfei/p/14506321.html
package.json檔案如下
{
  "name": "myvuesystem",
  "version": "0.1.0",
  "private": true,
  "scripts": {
    "serve": "vue-cli-service serve",
    "build": "vue-cli-service build",
    "lint": "vue-cli-service lint"
  },
  "dependencies": {
    "core-js": "^3.6.5",
    "vue": "^2.6.11",
    "vue-router": "^3.2.0"
  },
  "devDependencies": {
    "@vue/cli-plugin-babel": "~4.5.0",
    "@vue/cli-plugin-eslint": "~4.5.0",
    "@vue/cli-plugin-router": "~4.5.0",
    "@vue/cli-service": "~4.5.0",
    "@vue/eslint-config-standard": "^5.1.2",
    "babel-eslint": "^10.1.0",
    "eslint": "^6.7.2",
    "eslint-plugin-import": "^2.20.2",
    "eslint-plugin-node": "^11.1.0",
    "eslint-plugin-promise": "^4.2.1",
    "eslint-plugin-standard": "^4.0.0",
    "eslint-plugin-vue": "^6.2.2",
    "vue-template-compiler": "^2.6.11"
  }
}
View Code
5. 修改項目端口為8086(根目錄建立vue.config.js檔案),運作指令【npm run serve】,進行 http://localhost:8086/ 通路。
module.exports = {
  devServer: {
    port: 8086,
    open: true
  }
}
6. 引入element-ui最新版本,2.15.1,采用按需引入的方式,并測試。
(1). 安裝element-ui:運作指令【npm install [email protected] -save】,進行安裝
(2). 按需導入:運作指令【npm install babel-plugin-component -D】安裝插件babel-plugin-component ,然後在根目錄下的 babel.config.js 檔案中進行添加如下代碼,則不需要再檔案中單獨引入css樣式了。
module.exports = {
  presets: [
    '@vue/cli-plugin-babel/preset'
  ],
  plugins: [
    [
      'component',
      {
        libraryName: 'element-ui',
        styleLibraryName: 'theme-chalk'
      }
    ]
  ]
}
(3). 測試
在src目錄下建立plugins檔案夾,然後建立element.js檔案,用于處理elemet的引入,代碼如下,然後在main.js中導入element.js檔案即可。
element.js代碼:
import Vue from 'vue'
import { Button } from 'element-ui'

Vue.use(Button)
main.js代碼:
//導入element
import './plugins/element.js'
在App.vue中導入一段button的代碼,進行通路
<!-- 下面是ElementUI的button代碼 -->
    <el-row>
      <el-button>預設按鈕</el-button>
      <el-button type="primary">主要按鈕</el-button>
      <el-button type="success">成功按鈕</el-button>
      <el-button type="info">資訊按鈕</el-button>
      <el-button type="warning">警告按鈕</el-button>
      <el-button type="danger">危險按鈕</el-button>
</el-row> 7. 引入axios插件,用于處理http請求
運作指令【npm install axios -save】進行安裝即可。
8. 同步Git
截止此處,項目初始化工作已經完成。package.json檔案如下
{
"name": "myvuesystem",
"version": "0.1.0",
"private": true,
"scripts": {
"serve": "vue-cli-service serve",
"build": "vue-cli-service build",
"lint": "vue-cli-service lint"
},
"dependencies": {
"axios": "^0.21.1",
"core-js": "^3.6.5",
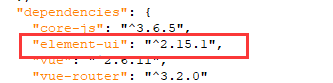
"element-ui": "^2.15.1",
"vue": "^2.6.11",
"vue-router": "^3.2.0"
},
"devDependencies": {
"@vue/cli-plugin-babel": "~4.5.0",
"@vue/cli-plugin-eslint": "~4.5.0",
"@vue/cli-plugin-router": "~4.5.0",
"@vue/cli-service": "~4.5.0",
"@vue/eslint-config-standard": "^5.1.2",
"babel-eslint": "^10.1.0",
"babel-plugin-component": "^1.1.1",
"eslint": "^6.7.2",
"eslint-plugin-import": "^2.20.2",
"eslint-plugin-node": "^11.1.0",
"eslint-plugin-promise": "^4.2.1",
"eslint-plugin-standard": "^4.0.0",
"eslint-plugin-vue": "^6.2.2",
"vue-template-compiler": "^2.6.11"
}
} View Code
!
- 作 者 : Yaopengfei(姚鵬飛)
- 部落格位址 : http://www.cnblogs.com/yaopengfei/
- 聲 明1 : 如有錯誤,歡迎讨論,請勿謾罵^_^。
- 聲 明2 : 原創部落格請在轉載時保留原文連結或在文章開頭加上本人部落格位址,否則保留追究法律責任的權利。