第一個Django app
by:授客 QQ:1033553122
測試環境:
Python版本:python-3.4.0.amd64
下載下傳位址:https://www.python.org/downloads/release/python-340/
Win7 64位
Django 1.11.4
下載下傳位址:https://www.djangoproject.com/download/
安裝django
python setup.py install
測試是否成功
>>> import django
>>> print(django.get_version())
1.10.6
>>>
或者
python -m django --version
參考連接配接:
https://docs.djangoproject.com/en/1.10/intro/install/
https://docs.djangoproject.com/en/1.10/intro/tutorial01/
第一個 Django app Part1
建立項目,選擇存放項目的目錄(例F:\project\Django\FirstApp),進入該目錄,執行django-admin指令
例:建立mysite項目
C:\Users\laiyu>cd /d F:\project\Django\FirstApp
F:\project\Django\FirstApp>django-admin startproject mysite
注意:項目名稱不能和python内置元件,或Django元件命名項目,特别是django(和Django自身沖突)或test(和python内置子產品沖突)。
運作指令後,生成檔案如下:
FirstApp/
mysite/
manage.py
mysite/
__init__.py
settings.py
urls.py
wsgi.py
說明:
最外層mystie: 項目根目錄。
manage.py:提供各種方式同Django項目互動的指令行工具。
内層的mysite:python包,存放項目python檔案目錄。
mystie/__init__.py:一個空檔案,告訴python,該目錄應該被解析為python包
mysite/settings.py:包含Django項目的配置/設定。
mysite/urls.py:包含Django項目的url聲明。
mysite/wsgi.py:服務項目的WSGI-compatible。
确認項目是否能正常運作,切換到根目錄,即例中的mysite,運作如下指令:
F:\project\Django\FirstApp\mysite>python manage.py runserver
運作結果:控制台輸出如下資訊
Performing system checks...
System check identified no issues (0 silenced).
You have 13 unapplied migration(s). Your project may not work properly until you apply the migrations for app(s): admin, auth, contenttypes, sessions.
Run 'python manage.py migrate' to apply them.
March 13, 2017 - 23:14:26
Django version 1.10.6, using settings 'mysite.settings'
Starting development server at http://127.0.0.1:8000/
Quit the server with CTRL-BREAK.
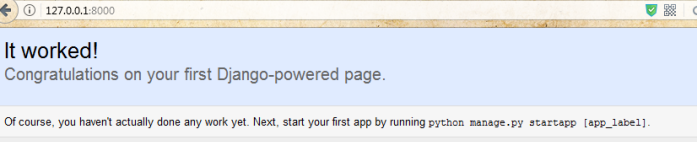
通路http://127.0.0.1:8000/,ok
運作服務時,可指定端口,如下
python manage.py runserver 8080
也可以用指定ip來通路服務,放入如下
1.運作如下指令
python manage.py runserver 0.0.0.0:8000
2.編輯project_dir/settings.py檔案,把服務所在ip添加到 ALLOWED_HOSTS清單中,如下
ALLOWED_HOSTS = ['192.168.1.103']
點選runserver檢視更多關于runserver的說明
建立投票app
項目(project) vs 應用(app)
應用:即一個web應用,比如web 部落格系統,存放公共記錄的資料庫,或者一個簡單的投票系統。
項目:特定網站應用和配置的集合。一個項目包含多個應用,而一個應用隻能在一個項目中。
接下來,在項目根目錄下,建立poll應用,這樣友善作為頂級子產品導入。
例:在manage.py所在目錄,即項目根目錄下運作指令來建立polls app
F:\project\Django\FirstApp\mysite>python manage.py startapp polls
運作後生成polls檔案:
mysite/
polls/
__init__.py
admin.py
apps.py
migrations/
models.py
tests.py
views.py
編寫第一個view
編輯polls/views.py檔案,添加python代碼(帶背景色部分)如下
from django.shortcuts import render
# Create your views here.
from django.http import HttpResponse
def index(request):
return HttpResponse("hello, world. You're at the polls index")
為了調用這個index view,需要把它映射到一個URL,是以需要一個URL 配置。
在polls目錄下,建立一個名為urls.py的檔案,以建立URLConf。現在app目錄看起來如下:
admin.py
apps.py
migrations/
__init__.py
urls.py
編輯urls.py,添加如下代碼
from django.conf.urls import url
from . import views
urlpatterns = [
url(r'^$', views.index, name='index'),
]
配置項目URLConf
編輯mysite/urls.py檔案,如下
from django.conf.urls import include, url
from django.contrib import admin
url(r'^polls/', include('polls.urls')),
url(r'^admin/', admin.site.urls),
]
浏覽器通路

1) 正規表達式:$, xxx$:比對xxx結尾的字元串)。
2) 當Django遇到include()時,會先把請求中的url同include()函數對應的正規表達式比對(例中按先後順序分别為:'^polls/','^admin/',如果比對到,則把URL中比對到的字元串之後的剩餘URL扔給include引用的app URLconf進行後續處理。
例子:修改polls/urls.py内容如下
url(r'test', views.index, name='index'),
修改通路連接配接:
http://127.0.0.1:8000/polls/testview
通路結果同上。
3)當且僅當需要包含其它應用的URLConf式時使用include()。這裡admin.site.urls是個特例。
url函數
url函數接收4個參數:必選參數regex,view,可選參數 kwargs和name。
參數regex: 字元串類型的正規表達式。Django會從urlpatterns list中第一個正規表達式子開始比對查找直到找到一個比對的。
注意:正則表達比對查找時,不搜尋GET和POST參數以及域名。比如請求 https://www.example.com/myapp/, URLconf隻查找myapp/,又如https://www.example.com/myapp/?page=3,URLconf隻查找myapp/
注:正規表達式在第一次加載URLconf子產品時就進行了編譯,隻要不是太複雜的正規表達式,查找速度都很快。
參數view:當Django找到比對正規表達式的字元串時,會調用view函數,并把一個HttpRequest對象當作第一個函數參數,把通過正規表達式“捕獲”的其它值作為其它參數。如果使用simple capture,那麼捕獲的值以位置參數傳遞,如果使用named capture則以關鍵詞參數傳遞。
參數kwargs:關鍵詞參數,以字典方式傳遞給目标view的關鍵詞參數。
參數name:命名URL,以便在Django其它地方引用時不産生歧義。
第一個 Django app Part2
建立資料庫
打開mysite/settings.py。這是個普通的python子產品,擁有代表Django配置的子產品級變量。
預設的,配置使用SQLite。如果你對資料庫不熟悉,或者僅是想使用試用Djano,這是個最容易的選擇。SQLite包含在python中,是以不要安裝其它任何東西來提供資料庫支援。但是開始真正的項目時,可能需要使用其它更有伸縮性的資料庫比如PostgreSQL。
如果想使用其它資料庫,安裝資料庫并改變DATABASE 'default'項中的關鍵詞來比對資料庫連接配接,如下:
DATABASES = {
'default': {
'ENGINE': 'django.db.backends.sqlite3',
'NAME': os.path.join(BASE_DIR, 'db.sqlite3'),
}
}
ENGINE:可選值是'django.db.backends.sqlite3', 'django.db.backends.postgresql', 'django.db.backends.mysql', 或者'django.db.backends.oracle'。其它後端也可以,檢視詳情
NAME:資料庫名字。
如果使用SQLite,資料庫檔案将存放在電腦上,這種情況下,NAME應該為絕對路徑,包含資料庫檔案的檔案名。預設值如上,把資料庫檔案存放在項目根目錄下。
如果不使用SQLite,需要設定額外參數如 USER, PASSWORD,和HOST。更多詳情參考DATABASES.
另外,確定提供的USER具備“create database”權限。
編輯mysite/settings.py,設定TIME_ZONE為你的時區。
注意INSTALLED_APPS設定,該設定包含了Django執行個體中激活的所有Django應用。應用可在多個項目中使用,可以打包并釋出給其它項目使用。
預設的,INSTALLED_APPS包含以下來自Django應用:
django.contrib.admin - 管理背景
django.contrib.auth - 授權系統
django.contrib.contenttypes - content type架構
django.contrib.sessions - 會話架構
django.contrib.message - 消息架構
django.contrib.staticfiles - 管理靜态檔案的架構
其中,一些應用使用了資料庫表,是以,我們需要在使用它們之前建立資料庫表。為了達到這個目的,執行以下指令:
python manage.py migrate
Operations to perform:
Apply all migrations: admin, auth, contenttypes, sessions
Running migrations:
Applying contenttypes.0001_initial... OK
Applying auth.0001_initial... OK
Applying admin.0001_initial... OK
Applying admin.0002_logentry_remove_auto_add... OK
Applying contenttypes.0002_remove_content_type_name... OK
Applying auth.0002_alter_permission_name_max_length... OK
Applying auth.0003_alter_user_email_max_length... OK
Applying auth.0004_alter_user_username_opts... OK
Applying auth.0005_alter_user_last_login_null... OK
Applying auth.0006_require_contenttypes_0002... OK
Applying auth.0007_alter_validators_add_error_messages... OK
Applying auth.0008_alter_user_username_max_length... OK
Applying sessions.0001_initial... OK
F:\project\Django\FirstApp\mysite>
migrate查找INSTALLED_APPS設定,然後根據mysite/setting.py中的資料庫設定和應用程式的資料庫遷移
建立必要的資料庫。檢視建立的表:資料庫用戶端輸入指令\dt(PostgreSQL),.shema(MySQL), SELECT TABLE_NAME FROM USER_TABLES(Oracle);
提醒:一些預設的應用我們不需要,可以在運作migrate之前删除、注釋掉。
建立子產品
将在poll應用中建立兩個子產品:Question和Choice。每個Question包含一個問題和釋出日期,每個Choice有兩個域:選項文字和投票計數器。每個Choice同一個Question關聯。
編輯polls/models.py檔案
from django.db import models
# Create your models here.
class Question(models.Model):
question_text = models.CharField(max_length=200)
pub_date = models.DateTimeField('date published')
class Choice(models.Model):
question = models.ForeignKey(Question, on_delete=models.CASCADE)
choice_text = models.CharField(max_length=200)
votes = models.IntegerField(default=0)
每個子產品都由django.db.models.Model的子類表示,類變量代表model中資料庫Field。
每個域由一個Field類(比如代表字元串的CharField,代表時間的DateTimeField)執行個體表示,告訴Django每個field可容納什麼類型的資料。
Field執行個體(比如 question_text、pub_date)的名字,即為域的名字,可在python代碼中使用,同時資料庫也将把它當表字段名使用。
給Field提供的第一個可選的位置參數可用來生成便于人易讀的名字。如果未提供,則使用機器易讀的名字作為人類易讀的名字。例中,我們僅為Question.pub_date提供了人類易讀的名字date published,其它子產品Field執行個體則使用機器易讀的名字,比如choice_text。
一些Field需要必選參數,比如CharField,需要提供max_length。這不僅是用于資料庫模式(schema),還用于合法性驗證(validation)。
Field還有各種可選參數,比如例中把votes的default值設定為0。
最後,注意這裡使用ForeignKey來确立關系,這告訴Django每個Choice和單個Question關聯。Django支援所有公共資料庫關系:多對一,多對多,一對一。
激活子產品
上述子產品代碼給Django提供了許多資訊,擁有它,Django可:
1)為該app建立資料庫模式(CREATE TABLE語句)
2)為通路Question和Choice對象建立Python 資料庫通路api
但是,要先告訴項目已安裝polls應用。
為了在項目中包含該app,需要在INSTALLED_APPS設定中添加引用。PollsConfig類位于polls/apps.py檔案中,點分路徑為jango.apps.PollsConfig,如下:
from django.apps import AppConfig
class PollsConfig(AppConfig):
name = 'polls'
編輯mysite/settings.py,添加點分路徑(帶背景色内容)
INSTALLED_APPS = [
'polls.apps.PollsConfig',
'django.contrib.admin',
'django.contrib.auth',
'django.contrib.contenttypes',
'django.contrib.sessions',
'django.contrib.messages',
'django.contrib.staticfiles',
運作指令:
F:\project\Django\FirstApp\mysite>python manage.py makemigrations polls
Migrations for 'polls':
polls\migrations\0001_initial.py:
- Create model Choice
- Create model Question
- Add field question to choice
通過運作makemigrations,告訴django你對子產品做了些改動,并且希望記錄這些改動(但不立即執行這些改動),這些改動存在在磁盤檔案,上例中檔案為polls/migrations/0001_initial.py。可易方式讀取這些改動,檢視migration帶來的sql執行。
python manage.py sqlmigrate polls 0001
BEGIN;
--
-- Create model Choice
CREATE TABLE "polls_choice" ("id" integer NOT NULL PRIMARY KEY AUTOINCREMENT, "c
hoice_text" varchar(200) NOT NULL, "votes" integer NOT NULL);
-- Create model Question
CREATE TABLE "polls_question" ("id" integer NOT NULL PRIMARY KEY AUTOINCREMENT,
"question_text" varchar(200) NOT NULL, "pub_date" datetime NOT NULL);
-- Add field question to choice
ALTER TABLE "polls_choice" RENAME TO "polls_choice__old";
CREATE TABLE "polls_choice" ("id" integer NOT NULL PRIMARY KEY AUTOINCREMENT, "c
hoice_text" varchar(200) NOT NULL, "votes" integer NOT NULL, "question_id" integ
er NOT NULL REFERENCES "polls_question" ("id"));
INSERT INTO "polls_choice" ("question_id", "choice_text", "votes", "id") SELECT
NULL, "choice_text", "votes", "id" FROM "polls_choice__old";
DROP TABLE "polls_choice__old";
CREATE INDEX "polls_choice_7aa0f6ee" ON "polls_choice" ("question_id");
COMMIT;
注意:
1)Django會自動添加主鍵 id(可重寫)
2)約定的,Django會添加”_id”到外鍵域(可重寫)
可執行python manage.py check,在不執行遷移或改動資料庫的情況下,來檢查項目中的問題
接着,執行migrate在資料庫中建立子產品表,即讓上述存儲的改動在應用中生效。
F:\project\Django\FirstApp\mysite>python manage.py migrate
Apply all migrations: admin, auth, contenttypes, polls, sessions
Applying polls.0001_initial... OK
閱讀django-admin documentation檢視manage.py工具的更多功能。
API互動
調用python shell
python manage.py shell
Python 3.4.0 (v3.4.0:04f714765c13, Mar 16 2014, 19:25:23) [MSC v.1600 64 bit (AM
D64)] on win32
Type "help", "copyright", "credits" or "license" for more information.
(InteractiveConsole)
同直接運作python不一樣,因為manage.py設定DJANGO_SETTINGS_MODULE環境變量,為mysite/settings.py檔案提供python導入路徑。
注:也可以不用manage.py,直接設定DJANGO_SETTINGS_MODULE環境變量,然後運作python并設定Django
set DJANGO_SETTINGS_MODULE=mysite.settings
python
>>> django.setup()
按這種方式,必須在manage.py所在目錄下開啟python。或者確定這個目錄在python的path中,這樣import mystie才起作用。
調用資料庫api
>>> from polls.models import Question, Choice
# 系統中還沒有問題
>>> Question.objects.all()
<QuerySet []>
# 建立一個新的Question
>>> from django.utils import timezone
>>> q = Question(question_text="what's up?", pub_date=timezone.now())
# 儲存對象到資料庫。
>>> q.save()
# 輸出也可能是1L,而不是1,取決于資料庫。
>>> q.id
1
# 通過python屬性通路子產品field
>>> q.question_text
"what's up?"
>>> q.pub_date
datetime.datetime(2017, 3, 22, 12, 57, 18, 103269, tzinfo=<UTC>)
# 通過修改屬性來修改field
>>> q.question_text = "what's up?"
# objects.all()展示資料庫中的所有問題。
<QuerySet [<Question: Question object>]>
為了更清楚點的顯示對象,可編輯polls/models.py檔案,添加一個__str__()方法到Question和Choice。
from django.utils.encoding import python_2_unicode_compatible
@python_2_unicode_compatible # 如果需要支援python2
Question(models.Model):
# ...
def __str__(self):
return self.question_text
@python_2_unicode_compatible # 如果需要支援python2
return self.choice_text
添加自定義方法
import datetime
from django.utils import timezone
def was_published_recently(self):
return self.pub_date >= timezone.now() - datetime.timedelta(days=1)
再次運作python manage.py shell
# 确認 __str__() 是否起作用
<QuerySet [<Question: What's up?>]>
# Django提供了一個完全由關鍵詞參數驅動的豐富的資料庫API。
>>> Question.objects.filter(id=1)
<QuerySet [<Question: What's up?>]
>>>> Question.objects.filter(question_text__startswith='What')
# 擷取今年釋出的問題
>>> current_year = timezone.now().year
>>> Question.objects.get(pub_date__year=current_year) #注意 pub_date和year中間有兩下劃線
<Question: What's up?>
# 如果請求的id不存在,将抛出異常.
>>> Question.objects.get(id=2)
Traceback (most recent call last):
...DoesNotExist: Question matching query does not exist.
# 按主鍵查詢,以下指令等同于Question.objects.get(id=1)
>>> Question.objects.get(pk=1)
# 确認自定義方法起作用
>>> q = Question.objects.get(pk=1)
>>> q.was_published_recently()
True
# 給Question多個Choice。調用create函數構造一個新的Choice對象,執行INSERT 語句,添加choice到#擷取的choice set,然後傳回建立的Choice對象。Django建立了一個集合以容納ForeignKey 關系的另一方#(如 question’s choice)。
# 展示相關對象集的choice - 目前為空
>>> q.choice_set.all()
>>> q.choice_set.create(choice_text='Not much', votes=0)
<Choice: Not much>
>>> q.choice_set.create(choice_text='The sky', votes=0)
<Choice: The sky>
>>> c = q.choice_set.create(choice_text='Just hacking again', votes=0)
# Choice 對象有API可通路與其相關的Question對象。
>>> c.question
# 反之,Question 對象可通路Choice對象。
<QuerySet [<Choice: Not much>, <Choice: The sky>, <Choice: Just hacking again>]>
>>> q.choice_set.count()
3
# 隻要你需要,API自動跟随關系。關系之間用下劃線關聯。
# 找出同Choice關聯的question,要求qub_date在今年以内
>>> Choice.objects.filter(question__pub_date__year=current_year)
# 删除其中一個choice
>>> c = q.choice_set.filter(choice_text__startswith='Just hacking')
>>> c.delete()
檢視更多關于對象關系:Accessing related objects,更多關于使用雙下劃線進行域查找:Field lookups,資料庫API完整資訊:Database API reference
介紹Djando Admin
建立管理者使用者
python manage.py createsuperuser
Username (leave blank to use 'laiyu'): admin
Email address: [email protected]
Password:
Password (again):
This password is too short. It must contain at least 8 characters.
Superuser created successfully.
開啟開發伺服器
Django管理者站點預設是激活的。
如果伺服器未運作,執行如下指令
python manage.py runserver
進入站點
輸入帳号,密碼登入
可看到groups和users,這是由django.contrib.auth提供的,django的認證架構。
使得poll應用在站點管理頁中可修改
如上,沒看到poll應用。要展示該頁面,還需告訴admin,Question對象擁有admin接口。為了達到這個目的,打開polls/admin.py,按如下編輯
# Register your models here.
from .models import Question
admin.site.register(Question)
點選Questions
點選what’s up
第一個 Django app Part3
Django中,web頁面和其它内容都是從views派生的,每個view由python函數(或方法)表示,Django通過檢查請求的域名後面的那部分URL來選擇view。
編寫更多的視圖(view)
在polls/view.py中添加幾個視圖
def detail(request, question_id):
return HttpResponse("You're looking at question %s." % question_id)
def results(request, question_id):
response = "You're looking at the results of question %s."
return HttpResponse(response % question_id)
def vote(request, question_id):
return HttpResponse("You're voting on question %s." % question_id)
然後在polls/urls.py中添加url()調用
polls/urls.py
# ex: /polls/
# ex: /polls/3/
url(r'^(?P<question_id>[0-9]+)/$', views.detail, name='detail'),
# ex: /polls/3/results/
url(r'^(?P<question_id>[0-9]+)/results/$', views.results, name='results'),
# ex: /polls/3/vote/
url(r'^(?P<question_id>[0-9]+)/vote/$', views.vote, name='vote'),
預設的,從站點請求頁面,比如“/polls/3”,Django會先加載mysite.urls python子產品,因為ROOT_URLCONF配置指向它。先查找urlpatterns變量,并按順序解析正規表達式,如果找到比對‘^polls/’的,把URL中比對到的字元串polls/去掉,然後把後面剩餘部分“3/”扔給polls.urls URLCONf進行後續處理。接着比對到r'^(?P<question_id>[0-9]+)/$',調用detail view,如下:
detail(request=<HttpRequest object>, question_id=3)
question_id=3 來自(?P<question_id>[0-9]+)。使用雙括号于正規表達式,可捕獲正規表達式比對到的文本,然後當作參數發給view函數。?P<question_id>定義了用于比對正規表達式的名稱,即用來比對函數關鍵詞參數的pattern,[0-9]+用于比對數字序列。
編寫執行實際任務的視圖
每個視圖都負責這兩件事之一:傳回一個包含請求頁面内容的HttpResponse()對象,或者是抛出異常,比如Http404
視圖可從資料庫讀取記錄,也可使用Django的模闆系統,或者是第三方的Python模闆系統,可生成PDF檔案,輸出XML,建立ZIP及其它你想要的。
根據釋出日期,展示最新的5個question,逗号分隔。
在polls/view.py中添加以下内容,其它保持不變
# Create your views here
latest_question_list = Question.objects.order_by('-pub_date')[:5]
output = ','.join([q.question_text for q in latest_question_list])
return HttpResponse("Hello, world. You’re at the polls index")
這裡有個問題,就是視圖中的頁面設計是寫死的,如果想改變頁面樣式,需要編輯Python代碼。這裡,使用Django的模闆系統來建立一個可用視圖。
先在polls目錄下建立一個名為templates的目錄,Django會在這裡查找目标。
項目的TEMPLATES設定描述了Django将咋樣加載并渲染模闆。預設的,配置檔案配置了一個DjangoTemplates後端,其APP_DIRS選項被設定為True。約定的,DjangoTemplates會在每個INSTALLED_APP中查找templates子目錄。
在剛建立的templates目錄下建立另一個polls目錄,并在該目錄下建立index.html檔案。換句話說,template應該在polls/templates/polls/index.html。由于app_directories模闆加載器按上述描述的方式工作,是以,可簡單的使用polls/index.html引用該模闆。
注意:模闆命名
我們可直接在polls/templates目錄下存放我們的模闆,但是這樣不好,Django會選擇它查找到的第一個名字比對的模闆,這樣的話,如果你在另一個不同的應用下有相同名稱的目标,Django無法區分它們。是以,我們需要對它們進行命名,也就是把那些目标存放在以應用自身命名的另一個目錄。
編輯模闆
{% if latest_question_list %}
<url>
{% for question in latest_question_list %}
<li><a href="/polls/{{ question.id }}" > {{ question.question_text }}</a></li>
{% endfor %}
</url>
{% else %}
<p>No polls are available.</p>
<% endif %>
使用模闆來更新polls/views.py裡面的index視圖。
from django.template import loader
latest_question_list = Question.objects.order_by('-pub_date')[:5]
template = loader.get_template('polls/index.html')
context = {
'latest_question_list':latest_question_list
return HttpResponse(template.render(context, request))
代碼加載名為polls/index.html的模闆,并傳遞給context。context為一個字典,映射模闆變量到python對象。
點選連接配接,打開詳情。
捷徑:render()
編輯polls/views.py
latest_question_list = Question.objects.order_by('-pub_date')[:5]
context = {'latest_question_list': latest_question_list}
return render(request, 'polls/index.html', context)
render函數接收一個request作為其第一個參數,模闆名字作為第二個參數,字典作為可選的第三個參數。函數傳回一個經過給定context渲染的HttpResponse對象。
抛出404錯誤
polls/views.py
from django.http import Http404
# ...
try:
question = Question.objects.get(pk=question_id)
except Question.DoesNotExist:
raise Http404("Question does not exist")
return render(request, 'polls/detail.html', {'question': question})
建立模闆
polls/templates/polls/detail.html
{{ question }}
運作浏覽器
捷徑:get_object_or_404()
推薦使用get_object_or_404()
使用模闆系統
到回來看detail視圖,針對給定變量question,polls/detail.html模闆可能如下
<h1>{{ question.question_text }}</h1>
<ul>
{% for choice in question.choice_set.all %}
<li>{{ choice.choice_text }}</li>
{% endfor %}
</ul>
運作結果如下
模闆系統使用點查找(dot-lookup)文法通路變量屬性。{{ question.question_text }}為例,先在question對象上執行字典查找,然後在視圖屬性中查找-這種情況下,找到了。如果屬性查找失敗,則嘗試清單索引查找。
方法調用發生咋{ % for %}循環:question.choice_set.all()被轉為python代碼 question.choice_set.all(),傳回适合{% for %}标簽,由Choice對象組成的可疊代對象。
移除模闆中的寫死的URL
polls/index.html中編寫的指向question的連接配接
<li><a href="/polls/{{ question.id }}/">{{ question.question_text }}</a></li>
寫死的url,對有許多模闆的項目來說,更改url會變成一件很困難的事情。由于polls.urls子產品的url()函數中定義了命名的參數,可通過{% url %}模闆标簽來移除在url配置中,特定url路徑上定義的依賴:
<li><a href="{% url 'detail' question.id %}">{{ question.question_text }}</a></li>
以下是'detail' polls/urls.py中的定義
...
# 'name'的值被 {% url %} 模闆标簽定義
url(r'^(?P<question_id>[0-9]+)/$', views.detail, name='detail'),
這樣當需要更改應用的url,比如更改為polls/specifics/12/,可以不用在目标中更改寫死的url,直接在polls/urls.py中更改。
# 添加 'specifics'到url
url(r'^specifics/(?P<question_id>[0-9]+)/$', views.detail, name='detail'),
給URL名字增加名稱空間
在URLConf中添加名稱空間,以便使用{% url %}模闆标簽時,django能區分不用應用的url。
在polls/urls.py中添加app_name來設定應用的名稱空間。
app_name = 'polls'
更改polls/index.html模闆
更改模闆
polls/templates/polls/index.html
為如下:
<li><a href="{% url 'polls:detail' question.id %}">{{ question.question_text }}</a></li>
第一個 Django app Part4
編寫一個簡單的表格
更新detail模闆(polls/detail.html)
{% if error_message %}<p><strong>{{ error_message }}</strong></p>{% endif %}
<form action="{% url 'polls:vote' question.id %}" method="post">
{% csrf_token %}
<input type="radio" name="choice" id="choice{{ forloop.counter }}" value="{{ choice.id }}" />
<label for="choice{{ forloop.counter }}">{{ choice.choice_text }}</label><br />
<input type="submit" value="Vote" />
</form>
1)每個choice都有一個對應的radio按鈕。每個radio按鈕的值都同關聯問題choice id關聯。每個radio按鈕的名字為choice。這也就意味着,當某人選擇其中一個radio按鈕并送出表單時,發送POST資料choice=#,其中#表示所選擇的choice的id
2)設定表單的action為 {% url 'polls:vote' question.id %},設定method='post'(對立的method='get'),這很重要,因為這會改變伺服器端的資料。
3)forloop.counter一個表示目前循環的執行次數的整數計數器。 這個計數器是從1開始的,是以在第一次循環時 forloop.counter 将會被設定為1
4)因為是POST表單,需要考慮跨站腳本攻擊,是以使用{% csrf_token %}模闆标簽。
接着,建立處理送出資料的視圖
還記得polls/urls.py有如下設定:
url(r'^(?P<question_id>[0-9]+)/vote/$', views.vote, name='vote'),
修改polls/views.py中的樣本函數vote
from django.shortcuts import get_object_or_404, render
from django.http import HttpResponseRedirect, HttpResponse
from django.urls import reverse
from .models import Choice, Question
question = get_object_or_404(Question, pk=question_id)
selected_choice = question.choice_set.get(pk=request.POST['choice'])
except (KeyError, Choice.DoesNotExist):
# Redisplay the question voting form.
return render(request, 'polls/detail.html', {
'question': question,
'error_message': "You didn't select a choice.",
})
else:
selected_choice.votes += 1
selected_choice.save()
# Always return an HttpResponseRedirect after successfully dealing
# with POST data. This prevents data from being posted twice if a
# user hits the Back button.
return HttpResponseRedirect(reverse('polls:results', args=(question.id,)))
Request.POST類似字典的對象,允許通過key名稱來通路送出的資料。例中,request.POST['choice']傳回字元串表示choice的ID。Request.POST值總是字元串。
類似的,django提供了request.GET來通路GET data
如果POST資料中無choice,Request.POST['choice']将抛出KeyError。
增加choice計數後,code傳回HttpResponseRedirect而非正常的HttpResponse。HttpResponseRedirect攜帶單個參數:将要重定向至的url。
使用reverse()函數避免在view視圖中寫死url。reverse()調用傳回一個類似如下的字元串:
'/polls/3/results'
其中,3為問題id,該重訂向url将會調用'results'視圖來展示最終頁面。
As mentioned in Tutorial 3, request is an HttpRequest object. For more on HttpRequest objects, see the request and response documentation.
投票之後,vote視圖,重定向到問題的結果頁面。重寫vote視圖:
return render(request, 'polls/results.html', {'question': question})
建立polls/results.html模闆
polls/templates/polls/results.html
<ul>{% for choice in question.choice_set.all %}
<li>{{ choice.choice_text }} -- {{ choice.votes }} vote{{ choice.votes|pluralize }}</li>{% endfor %}</ul>
<a href="{% url 'polls:detail' question.id %}">Vote again?</a>
使用通用視圖
使用通用視圖來轉換poll應用。
1)轉換URLConf
2)删除舊的,不必要的視圖
3)引入基于Django的通用視圖(generic view)
改良的URLConf
url(r'^$', views.IndexView.as_view(), name='index'),
url(r'^(?P<pk>[0-9]+)/$', views.DetailView.as_view(), name='detail'),
url(r'^(?P<pk>[0-9]+)/results/$', views.ResultsView.as_view(), name='results'),
改良的視圖
from django.http import HttpResponseRedirect
from django.views import generic
class IndexView(generic.ListView):
template_name = 'polls/index.html'
context_object_name = 'latest_question_list'
def get_queryset(self):
"""Return the last five published questions."""
return Question.objects.order_by('-pub_date')[:5]
class DetailView(generic.DetailView):
model = Question
template_name = 'polls/detail.html'
class ResultsView(generic.DetailView):
template_name = 'polls/results.html'
... # same as above, no changes needed.
問題:問題清單這麼調整後變成了空白,怎麼解決?
這裡使用了兩種視圖:ListView和DetailView。這兩種對象分别抽象了list對象的展示和特定讀寫的詳細頁面展示。
每種通用視圖使用model屬性來區分需要作用的子產品。
DetailView視圖期望從ULR捕獲的主鍵值被稱為pk,是以把question_id改成了pk
預設的DetailView視圖使用名為<app name>/<model name>_detail.html的模闆。例子中,使用polls/question_detail.html。template_name屬性告訴Django使用指定名稱的模闆,而不是使用預設模闆名稱。
類似的,ListView使用<app name>/<model name>_list.html模闆。
對于ListView,自動生成context變量question_list。為了重寫這個,提供context_object_name來指定自己的變量latest_question_list。
第一個 Django app Part5
略
第一個 Django app Part6
自定義app樣式和感觀。
在polls目錄下建立static。Django會在這查找靜态檔案。類似查找模闆。
Django的STATICFILES_FINDERS設定包含了finder list,告訴它怎麼查找靜态檔案。其中一個預設的finder AppDirectoriesFinder會在每個INSTALLED_APPS查找static子目錄。管理站點對靜态檔案使用相同的目錄結構
static目錄下建立一個polls目錄,在該目錄下建立名為style.css的檔案。使用polls/style.css引用資源
編輯style.css
polls/static/polls/style.css
li a {
color: green;
修改polls/templates/polls/index.html
{% load static %}
<link rel="stylesheet" type="text/css" href="{% static 'polls/style.css' %}" />
運作效果:
{% static %}模闆标簽生成靜态檔案的絕對URL。
添加背景圖檔
在polls/static/polls目錄下建立images目錄,并在該目錄下存放一張名為background.gif的圖檔。
修改sytle.cass,新增代碼如下
body {
background: white url("images/background.gif") no-repeat right bottom;
重新整理頁面,可看到螢幕右上方顯示動态圖檔
注意:{% static %}模闆标簽不适用非Django生成的靜态檔案,比如樣式表單。
第一個 Django app Part7
自定義管理站點 form
polls/admin.py
class QuestionAdmin(admin.ModelAdmin):
fields = ['pub_date', 'question_text']
admin.site.register(Question, QuestionAdmin)
上述代碼使得Question field位于Publication date之後
分隔成多個fieldsets
fieldsets = [
(None, {'fields': ['question_text']}),
('Date information', {'fields': ['pub_date']}),
添加關聯對象
方式1,注冊子產品
admin.site.register(Choice)
那個form中,Question field是一個select box,包含資料庫中的每個問題。Django知道ForeignKey應該在<select> box中出現。
Question的編輯和+号按鈕,可分别打開question編輯(需要先標明問題才可用)和添加頁面。
方式2:
class ChoiceInline(admin.StackedInline):
model = Choice
extra = 3
('Date information', {'fields': ['pub_date'], 'classes': ['collapse']}),
inlines = [ChoiceInline]
預設3個choice是由extra指定的,點選Add another Choice連結,自動新增一個Choice。
這裡有個問題,就是占用空間比較大。為此,Django提供了一個tabular的方式來展示inline相關對象。
class ChoiceInline(admin.TabularInline):
#...
delete?列用于提供删除操作(通過點選Add another Choice增加的行。)
自定義admin change list
展示單個field。使用list_display admin選項,供展示的field元組,比如列。
list_display = ('question_text', 'pub_date')
還可添加was_published_recently()方法。
list_display = ('question_text', 'pub_date', 'was_published_recently')
可點選列标題來排序,was_published_recently列除外,因為不支援按任意方法的輸出排序。另外,was_published_recently列預設為方法名稱(下劃線替換了空格)。
通過給方法增加屬性來改善。
polls/models.py
now = timezone.now()
return now - datetime.timedelta(days=1) <= self.pub_date <= now
was_published_recently.admin_order_field = 'pub_date'
was_published_recently.boolean = True
was_published_recently.short_description = 'Published recently?'
效果:
增加過濾器
修改polls/admin.py,新增list_filer,新增代碼如下。
list_filter = ['pub_date']
效果如下:
filter展示類型取決于你過濾的field。因為pub_date是DateTimeField,Django知道怎麼給恰當的filter選項:Any date,Today等
增加搜尋
search_fields = ['question_text']
自定義admin樣式和感觀
自定義項目模闆
在項目目錄中(包含manage.py檔案)下建立template目錄。template可放在Django可通路的任何檔案系統,但是保持模闆在項目裡,是需要好好遵守的約定。
編輯mysite/settings.py,在TEMPLATES設定中添加一個DIRS選項。
mysite/settings.py
TEMPLATES = [
{
'BACKEND': 'django.template.backends.django.DjangoTemplates',
'DIRS': [os.path.join(BASE_DIR, 'templates')],
'APP_DIRS': True,
'OPTIONS': {
'context_processors': [
'django.template.context_processors.debug',
'django.template.context_processors.request',
'django.contrib.auth.context_processors.auth',
'django.contrib.messages.context_processors.messages',
],
},
},
DIRS是當加載Django模闆時,需要檢查的檔案系統目錄清單,是一個搜尋路徑。
現在在templates目錄中建立一個名為admin的目錄,從預設的Django admin模闆目錄(django/contrib/admin/templates)中拷貝模闆檔案admin/base_site.html到該目錄。
編輯檔案,替換{{ site_header|default:_('Django administration') }}為自己的站點名稱。
{% block branding %}
<h1 id="site-name"><a href="{% url 'admin:index' %}">Polls Administration</a></h1>
{% endblock %}
該例字告訴我們使用這種方法來重寫模闆。
模闆包含很多類似{% block branding %} and {{ title }}的文本,{%和{{标簽是Django的模闆語言。
https://docs.djangoproject.com/en/1.10/intro/tutorial02/
作者:授客
QQ:1033553122
全國軟體測試QQ交流群:7156436
Git位址:https://gitee.com/ishouke
友情提示:限于時間倉促,文中可能存在錯誤,歡迎指正、評論!
作者五行缺錢,如果覺得文章對您有幫助,請掃描下邊的二維碼打賞作者,金額随意,您的支援将是我繼續創作的源動力,打賞後如有任何疑問,請聯系我!!!
微信打賞
支付寶打賞 全國軟體測試交流QQ群