一、我們前面基本上都是講解的Spring Cloud Netflix的元件,下面我們會重點說Spring Cloud Config分布式配置中心。為什麼需要這個元件來管理配置呢?在分布式應用開發過程中我們的大小服務會特别多,如果一個個去配置的話會帶來更多的工作量,是以Spring Cloud 催生一種集中配置的方式,這種方式就是Config元件。這個主鍵主要介紹一下幾個部分。
1)Config Server從本地讀取配置。
2)Config Server從遠端倉庫Git上面讀取配置。
3)搭建高可用的Config Server叢集。
4)使用Spring Cloud Bus重新整理配置。
二、Config Server從本地讀取配置。
1、Config Server編寫。
1)首先在Springboot和SpringCloud的基礎上加入一下依賴。
<dependency>
            <groupId>org.springframework.boot</groupId>
            <artifactId>spring-boot-starter-web</artifactId>
        </dependency>
        <dependency>
            <groupId>org.springframework.cloud</groupId>
            <artifactId>spring-cloud-config-server</artifactId>
        </dependency>
2)編寫啟動項
package com.cetc;

import org.springframework.boot.SpringApplication;
import org.springframework.boot.autoconfigure.SpringBootApplication;
import org.springframework.cloud.config.server.EnableConfigServer;

@SpringBootApplication
@EnableConfigServer
public class ConfigServerApplication {

    public static void main(String[] args) {
        SpringApplication.run(ConfigServerApplication.class, args);
    }
}
3)編寫配置application.yaml
server:
  port: 8683
#  port: 8684
spring:
  application:
    name: config-server
  cloud:
    config:
      server:
        native:
          search-locations: classpath:/shared # 指定本地配置目錄
  profiles:
    active: native # 本地讀取配置
說明:這裡profiles.active這裡一定要配置native從本地讀取。spring.cloud.server.native.search-locations為指定掃描的路徑。
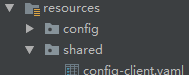
4)編寫需要配置的用戶端配置檔案config-client.yaml
server:
  port: 8685
version: 1.0
說明:config-client必須和服務名稱一樣。如何存在不同環境,比如:dev,test,prod等環境。可以通過spring.profiles.active來激活指定檔案。
服務端的配置就完成了。那麼下面編寫用戶端。
2、編寫Config Client用戶端。
1)加入相關配置pom.xml
<dependency>
            <groupId>org.springframework.boot</groupId>
            <artifactId>spring-boot-starter-web</artifactId>
        </dependency>
        <dependency>
            <groupId>org.springframework.cloud</groupId>
            <artifactId>spring-cloud-starter-config</artifactId>
        </dependency>
2)編寫啟動項和測試接口。
package com.cetc;

import org.springframework.boot.SpringApplication;
import org.springframework.boot.autoconfigure.SpringBootApplication;

@SpringBootApplication
public class ConfigClientApplication {

    public static void main(String[] args) {
        SpringApplication.run(ConfigClientApplication.class, args);
    }
}
package com.cetc.web.rest;
import org.springframework.beans.factory.annotation.Value;import org.springframework.web.bind.annotation.GetMapping;
import org.springframework.web.bind.annotation.RequestMapping;
import org.springframework.web.bind.annotation.RestController;
@RestController
@RequestMapping("/api/test")
public class TestResource {
@Value("${version}")
private String version;
@GetMapping("/getVersion")
public String getVersion() {
return version;
}
} 3)重點來了,這裡我們不編寫application.yaml類似的檔案了,這裡我們使用bootstrap.yaml。為什麼是bootstrap.yaml,因為bootstrap相對于application有優先執行權。
spring:
  application:
    name: config-client
  cloud:
    config:
      uri: http://127.0.0.1:8683
      fail-fast: true
說明:這裡的spring.cloud.config的uri為服務配置位址。fail-fast為快速失敗配置。
3、測試。啟動Config Server、Config Client端口為8683,8685。
Config Client啟動過程節點。

測試接口:
三、Config Server從Git倉庫擷取配置檔案。可以自己使用github,也可以自己打架gitlab服務。我這裡是自己搭建的gitlab。
1)上面的工程基本上都是一樣的,需要修改的地方就是Config Server 的application.yaml配置檔案,修改如下:
server:
  port: 8683
#  port: 8684
spring:
  application:
    name: config-server
  cloud:
    config:
      server:
        git:
          uri: http://127.0.0.1/lilin/SpringCloudConfig.git
          search-paths: shared
          username: lilin
          password:
      label: master
說明:一般配置檔案都是私有的,是以一般都是使用賬号登入,如果需要公開的可以使用github等方式。label:為那個分支。search-paths為搜尋路徑。
2)在Git上面編寫config-client.yaml配置檔案,為了友善我把之前的傳上Git了。
3)啟動Config Server和Config Client,端口8683,8685。
Config Server的展示如下:
用戶端和從本地擷取沒有什麼差別。
測試接口如下:
四、建構高可用的Config Server叢集。為了友善管理,配置采用注冊方式,是以需要加入Eureka服務注冊中心。這裡我們還是使用以前的注冊中心Eureka Server端口8670。結構圖如下
1、改造Config Server
1)在上面工程中,加入Eureka Client依賴。
<dependency>
            <groupId>org.springframework.cloud</groupId>
            <artifactId>spring-cloud-starter-netflix-eureka-client</artifactId>
        </dependency>
2)在上面工程中,加入啟動配置
package com.cetc;

import org.springframework.boot.SpringApplication;
import org.springframework.boot.autoconfigure.SpringBootApplication;
import org.springframework.cloud.config.server.EnableConfigServer;
import org.springframework.cloud.netflix.eureka.EnableEurekaClient;

@SpringBootApplication
@EnableConfigServer
@EnableEurekaClient
public class ConfigServerApplication {

    public static void main(String[] args) {
        SpringApplication.run(ConfigServerApplication.class, args);
    }
}
3)在上面工程基礎上,修改配置。
server:
  port: 8683
#  port: 8684
spring:
  application:
    name: config-server
  cloud:
    config:
      server:
        git:
          uri: http://127.0.0.1/lilin/SpringCloudConfig.git
          search-paths: shared
          username: lilin
          password:
      label: master
eureka:
  client:
    service-url:
      defaultZone:
        http://127.0.0.1:8670/eureka/ # 實際開發中建議使用域名的方式
2、改造Config Client.
1)在上面工程基礎上,加入Euraka Client依賴。
<dependency>
            <groupId>org.springframework.cloud</groupId>
            <artifactId>spring-cloud-starter-netflix-eureka-client</artifactId>
        </dependency>
2)在上面工程基礎上,修改啟動項。
package com.cetc;

import org.springframework.boot.SpringApplication;
import org.springframework.boot.autoconfigure.SpringBootApplication;
import org.springframework.cloud.netflix.eureka.EnableEurekaClient;

@SpringBootApplication
@EnableEurekaClient
public class ConfigClientApplication {

    public static void main(String[] args) {
        SpringApplication.run(ConfigClientApplication.class, args);
    }
}
3)修改bootstrap.yaml配置檔案。
spring:
  application:
    name: config-client
  cloud:
    config:
      fail-fast: true
      discovery:
        enabled: true
        service-id: config-server
eureka:
  client:
    service-url:
      defaultZone:
        http://127.0.0.1:8670/eureka/ # 實際開發中建議使用域名的方式
3、啟動Eureka Server、2個Config Server、Config Client。端口8670,8683/8684、8685。
可以得知,啟動一切正常。
測試接口:
五、使用Spring Cloud bus重新整理配置。
1)簡介:Spring Cloud Bus 是用輕量的消息代理将分布式的節點連接配接起來,可以用于廣播配置檔案的更改或者服務的監控管理。一個關鍵的意思就是,消息總線可以為微服務總監控,也可以實作應用之間的通信。Spring Cloud Bus 可以選擇的元件有RabbitMQ,AMQP和Kafka等。我們這裡使用RabbitMQ來實作消息總線的管理。
2)為什麼需要Spring Cloud Bus去重新整理配置呢?如果有幾十個微服務,并且每個微服務都存在很多執行個體,當更改配置時,需要重新開機很多微服務執行個體,會特别麻煩。Spring Cloud Bus就将這個過程進行了簡化,當遠端Git配置檔案修改後,我們隻需要向某一個微服務執行個體發送一個POST請求,通過消息元件通知其他微服務重新拉取配置檔案。請求接口為:/actuator/bus-refresh(不同版本可能存在差異)。
3)我們開始改造Config Client。
(1)首先需要加入兩個依賴。
<dependency>
            <groupId>org.springframework.cloud</groupId>
            <artifactId>spring-cloud-starter-bus-amqp</artifactId>
        </dependency>
        <dependency>
            <groupId>org.springframework.boot</groupId>
            <artifactId>spring-boot-starter-actuator</artifactId>
        </dependency>
(2)修改配置檔案bootstrap.yaml。
spring:
  application:
    name: config-client
  cloud:
    config:
      fail-fast: true
      discovery:
        enabled: true
        service-id: config-server
  rabbitmq:
    host: 127.0.0.1
    port: 5672
    username: admin
    password: admin
eureka:
  client:
    service-url:
      defaultZone:
        http://127.0.0.1:8670/eureka/ # 實際開發中建議使用域名的方式
management:
  endpoints:
    web:
      exposure:
        include: ["*"]
說明:目前Spring 2.0版本是通過actuator的接口進行外部通路的是以在使用的時候,一定要配置management.endpoints.web.exposure.include。
(3)在需要重新整理配置的地方加入@RefreshScope注解,注意這個注解隻針對于目前類生效。我們這裡是擷取的版本号是以在TestResource類加上。
package com.cetc.web.rest;

import org.springframework.beans.factory.annotation.Value;
import org.springframework.cloud.context.config.annotation.RefreshScope;
import org.springframework.web.bind.annotation.GetMapping;
import org.springframework.web.bind.annotation.RequestMapping;
import org.springframework.web.bind.annotation.RestController;

@RestController
@RequestMapping("/api/test")
@RefreshScope
public class TestResource {

    @Value("${version}")
    private String version;

    @GetMapping("/getVersion")
    public String getVersion() {
        return version;
    }
}
(4)測試。啟動Eureka Server,2個Config Server,2個Config Client端口分别為8670,8683/8684,8685/8686。
通路兩個接口為:
(5)重新整理配置。我們修改Git的上面config-client.yaml的版本号為2.0。
通過PostMan發送POST請求http://127.0.0.1:8685/actuator/bus-refresh,進行重新整理。
發送請求測試,等待重新整理:
從上面可以看出,我想一個接口發送了重新整理請求,結果全部執行個體都進行了重新整理,這樣的結果好處就是。一次更改,全部可重新整理。
說明:通過對啟動接口:
我們可以得知,重新整理是可以帶參數的。而這個參數的意思就是重新整理特定執行個體參數。
比如:http://127.0.0.1:8685/actuator/bus-refresh?destination=config-client:**
六、總結:
1)Spring Cloud Config簡單來說就是對配置的簡單化,讓配置集中化。
2)Spring Cloud Config通過Eureka可以實作叢集化,達到高可用。
3)通過對用戶端進行改造加入Bus總線,可以實作一次更改,多個服務執行個體的更新。避免了多個服務重新開機的問題。
4)Spring Cloud Config的配置擷取方式有:本地(native)、Git、SVN、vault等方式。
七、源碼位址:https://github.com/lilin409546297/spring-cloud/tree/master/config