一、虛拟環境搭建
1、工具或者軟體
- centos阿裡雲伺服器
- Anaconda3-5.2.0-Linux-x86_64.sh
注意的是官網下載下傳Anaconda是比較慢的,可以去https://mirrors.tuna.tsinghua.edu.cn/anaconda/archive/上下載下傳對應的Anaconda:
[root@iZwz9ba9y5k8ij7xf2boohZ software]# wget https://mirrors.tuna.tsinghua.edu.cn   \
                        /anaconda/archive/Anaconda3-5.2.0-Linux-x86_64.sh
2、虛拟環境搭建
- 安裝
[root@iZwz9ba9y5k8ij7xf2boohZ software]# bash Anaconda3-5.2.0-Linux-x86_64.sh 安裝過程隻需要回車以及yes确定即可,當然預設安裝在root目錄下,是以你可以進行更改:
"""
...
Anaconda3 will now be installed into this location:
/root/anaconda3

  - Press ENTER to confirm the location
  - Press CTRL-C to abort the installation
  - Or specify a different location below

[/root/anaconda3] >>> /software
PREFIX=/software
...

"""
在裝完後環境變量寫入到/root/.bash_profile檔案中隻需要source這個檔案立即生效即可,這樣就可以使用conda等指令了。
- 配置
anaconda的源配置很重要,配置的好下載下傳很快:
# 添加源
conda config --add channels https://mirrors.tuna.tsinghua.edu.cn/anaconda/pkgs/free
conda config --add channels https://mirrors.tuna.tsinghua.edu.cn/anaconda/pkgs/main
conda config --set show_channel_urls yes

# 換回預設源
conda config --remove-key channels
上面的操作實際上就是在/root/.condarc檔案中添加如下資訊:
show_channel_urls: true
channels:
  - https://mirrors.tuna.tsinghua.edu.cn/anaconda/pkgs/main
  - https://mirrors.tuna.tsinghua.edu.cn/anaconda/pkgs/free
  - defaults
3、虛拟環境建立、使用
# 1、虛拟環境建立
[root@iZwz9ba9y5k8ij7xf2boohZ ~]# conda create -n qaWebEnv python=3.8

# 2、檢視虛拟環境
[root@iZwz9ba9y5k8ij7xf2boohZ ~]# conda info --env
# conda environments:
#
base                  *  /project/software/anaconda3
qaWebEnv                 /project/software/anaconda3/envs/qaWebEnv

# 3、激活虛拟環境,使用source激活
(base) [root@iZwz9ba9y5k8ij7xf2boohZ ~]# source activate qaWebEnv
(qaWebEnv) [root@iZwz9ba9y5k8ij7xf2boohZ ~]#
二、建立項目
1、安裝cookiecutter
(qaWebEnv) [root@iZwz9ba9y5k8ij7xf2boohZ ~]# pip install "cookiecutter>=1.7.0" 2、下載下傳模闆
(qaWebEnv) [root@iZwz9ba9y5k8ij7xf2boohZ ~]# cookiecutter https://github.com/pydanny/cookiecutter-django.git 但是這裡容易出的問題就是卡住不動了,下載下傳不下來,是以解決的方法就是去手動下載下傳源碼然後将其放到/root/.cookiecutters目錄下:
[root@iZwz9ba9y5k8ij7xf2boohZ .cookiecutters]# ls
cookiecutter-django
3、建立項目
(qaWebEnv) [root@iZwz9ba9y5k8ij7xf2boohZ project]# cookiecutter https://github.com/pydanny/cookiecutter-django.git
You've downloaded /root/.cookiecutters/cookiecutter-django before. Is it okay to delete and re-download it? [yes]: n
Do you want to re-use the existing version? [yes]: y
project_name [My Awesome Project]: qaWeb
project_slug [qaweb]:
description [Behold My Awesome Project!]: a website
author_name [Daniel Roy Greenfeld]: Bright
domain_name [example.com]:
email [[email protected]]:
version [0.1.0]:
Select open_source_license:
1 - MIT
2 - BSD
3 - GPLv3
4 - Apache Software License 2.0
5 - Not open source
Choose from 1, 2, 3, 4, 5 [1]: 5
timezone [UTC]: Asia/Shanghai
windows [n]: n
use_pycharm [n]: y
use_docker [n]:
Select postgresql_version:
1 - 12.3
2 - 11.8
3 - 10.8
4 - 9.6
5 - 9.5
Choose from 1, 2, 3, 4, 5 [1]:
Select js_task_runner:
1 - None
2 - Gulp
Choose from 1, 2 [1]:
Select cloud_provider:
1 - AWS
2 - GCP
3 - None
Choose from 1, 2, 3 [1]:
Select mail_service:
1 - Mailgun
2 - Amazon SES
3 - Mailjet
4 - Mandrill
5 - Postmark
6 - Sendgrid
7 - SendinBlue
8 - SparkPost
9 - Other SMTP
Choose from 1, 2, 3, 4, 5, 6, 7, 8, 9 [1]:
use_async [n]:
use_drf [n]:
custom_bootstrap_compilation [n]:
use_compressor [n]: y
use_celery [n]: y
use_mailhog [n]:
use_sentry [n]:
use_whitenoise [n]:
use_heroku [n]:
Select ci_tool:
1 - None
2 - Travis
3 - Gitlab
Choose from 1, 2, 3 [1]:
keep_local_envs_in_vcs [y]: n
debug [n]: y
 [SUCCESS]: Project initialized, keep up the good work!
此時就生成了對應的檔案和配置:
(qaWebEnv) [root@iZwz9ba9y5k8ij7xf2boohZ project]# tree qaweb/
qaweb/
├── config
│   ├── celery_app.py
│   ├── __init__.py
│   ├── settings
│   │   ├── base.py
│   │   ├── __init__.py
│   │   ├── local.py
│   │   ├── production.py
│   │   └── test.py
│   ├── urls.py
│   └── wsgi.py
├── docs
│   ├── conf.py
│   ├── __init__.py
│   ├── make.bat
│   ├── Makefile
│   └── _source
│       ├── howto.rst
│       ├── index.rst
│       ├── pycharm
│       │   ├── configuration.rst
│       │   └── images
│       │       ├── 1.png
│       │       ├── 2.png
│       │       ├── 3.png
│       │       ├── 4.png
│       │       ├── 7.png
│       │       ├── 8.png
│       │       ├── f1.png
│       │       ├── f2.png
│       │       ├── f3.png
│       │       ├── f4.png
│       │       ├── issue1.png
│       │       └── issue2.png
│       └── users.rst
├── locale
│   └── README.rst
├── manage.py
├── pytest.ini
├── qaweb
│   ├── conftest.py
│   ├── contrib
│   │   ├── __init__.py
│   │   └── sites
│   │       ├── __init__.py
│   │       └── migrations
│   │           ├── 0001_initial.py
│   │           ├── 0002_alter_domain_unique.py
│   │           ├── 0003_set_site_domain_and_name.py
│   │           └── __init__.py
│   ├── __init__.py
│   ├── static
│   │   ├── css
│   │   │   └── project.css
│   │   ├── fonts
│   │   ├── images
│   │   │   └── favicons
│   │   │       └── favicon.ico
│   │   ├── js
│   │   │   └── project.js
│   │   └── sass
│   │       ├── custom_bootstrap_vars.scss
│   │       └── project.scss
│   ├── templates
│   │   ├── 403.html
│   │   ├── 404.html
│   │   ├── 500.html
│   │   ├── account
│   │   │   ├── account_inactive.html
│   │   │   ├── base.html
│   │   │   ├── email_confirm.html
│   │   │   ├── email.html
│   │   │   ├── login.html
│   │   │   ├── logout.html
│   │   │   ├── password_change.html
│   │   │   ├── password_reset_done.html
│   │   │   ├── password_reset_from_key_done.html
│   │   │   ├── password_reset_from_key.html
│   │   │   ├── password_reset.html
│   │   │   ├── password_set.html
│   │   │   ├── signup_closed.html
│   │   │   ├── signup.html
│   │   │   ├── verification_sent.html
│   │   │   └── verified_email_required.html
│   │   ├── base.html
│   │   ├── pages
│   │   │   ├── about.html
│   │   │   └── home.html
│   │   └── users
│   │       ├── user_detail.html
│   │       └── user_form.html
│   ├── users
│   │   ├── adapters.py
│   │   ├── admin.py
│   │   ├── apps.py
│   │   ├── forms.py
│   │   ├── __init__.py
│   │   ├── migrations
│   │   │   ├── 0001_initial.py
│   │   │   └── __init__.py
│   │   ├── models.py
│   │   ├── tasks.py
│   │   ├── tests
│   │   │   ├── factories.py
│   │   │   ├── __init__.py
│   │   │   ├── test_forms.py
│   │   │   ├── test_models.py
│   │   │   ├── test_tasks.py
│   │   │   ├── test_urls.py
│   │   │   └── test_views.py
│   │   ├── urls.py
│   │   └── views.py
│   └── utils
│       ├── context_processors.py
│       ├── __init__.py
│       └── storages.py
├── README.rst
├── requirements
│   ├── base.txt
│   ├── local.txt
│   └── production.txt
├── setup.cfg
└── utility
    ├── install_os_dependencies.sh
    ├── install_python_dependencies.sh
    ├── requirements-bionic.apt
    ├── requirements-buster.apt
    ├── requirements-jessie.apt
    ├── requirements-stretch.apt
    ├── requirements-trusty.apt
    └── requirements-xenial.apt

28 directories, 103 files
三、本地搭建
上面的虛拟環境以及項目都是在雲環境建立完成,現在通過PyCharm來進行連接配接同步。
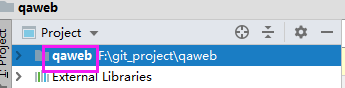
1、本地建立項目目錄
本地建立一個空檔案夾,名稱和遠端主機項目名稱一緻,然後使用PyCharm打開:
2、配置遠端連接配接
先打開遠端配置的相關頁面:Tools->Deployment->Configuration

在配置檔案中首先建立一個server,然後再Connection頁中進行連接配接的配置:
然後Mappings中進行本地和遠端目錄的映射:
Local path就是本地的目錄,Deployment path就是遠端中相對于Connection中Root path中後面的路徑,也就是Root path+Deployment path=Local path。
另外一個就是Exclude Path這是設定本地或者遠端目錄中不進行同步的檔案的路徑。此時不需要進行配置。
3、Python解釋器配置
本地開發該項目使用的是遠端虛拟環境Python解釋器:
點選下面的next按鈕,注意的是選擇Move this Server to IDE settings(之前選擇過,選擇沒出先該選項了)。
這樣就完成了配置,注意勾選自動上傳檔案到server項目目錄。
4、遠端同步
當連接配接與目錄映射完成後将遠端主機上的項目檔案同步到本地,可以看到Upload to qaWeb、Download from qaWeb、Sync with Deployed to qaWeb,這裡選擇第三個就是将遠端主機與本地可以進行比對,然後同步:
5、Django Server配置
- Django Server Configurations
- Languages & FrameWorks
在PyCharm上設定需要注意這三點:
- 設定本地與遠端的映射
- 設定Python解釋器
- 啟動django支援(設定Settings就是為了PyCharm中啟動Django項目)
作者:iveBoy
出處:http://www.cnblogs.com/shenjianping/
本文版權歸作者和部落格園共有,歡迎轉載,但未經作者同意必須在文章頁面給出原文連接配接,否則保留追究法律責任的權利。